Published 14 November 2026 · Acer Nitro AN517-51 case study
Nitro AN517-51 clean
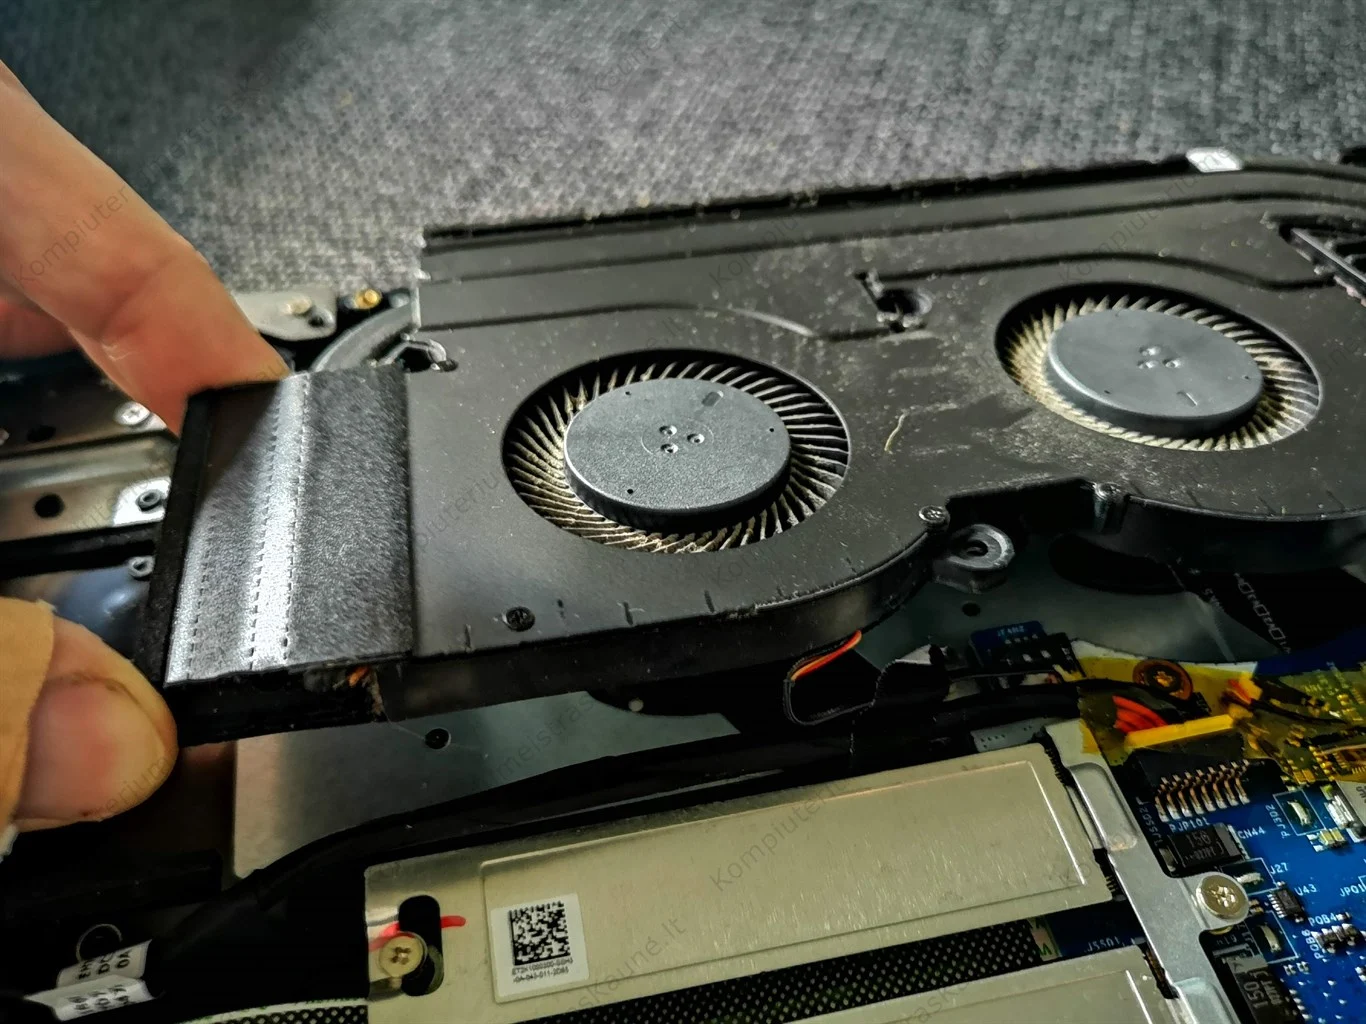
the fan shroud made both outlets easier to inspect.
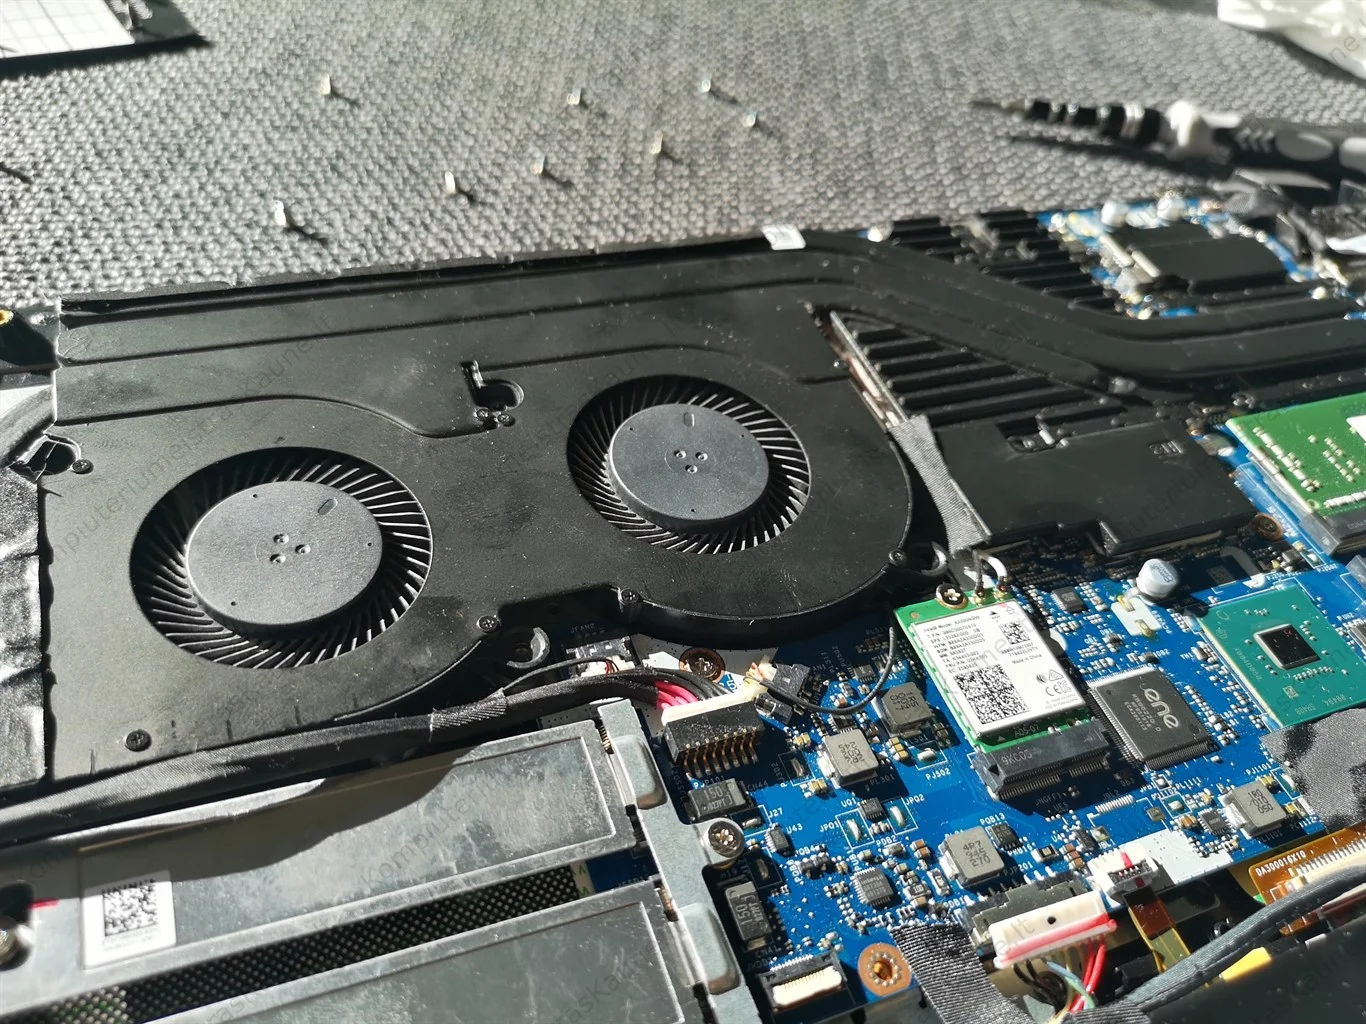
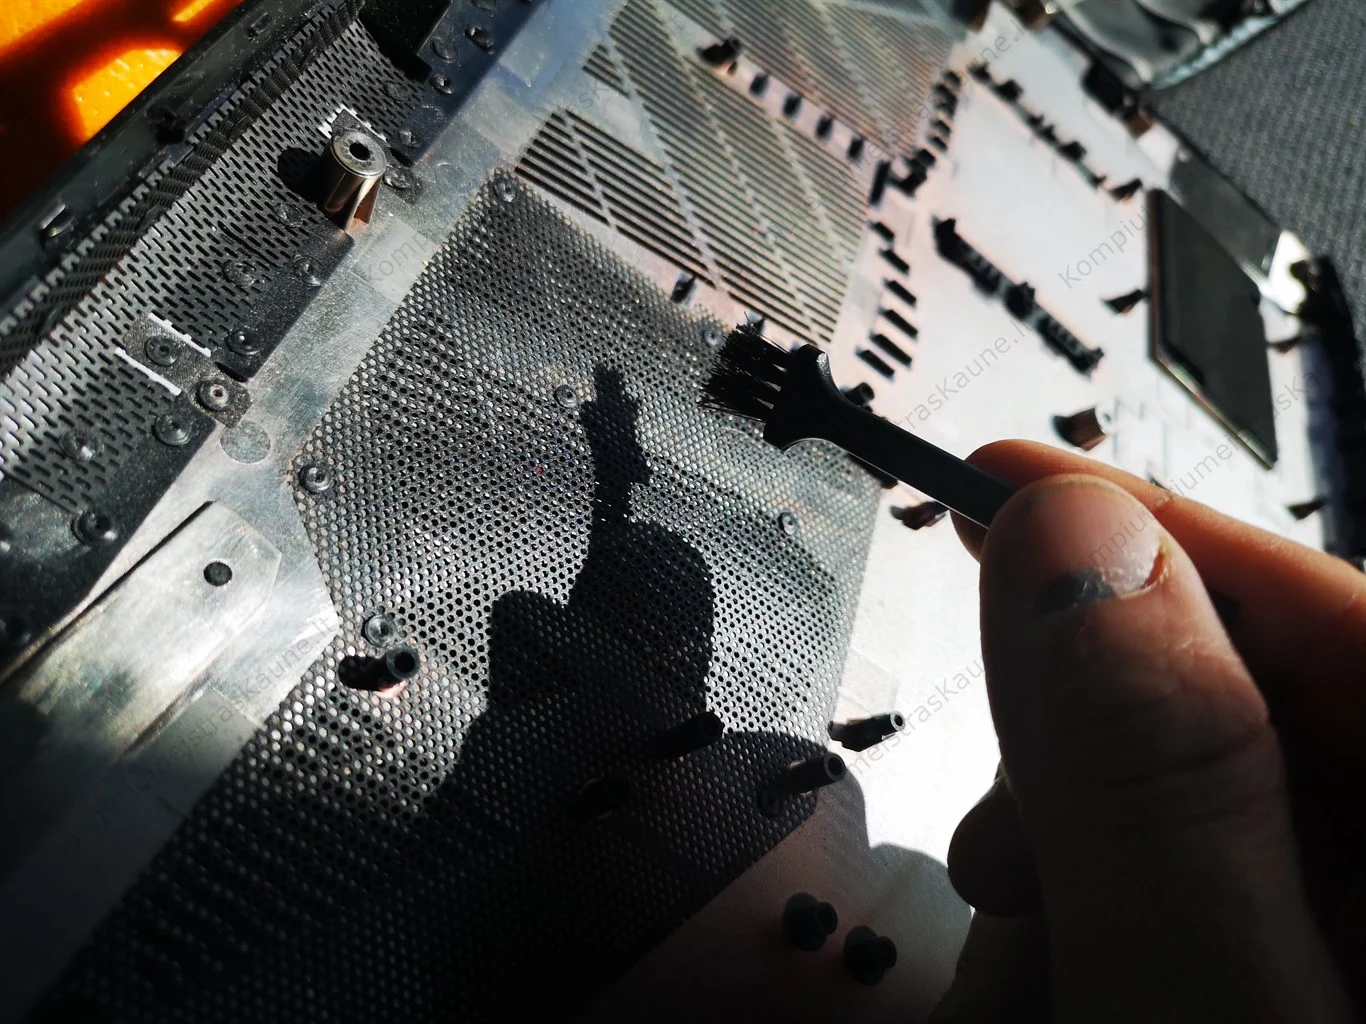
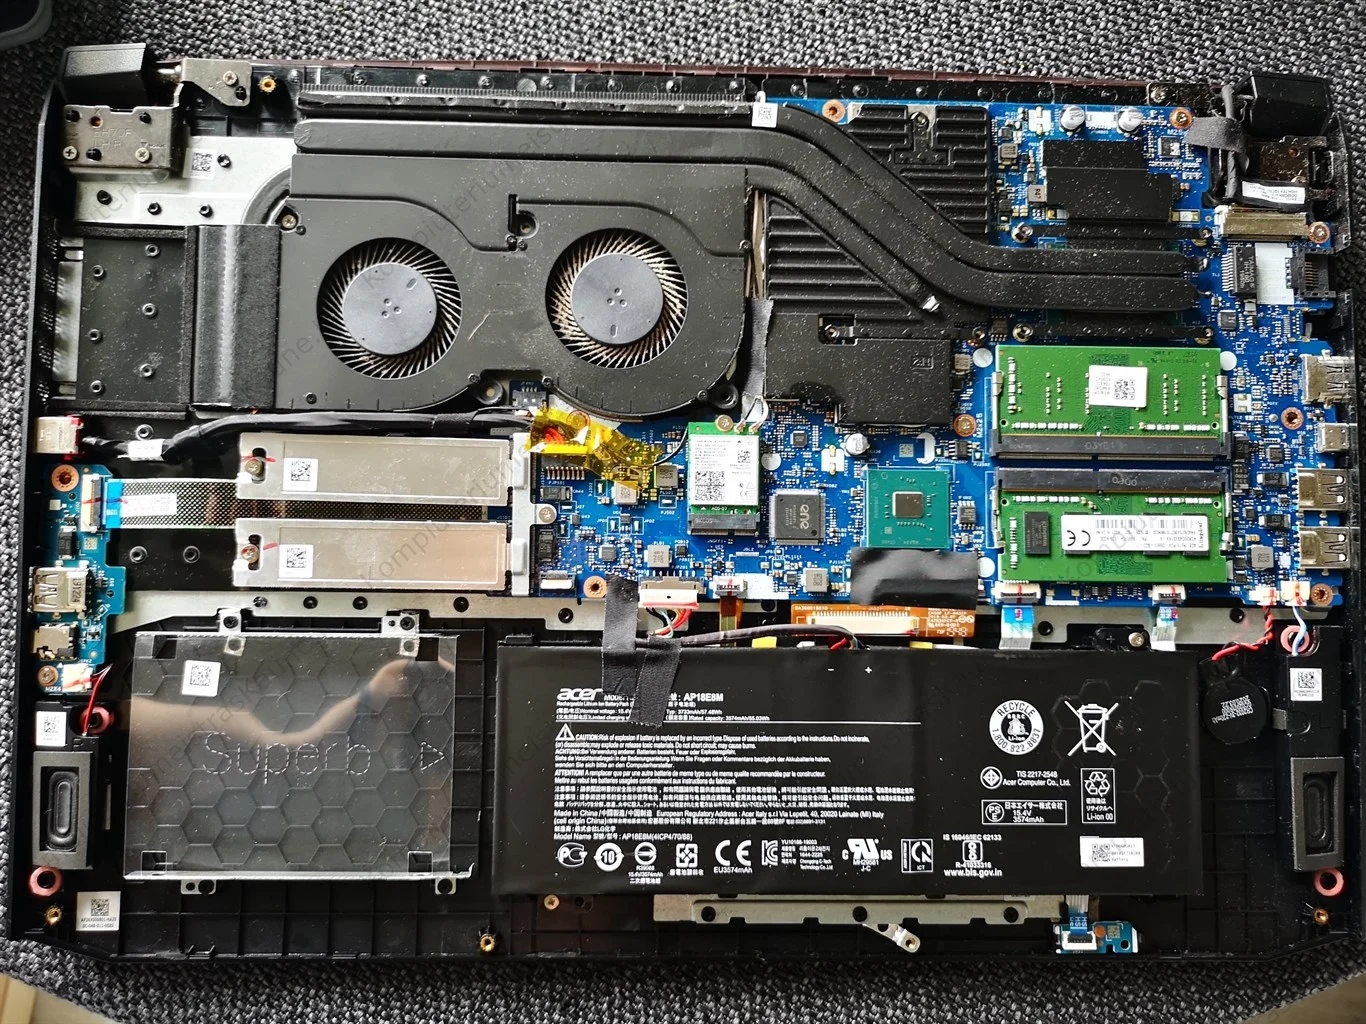
This Nitro's two fans sit in one broad cooling module. The workshop sequence shows the module exposed, its fine outlet fins inspected, and the vented base panel separated from the chassis for cleaning.
The model
Acer Nitro AN517-51
Cooling layout
Two blowers in a shared shroud with fin outlets
Access
Bottom cover removed and cooler contacts exposed
The red-keyboard Acer Nitro looks familiar from the outside, but its cooling path is easier to understand once the bottom cover is off. Two circular blowers sit under one dark housing. Their outlet fins are at the rear edge, and the large vent pattern in the base supplies air to the module.
This archive includes close-ups of screws, the removed base and chip contacts. The model label in the photos supports AN517-51. It does not contain a matched temperature test or a clear quantified amount of dust removed, so the article treats this as an access and cleaning case rather than a dramatic performance claim.
In this case study
01 / The internal layout
Both blowers sit in one long cooling assembly
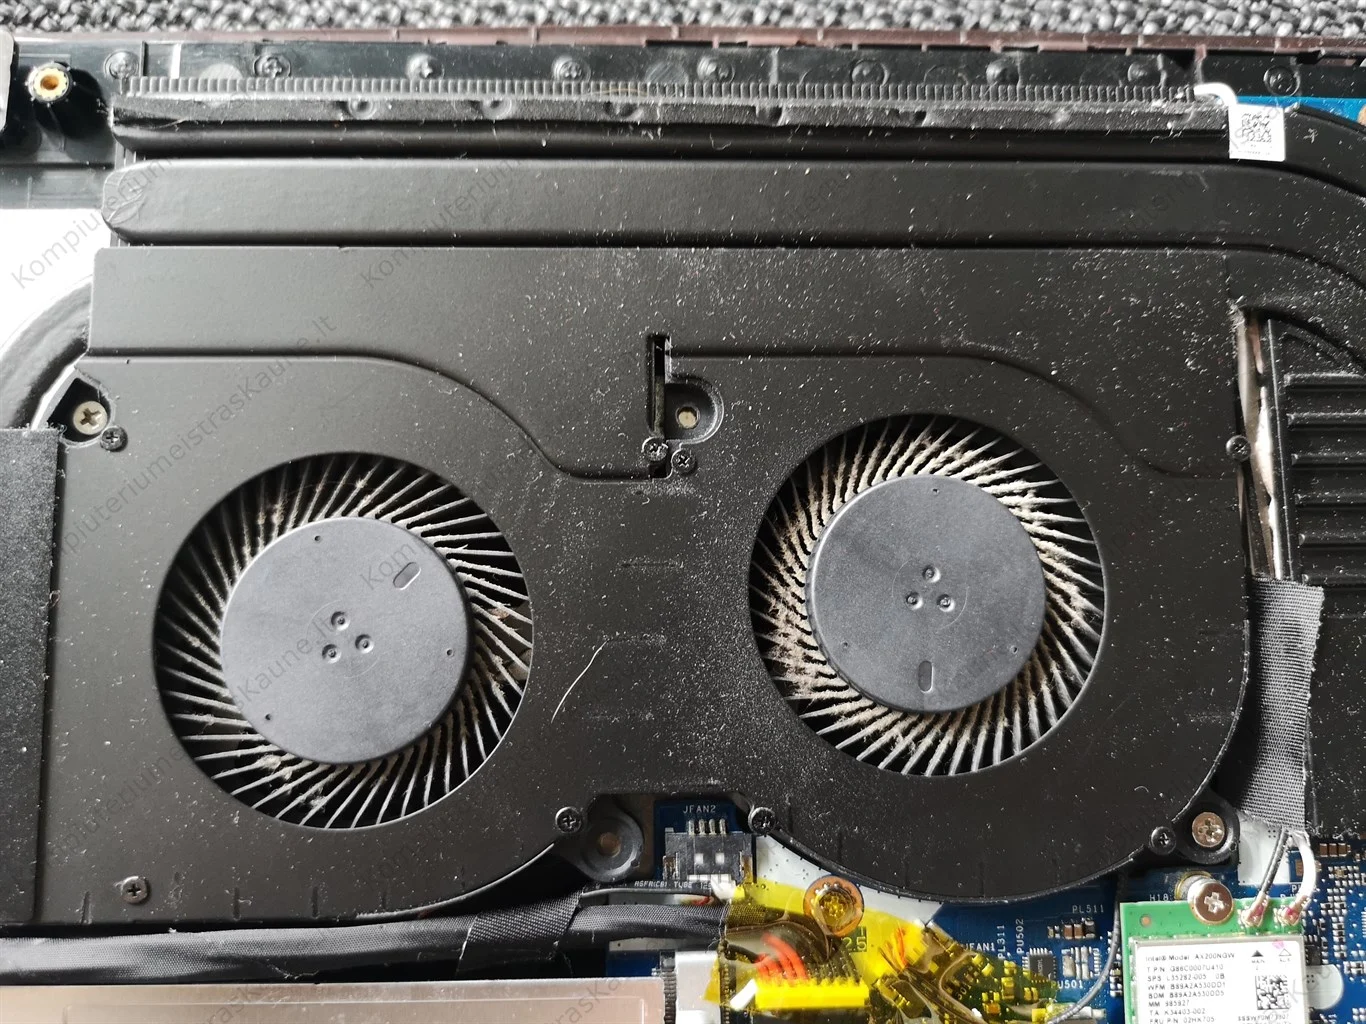
The open chassis shows a left and right blower linked by the black shroud and heat-pipe route. This is why cleaning one visible fan from the outside is incomplete: each blower has blades, a chamber and a fin outlet to inspect.
A later view of the lifted module shows how much access is gained, but removal also exposes delicate cables and thermal-contact surfaces. Record screw positions before lifting anything.
02 / Where hot air exits
The rear fin edge is narrow and easy to miss
The close-up of the fin edge shows tightly spaced metal channels. Any lint lodged on the inner face can restrict the fan's exhaust even when the outer grille looks reasonable. Inspect along the entire edge of both outlets.
The photographs show direct access to the fins, but they do not establish a before-and-after airflow measurement. A gentle brush or controlled air should move loose debris out of the module, not into the board or fan bearing.
03 / The incoming air
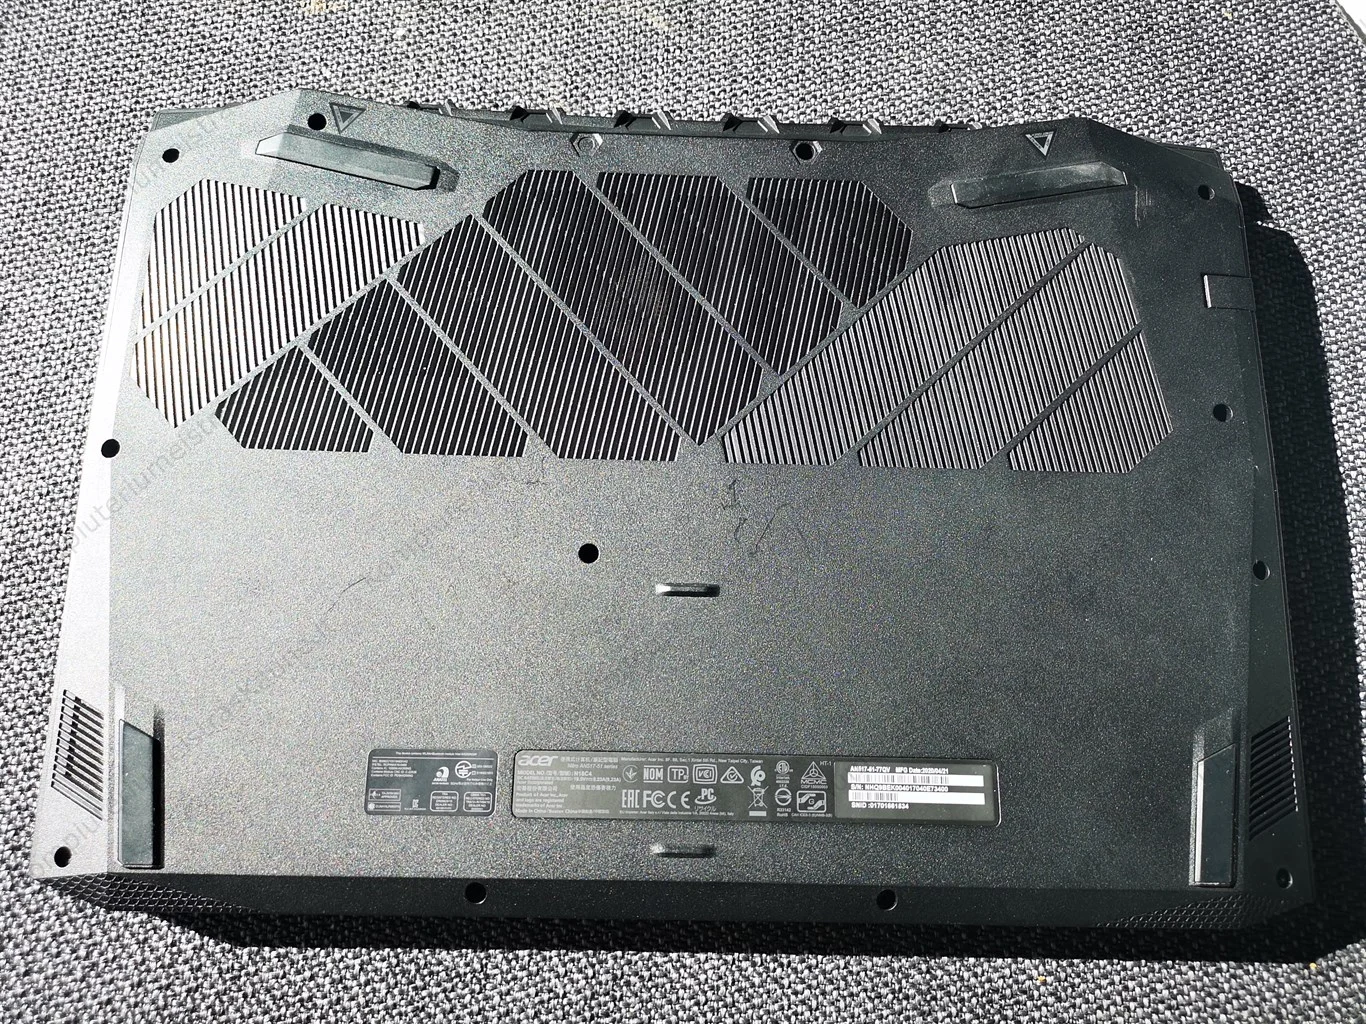
The base panel has large patterned intake areas
The removed bottom cover has several broad vents. Dust can collect on its inner face, so check both sides before refitting. If you wash a detachable filter or panel, keep it away from electronics and wait until it is fully dry.
Opening the AN517-51 involves more than the visible edge screws; the photos show the base being worked free carefully. Forcing a plastic clip can crack the cover or damage a concealed cable.
04 / When the module is lifted
The processor and graphics contacts were exposed
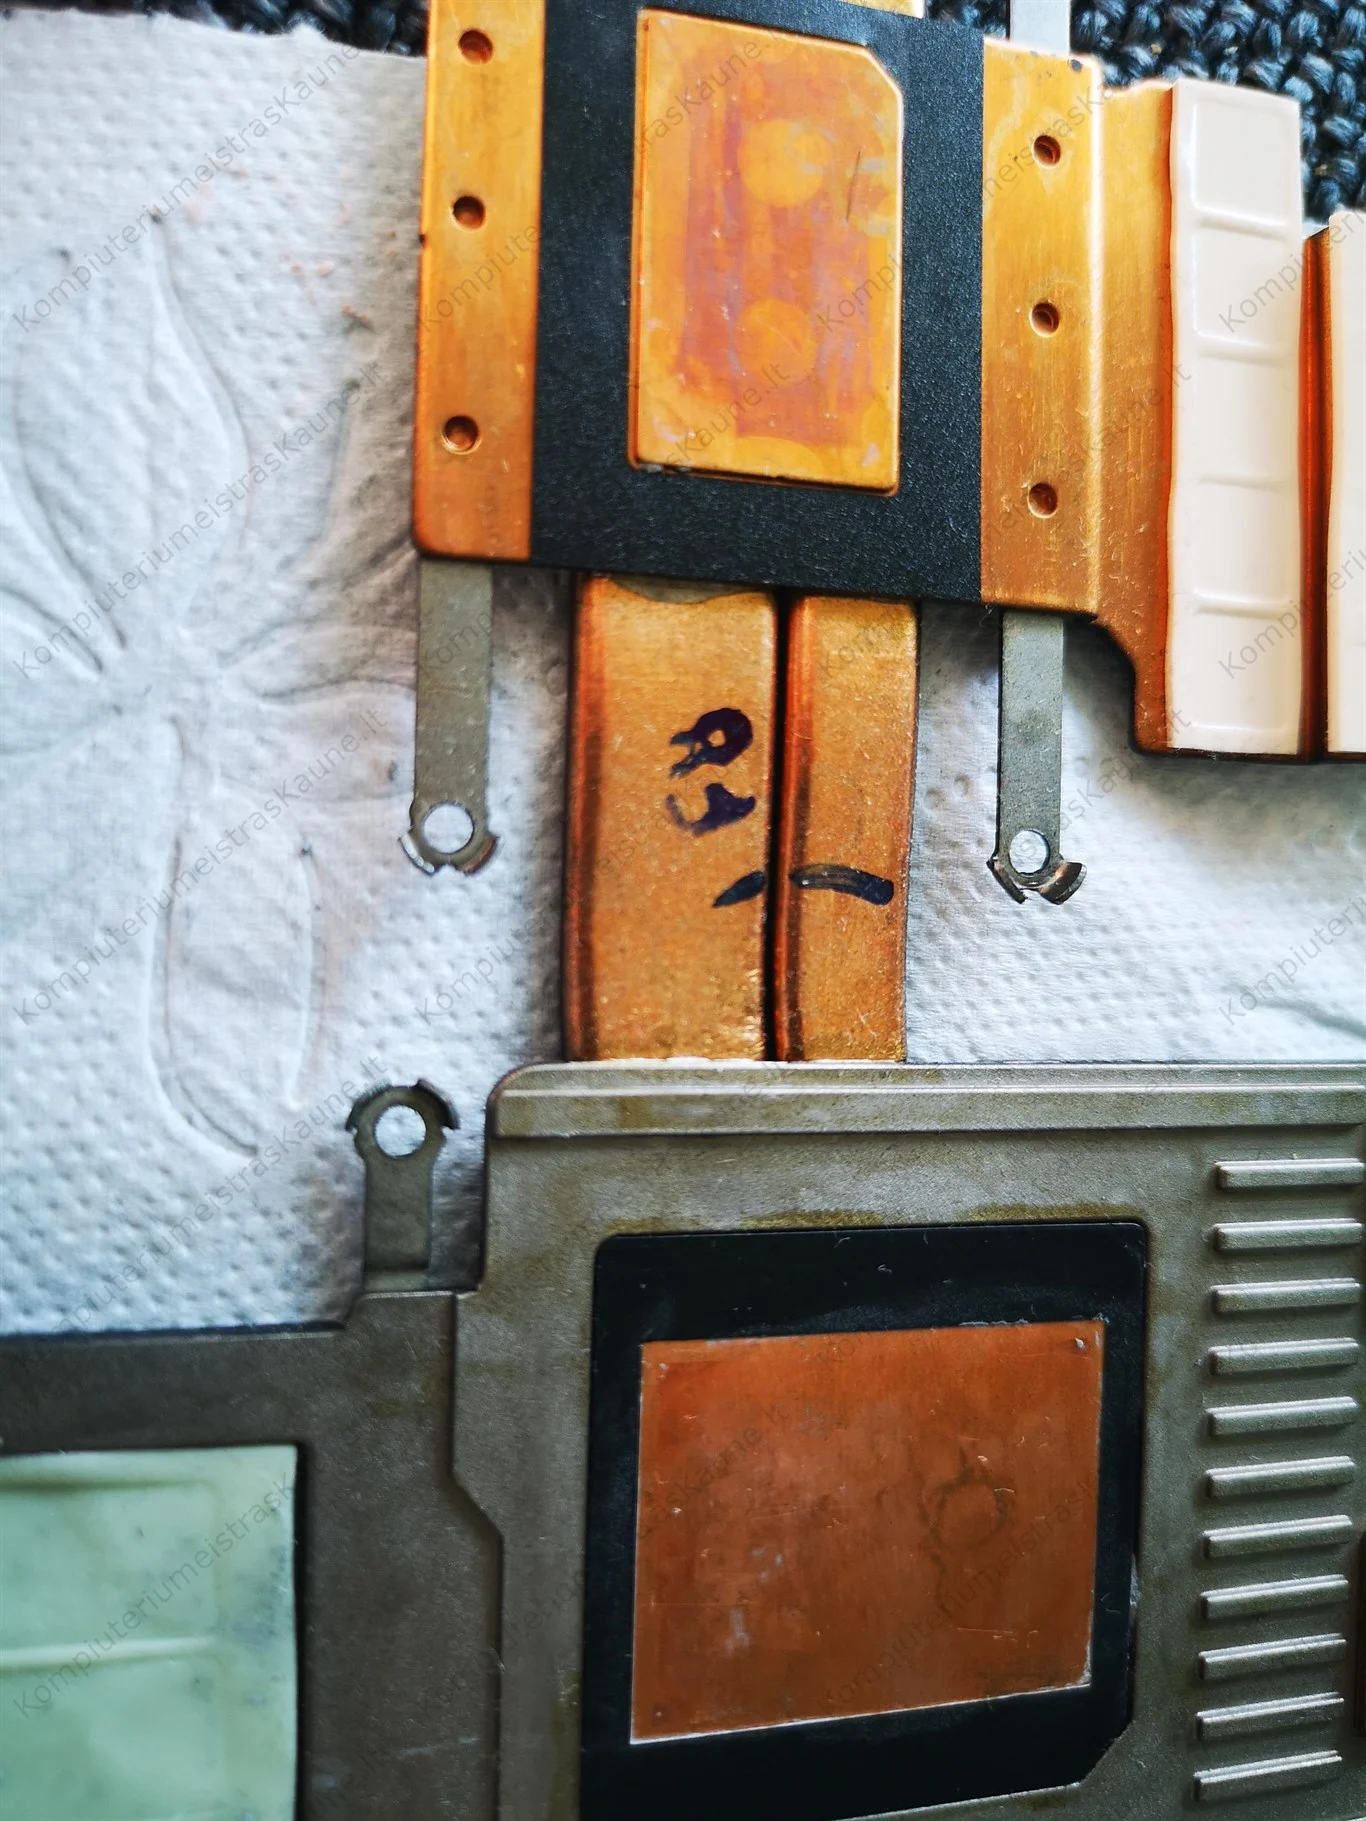
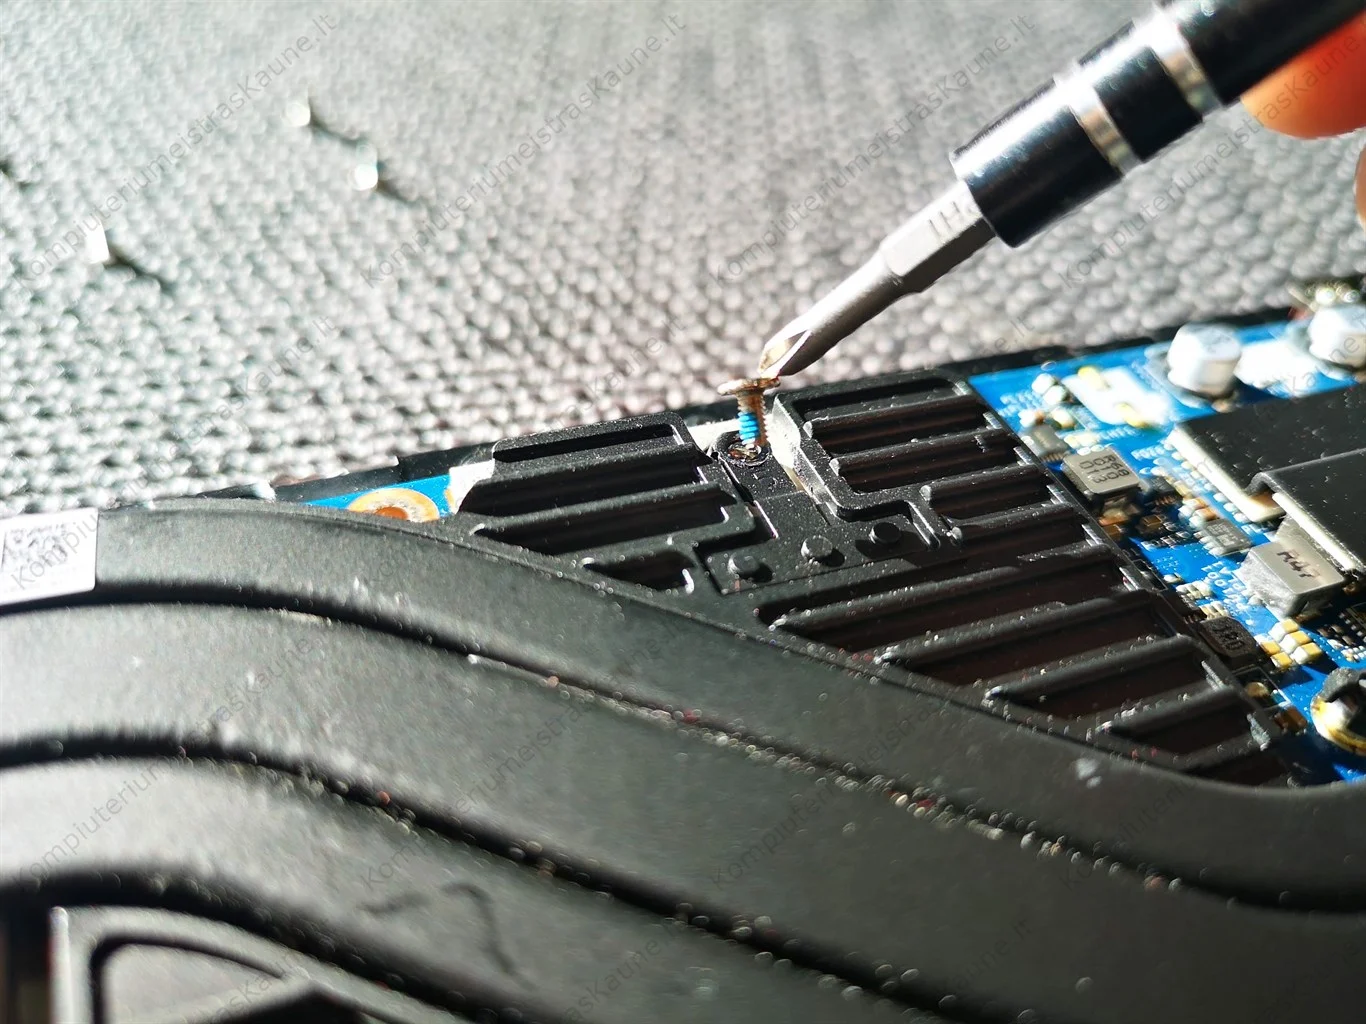
Close-ups of the board show two main chip surfaces after the shared assembly was removed. Once that thermal interface is disturbed, the old compound and any separate pad or putty contacts need correct preparation before the cooler goes back.
A screwdriver and paste products appear in the archive, but photographs alone do not prove every final application step. The key DIY distinction is that cleaning an accessible vent is simple; lifting a shared cooler commits you to a careful refit.
The engineer’s takeaway
For this AN517-51, the twin-fan shroud and broad base vents are the useful landmarks. Check both outlet fin edges and both sides of the base; leave the shared cooler seated unless you can restore its thermal contacts correctly.
Before you open the laptop
Can you clean an Acer Nitro AN517-51 yourself?
Power down, unplug the charger and use the AN517-51 service instructions before opening the base. Make a screw map, ease clips rather than prying hard and disconnect the internal battery as directed before touching the fans.
Hold each blower still while cleaning and keep debris away from the motherboard. If the full shroud must come out, document fan leads, screw order, paste and pad positions before lifting it.
After the clean
Checks after the Nitro is closed
Confirm the base sits flat, the machine starts without a fan error and both blowers can respond. Listen for scraping that could mean a trapped wire or shifted housing.
Compare temperatures under the same workload and room conditions if you have prior values. This archive does not support a numerical improvement claim.
Questions from owners
Acer Nitro AN517-51 cleaning FAQs
Answers based on the twin-fan module, narrow fins and vented base visible here.
Does the AN517-51 have two fans?
The photographed AN517-51 has two blowers in a shared cooling assembly. Inspect both sides when cleaning.
Can I clean the fans without lifting the full cooler?
Often accessible dust can be removed with the base off. The need to lift the assembly depends on where lint is trapped and the exact access path.
Why inspect the fin edge?
Air must pass through narrow fins to leave the laptop. The outer vent can look clear while material sits on the inner edge.
What changes when the shared module is removed?
It exposes chip contacts and may disturb paste, pads or putty. Their correct placement must be restored during reassembly.
Can I wash the base panel?
Only if separated safely from electronics, and it must be completely dry before refitting. Use the model's service guidance.
Was a temperature drop measured?
No matched before-and-after readings are documented in this photo archive.
UK Acer Nitro cleaning enquiries
Need both Nitro outlets inspected?
If you are in the UK, tell us your Acer product number, whether one side sounds different from the other, and when heat or fan noise appears. Include your postcode in the form.
Mention any previous opening or repaste. That helps us decide whether the main work is at the base screen, fan shroud, outlet fins or thermal contact.
Read about our laptop fan and cooling service, then use the form to tell us your computer model, symptoms and UK postcode.
Free to enquire · No obligation to book. We discuss the proposed work and price before you decide.
The workshop photos
Acer Nitro AN517-51 fan-shroud gallery
Open the photos for the dual-fan module, outlet fins, vented base and chip contact surfaces.