Published 17 November 2026 · ASUS ROG single-fan laptop case study
ROG single-fan clean
one fan still has several places for dust to hide.
This older ASUS ROG layout has a single blower, a compact copper heat-pipe assembly and a long rear outlet. The photos show a dusty fan and fibres caught at the fin edge, then the contact surfaces exposed during deeper service.
The system
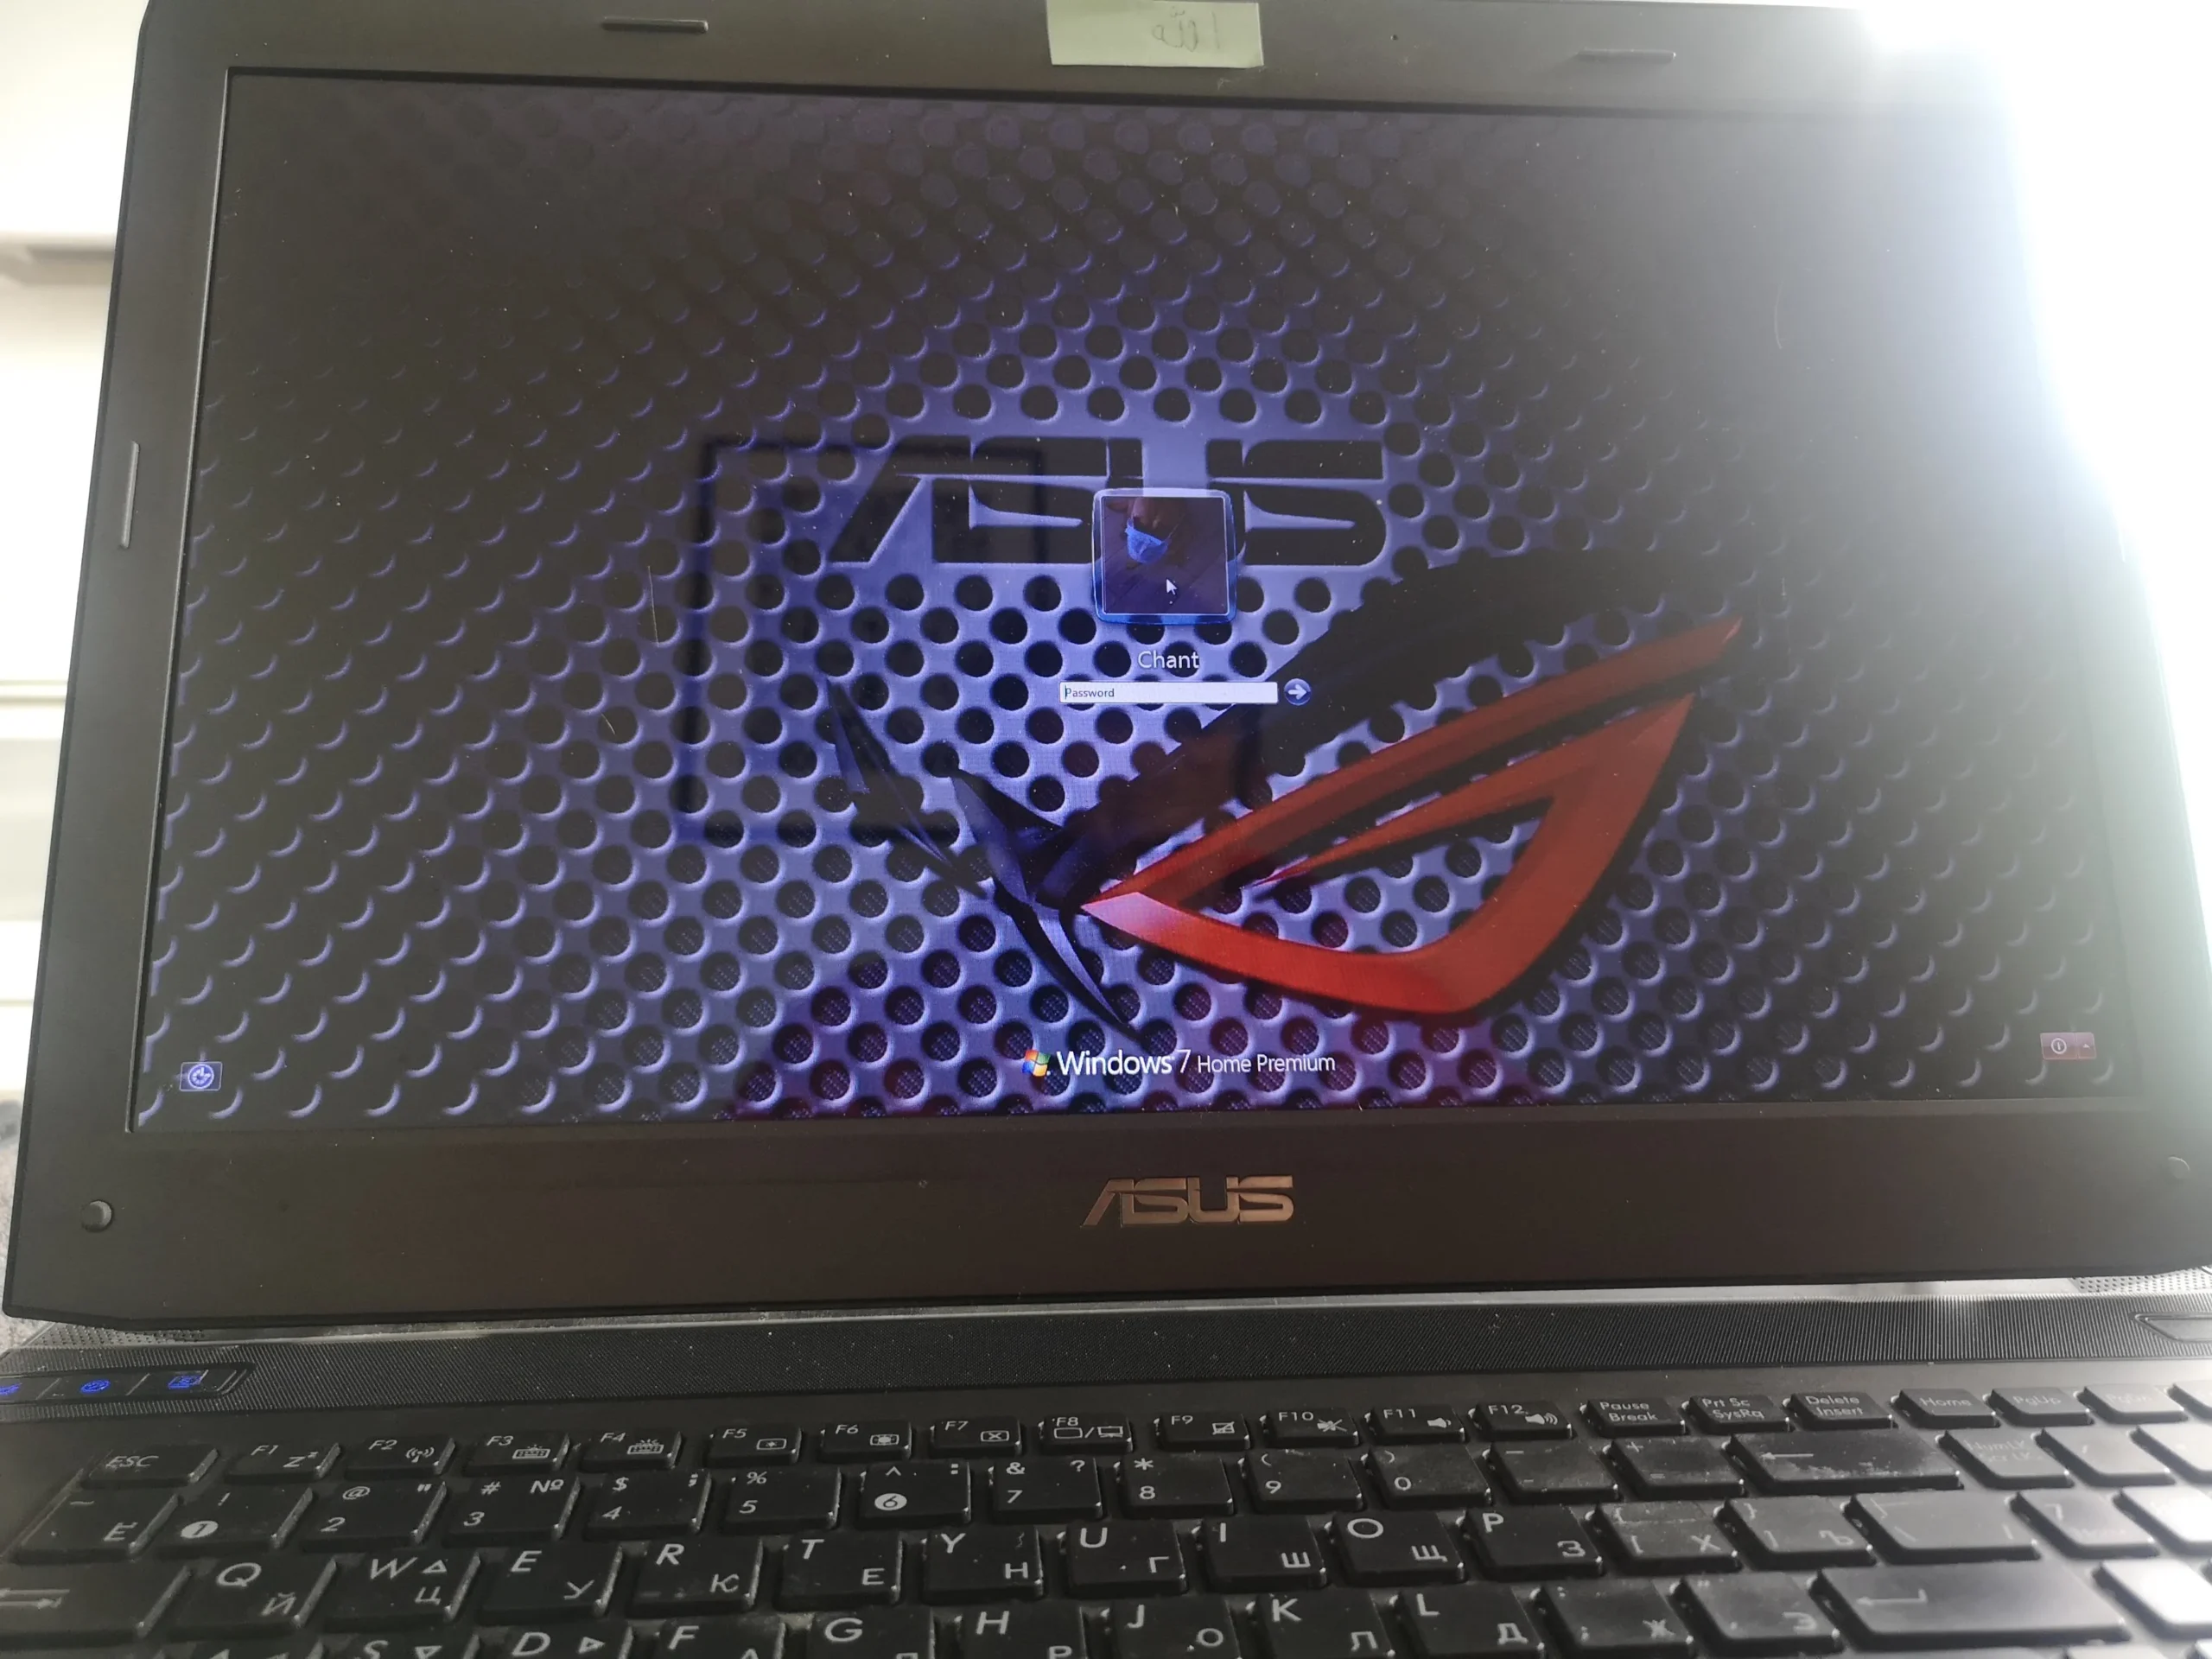
ASUS ROG laptop with one main blower
Airflow finding
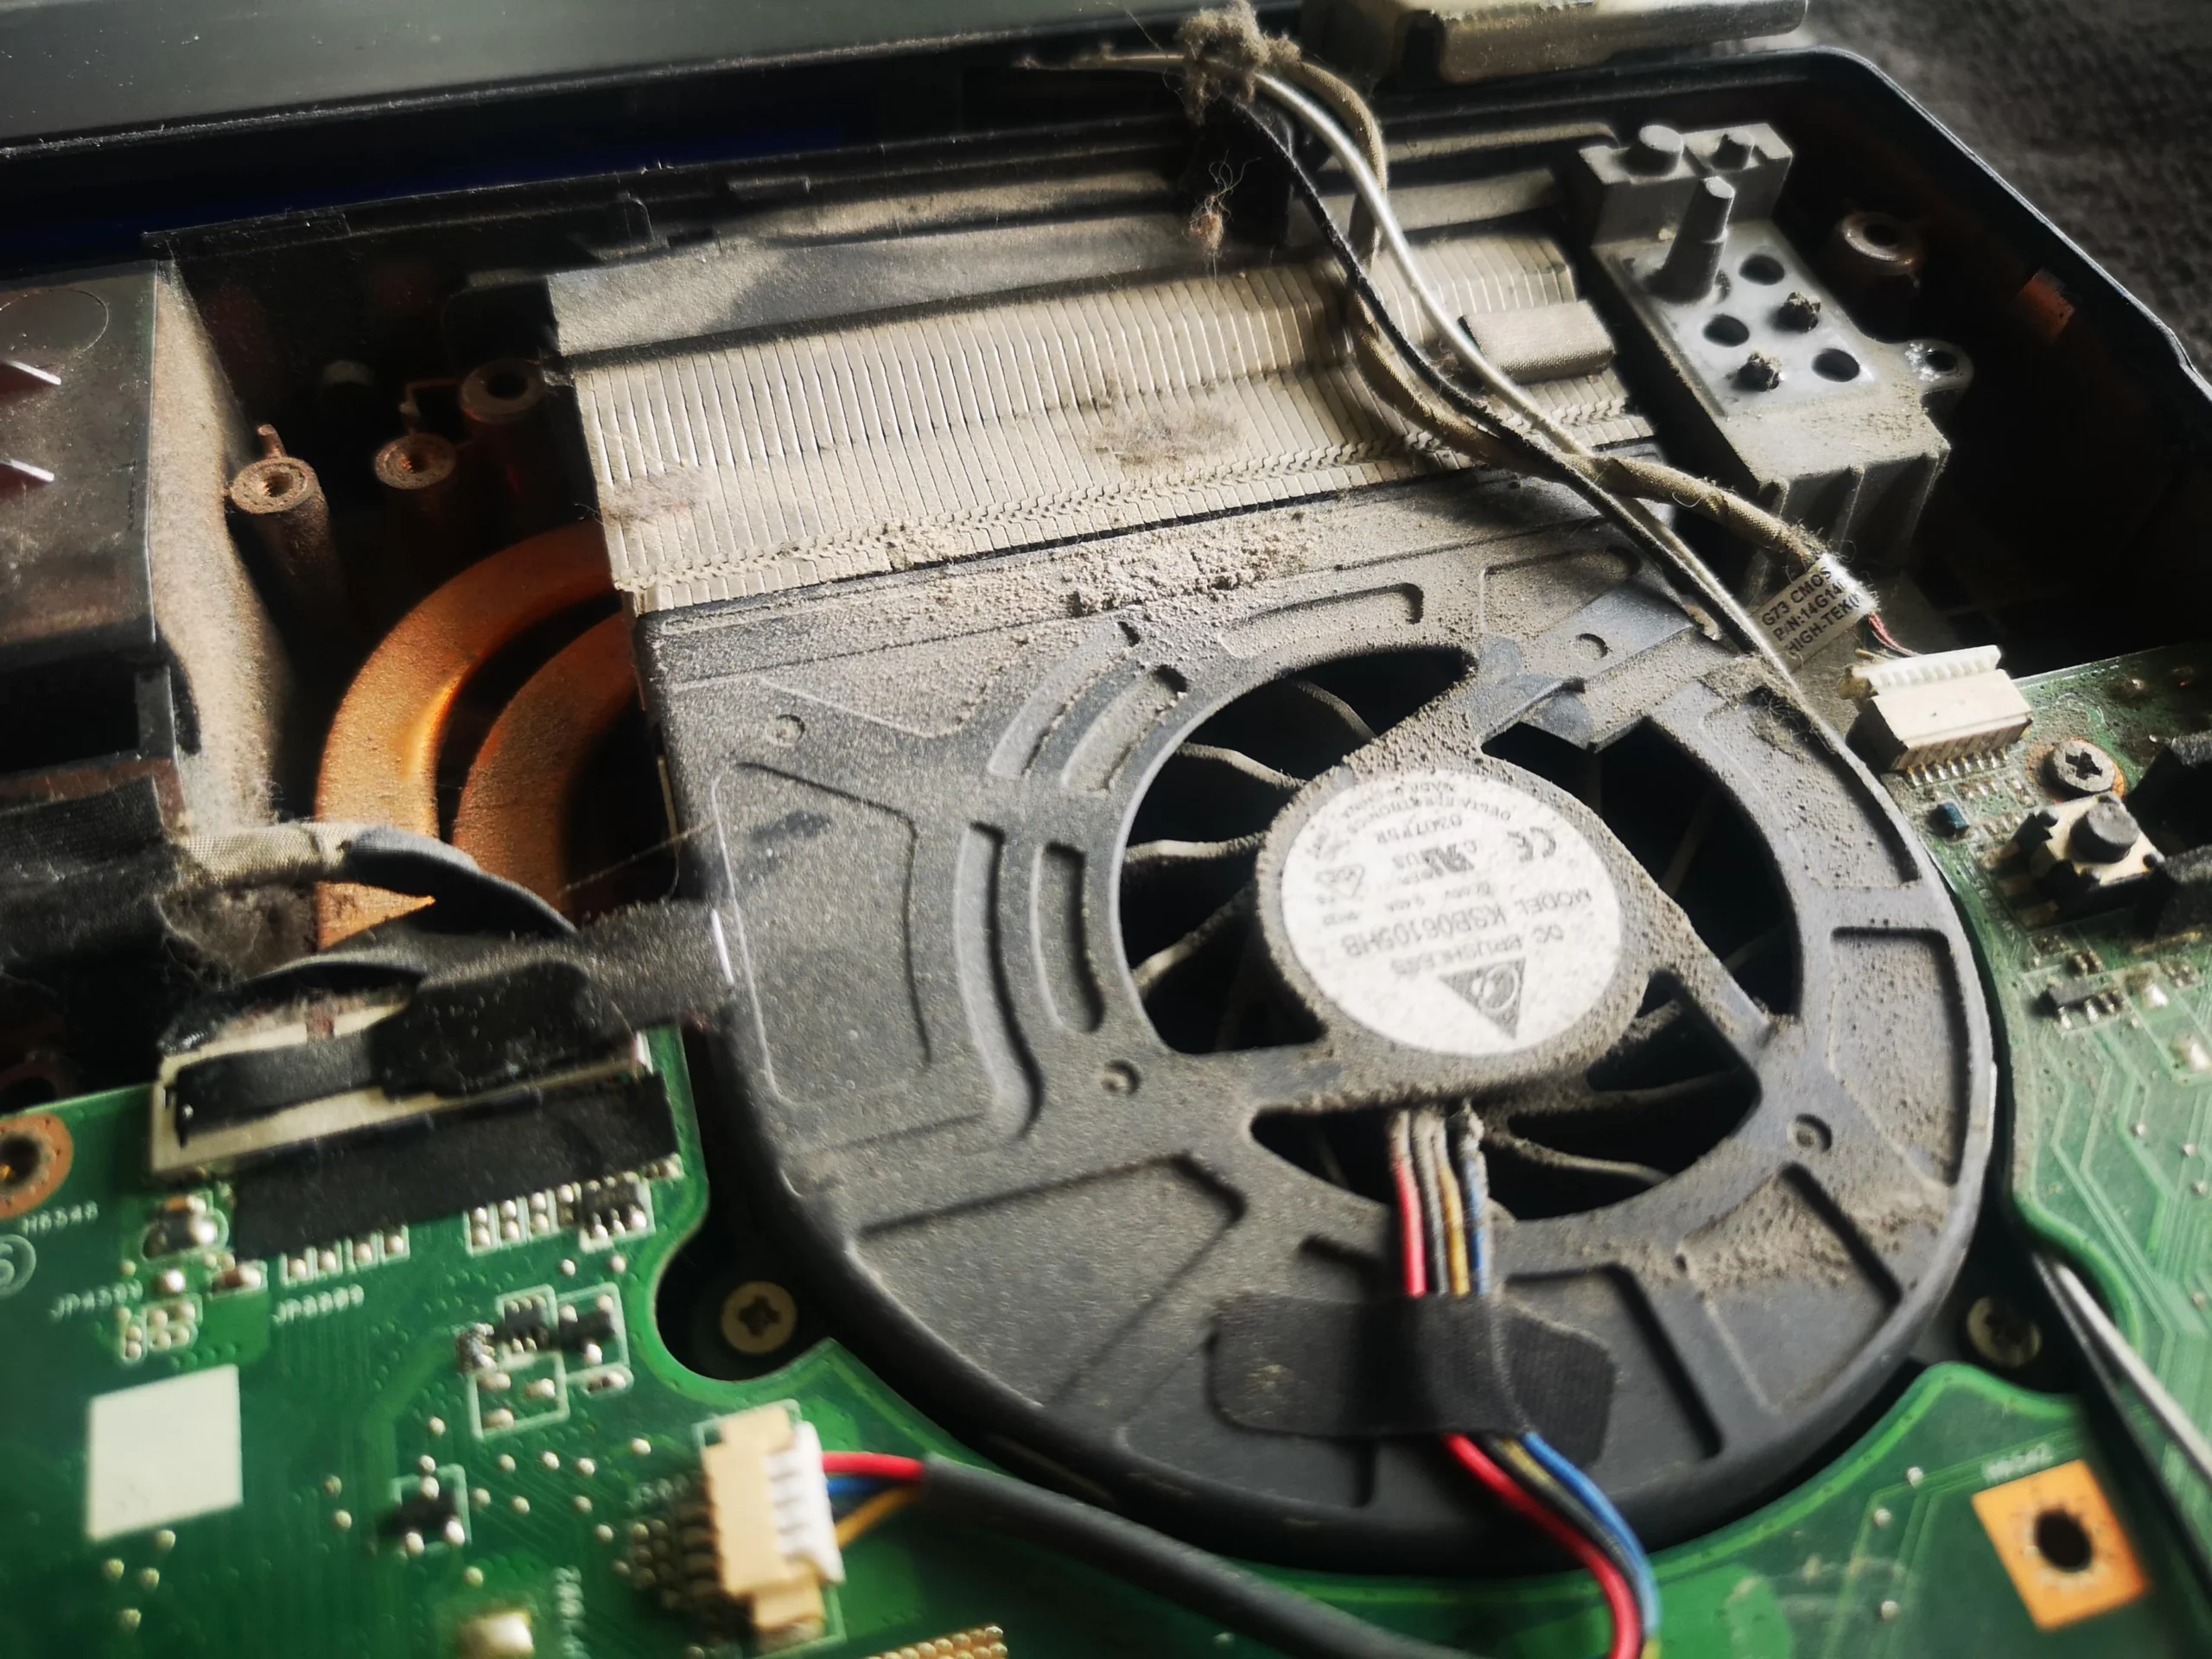
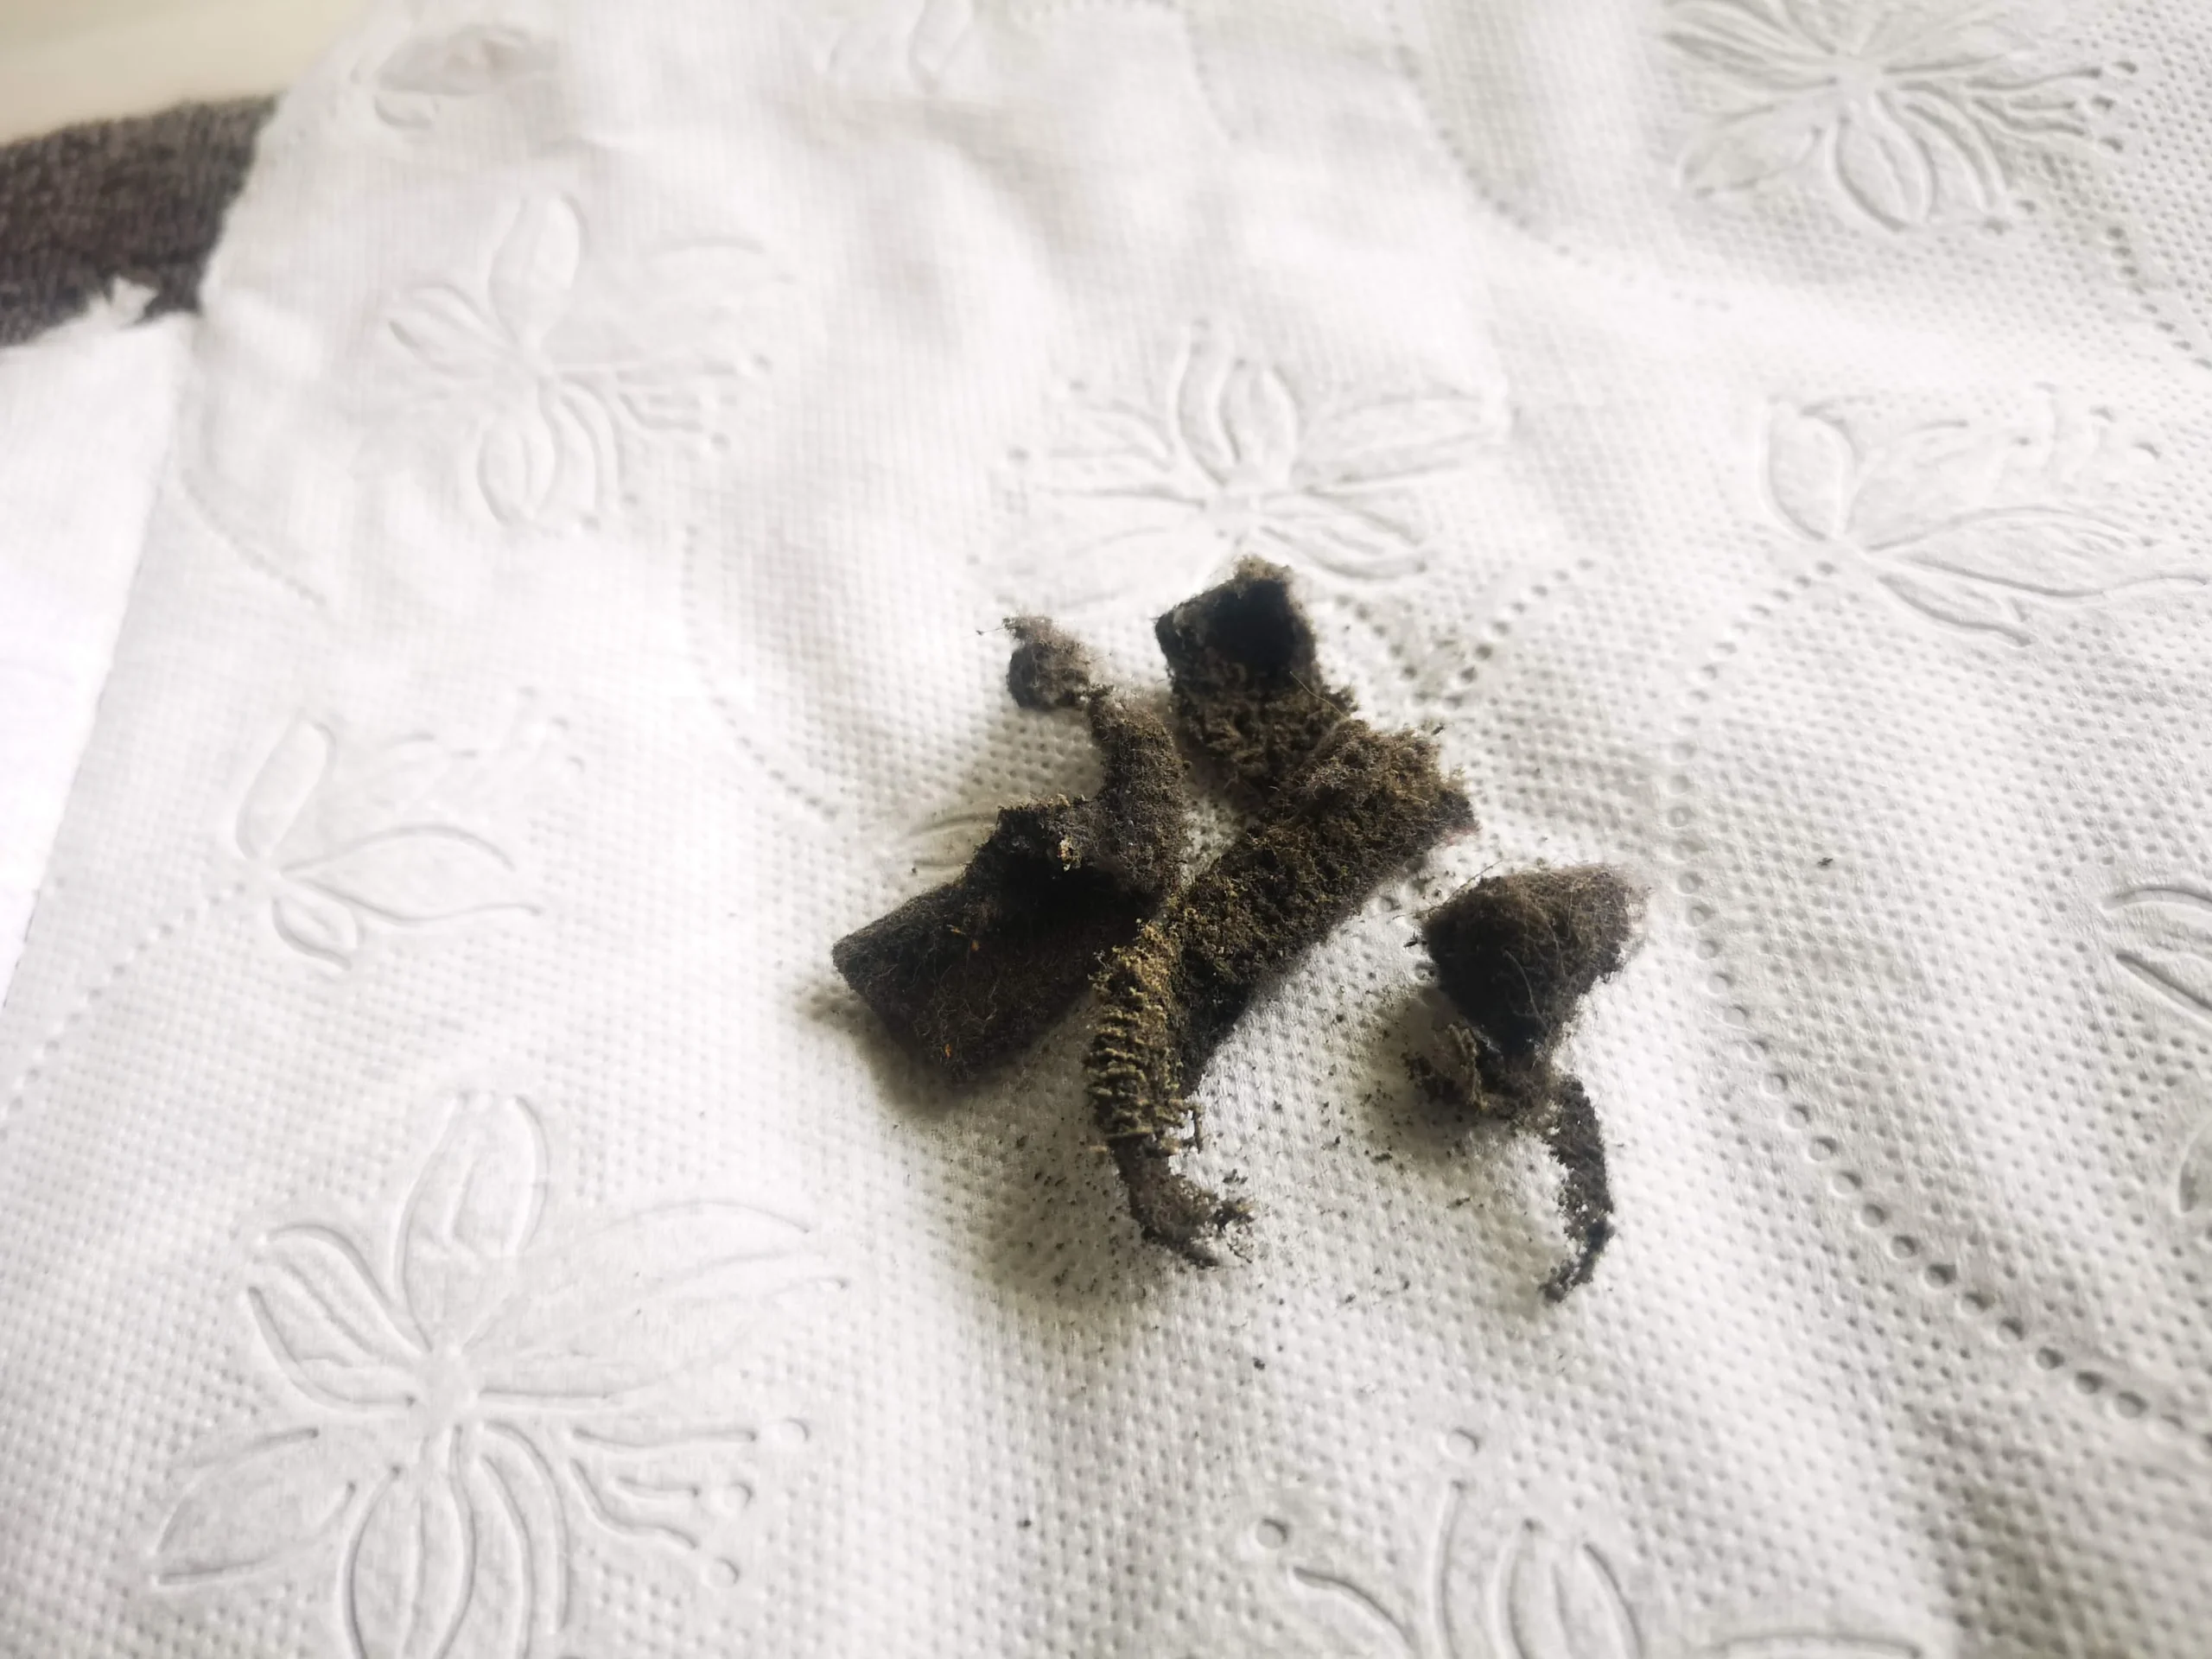
Dust on the fan and fibres at the rear fin edge
Thermal work
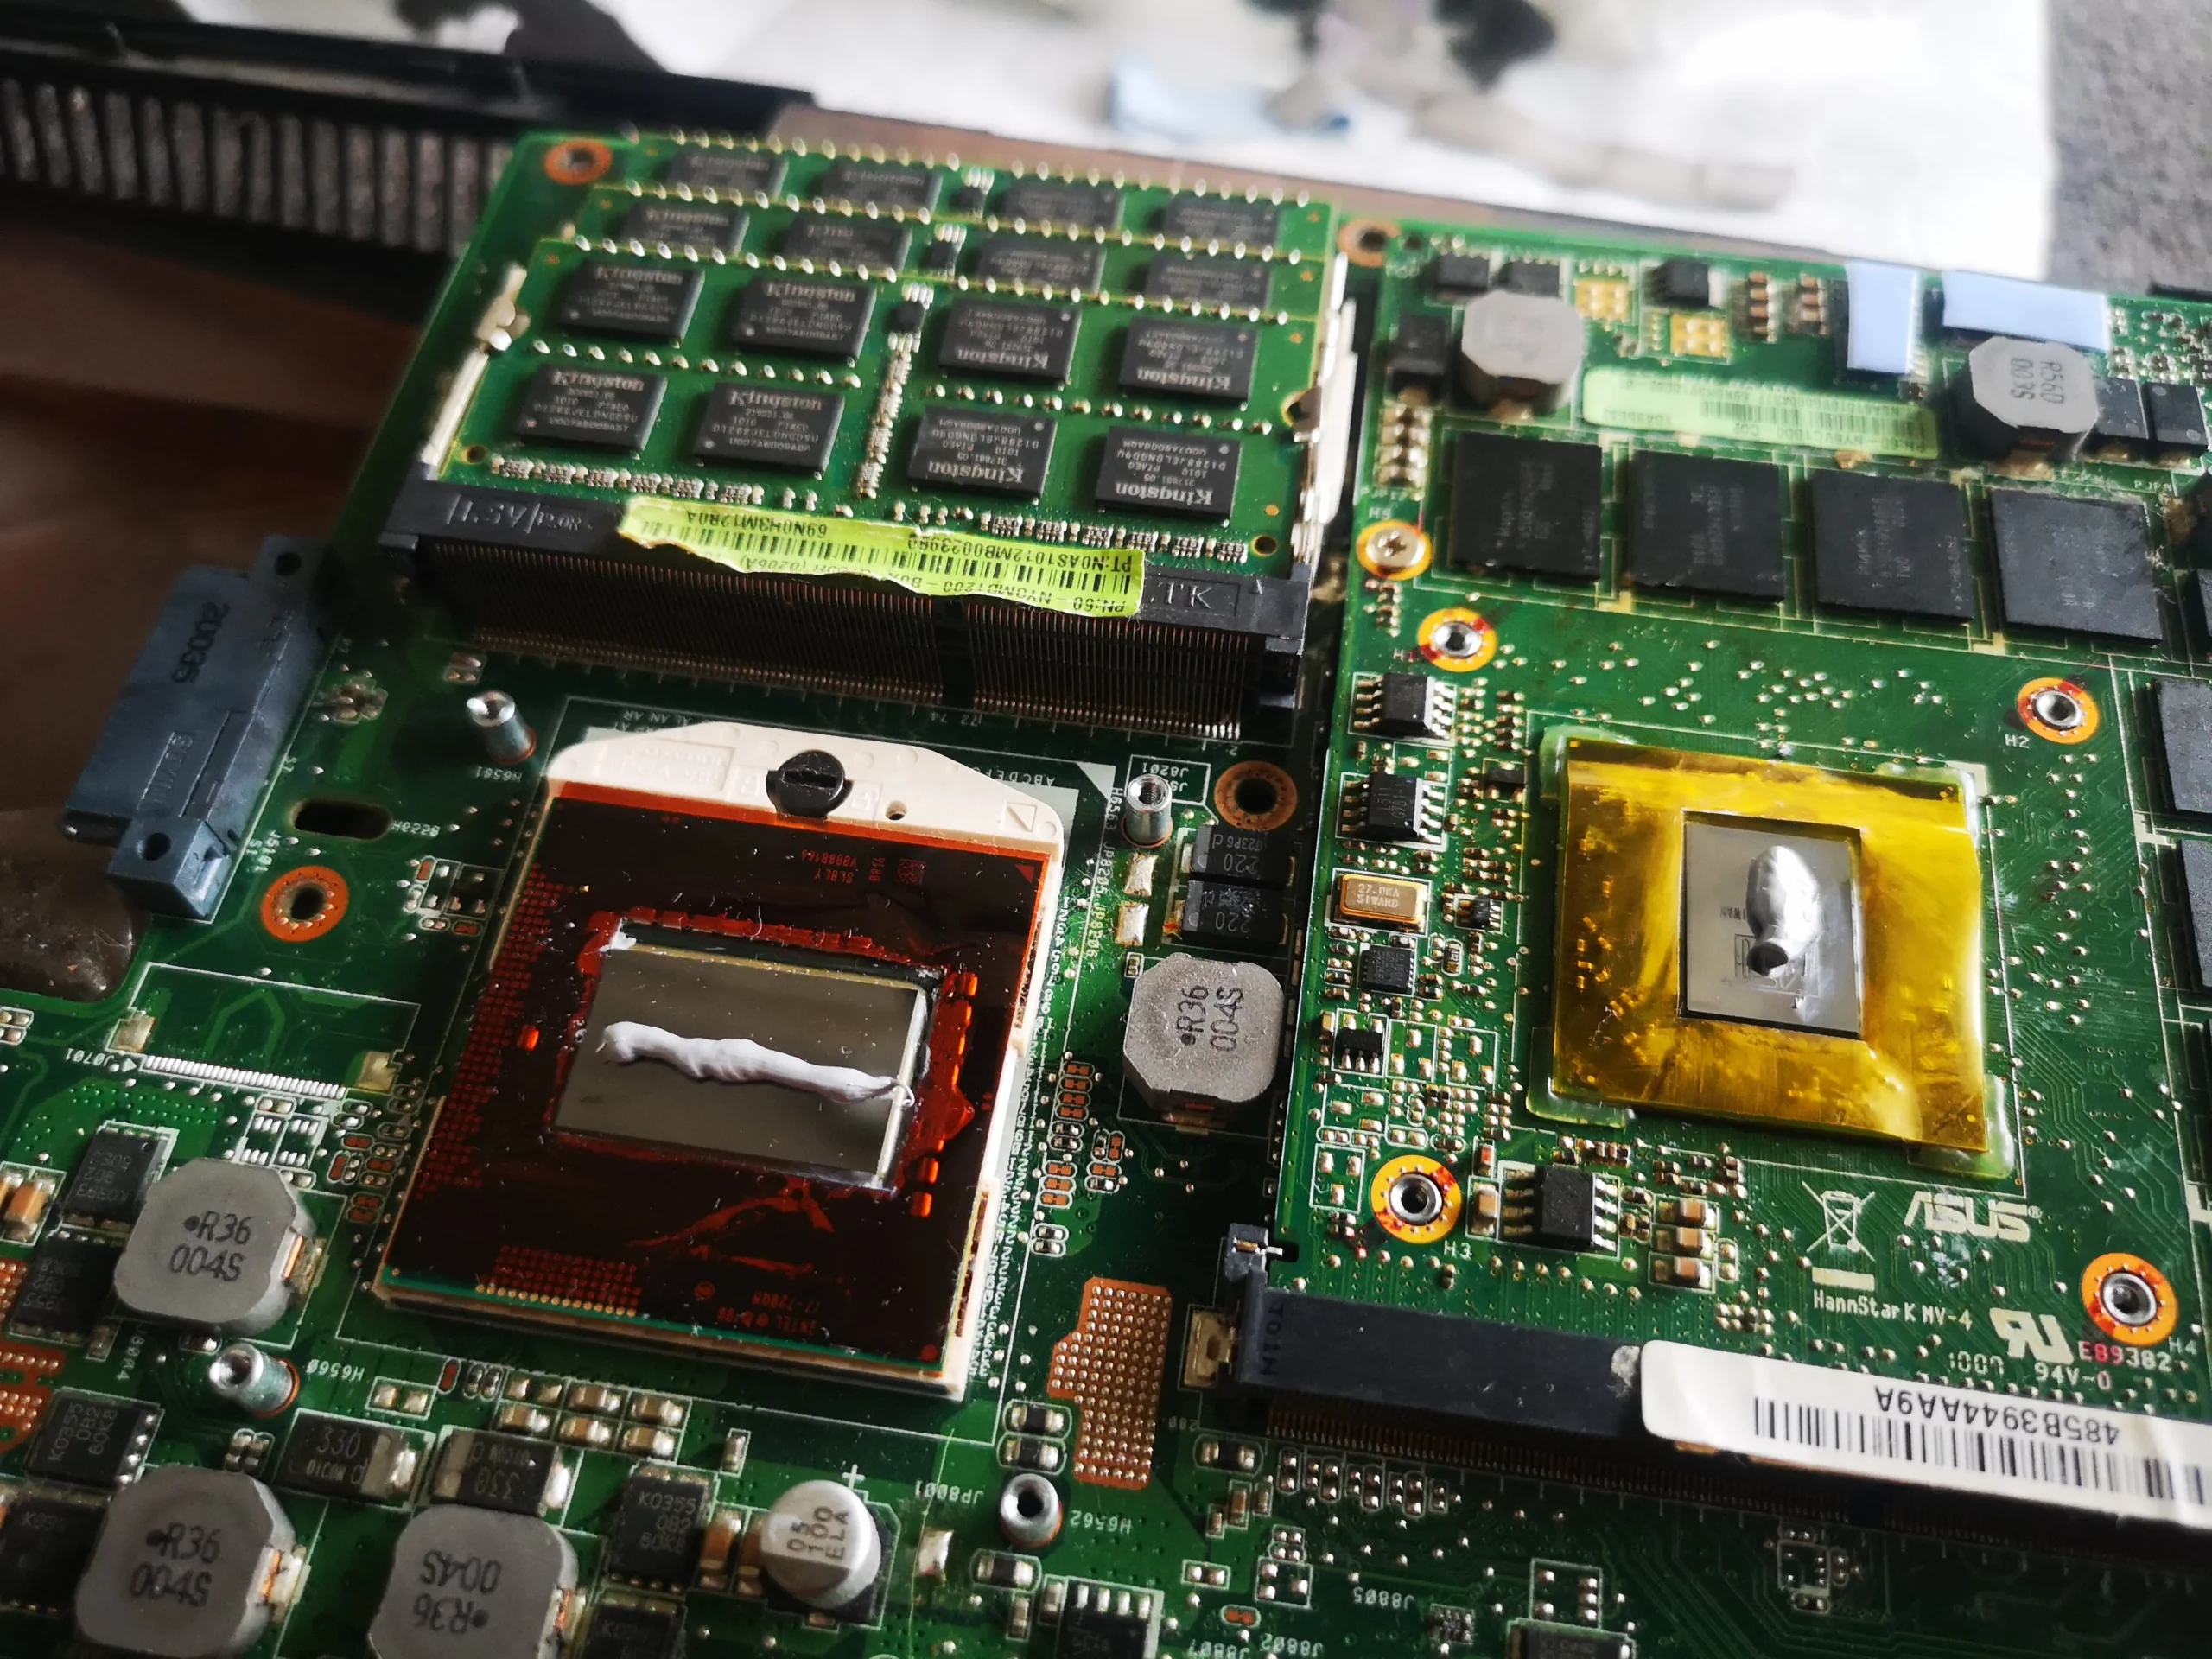
Copper cooler lifted from two chip contacts
The ROG badge on the cover makes this a gaming laptop, but its cooling system is simpler than many modern twin-fan designs. One blower moves air across a compact copper cooler and out through a rear fin stack. The workshop photos show dust on that fan and a pale line of material along the outlet edge.
The copper assembly was also removed, exposing two chip contact areas. No readable exact commercial model or matched temperature log is available in the archive, so this case concentrates on the physical air route and careful thermal refit rather than a claimed result.
In this case study
01 / The blower
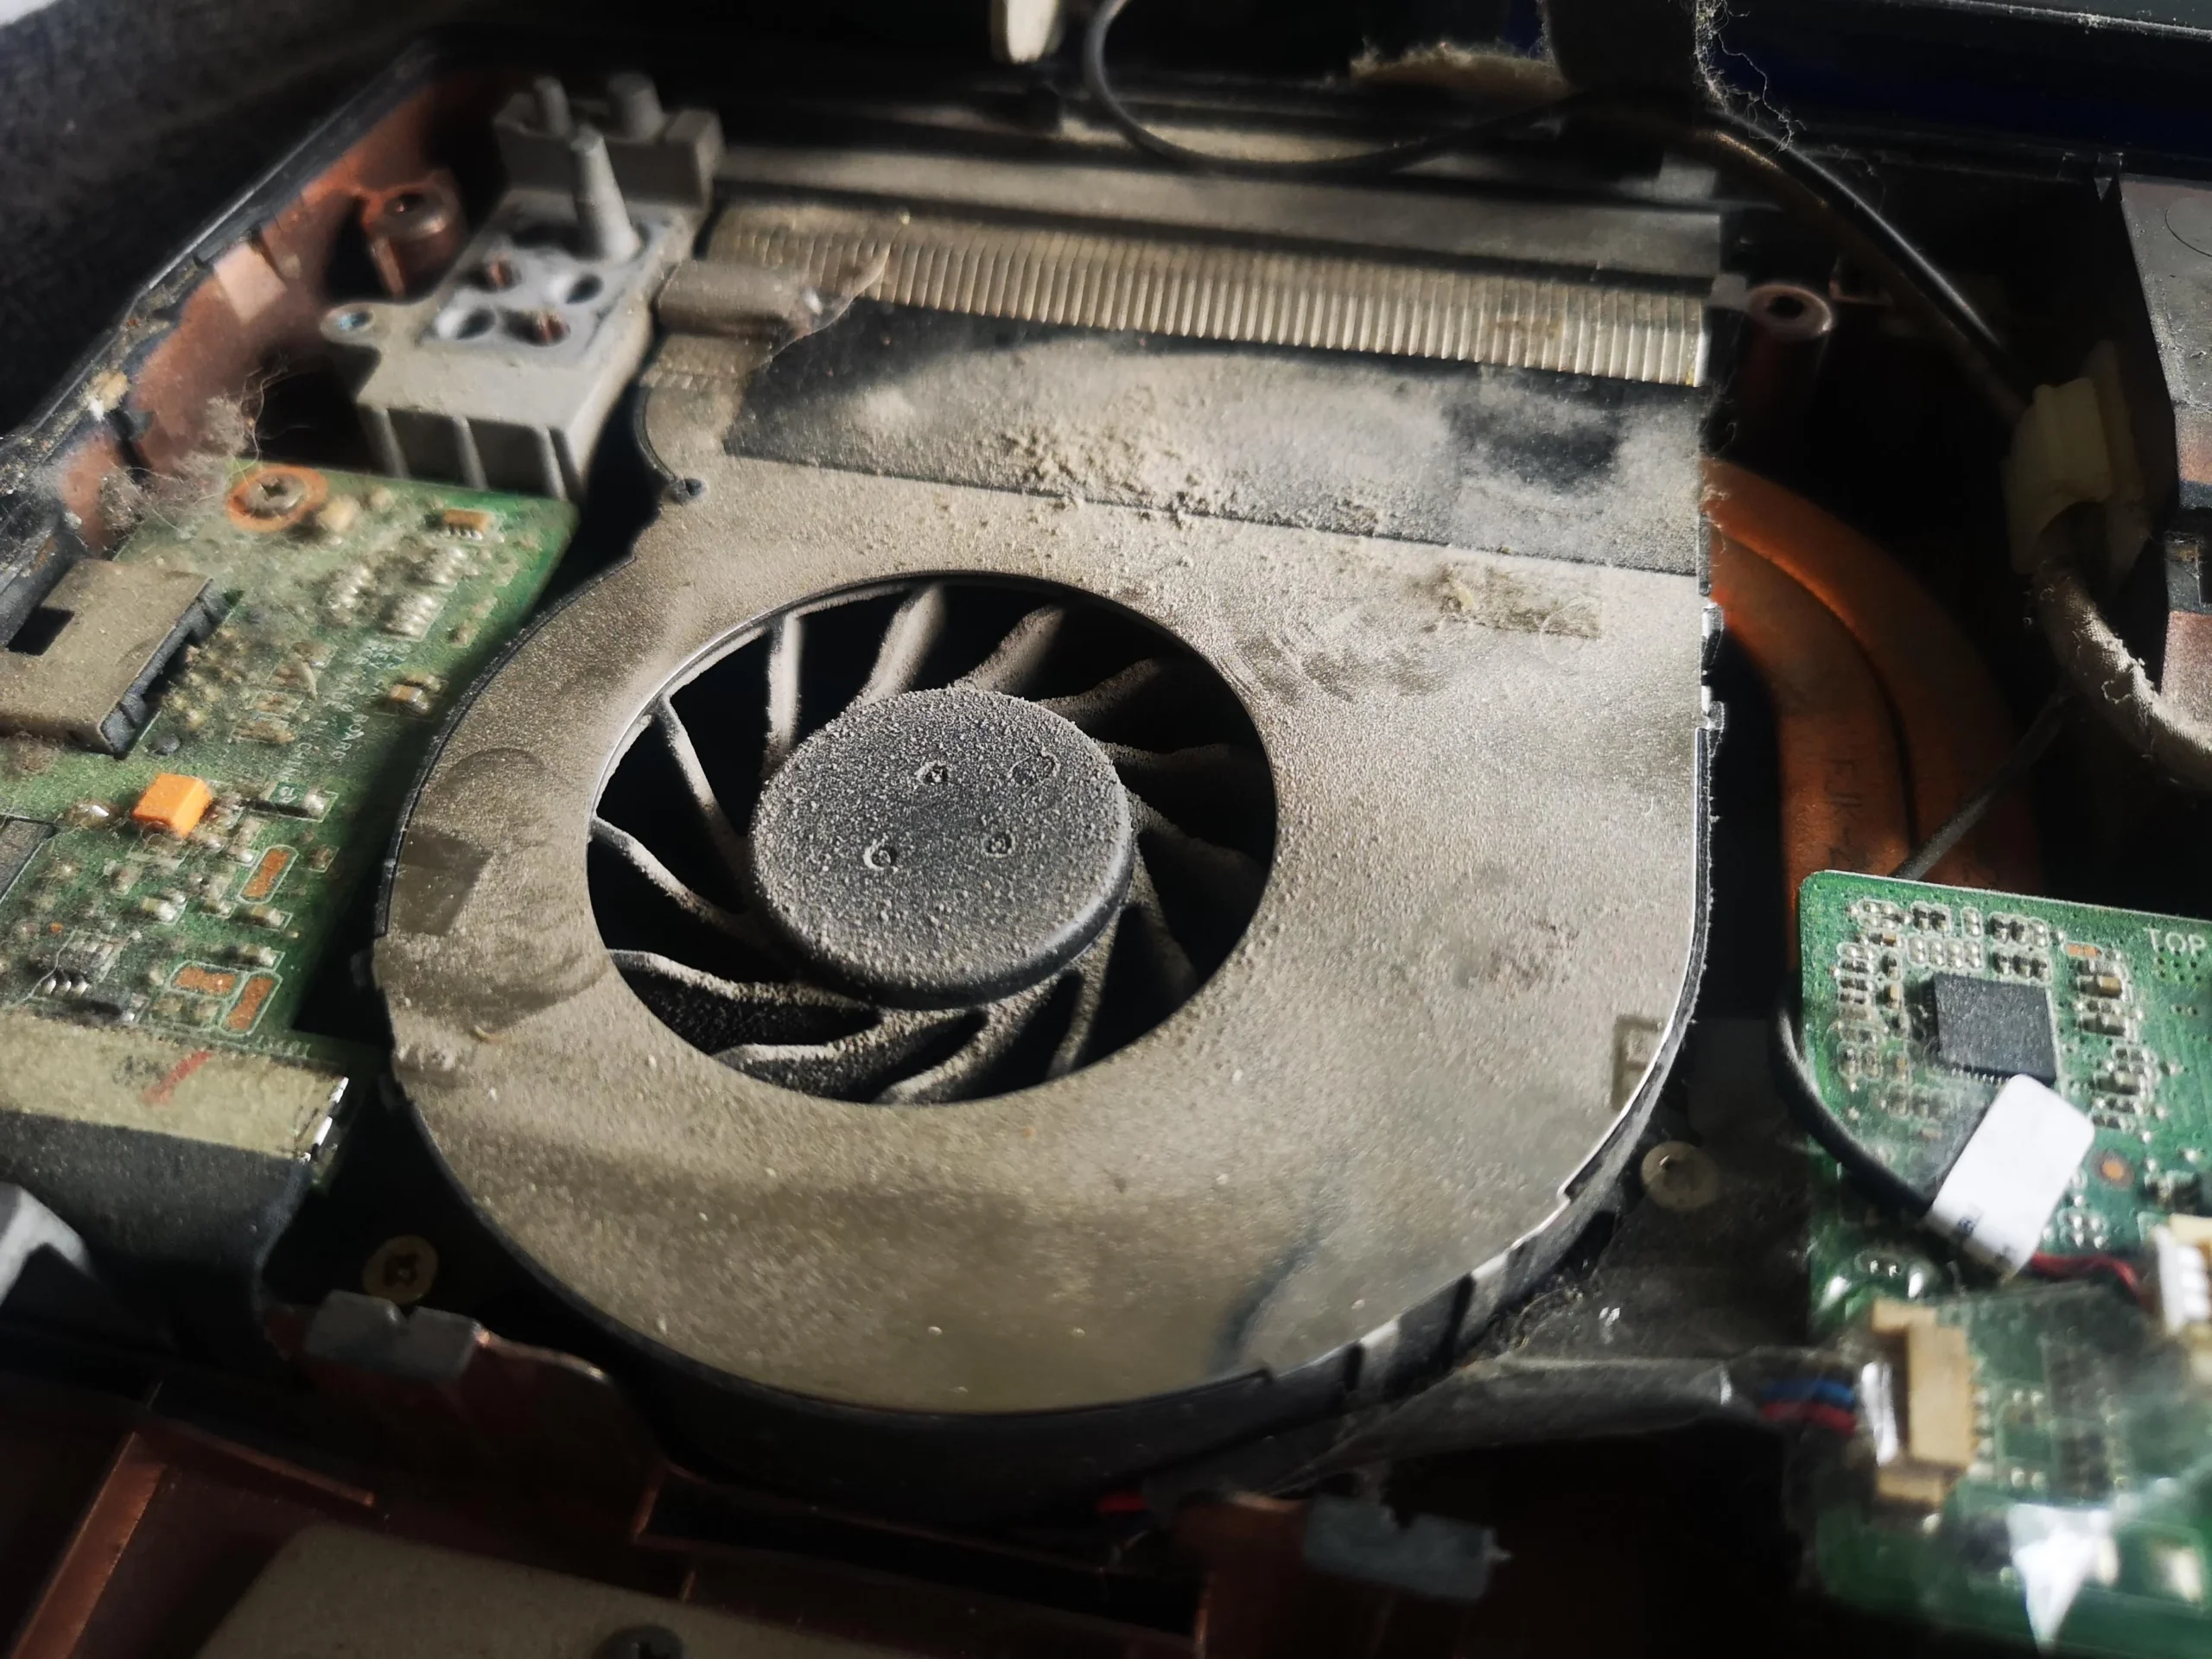
Dust covered the visible fan blades
The fan close-up shows a grey coating around the rotor and housing. A single-fan layout is not necessarily easy to clean: its one blower still has to feed the full fin outlet, so a local obstruction can affect the whole cooling route.
A later brush view shows direct access to the fan. Hold the impeller still during cleaning and avoid pulling the small connector or scraping the board beneath it.
02 / The tight exit
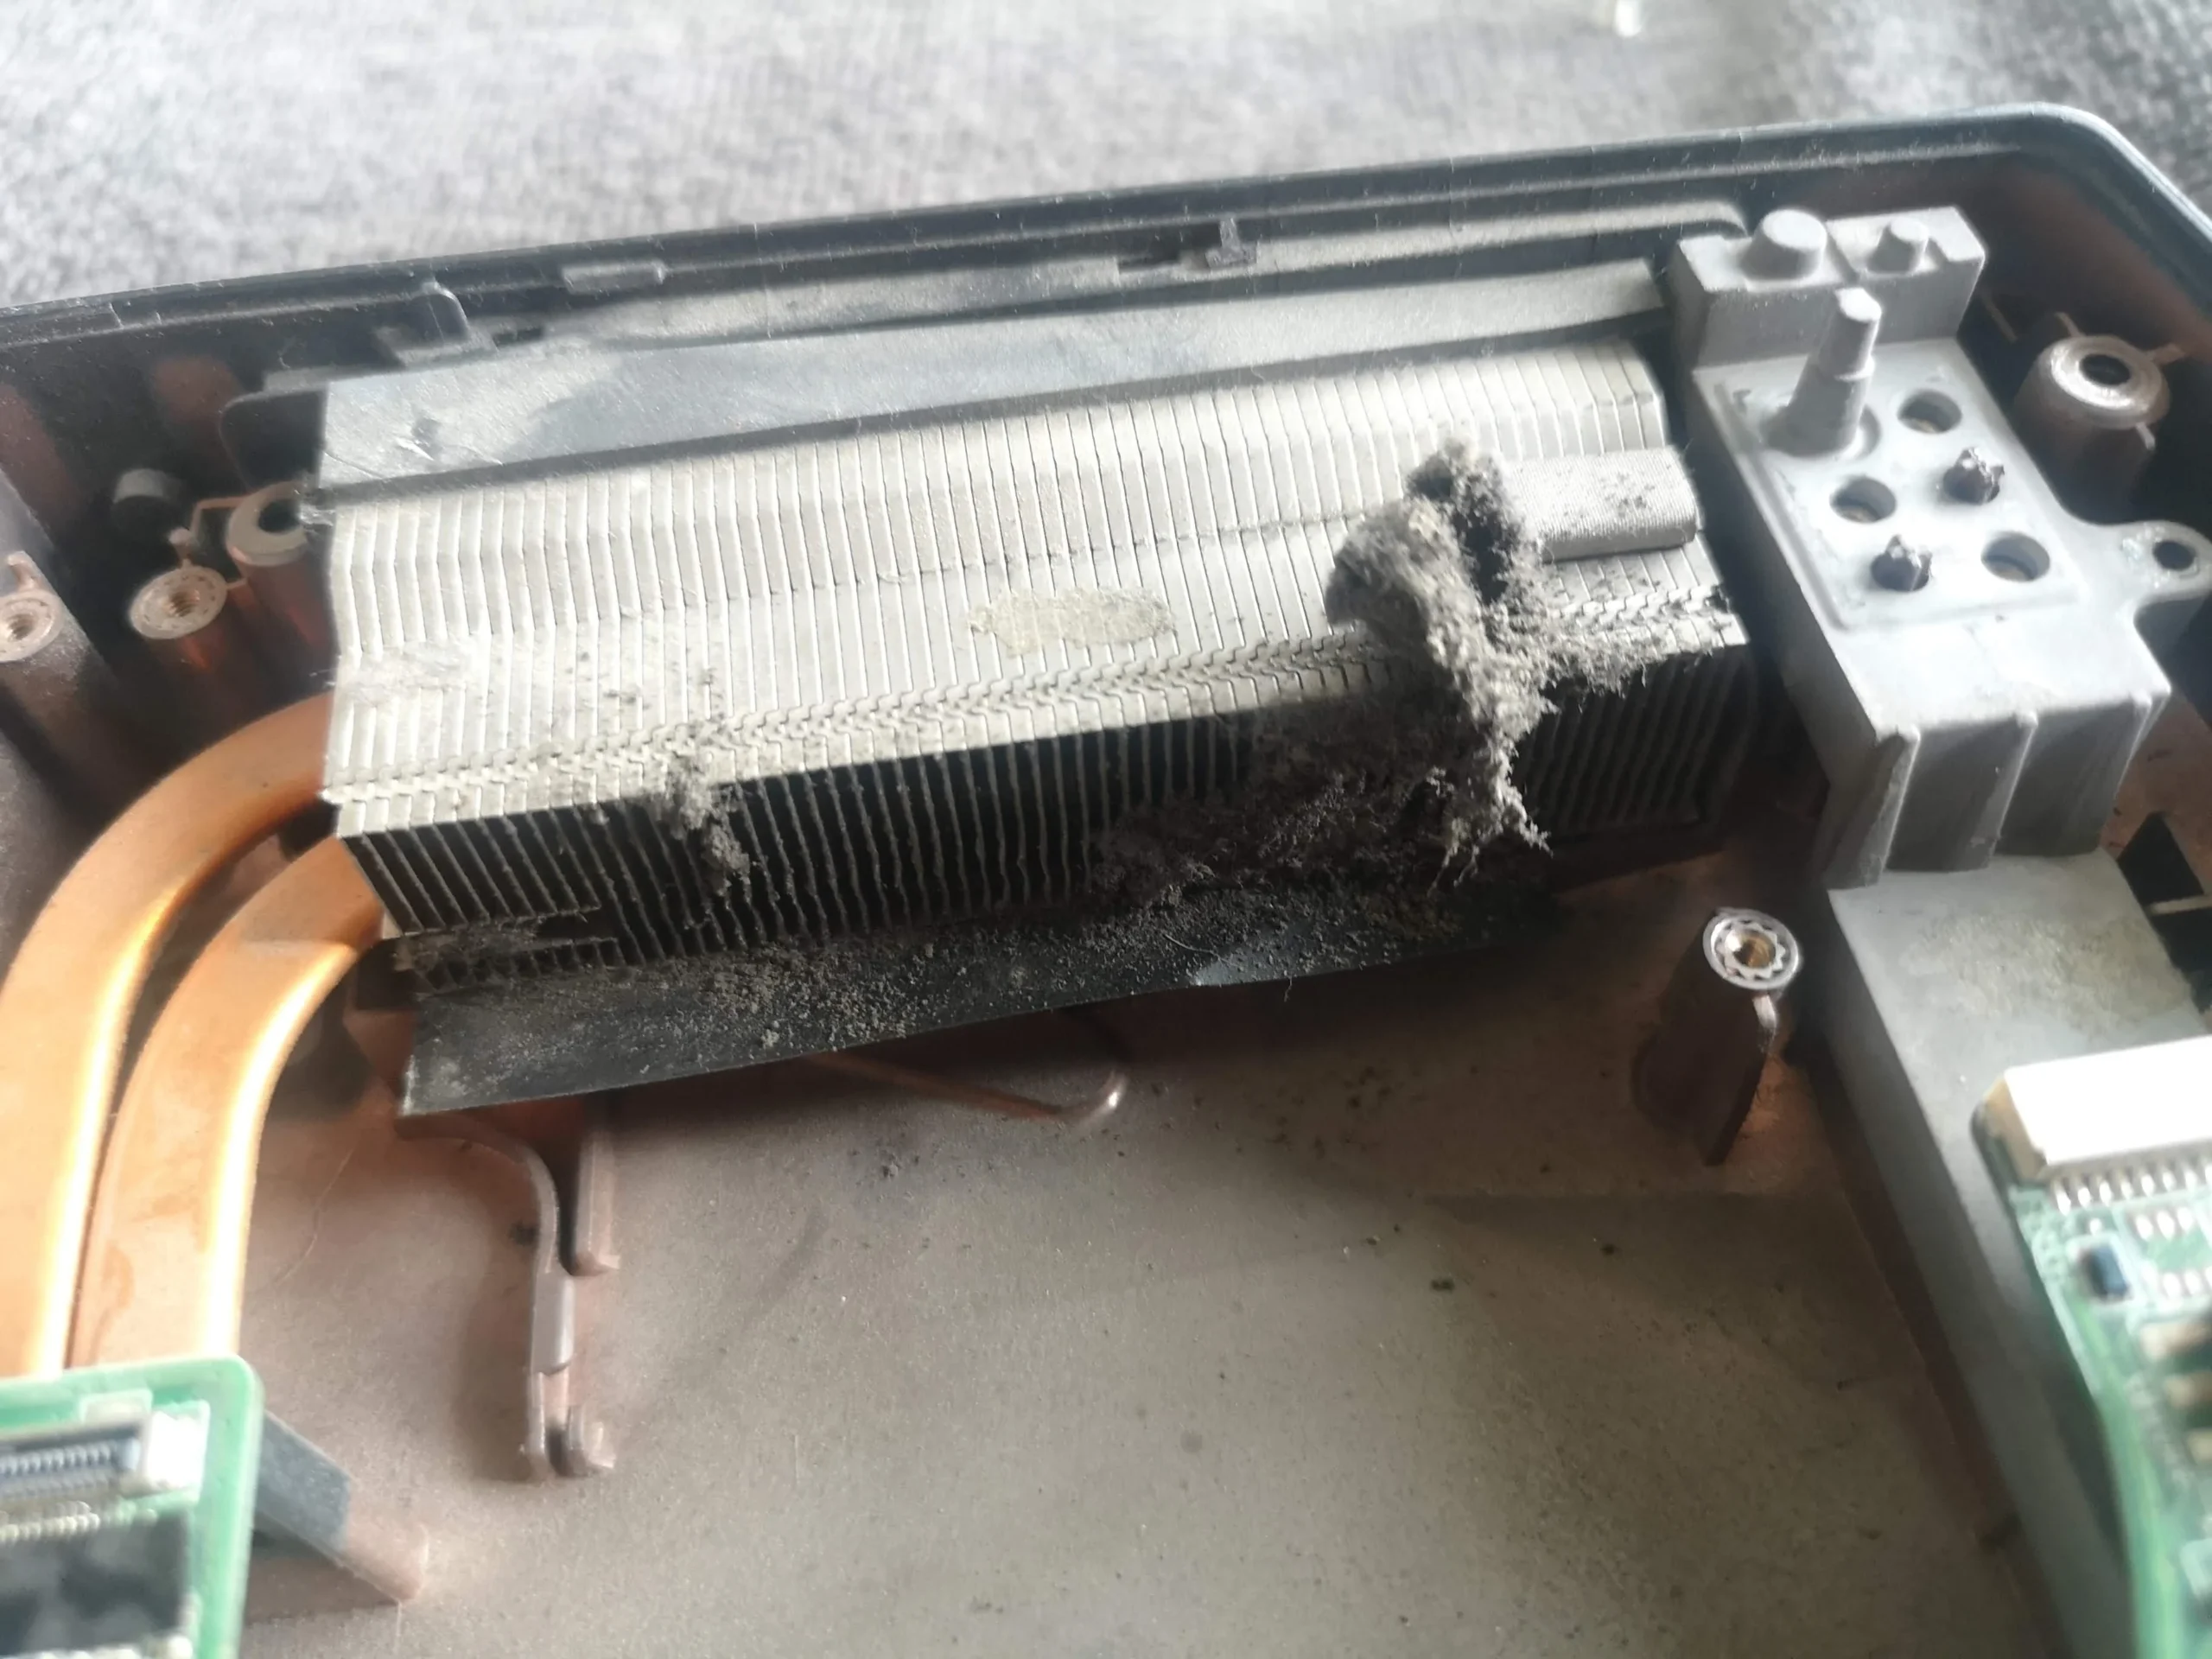
Fibres collected where air leaves the chassis
The removed fin assembly shows pale material caught along its rear edge. That narrow face is easy to overlook if you only wipe the round blades or the outside vent. Follow the path from the fan housing all the way to the fin slots.
The photos also show the base and rear area apart for access. Work gently around clips and ribbon cables; forcing the cover to reach a fin can cause more damage than the lint.
03 / Under the heat pipes
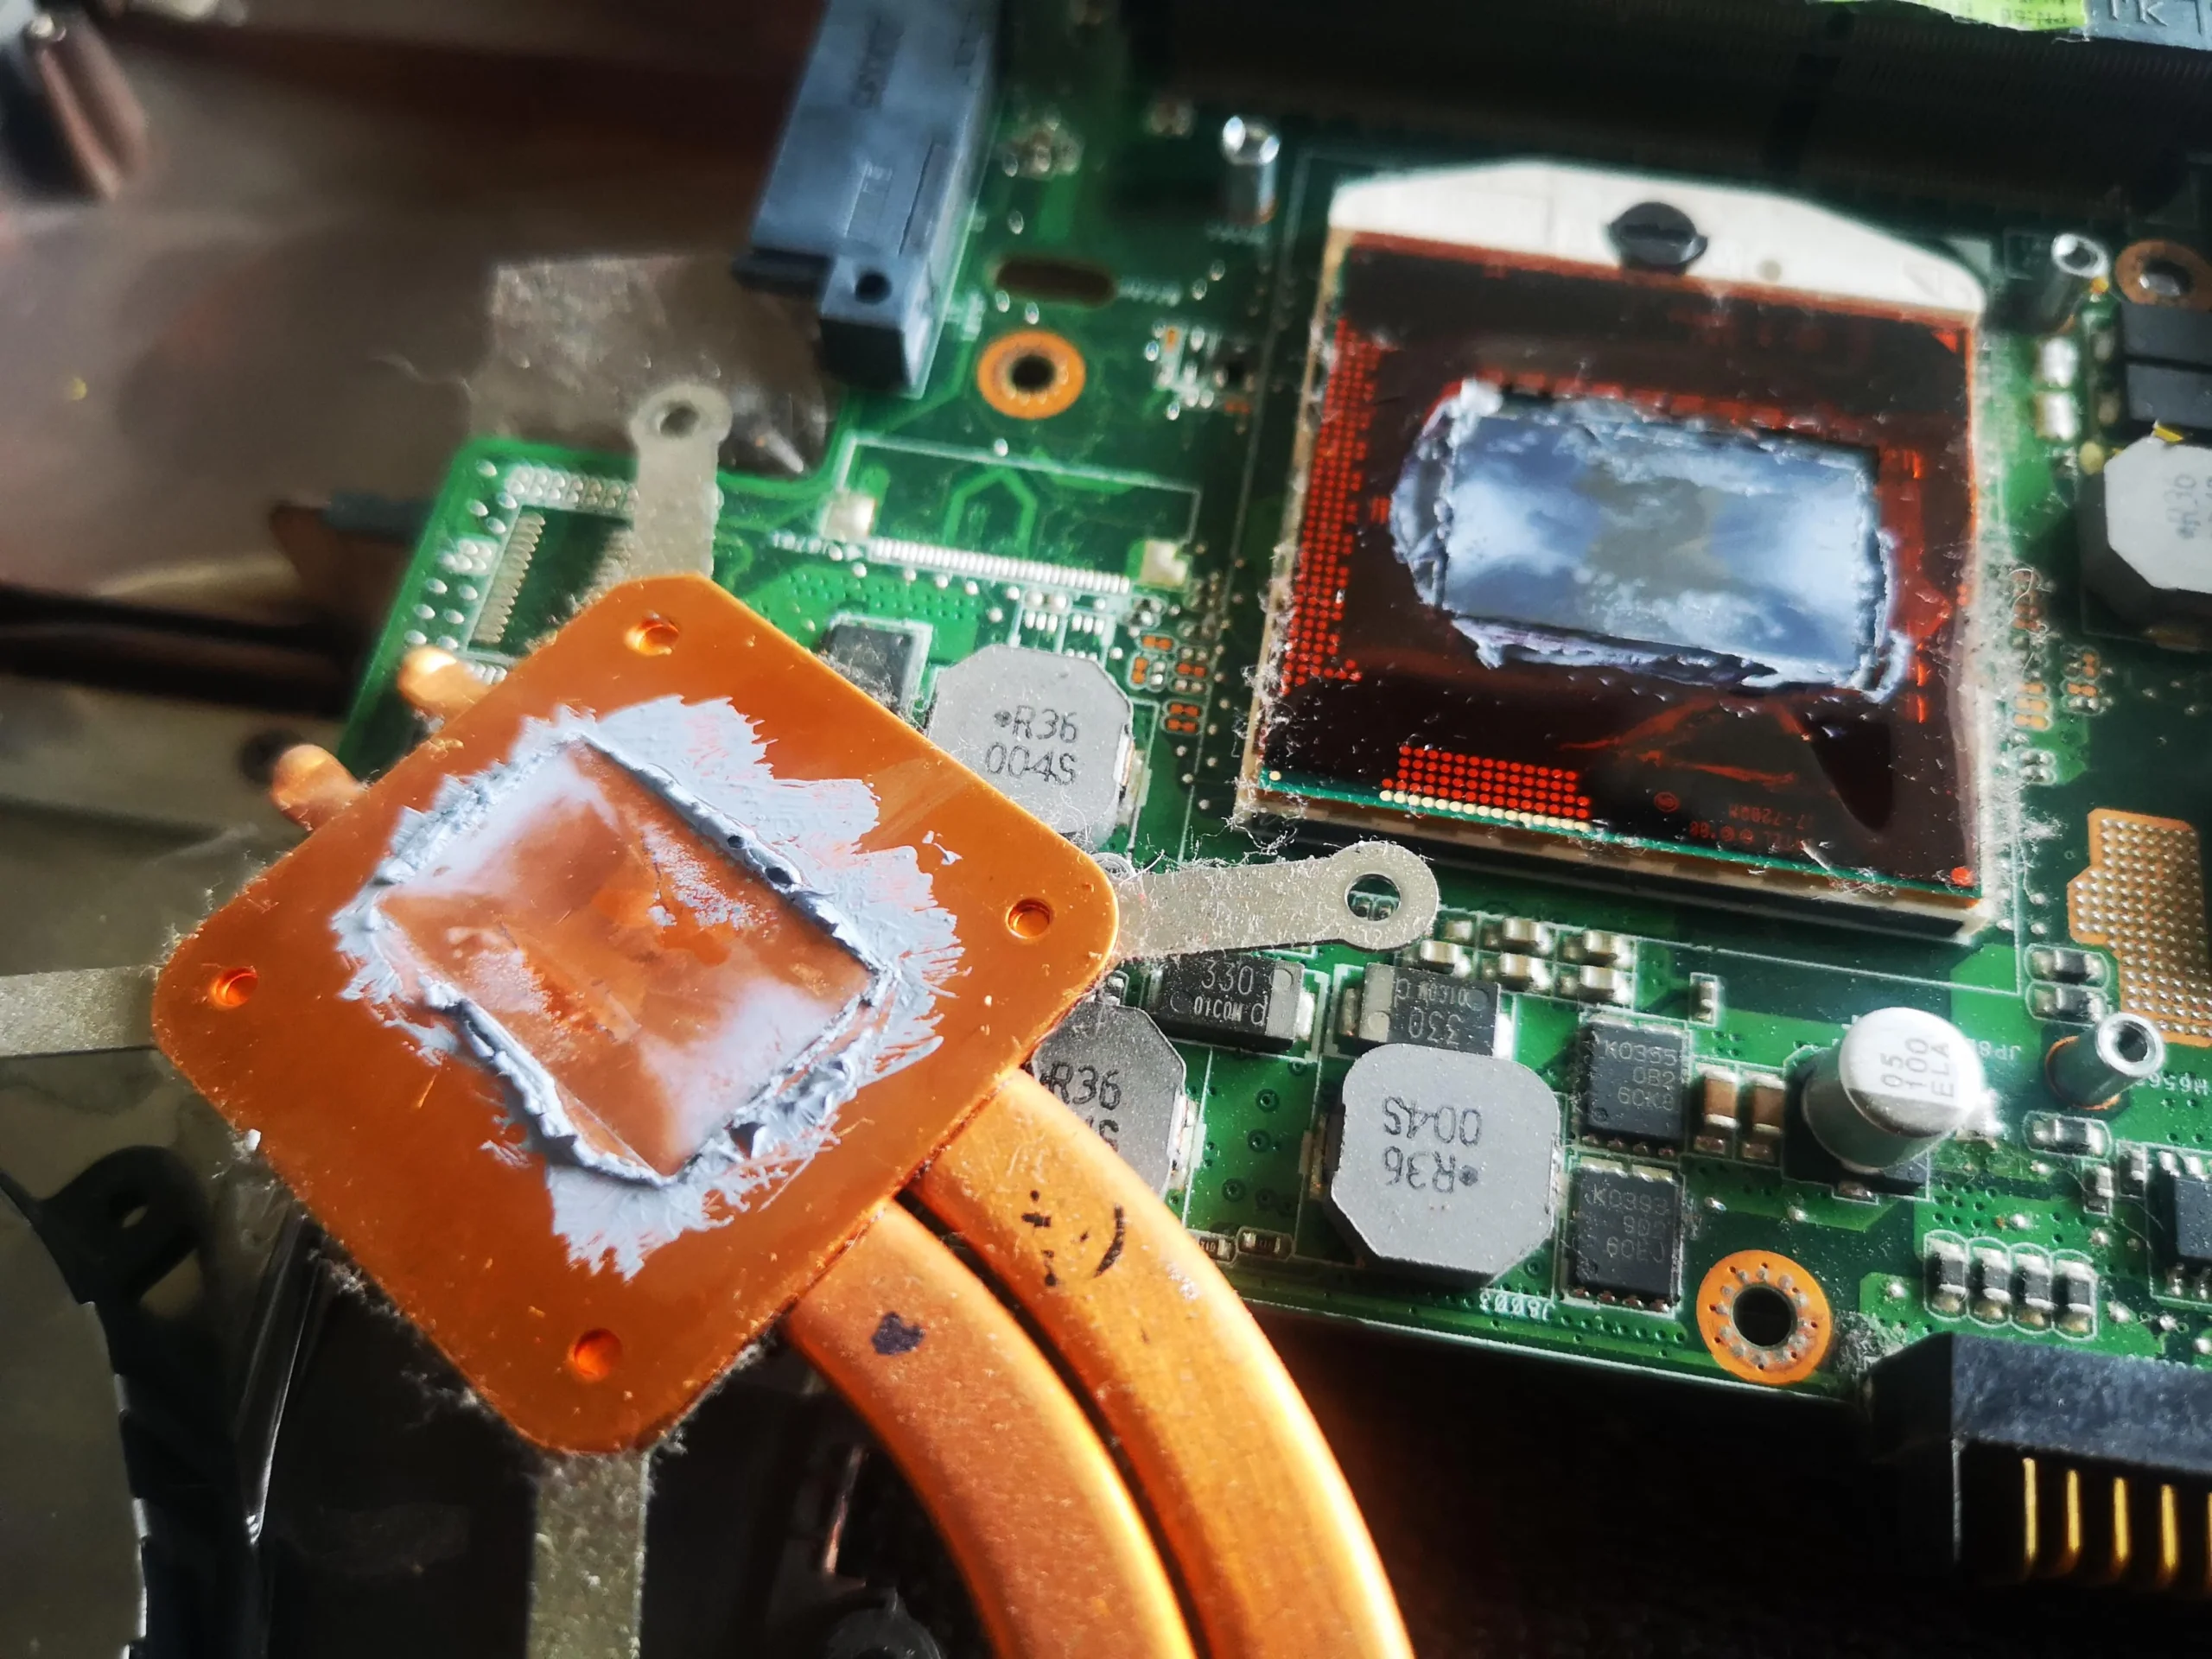
The cooler carried two thermal contact plates
The lifted copper unit has separate plates that meet the processor and graphics chips. The board view shows old compound left on both contacts. Once separated, these surfaces need proper cleaning and suitable new material before an even refit.
It is worth recording each screw and any pad or putty placement before lifting the assembly. The archive shows paste on the contacts, but not a reliable, matched thermal test after the work.
04 / The last checks
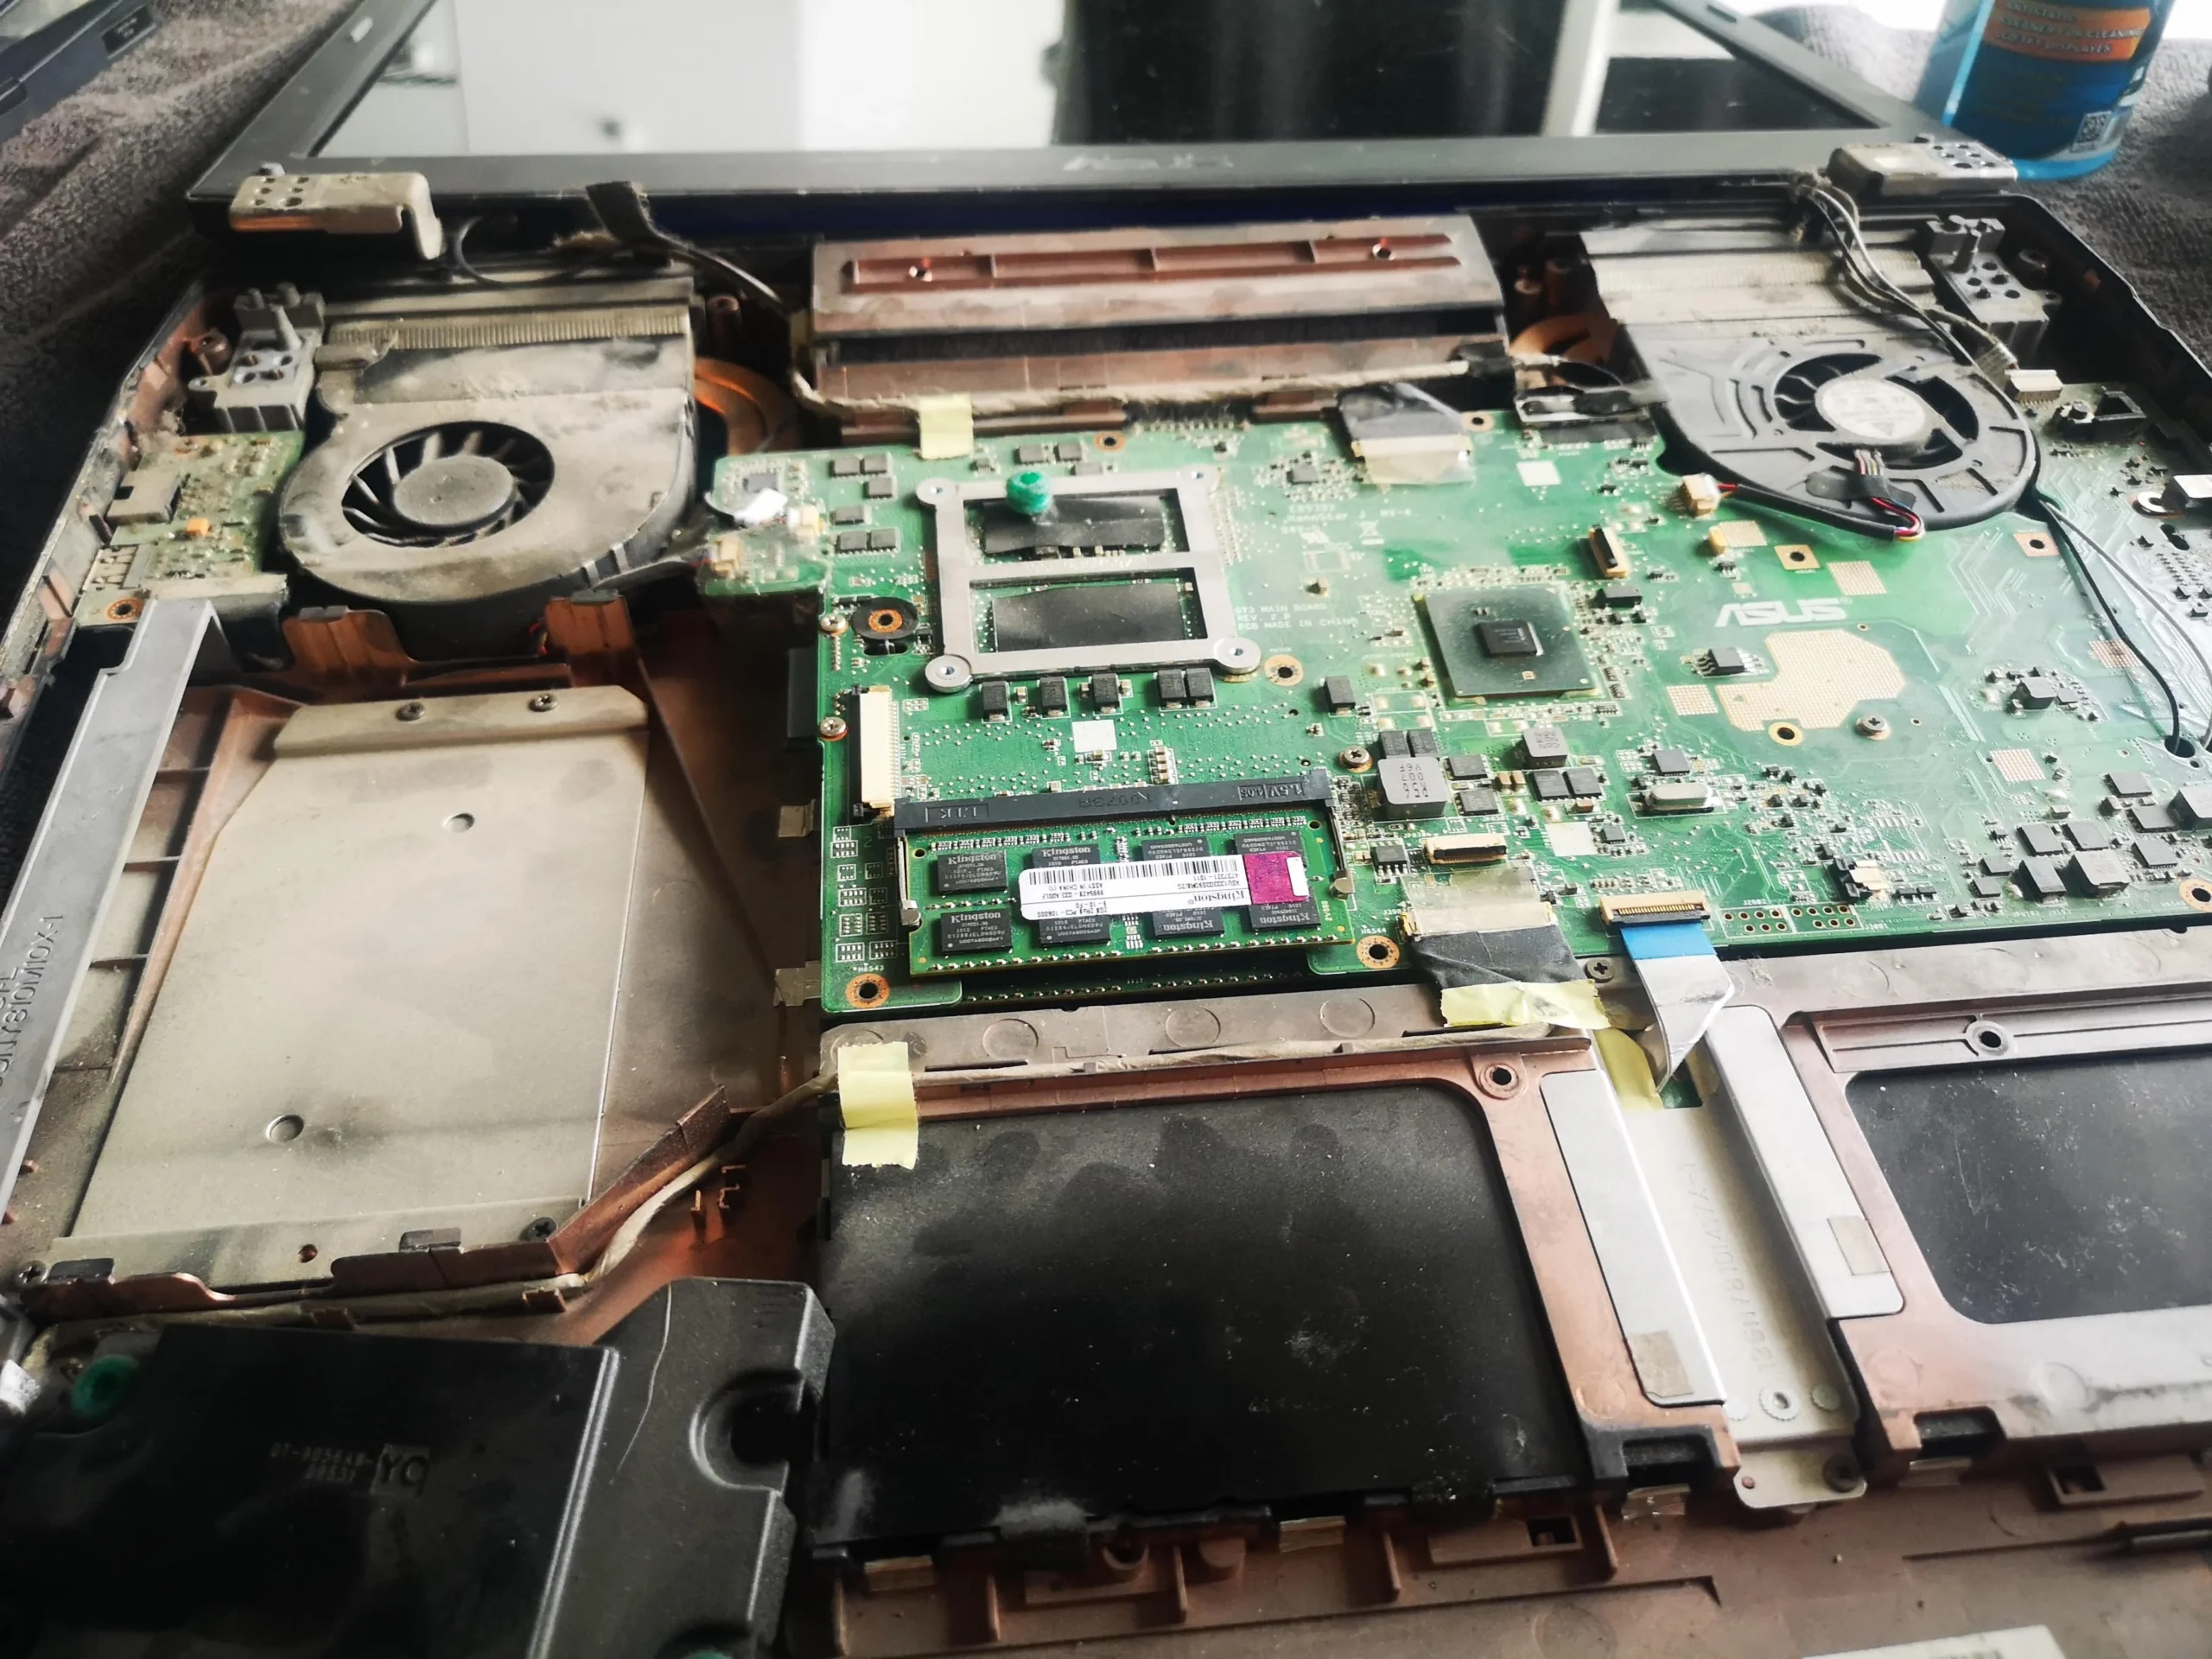
Fan and outlet alignment matter when the base returns
The interior overview shows how the fan, copper pipes and rear outlet fit together. Make sure the blower is connected and seated flat and that no cable blocks the fan or pinches under the base.
After the laptop boots, listen for a smooth fan response and compare temperatures under similar tasks if you have earlier readings. A power-on image alone would not prove a cooling improvement.
The engineer’s takeaway
This ROG case demonstrates that even one blower has multiple cleaning points: its blades, the fin exit and the base air path. Cooler removal adds a separate job of restoring two chip contacts correctly.
Before you open the laptop
Can you clean a single-fan ROG laptop yourself?
Power off, unplug the charger and find the guide for the exact ASUS model before removing the base. Map screws and photograph any ribbon cables or connectors. Disconnect the battery as directed before working near the fan.
Accessible fan and vent dust can be lifted gently with the rotor restrained. A compacted mat at the inner fin edge may need more access. Leave the copper cooler mounted unless you can restore the paste and any pads or putty correctly.
After the clean
What to check after cleaning
The fan should respond when the machine warms, with no scraping or error. Make sure the rear exhaust is open and the base is clipped down without trapping a cable.
If a baseline exists, compare heat and fan speed under the same workload and room temperature. No paired readings are available for this case.
Questions from owners
ASUS ROG single-fan cleaning FAQs
Answers based on this machine's dusty blower, fin outlet and lifted copper cooler.
Does this ROG laptop have only one fan?
The photographed chassis has one main blower. Other ROG models may have two or more, so use your exact model when following a guide.
Why check the fin outlet after cleaning the blades?
Lint can lodge at the narrow inner face of the fins. This archive shows material along that edge.
Can I use a household vacuum on the fan?
Avoid putting a nozzle against delicate blades or electronics. Use controlled, model-appropriate cleaning with the rotor restrained.
What if I remove the copper cooler?
Clean and renew disturbed chip paste and restore any separate pads or putty in their correct locations before an even refit.
How do I identify my exact ROG model?
Check the underside label or ASUS system information; ROG is a broad family name.
Was a cooling improvement measured?
No matched temperature readings appear in the archive.
UK ASUS ROG cleaning enquiries
Weak airflow from the ROG rear vent?
If you are in the UK, use the form with your ASUS model, postcode and a short description of whether the fan is loud, weak or not responding. Mention when heat appears.
If the cooler has been lifted before, say so. We can discuss a fan and fin clean separately from thermal-contact inspection.
Read about our laptop cooling-system cleaning service, then use the form to tell us your computer model, symptoms and UK postcode.
Free to enquire · No obligation to book. We discuss the proposed work and price before you decide.
The workshop photos
ASUS ROG single-fan and fin cleaning gallery
Open the workshop photos for the dusty fan, rear fin lint, copper cooler and two chip contacts.