Published 15 November 2026 · Dell dual-fan laptop case study
Dell rear-vent clean
the lint sat behind the fans.
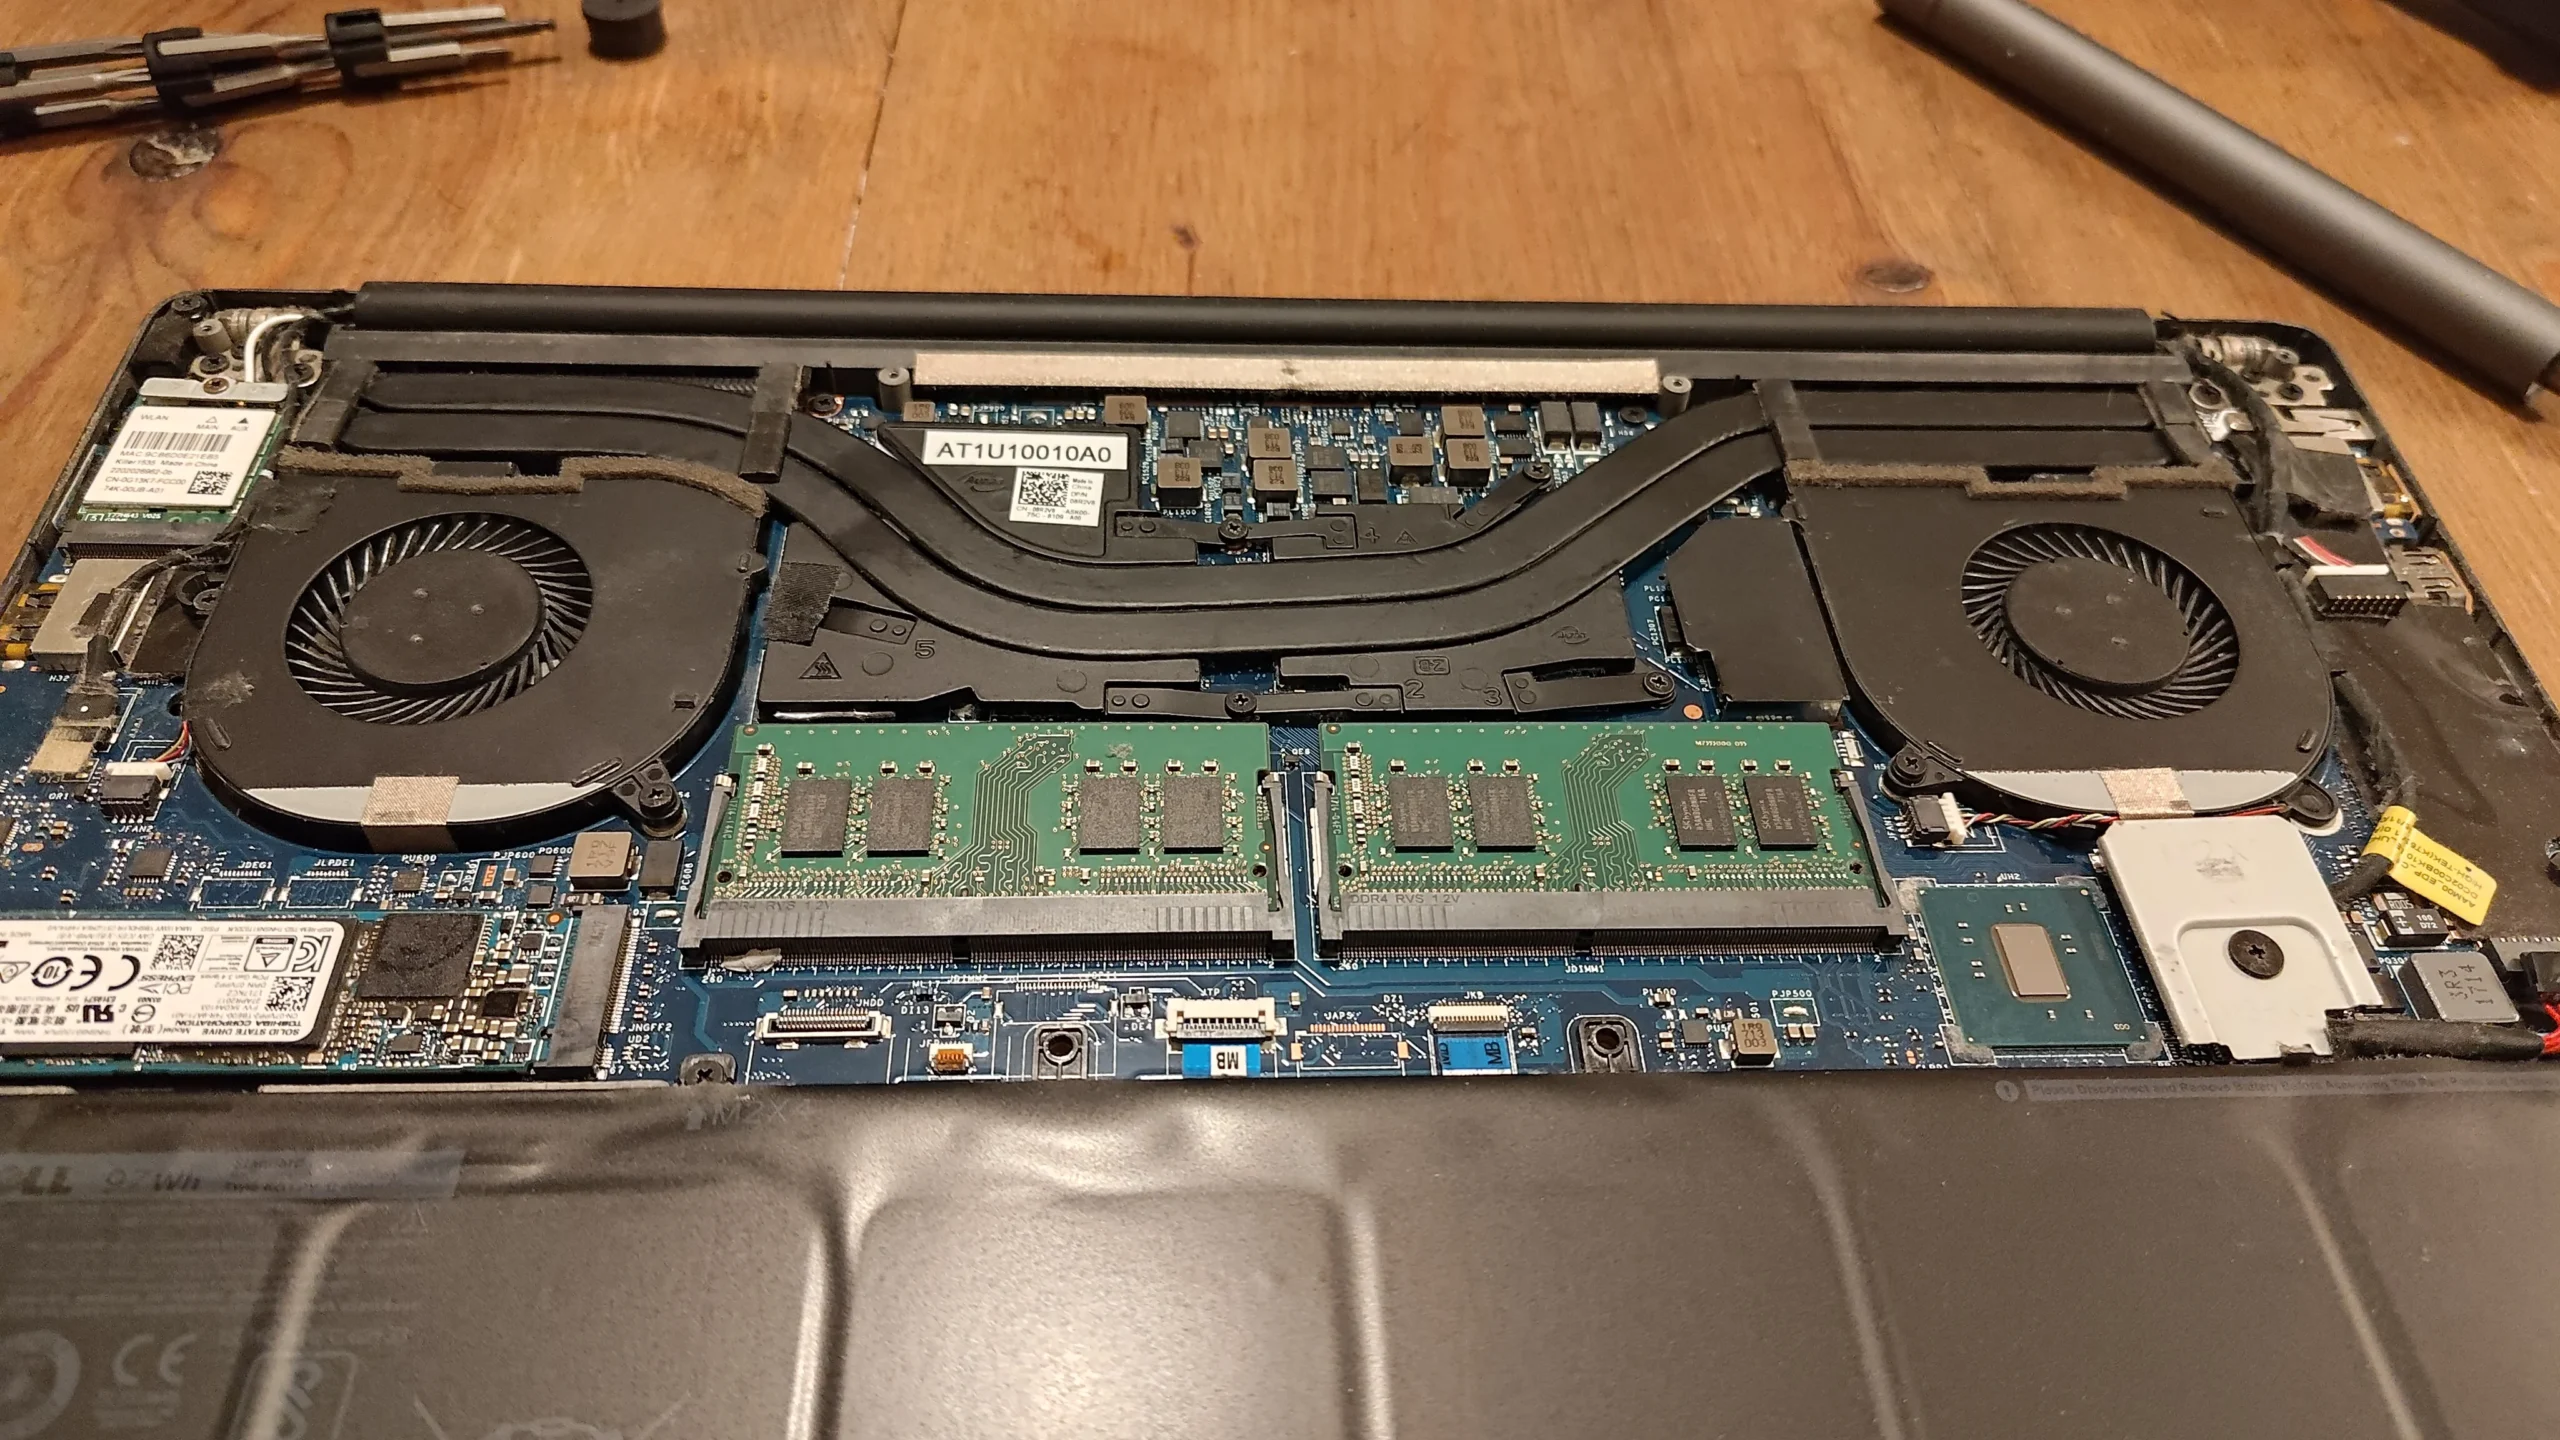
Two fans and a wide rear heat-pipe assembly fill this Dell's upper chassis. The photos show lint caught along that rear edge, the bottom cover's vent pattern and the thermal contacts exposed during deeper service.
The layout
Two fans joined by a wide rear cooler
Visible finding
Lint along the rear cooling edge
Deeper work
Cooler lifted and two chip contacts exposed
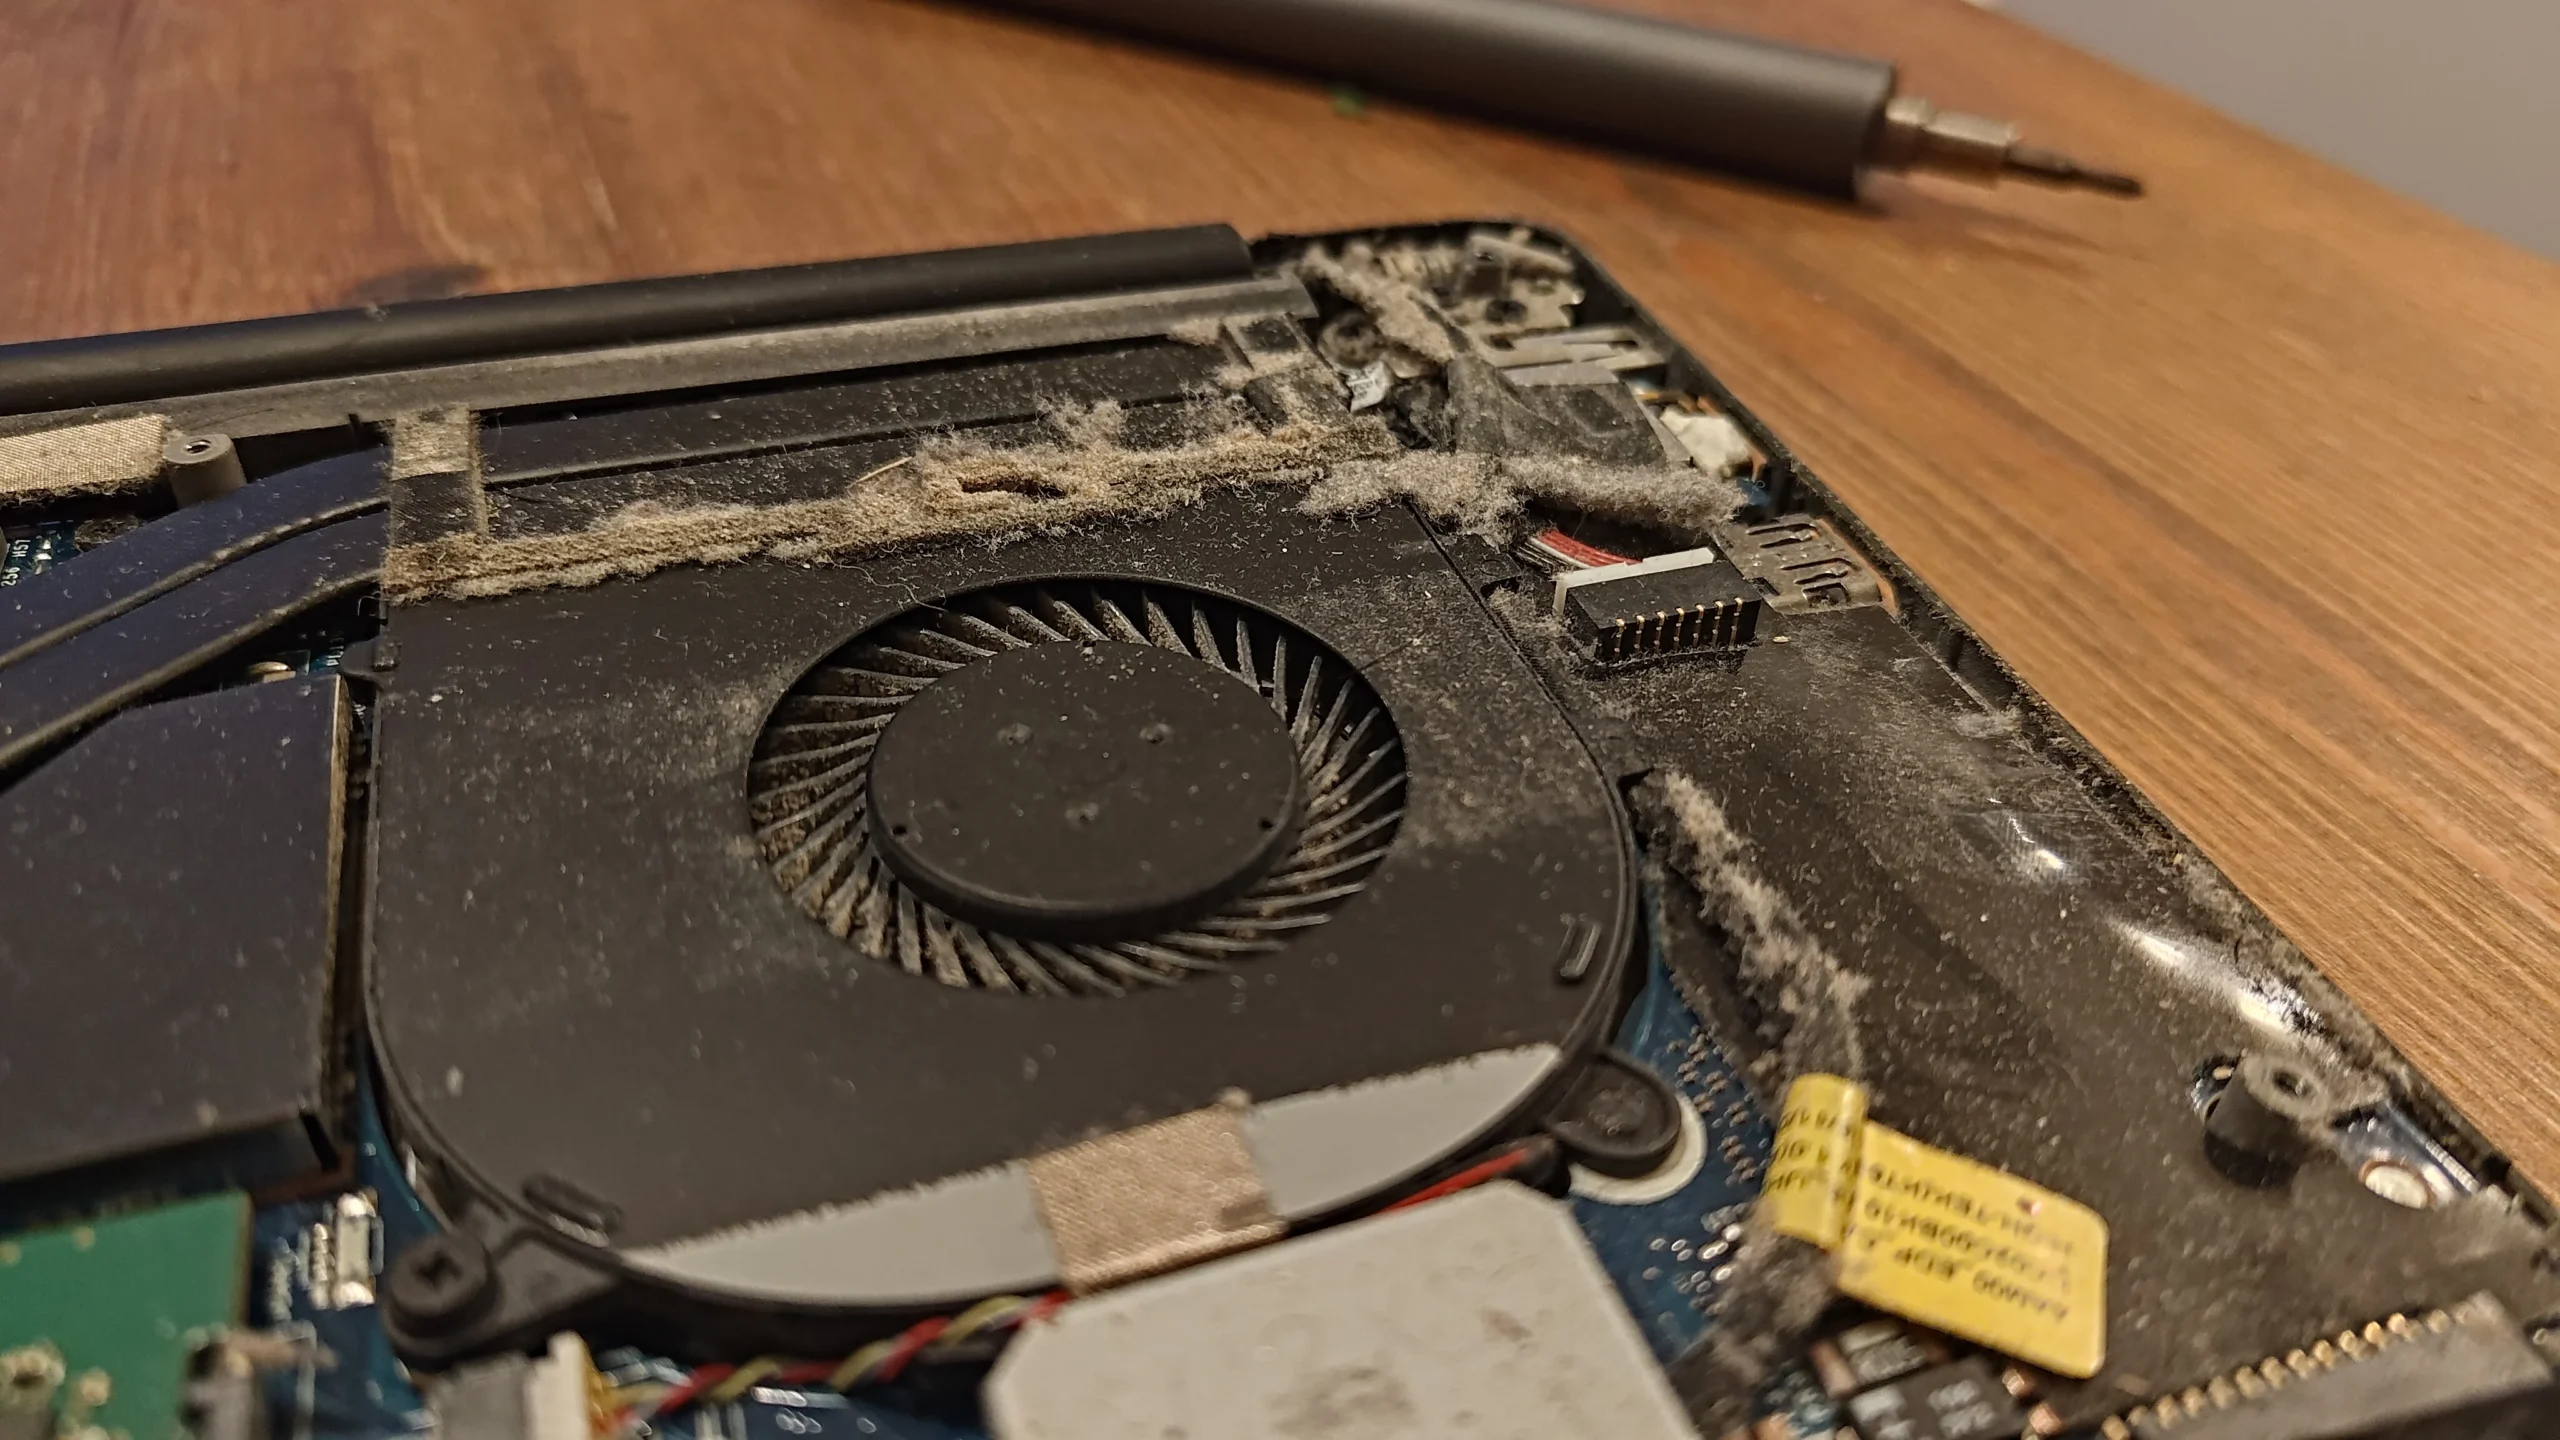
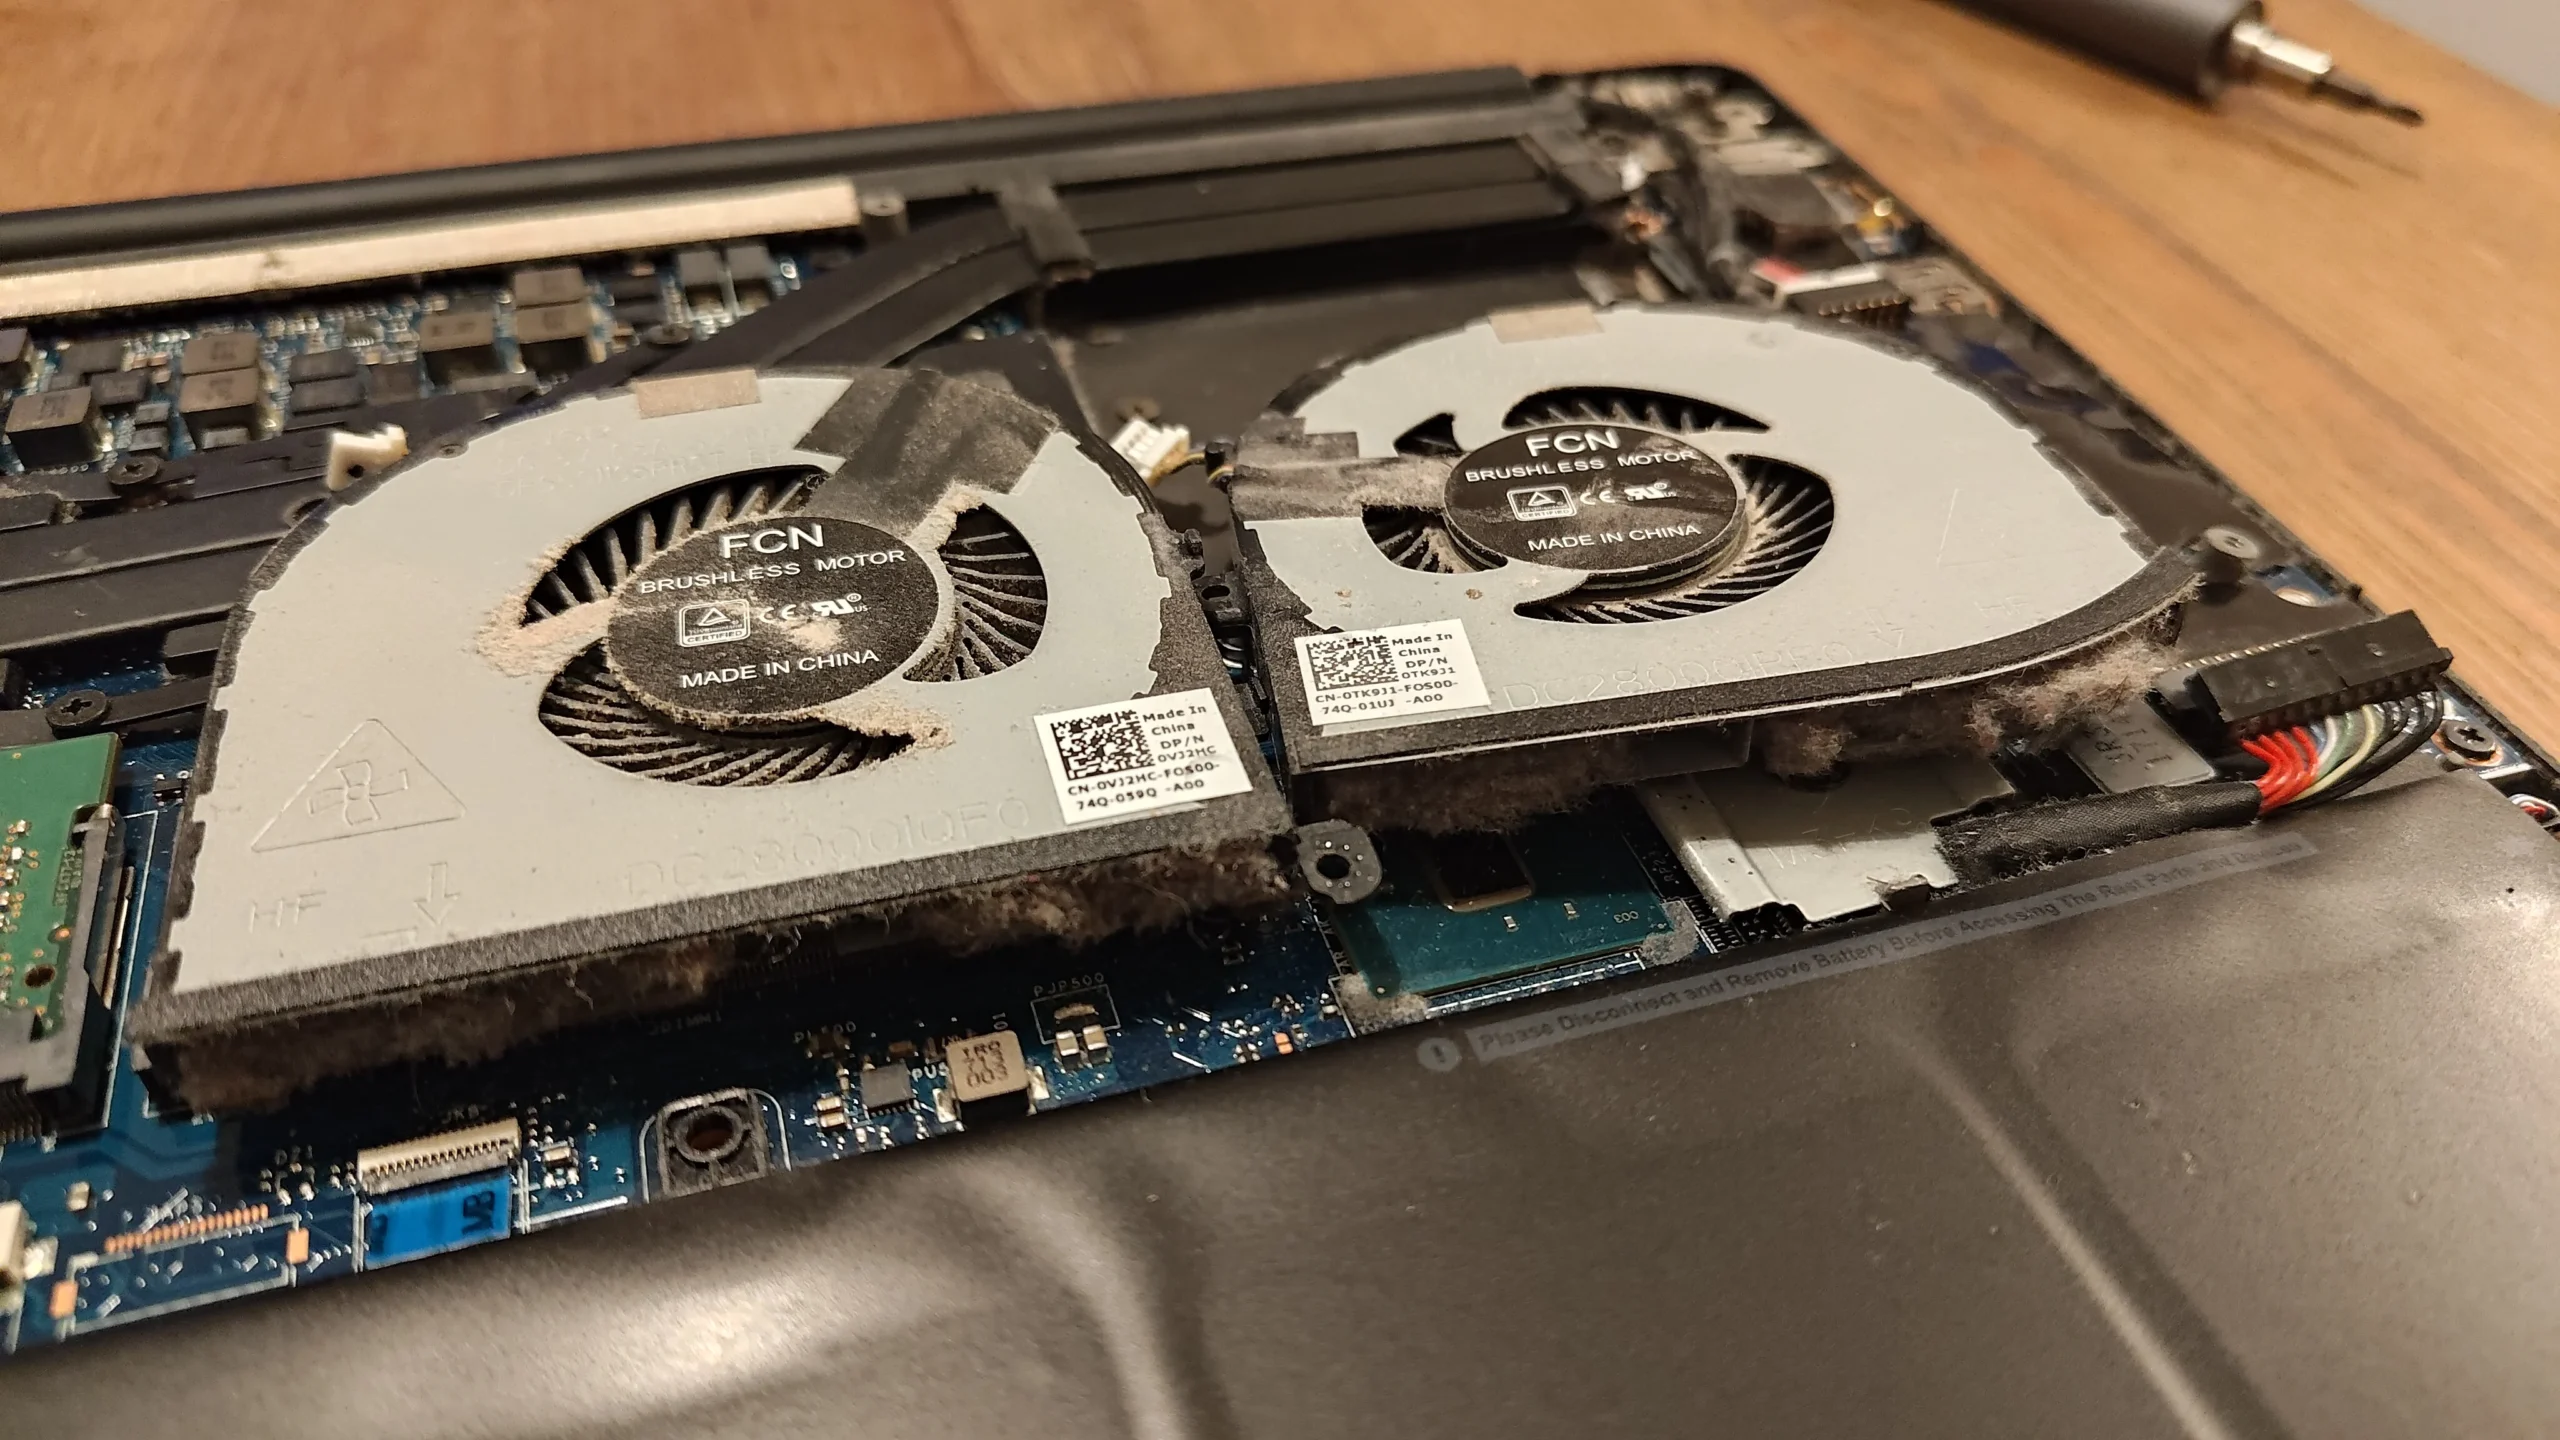
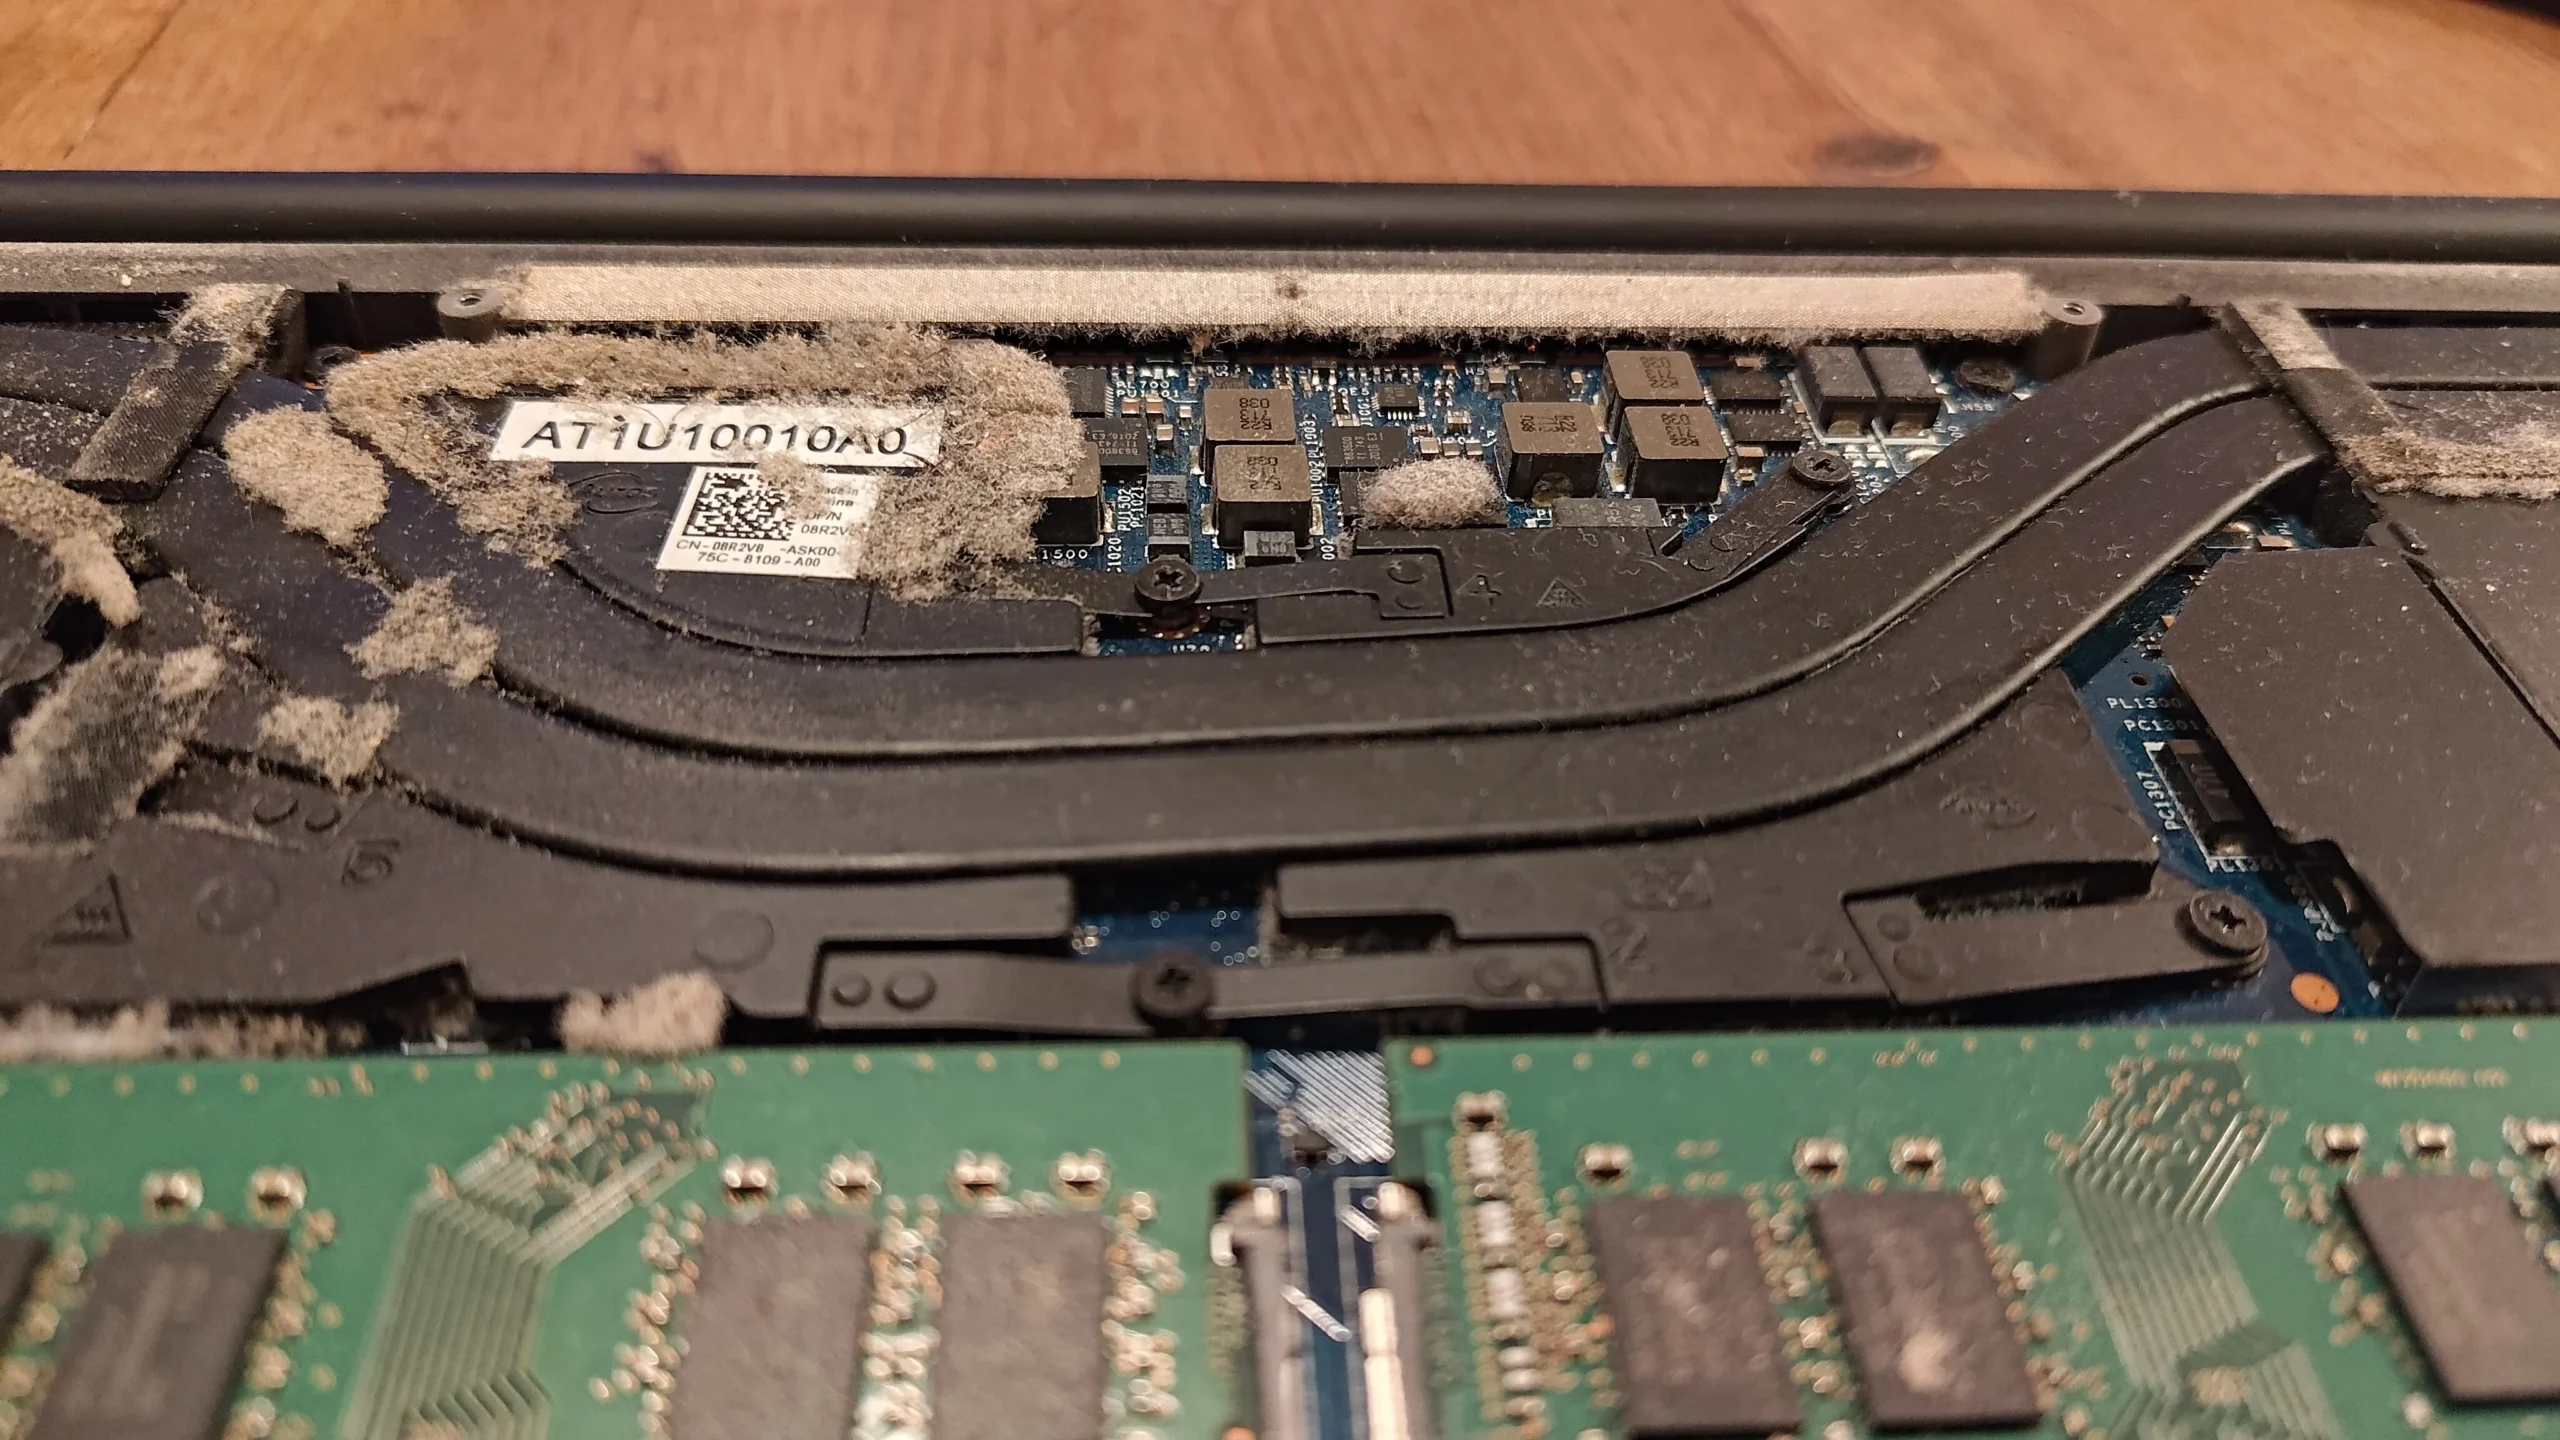
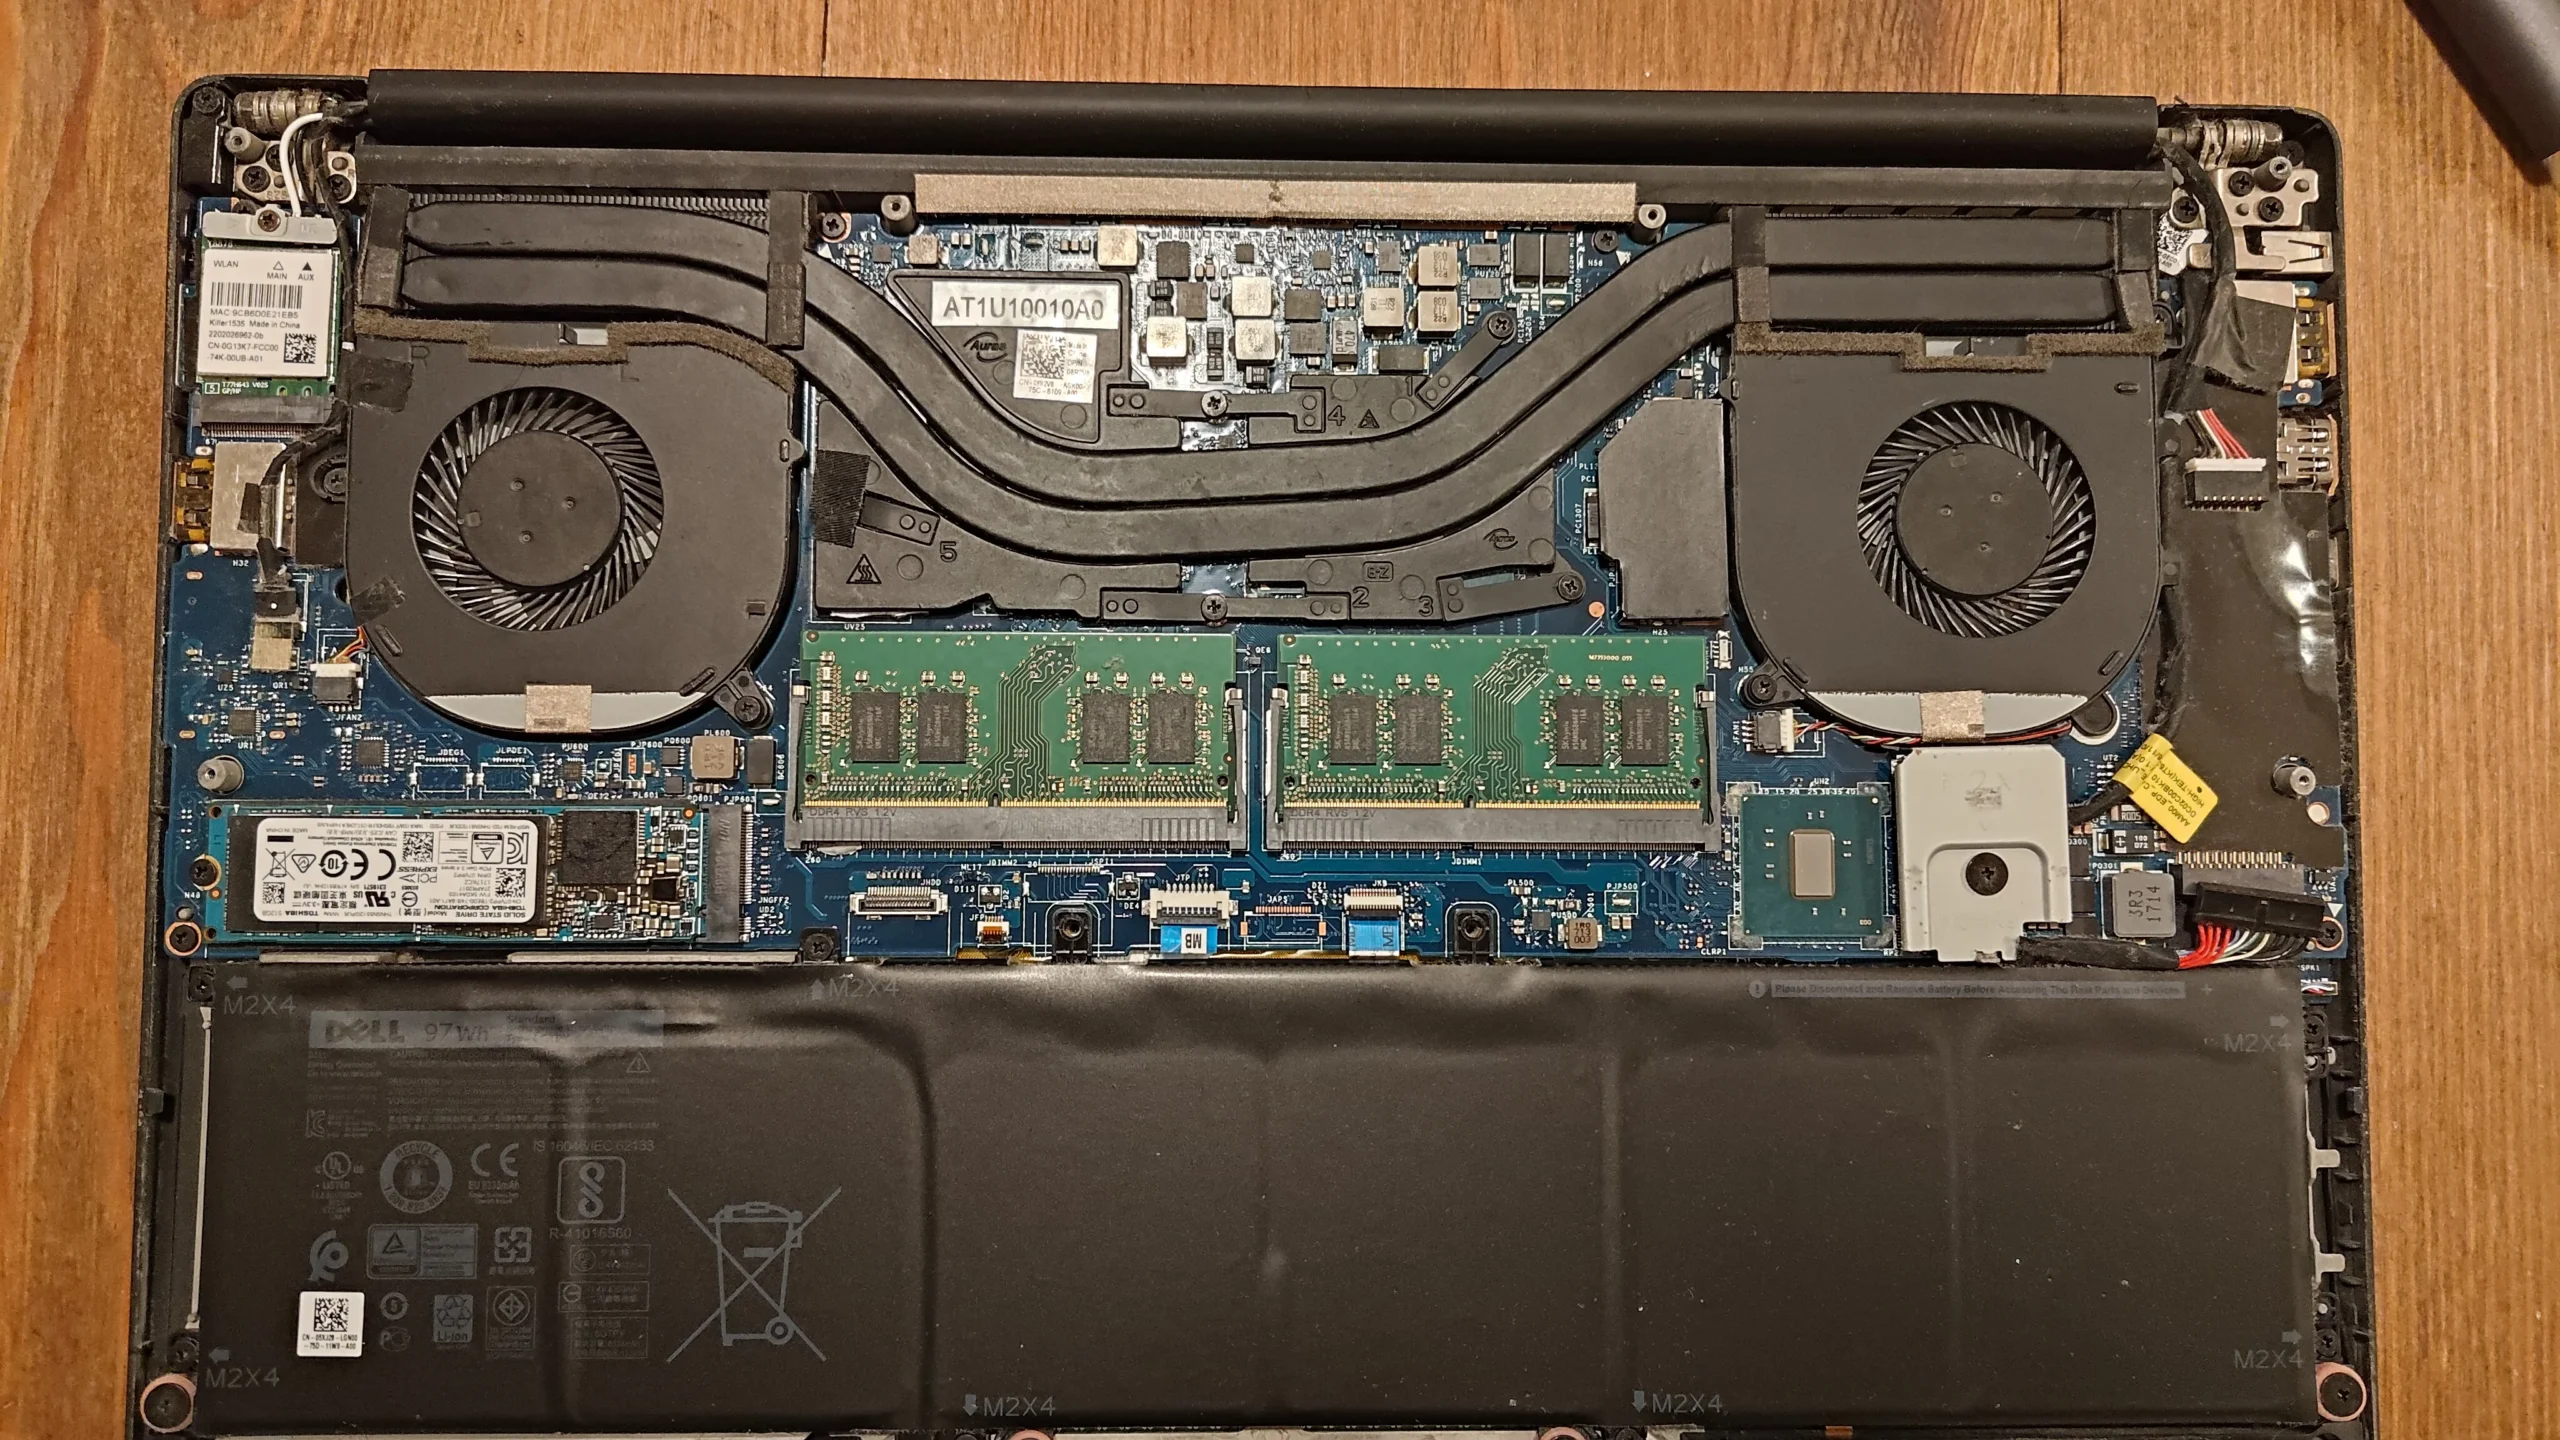
On this Dell, the cooling parts occupy almost the entire top edge of the open chassis. A fan sits at each end, with heat pipes spanning between them. The close-up shows pale lint along the rear side of the assembly, where air has to leave the machine.
The archive also shows the cooler lifted, old material on its contact plates and the underside panel. The photographs identify Dell branding but not a trustworthy exact model number, and they do not provide matched temperature readings. We can still learn from the visible airflow route without inventing a submodel or measured improvement.
In this case study
01 / The airflow finding
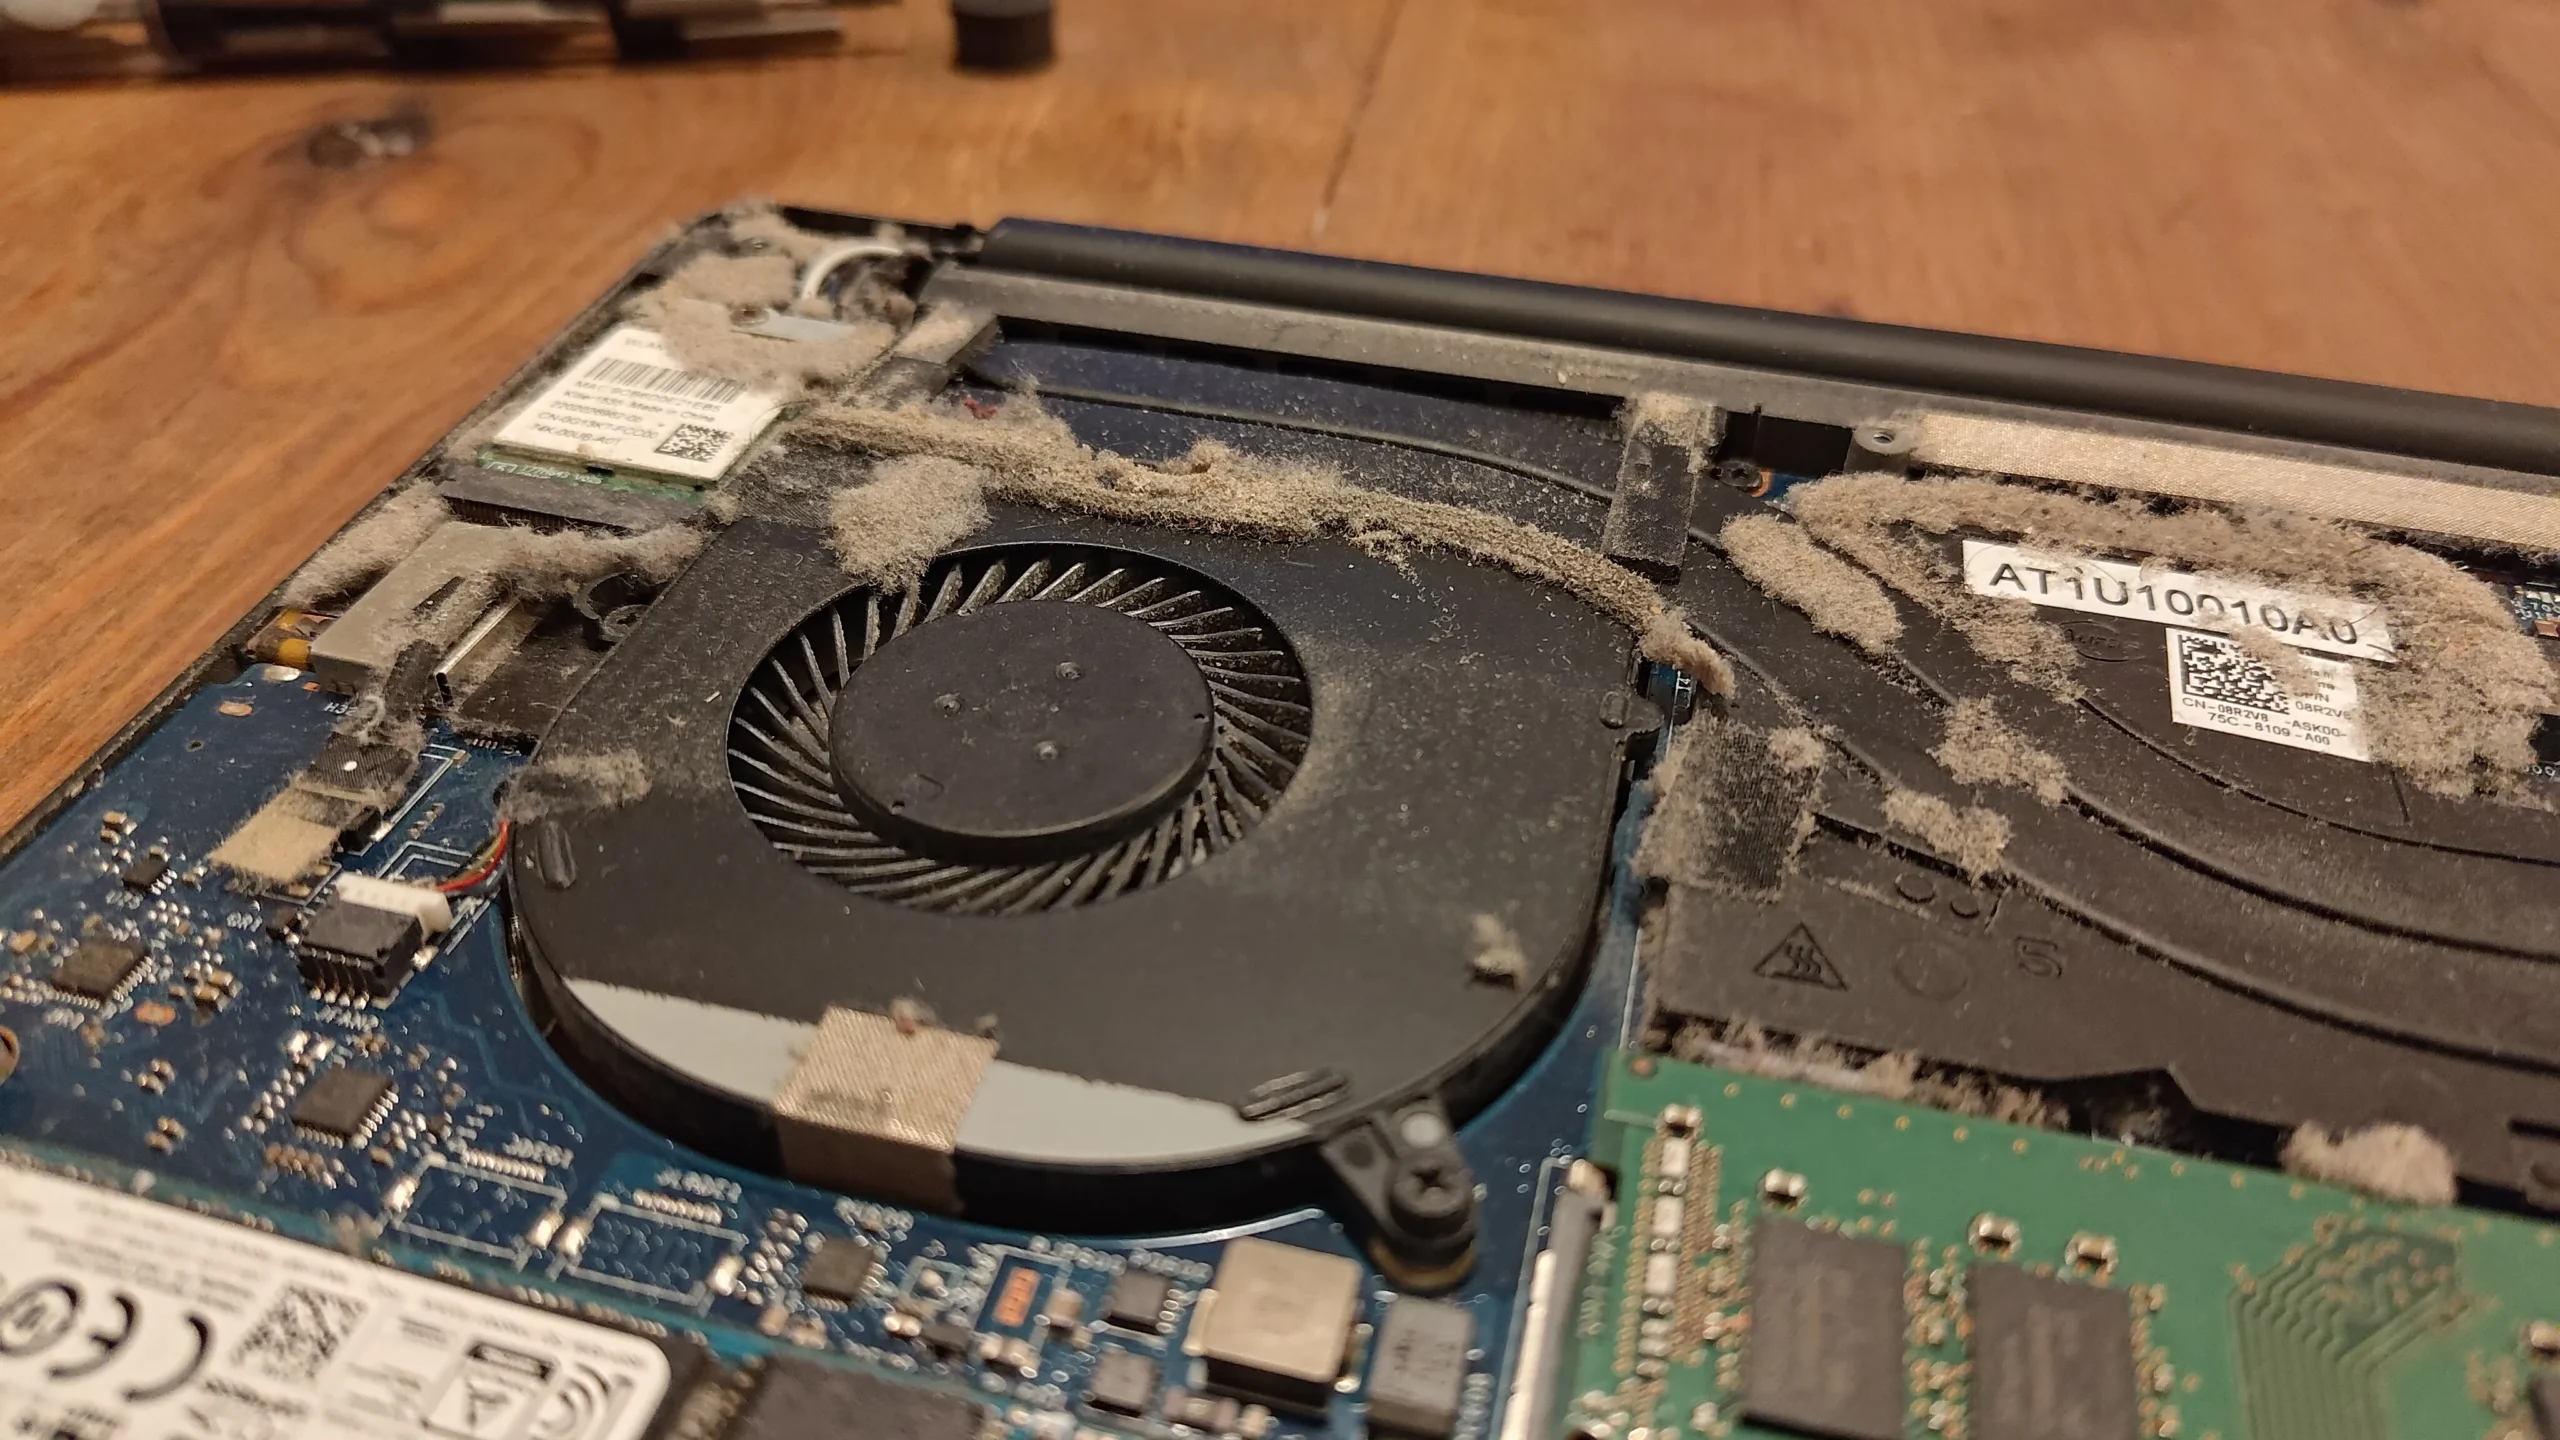
Fibres gathered along the rear cooling edge
The first close-up shows a pale line of lint near the rear vent and heat-pipe assembly. Fan blades can look acceptable from above while the outlet beyond them is restricted. This is why the fin face, not only the rotor, needs inspection.
Clear material outward with direct access where safe. A strong blast through an external grille may push a mat further into the fan chamber or spin a small blower too fast.
02 / Across the chassis
The left and right blowers needed separate checks
The wide overview shows both fans, their wires and a shared copper route. Dust often accumulates differently on the two sides, so inspect both sets of blades and their neighbouring outlets before closing the case.
Later photos show the fan housings more clearly after access work. A visible reassembly photo confirms the parts returned to place, but normal fan response still needs checking after power-on.
03 / Where air enters
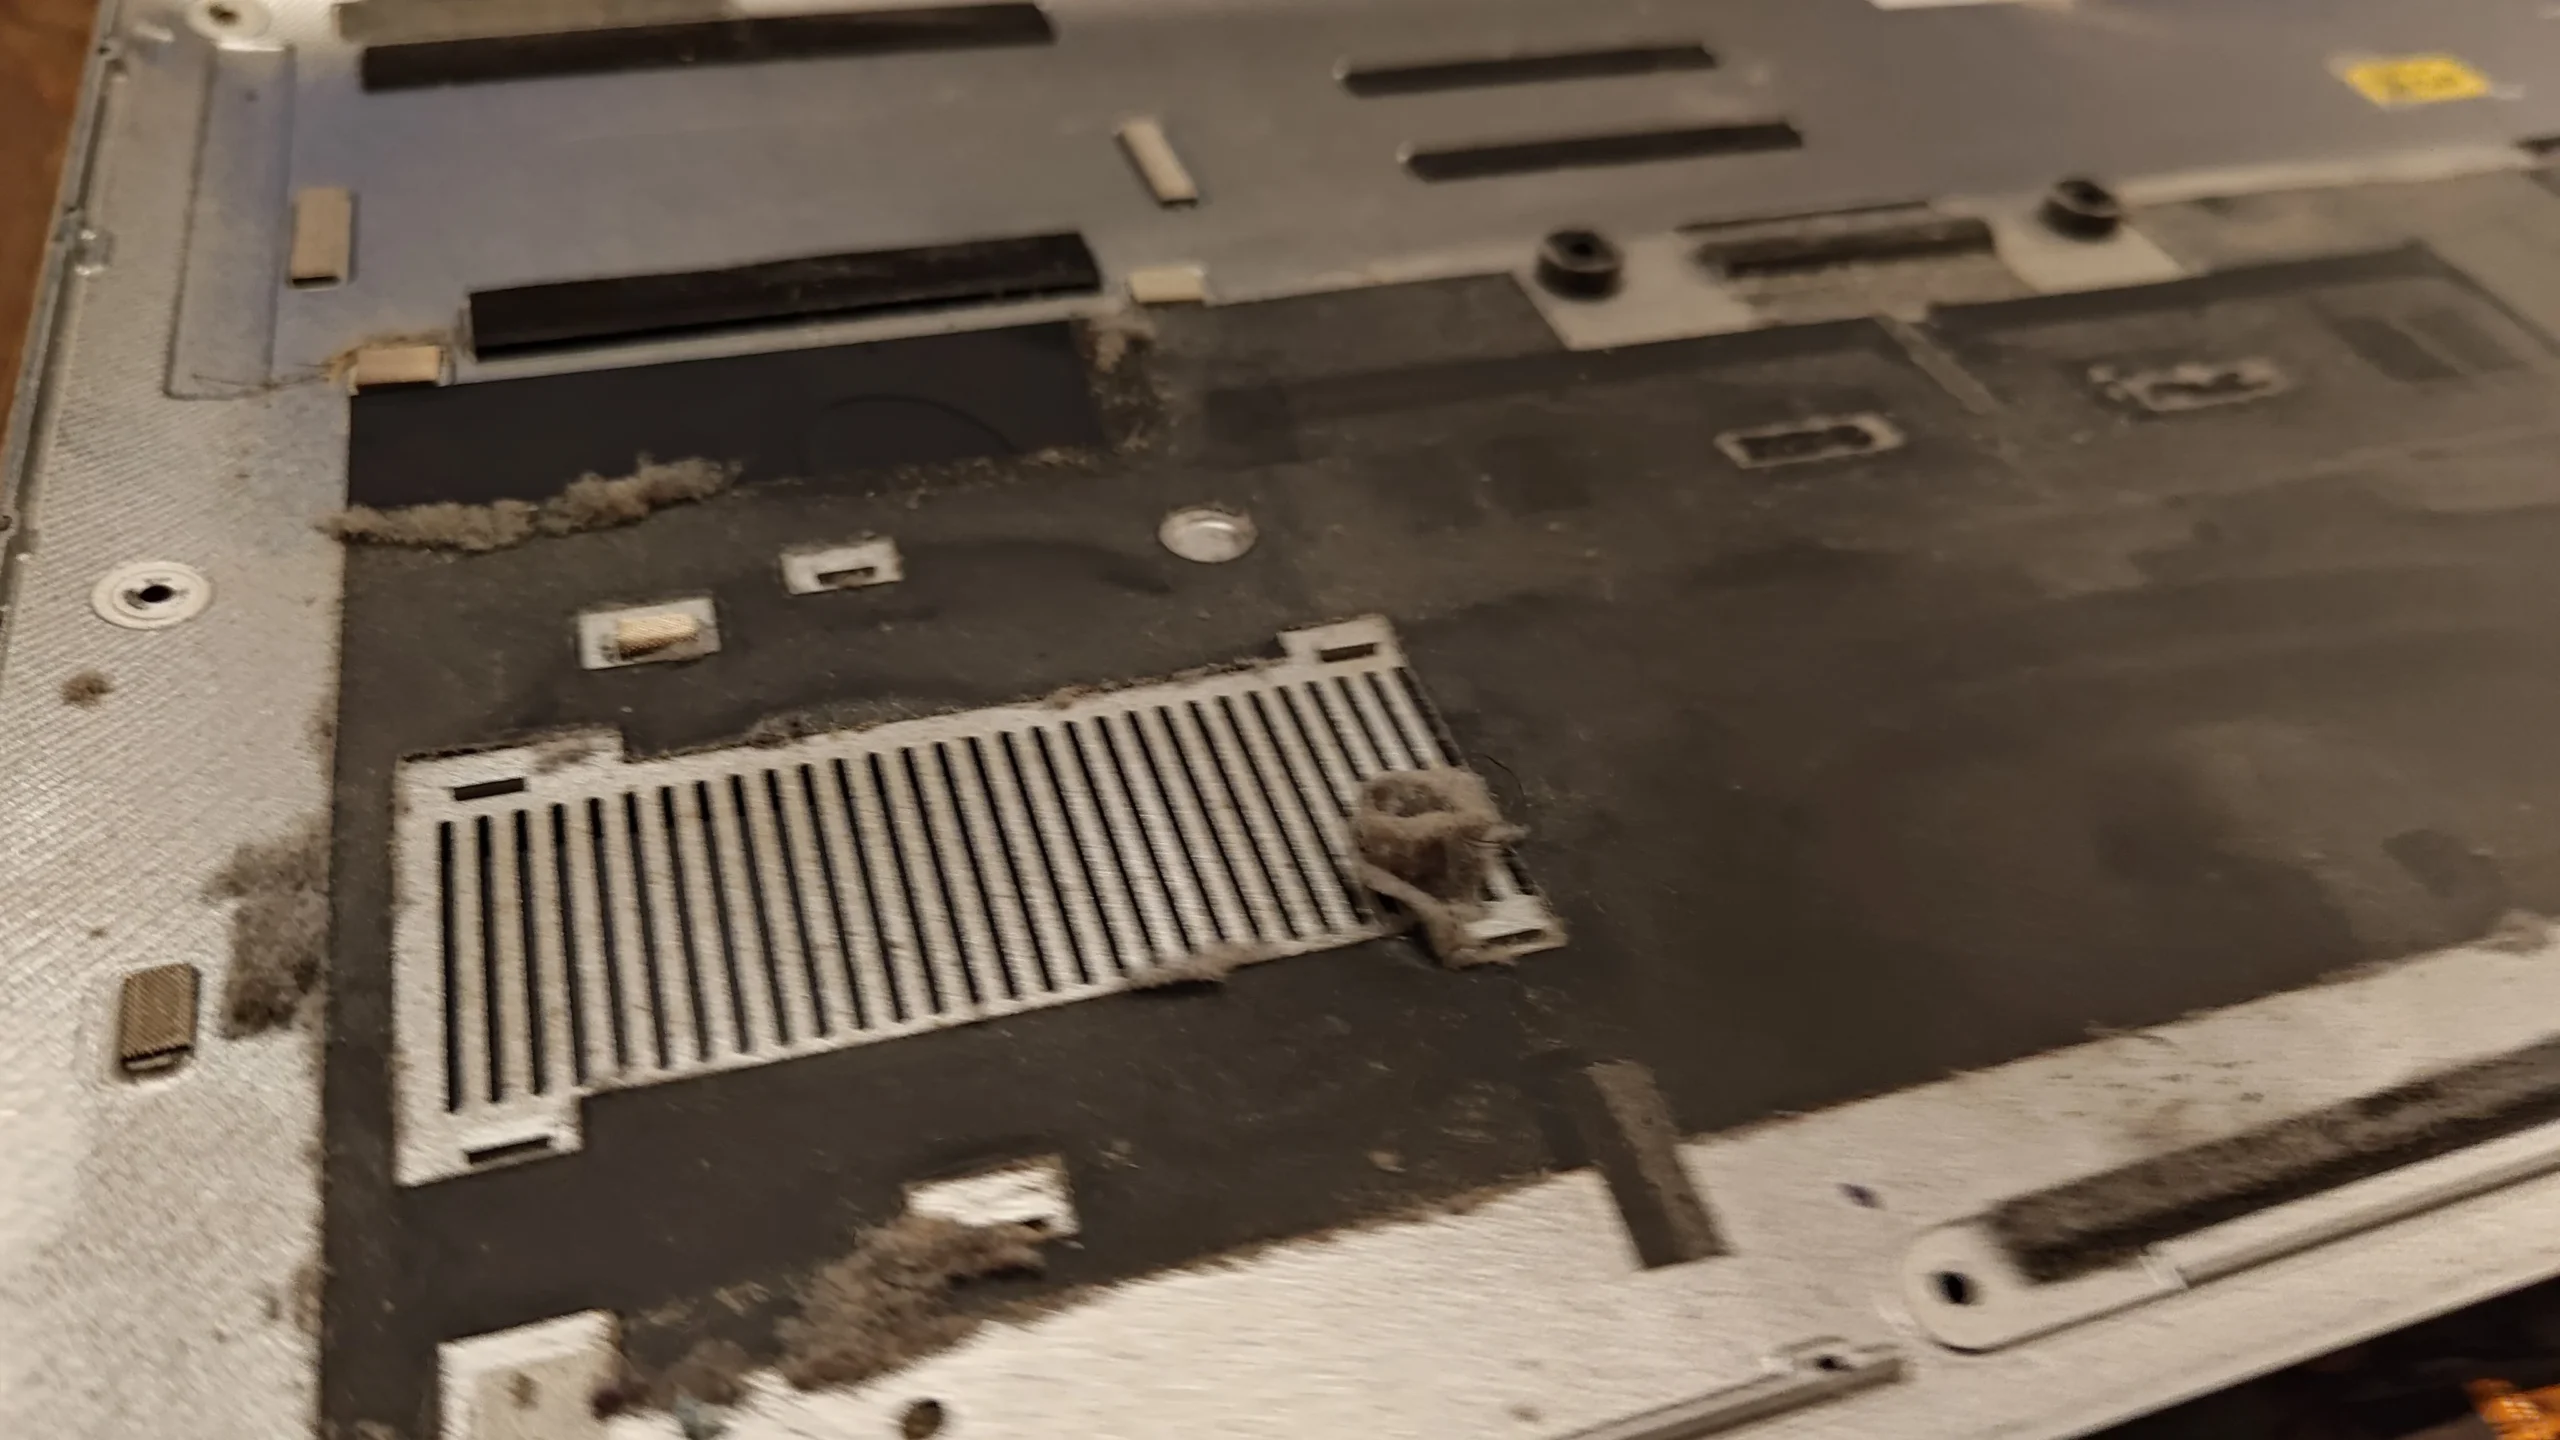
The bottom cover has a separate ventilation area
The underside photo shows a vented panel and internal structures in the removed cover. Cleaning the rear outlet but leaving its intake screen clogged can still limit airflow. Examine both faces of any removable mesh.
Do not use liquid on the laptop body or refit a damp panel. Keep screws sorted because mixing lengths can damage a thin cover or board.
04 / When the cooler is lifted
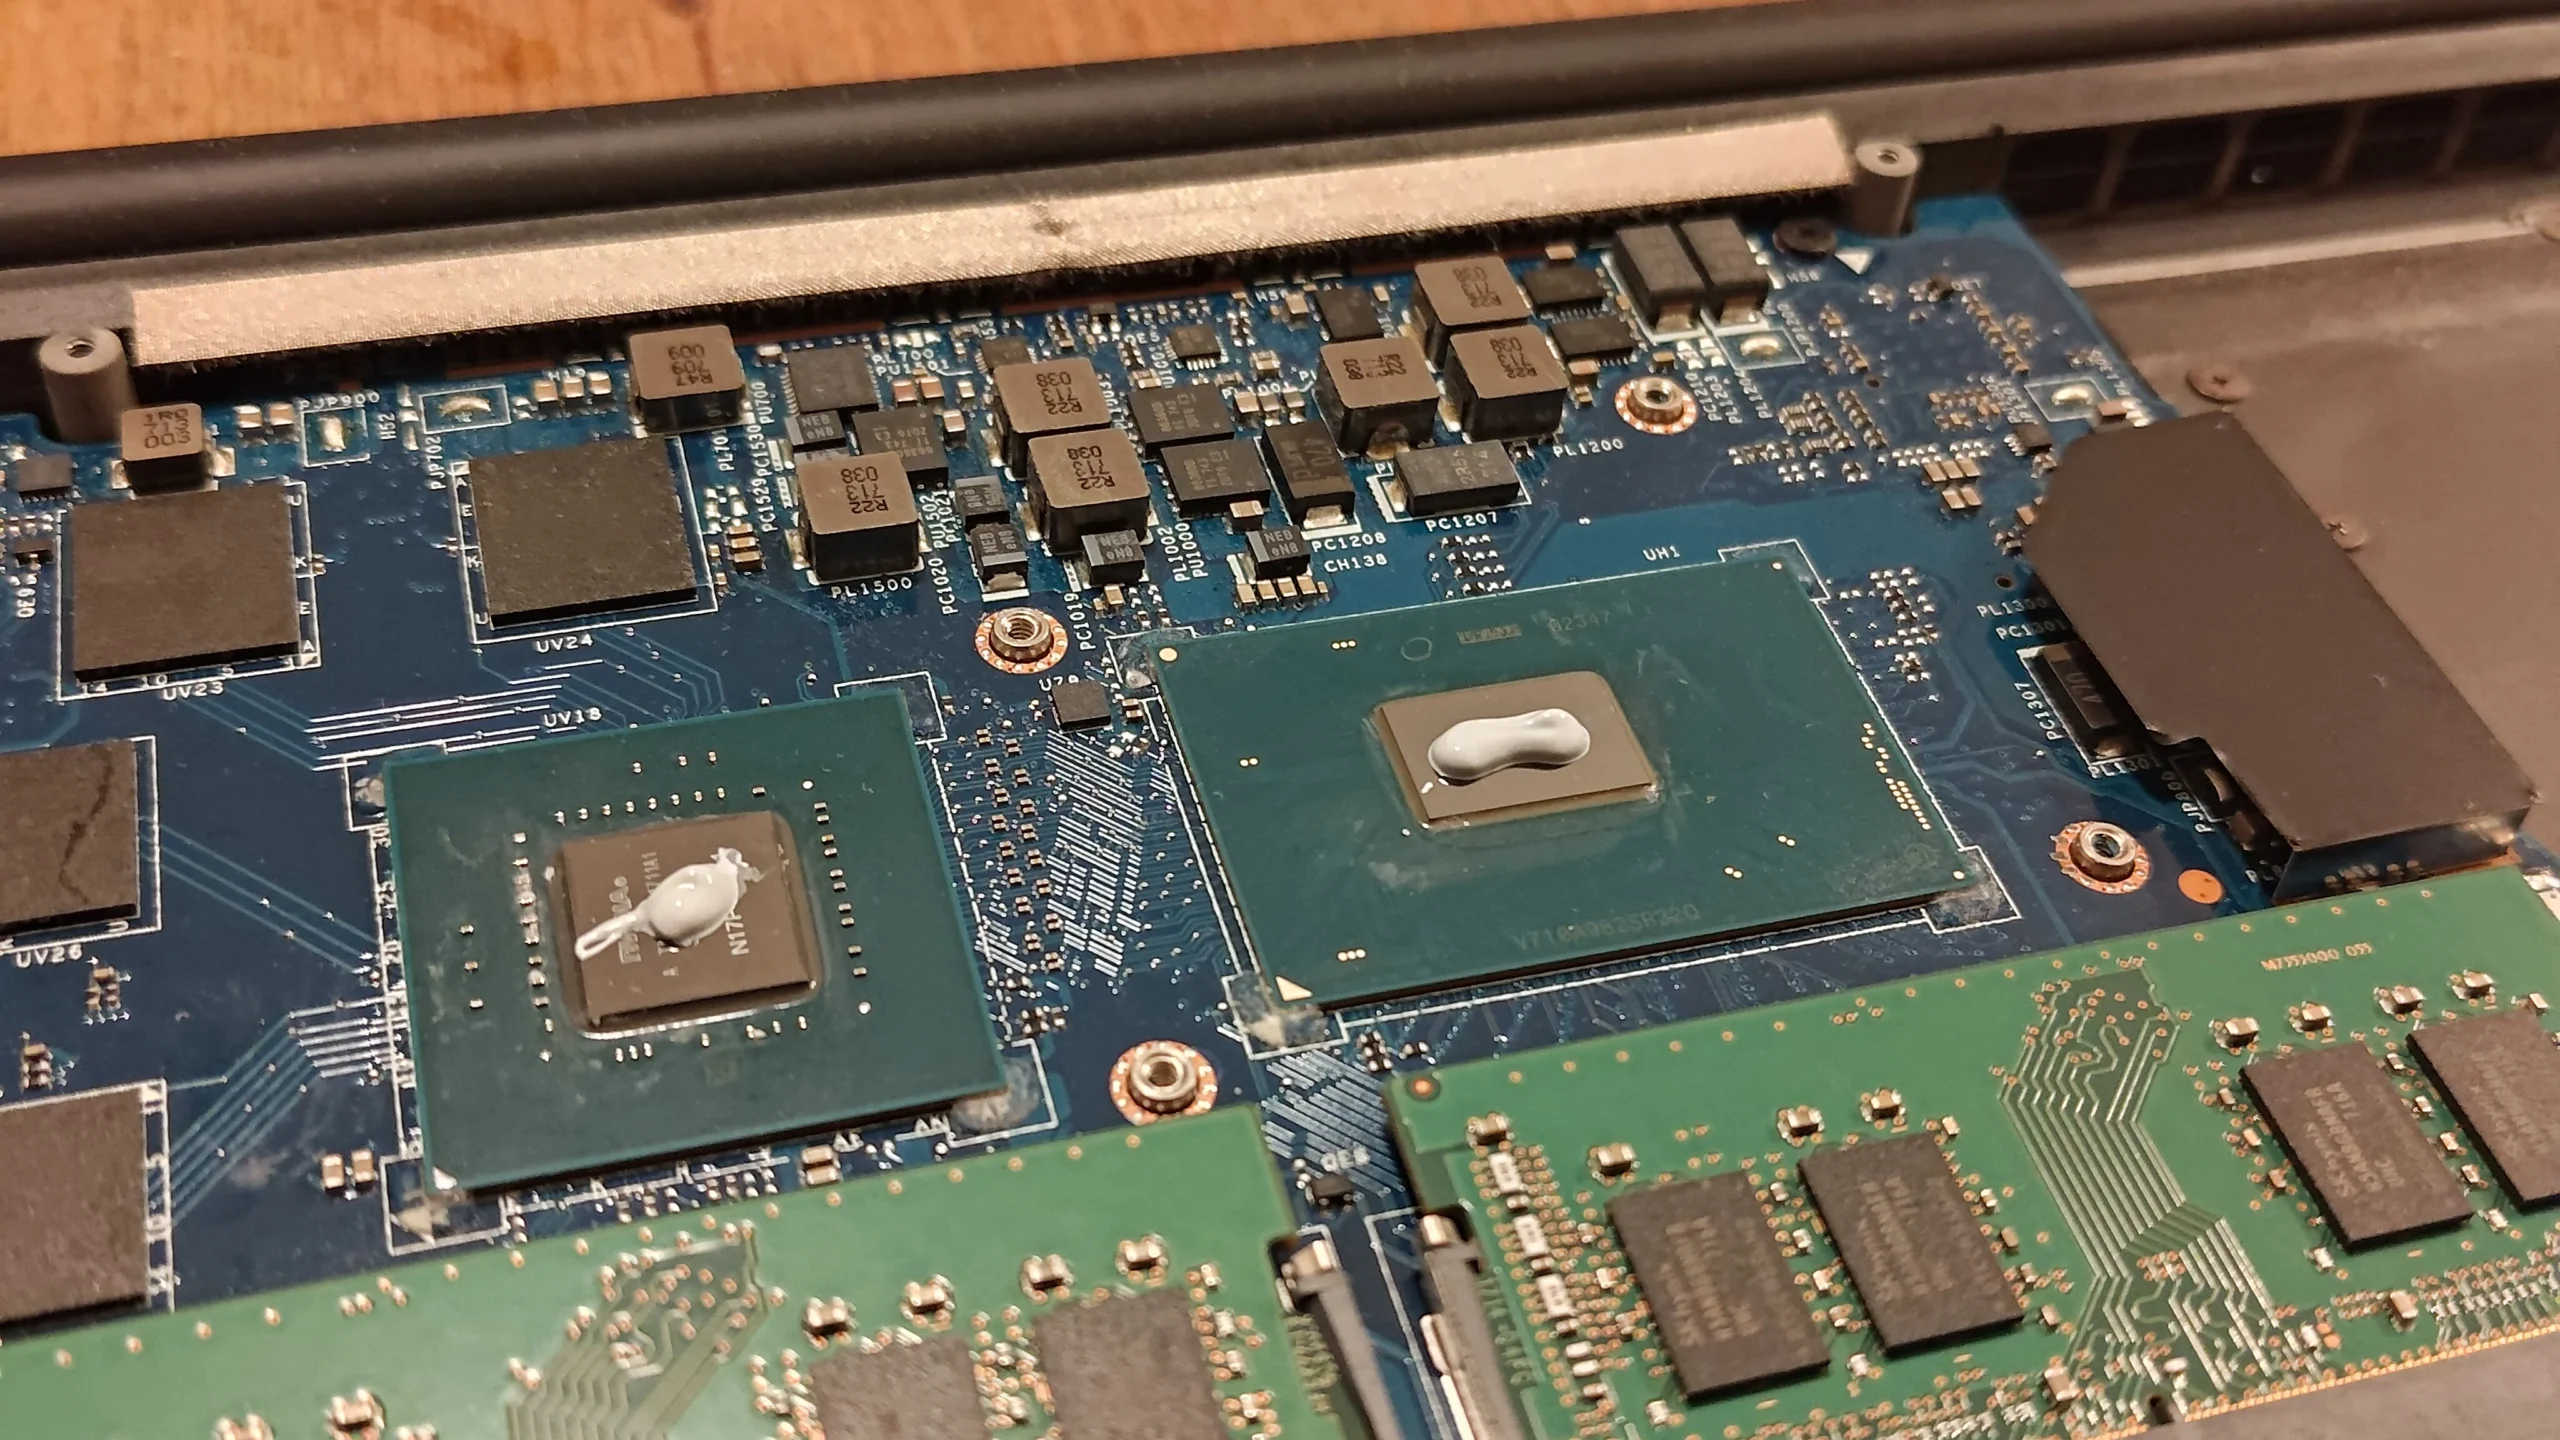
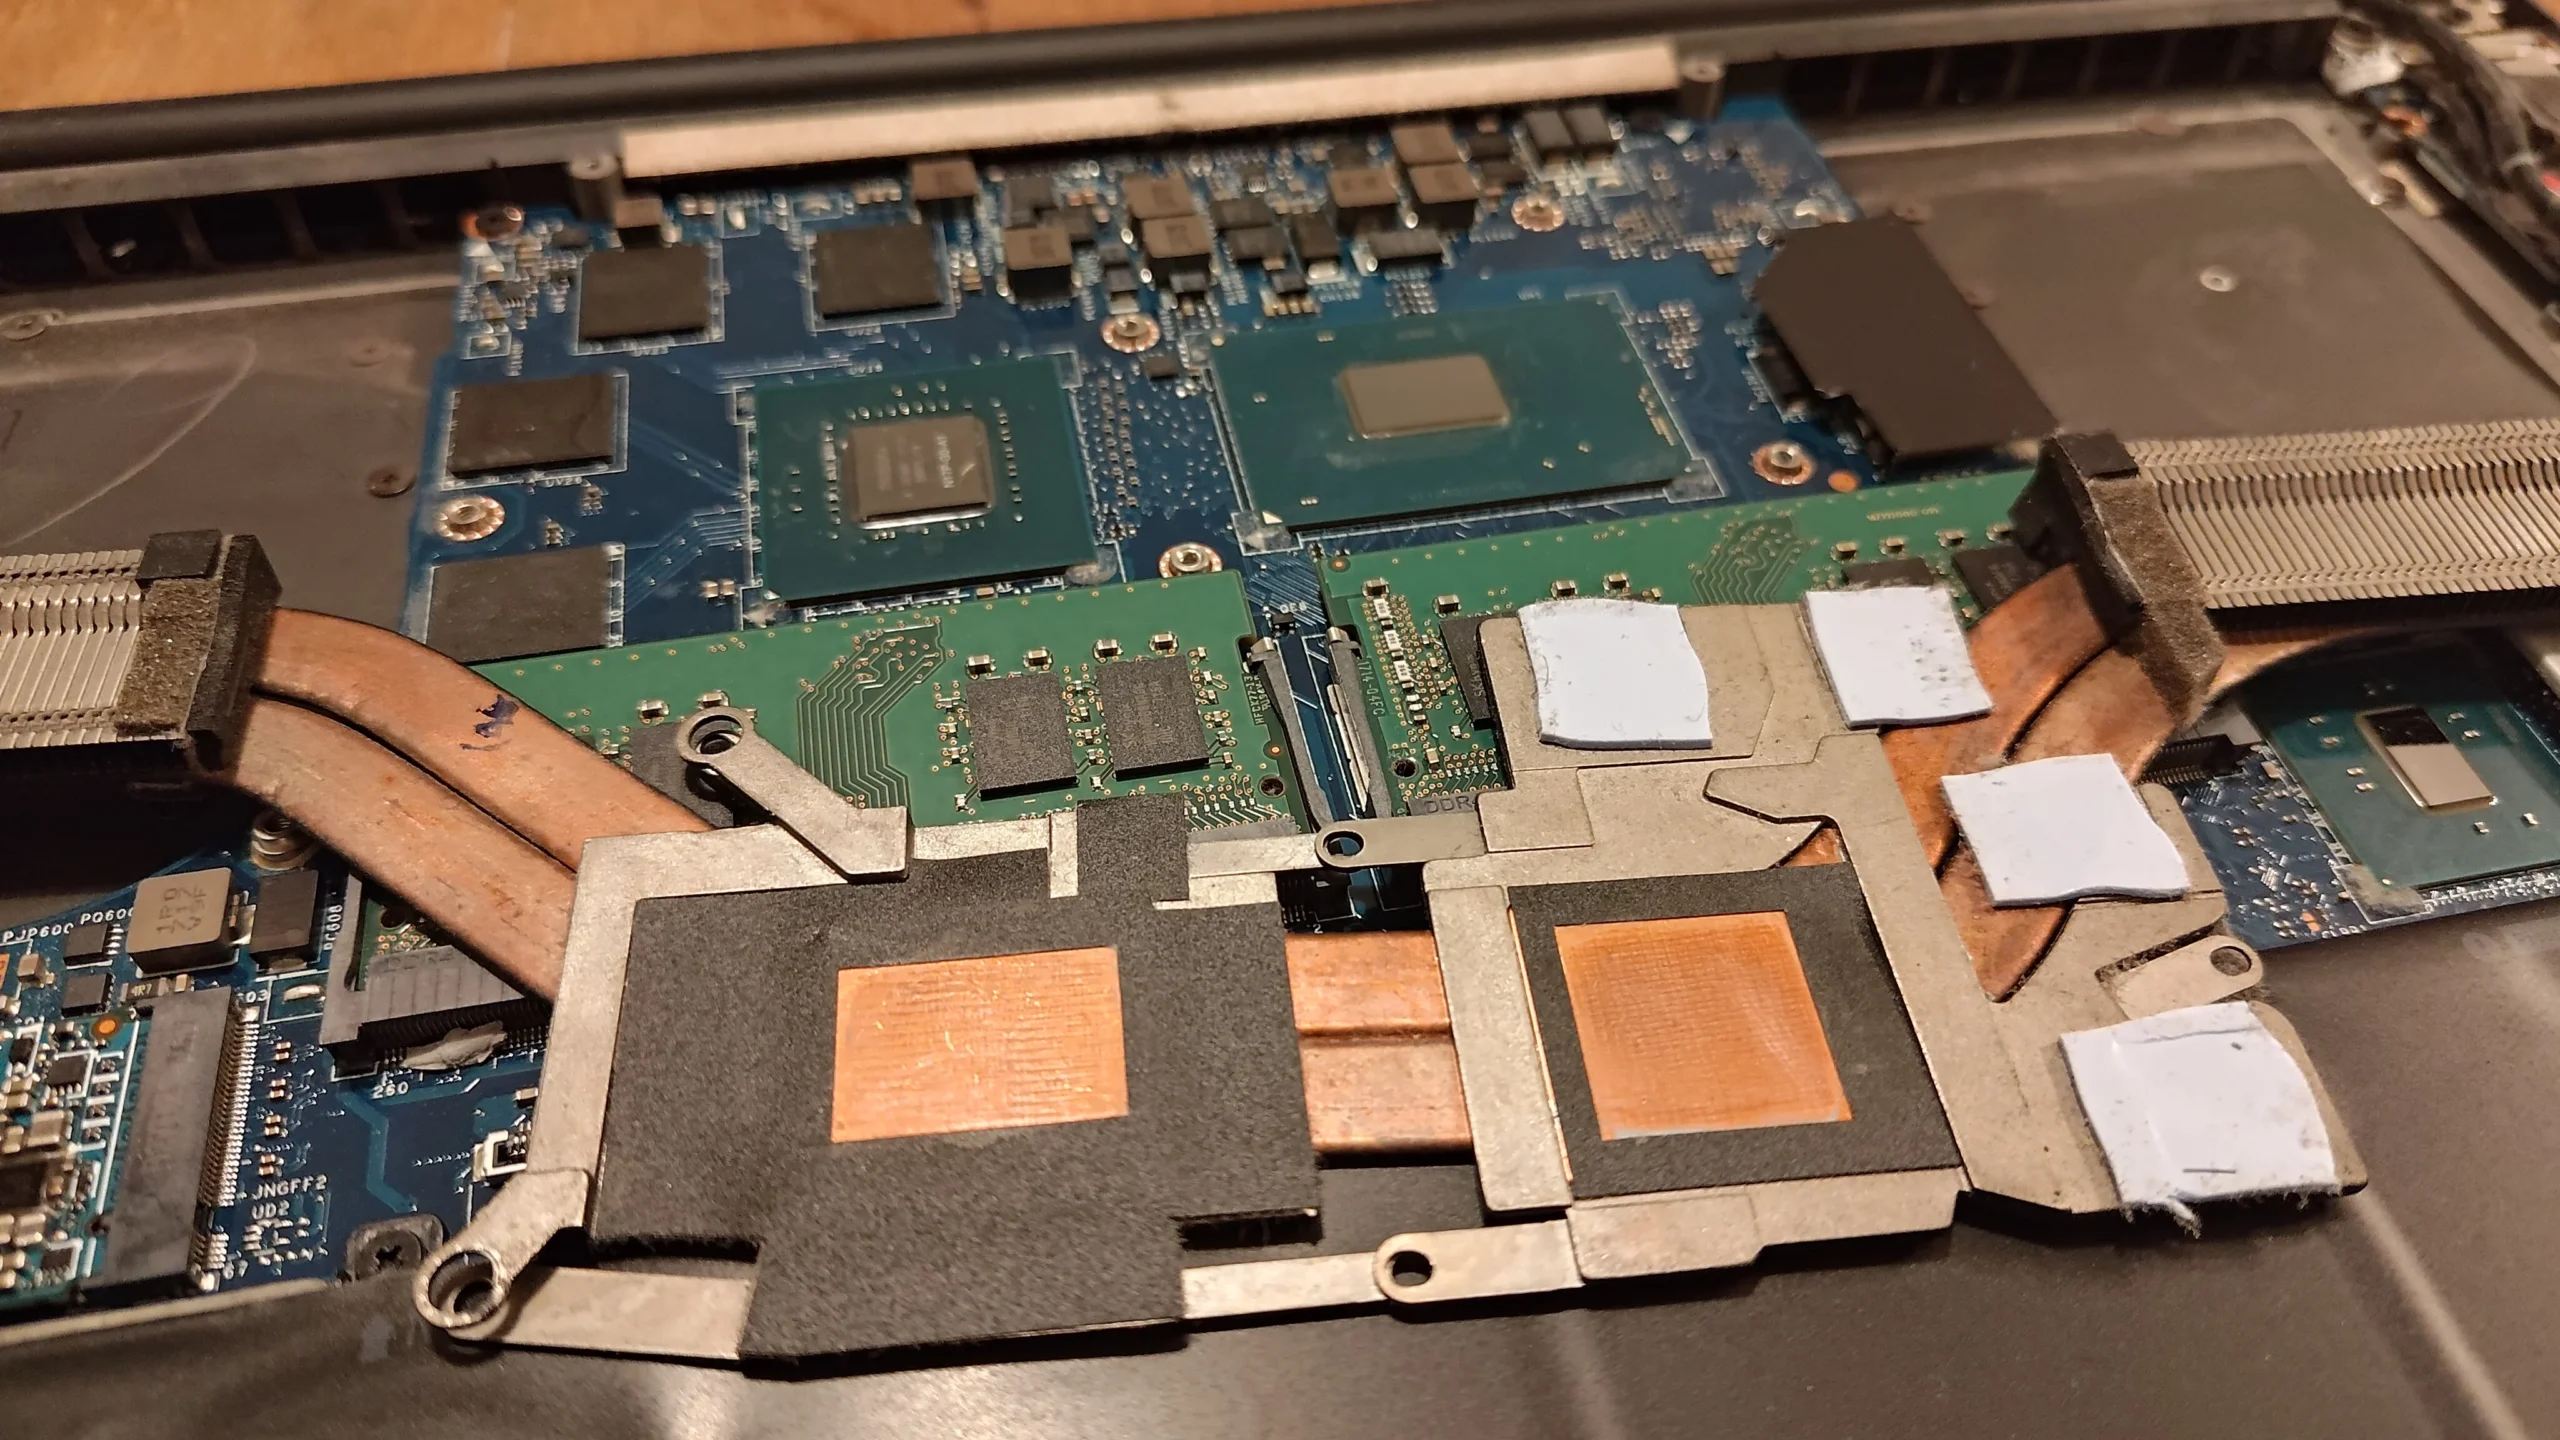
Two main chip contacts and smaller thermal pieces were exposed
The removed cooler photo shows two contact plates and surrounding thermal pieces. The board photos show the corresponding chips after separation. Once lifted, the old paste and any pads or putty need to be restored in the right places when the cooler is seated again.
For an owner cleaning accessible lint, it is better to leave a sound cooler mounted than lift it without the correct thermal materials. The photo set records access and preparation, not a verified temperature outcome.
The engineer’s takeaway
The interesting dust on this Dell sat along the rear exit behind a two-fan cooler. A useful service checks both fan routes and the base intake; removing the shared cooler introduces careful thermal-interface work.
Before you open the laptop
Can you clean a Dell dual-fan laptop yourself?
Shut down, unplug the charger and look up the service manual for the exact Dell service tag or model. Photograph screw positions, remove the base carefully and disconnect the internal battery as directed before working around the fans.
Hold each rotor still while loosening dust gently. If lint is trapped at the internal fin face, gain direct access rather than forcing it deeper from outside. Cooler removal should be left to someone prepared to map and replace paste, pads or putty correctly.
After the clean
What to verify after the clean
Confirm the laptop boots, both fans respond when needed and there is no new scraping sound. Compare heat and fan noise under similar tasks and room conditions if you have a baseline.
The archive contains no paired temperature log, so it does not support a numerical cooling claim.
Questions from owners
Dell dual-fan laptop cleaning FAQs
Answers based on the rear lint, two blowers and cooler contacts visible here.
Why is rear-edge lint important?
It sits near the narrow exit where fan air passes the cooling fins. Cleaning only visible blades may leave that restriction behind.
Do both fans need to be removed?
Both need inspection; removal depends on access and the exact model. Avoid disturbing good connectors or thermal contact without a reason.
Can I identify the exact Dell model from these photos?
The archive confirms Dell branding but does not give a reliable exact model identifier for publication.
What if I lift the heat-pipe cooler?
You must clean and renew disturbed chip paste and preserve the correct placement and thickness of any smaller thermal materials.
Can I clean the base grille with water?
Only a detached washable part may be cleaned that way if the manufacturer's guidance allows it. Dry it completely before reassembly.
Was the temperature improvement measured?
No comparable before-and-after readings are recorded in this archive.
UK Dell cooling enquiries
Dust behind the Dell rear vents?
If you are in the UK, use the form with your Dell model or service tag kept private in the message, your postcode, and a description of which side sounds loud or feels weak.
Mention any earlier fan or paste work. That helps us assess whether the rear fins, one fan or the thermal contact needs attention.
Read about our laptop cooling-system cleaning service, then use the form to tell us your computer model, symptoms and UK postcode.
Free to enquire · No obligation to book. We discuss the proposed work and price before you decide.
The workshop photos
Dell rear-vent and two-fan cleaning gallery
Open the workshop photos of the linted rear edge, twin fans, vented base and removed cooler contacts.