Published 18 November 2026 · Dell XPS dual-fan laptop case study
Dell XPS cooling clean
the wide cooler hid more than the fans showed.
This XPS has a thin body but a broad cooling assembly: two blowers, a long fin edge and copper contact plates for two main chips. The workshop photos show the cooler separated so the air and heat routes can be understood together.
The laptop
Dell XPS with a broad two-fan cooling layout
Access finding
Fin edge and fan housings exposed directly
Thermal work
Shared copper assembly lifted from two chip surfaces
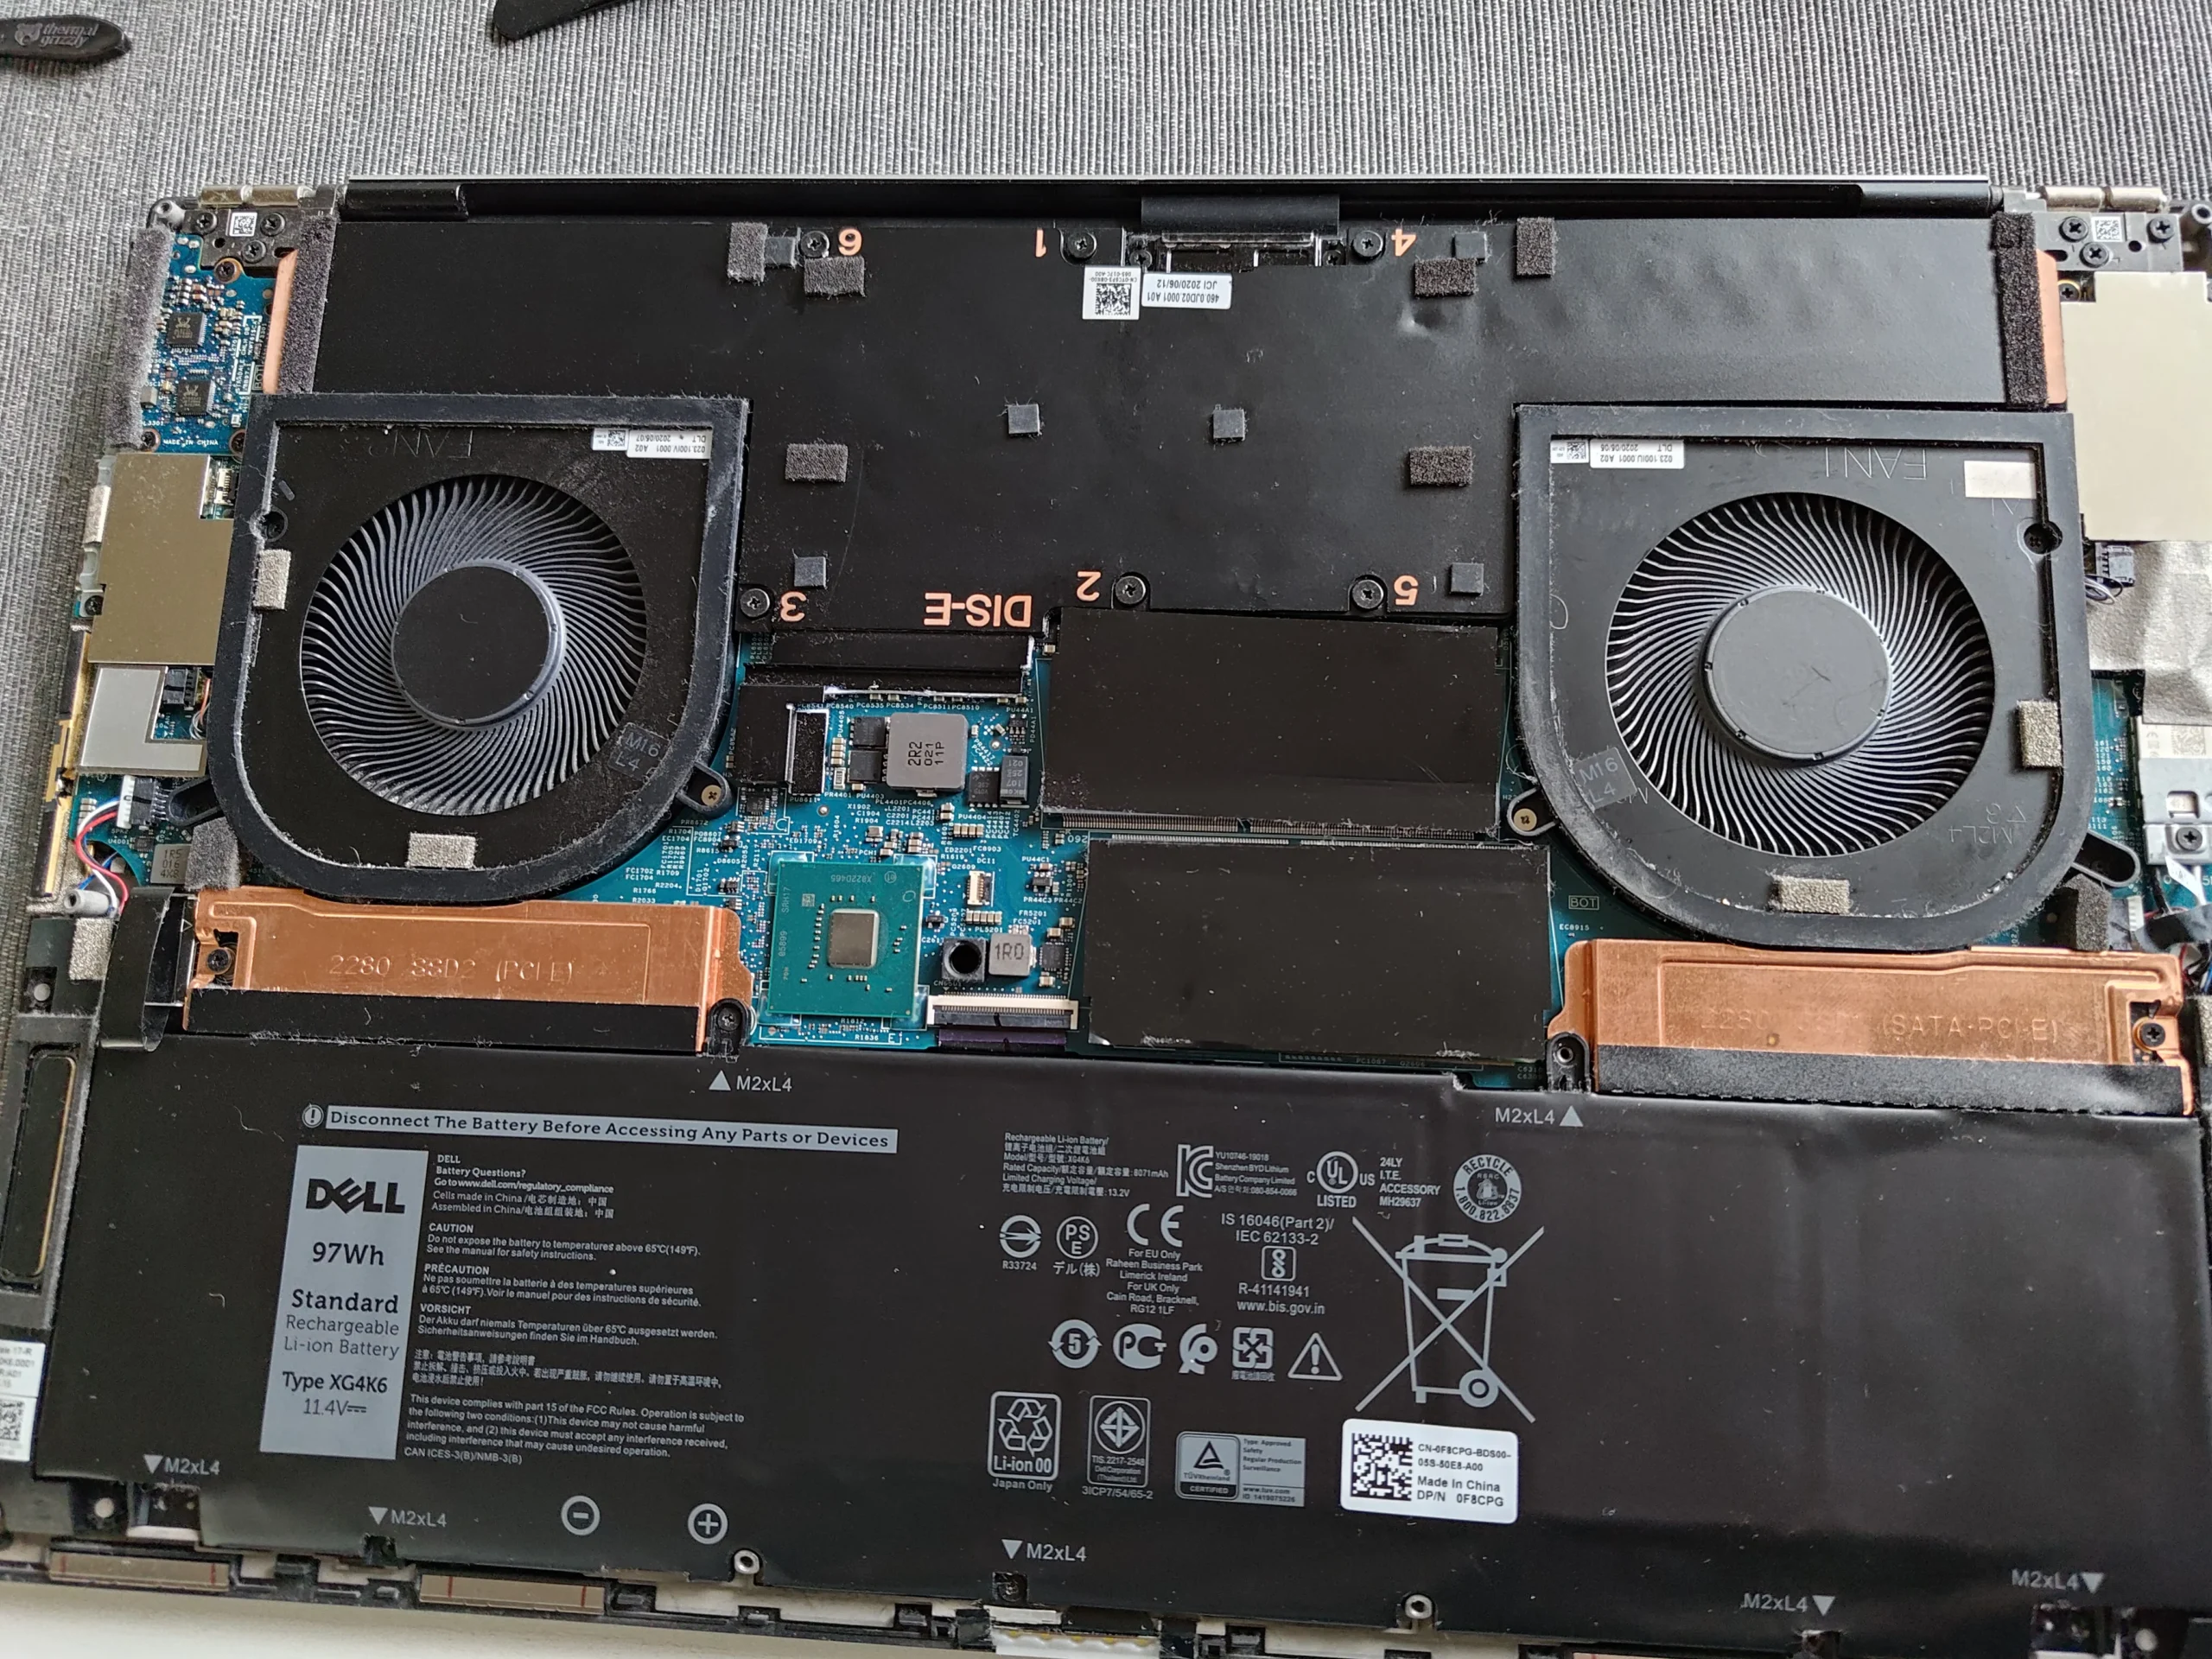
The silver XPS shell gives little away about its cooling system. The opened view shows a blower on each side and a shared copper assembly across the processor and graphics area. A separate close-up shows the narrow fin stack, which is the part the fan's air must pass through before leaving the case.
This archive has several repeated close-ups and a hardware-monitoring screenshot, but no controlled before-and-after test. The exact XPS submodel is not confidently readable from the selected photos. This article therefore explains the physical cleaning and cooler access without a numerical claim or guessed model number.
In this case study
01 / Inside the thin case
The XPS uses a fan at each side of the cooler
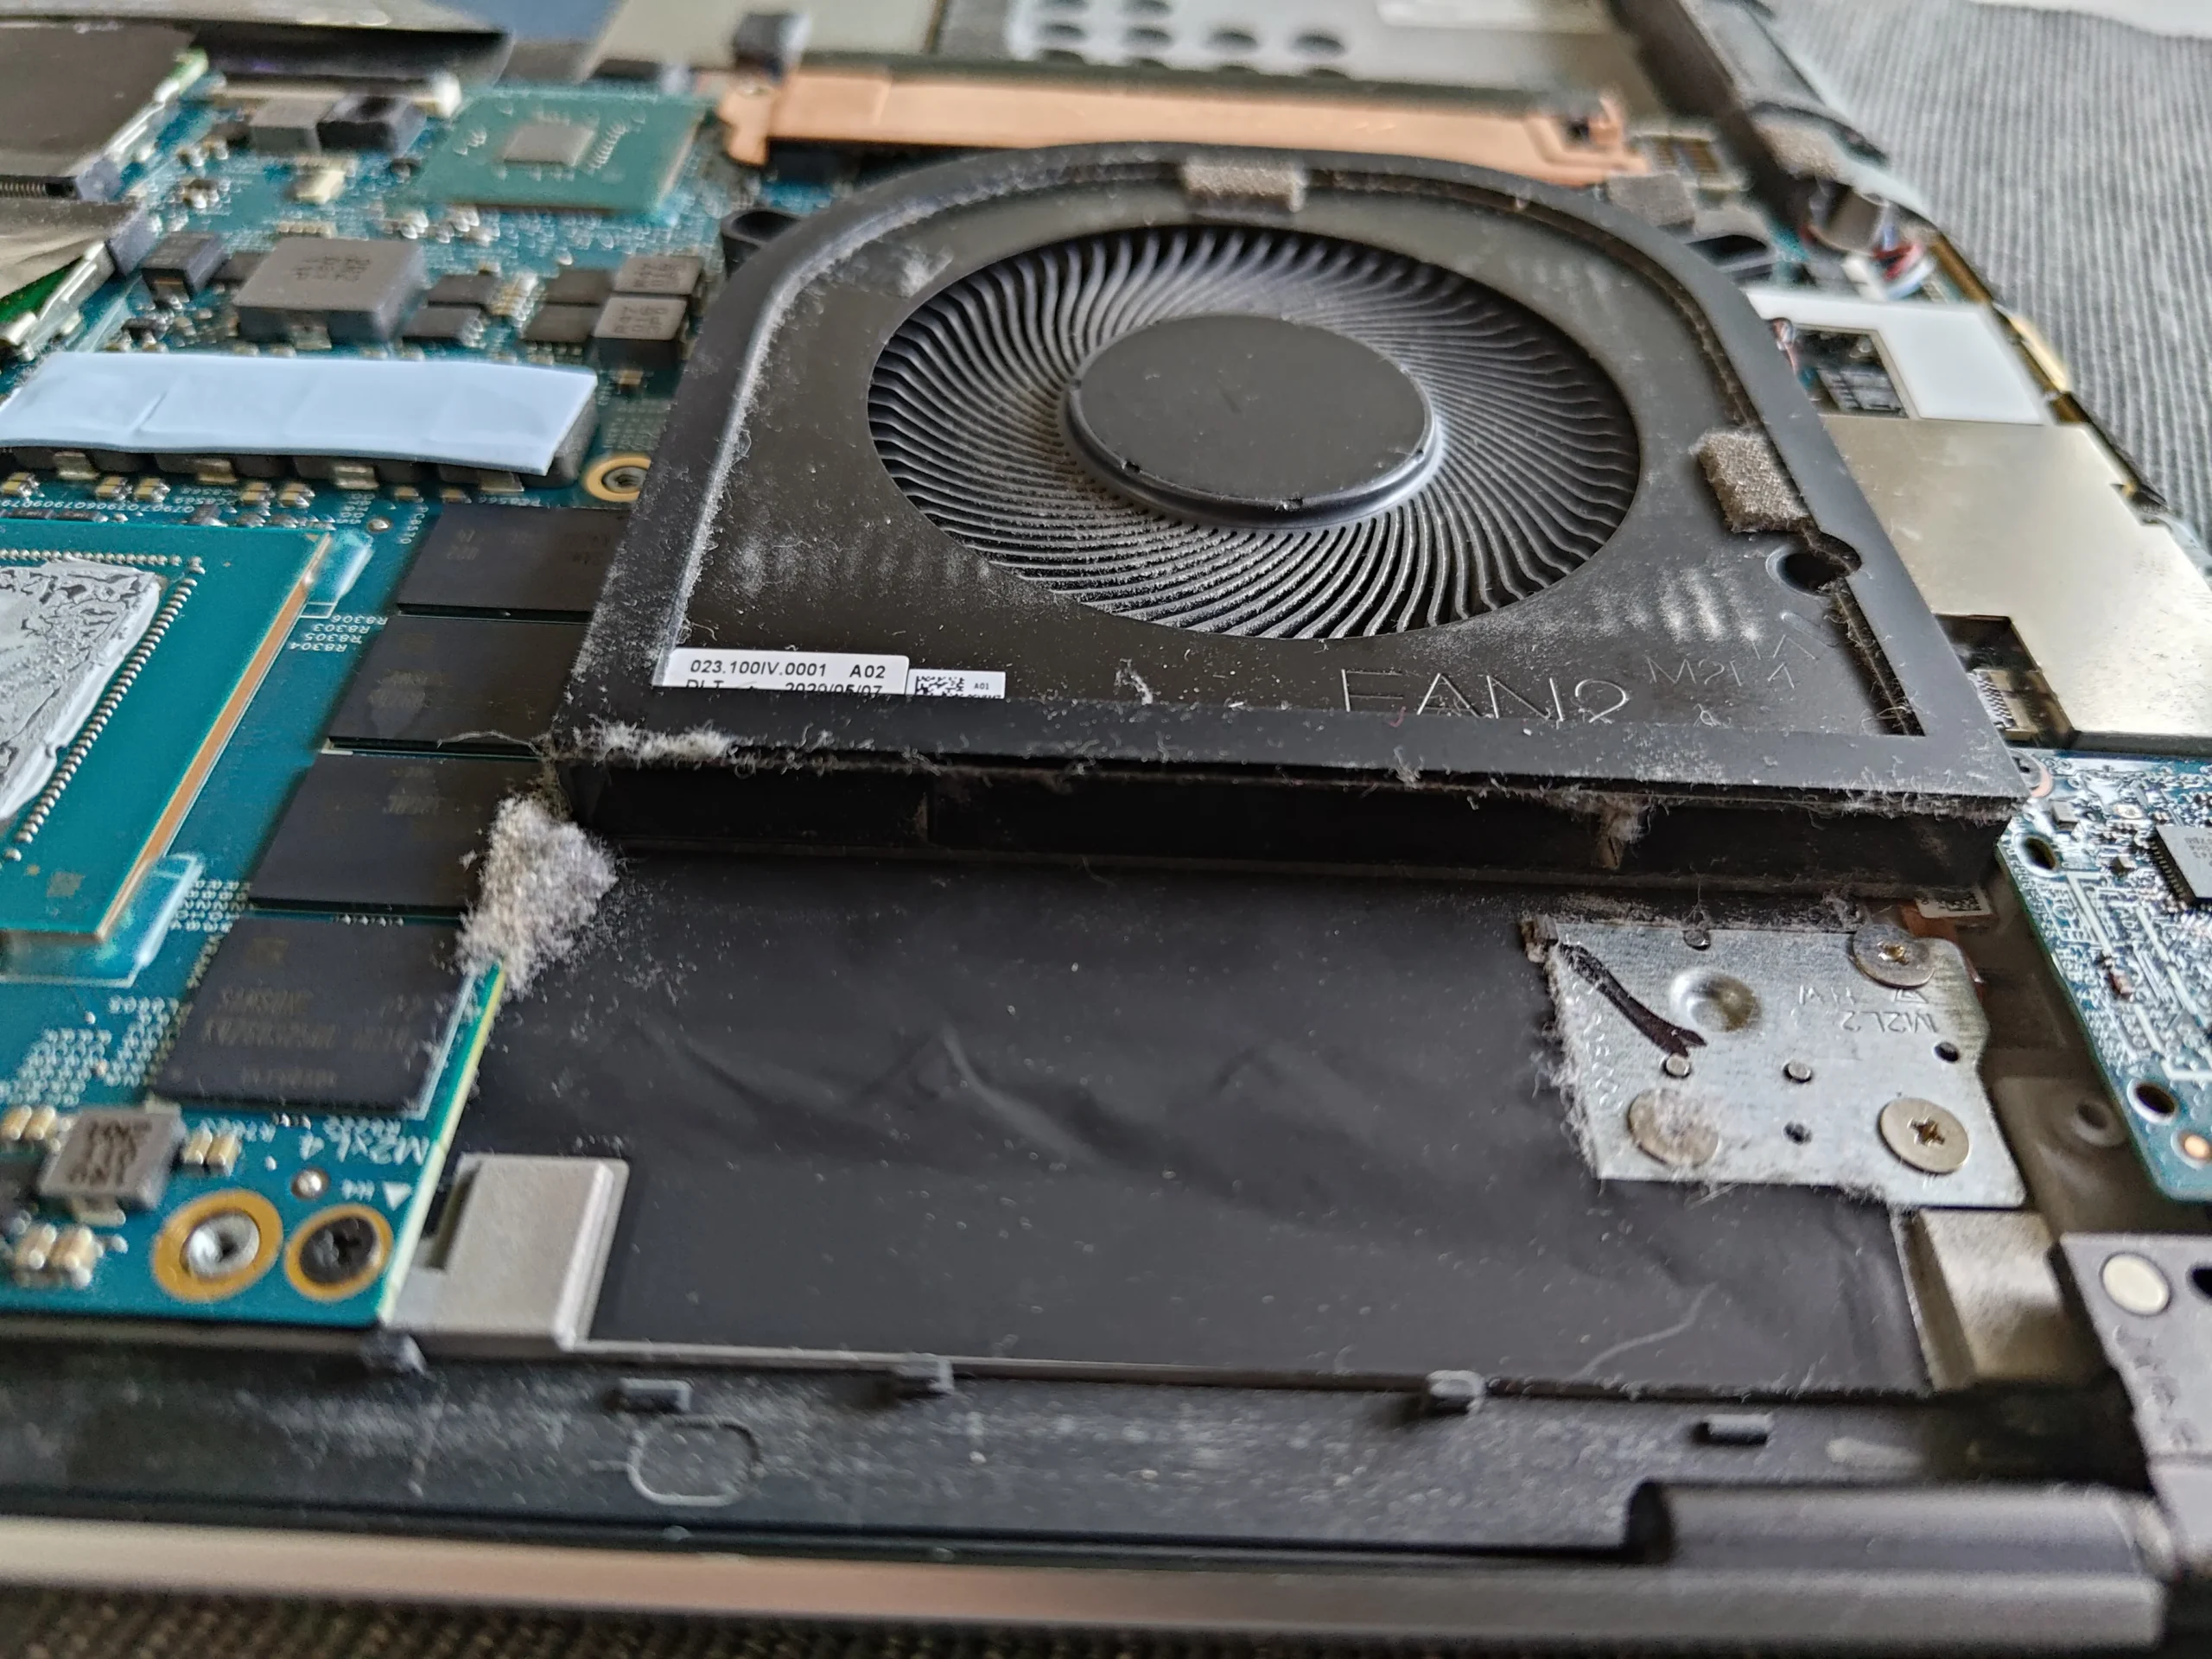
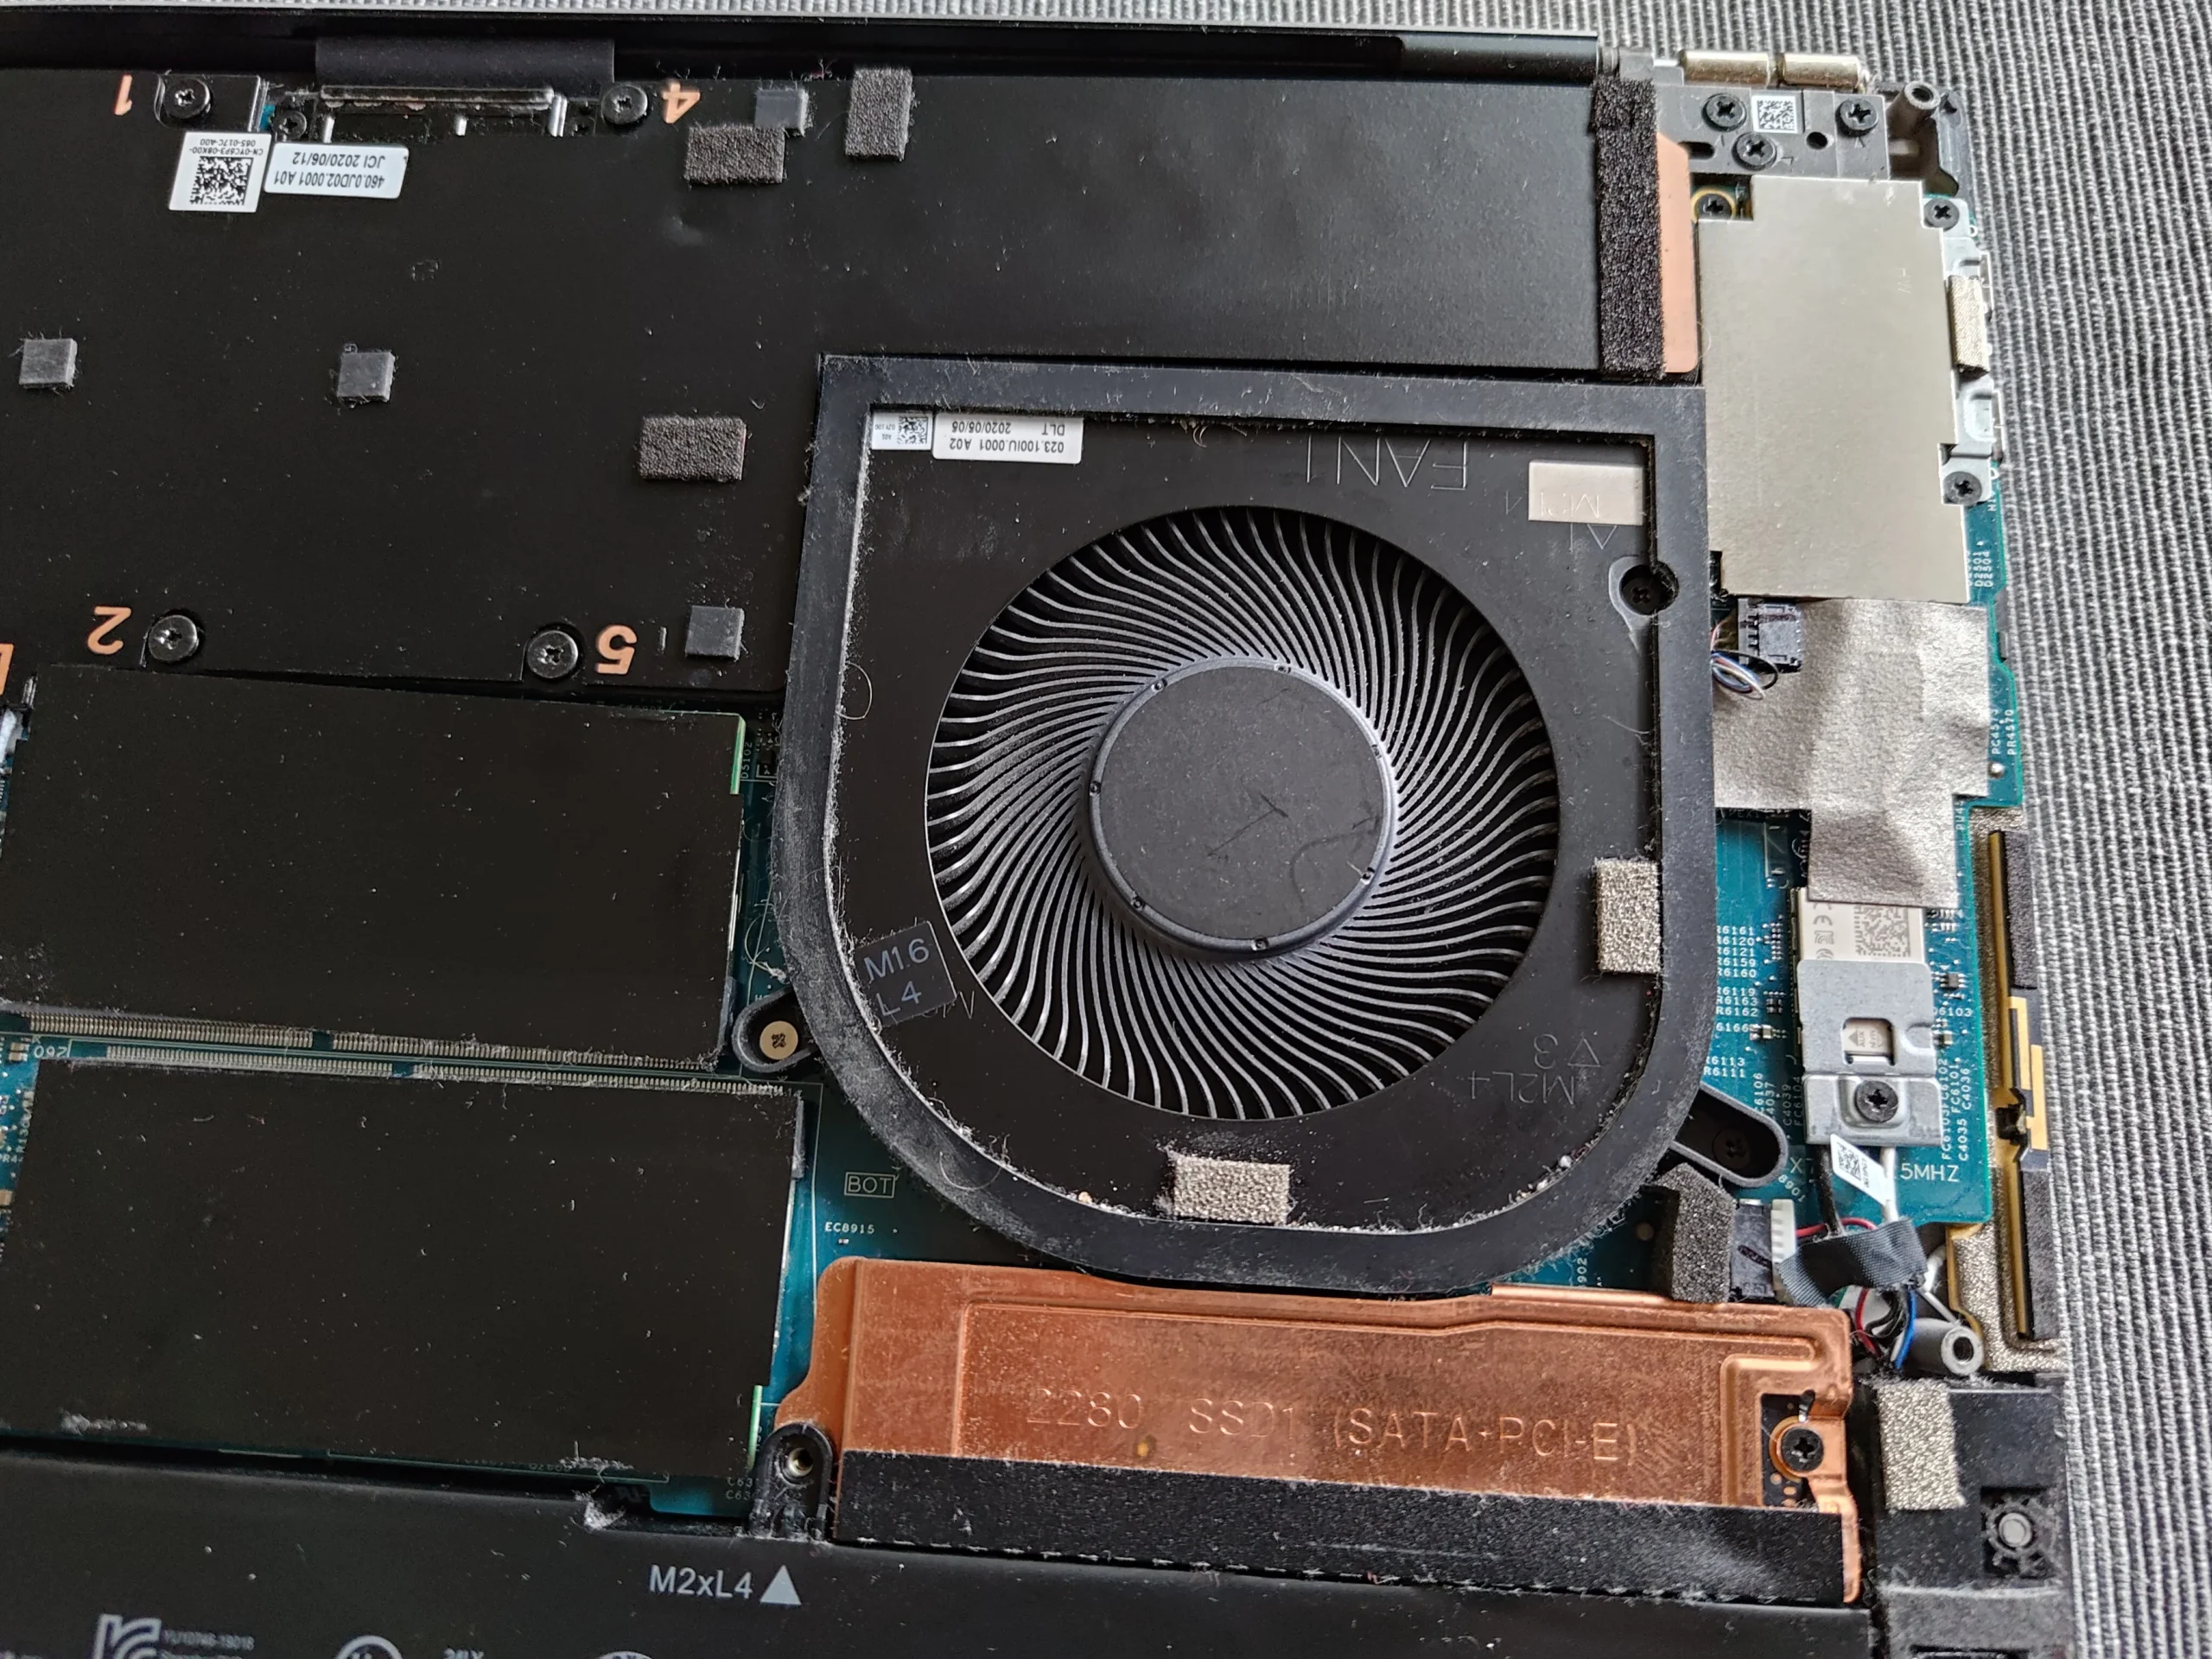
The wide internal overview shows two circular blowers close to the battery and the copper assembly. In a thin laptop, air routes are compact, so dust at a narrow outlet may matter even when the visible blades have only a light coating.
Inspect both fan chambers and each adjacent outlet. Do not judge the job by cleaning just the fan that is easiest to reach after the base comes off.
02 / The tightest passage
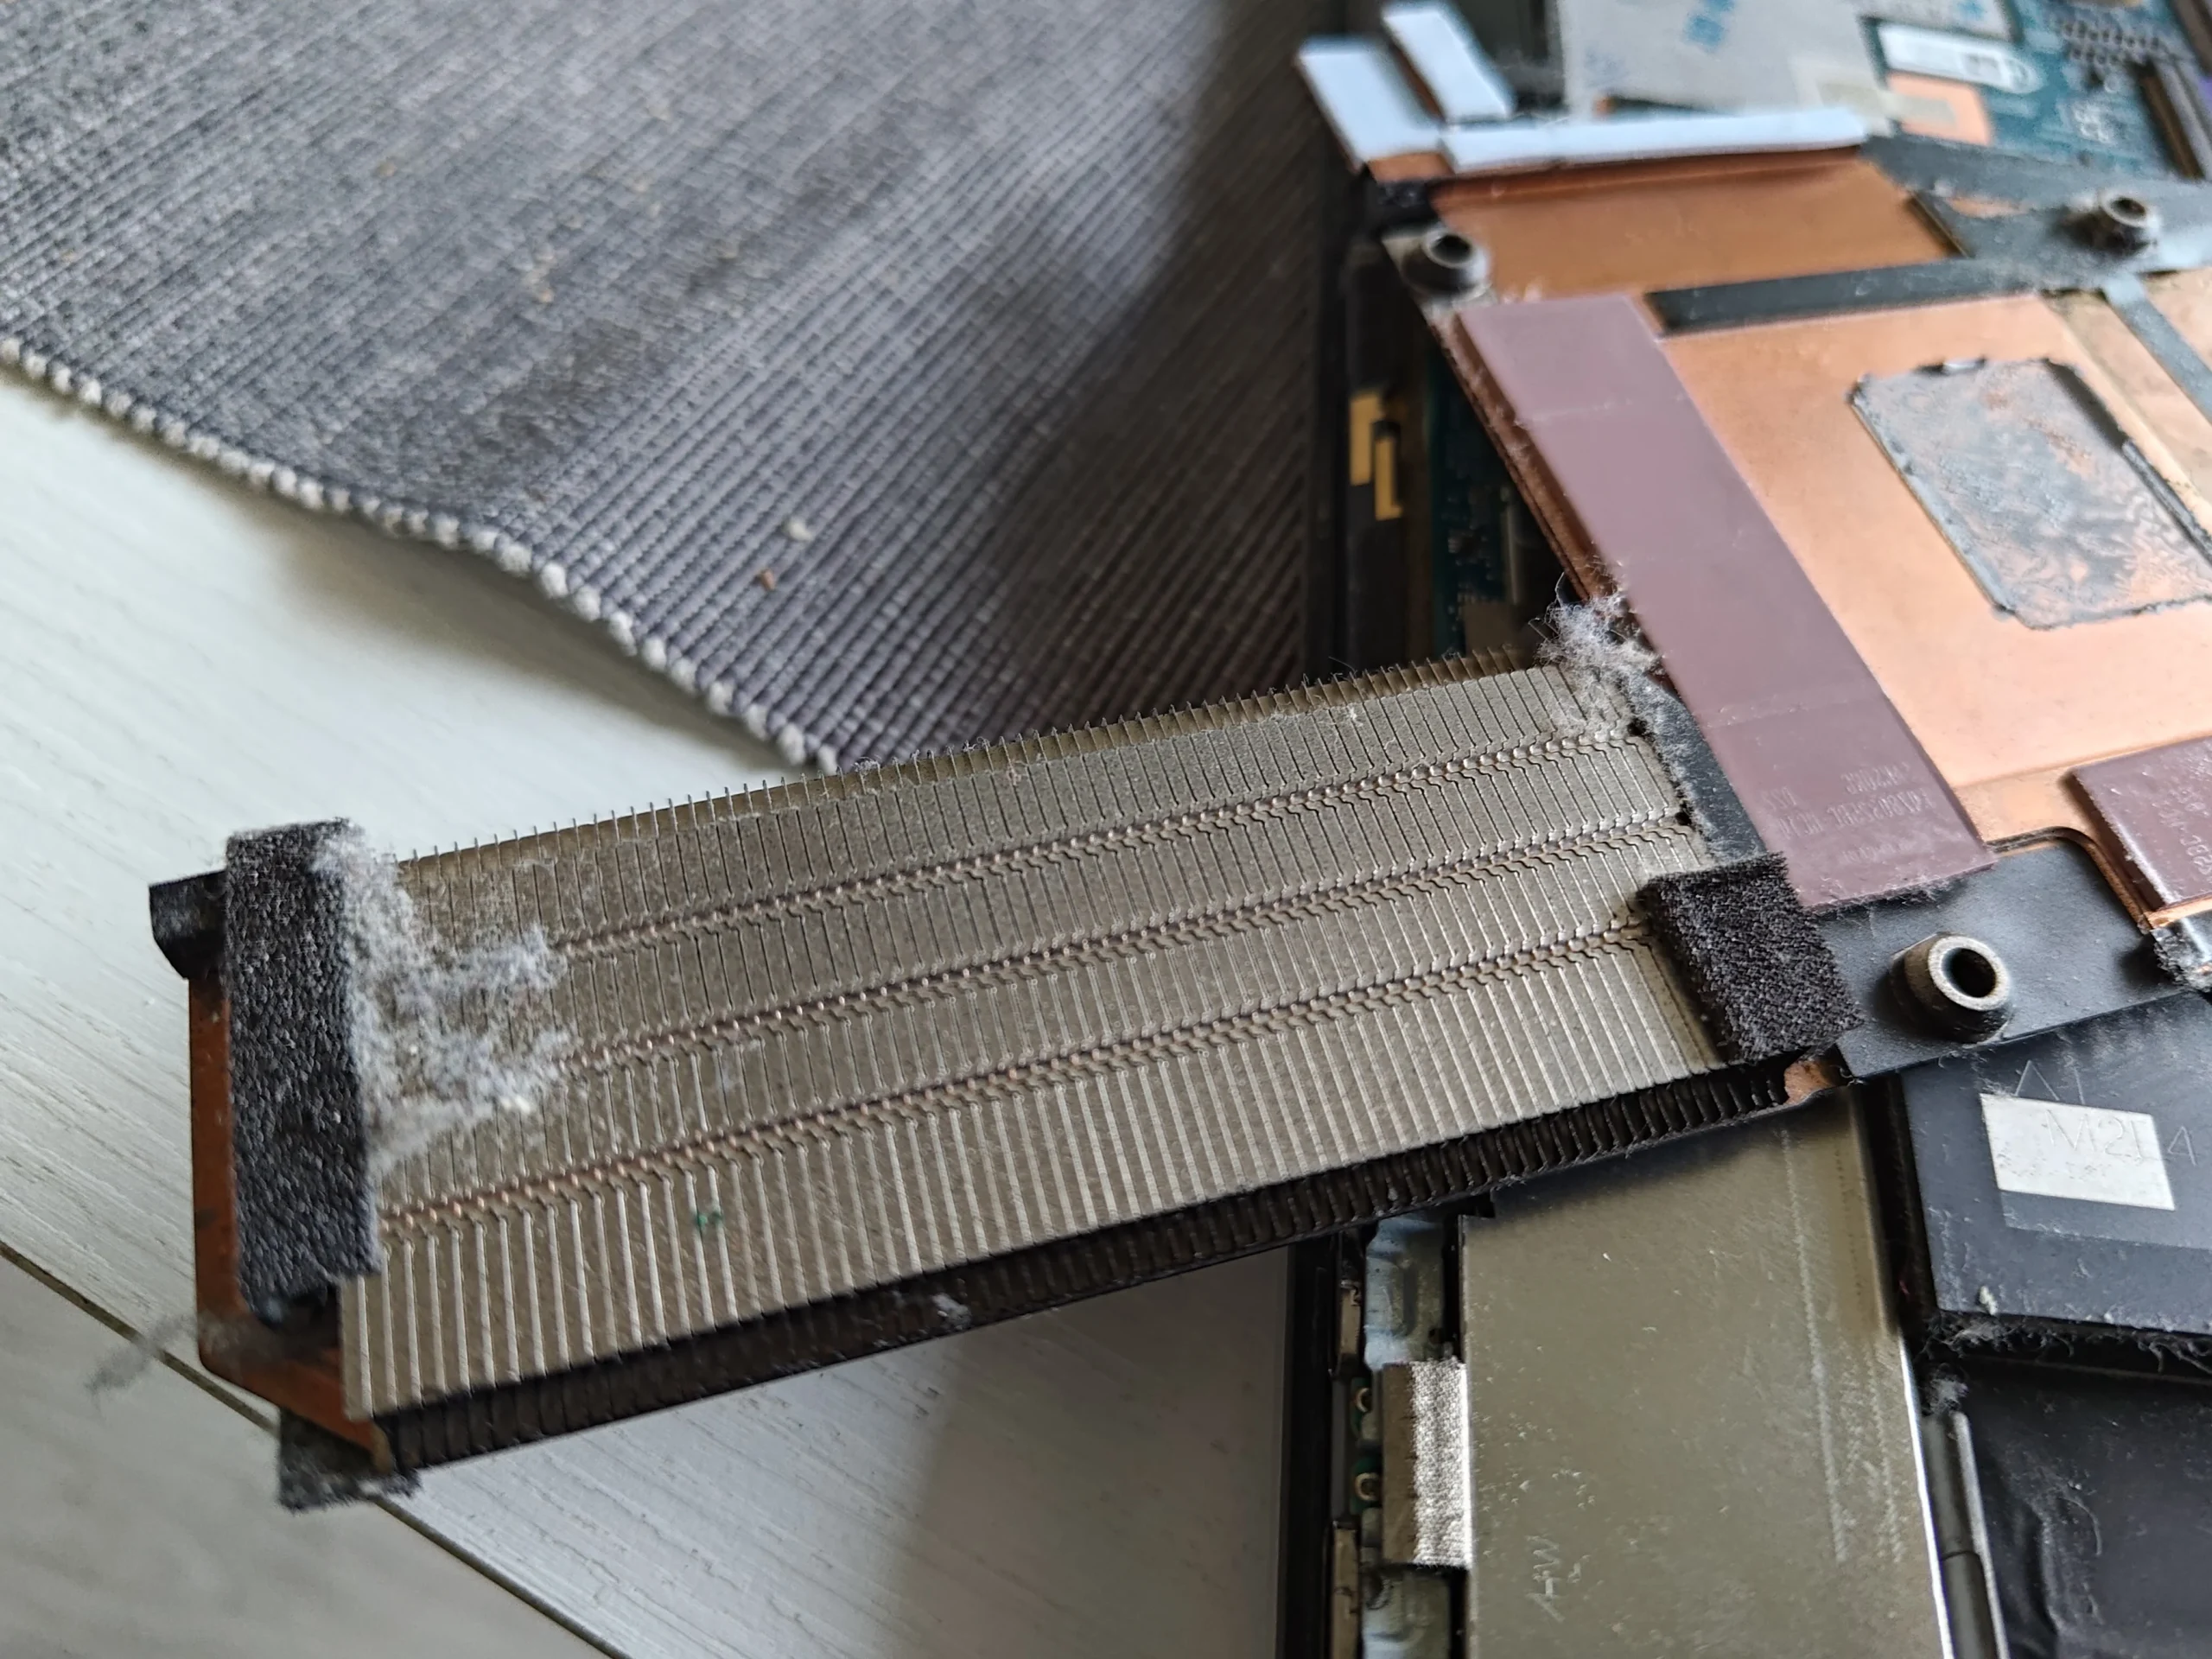
The exposed fin stack shows the narrow air exit
The cooler photo isolates a long, fine metal fin bank. The fan needs to push air through those passages; trapped lint on the inside face can restrict the flow while the outside grille looks nearly clear.
The archive proves direct access to this fin edge, not a measured amount of blockage. Clean gently so the thin fins do not bend and capture material away from the motherboard.
03 / A separate thermal job
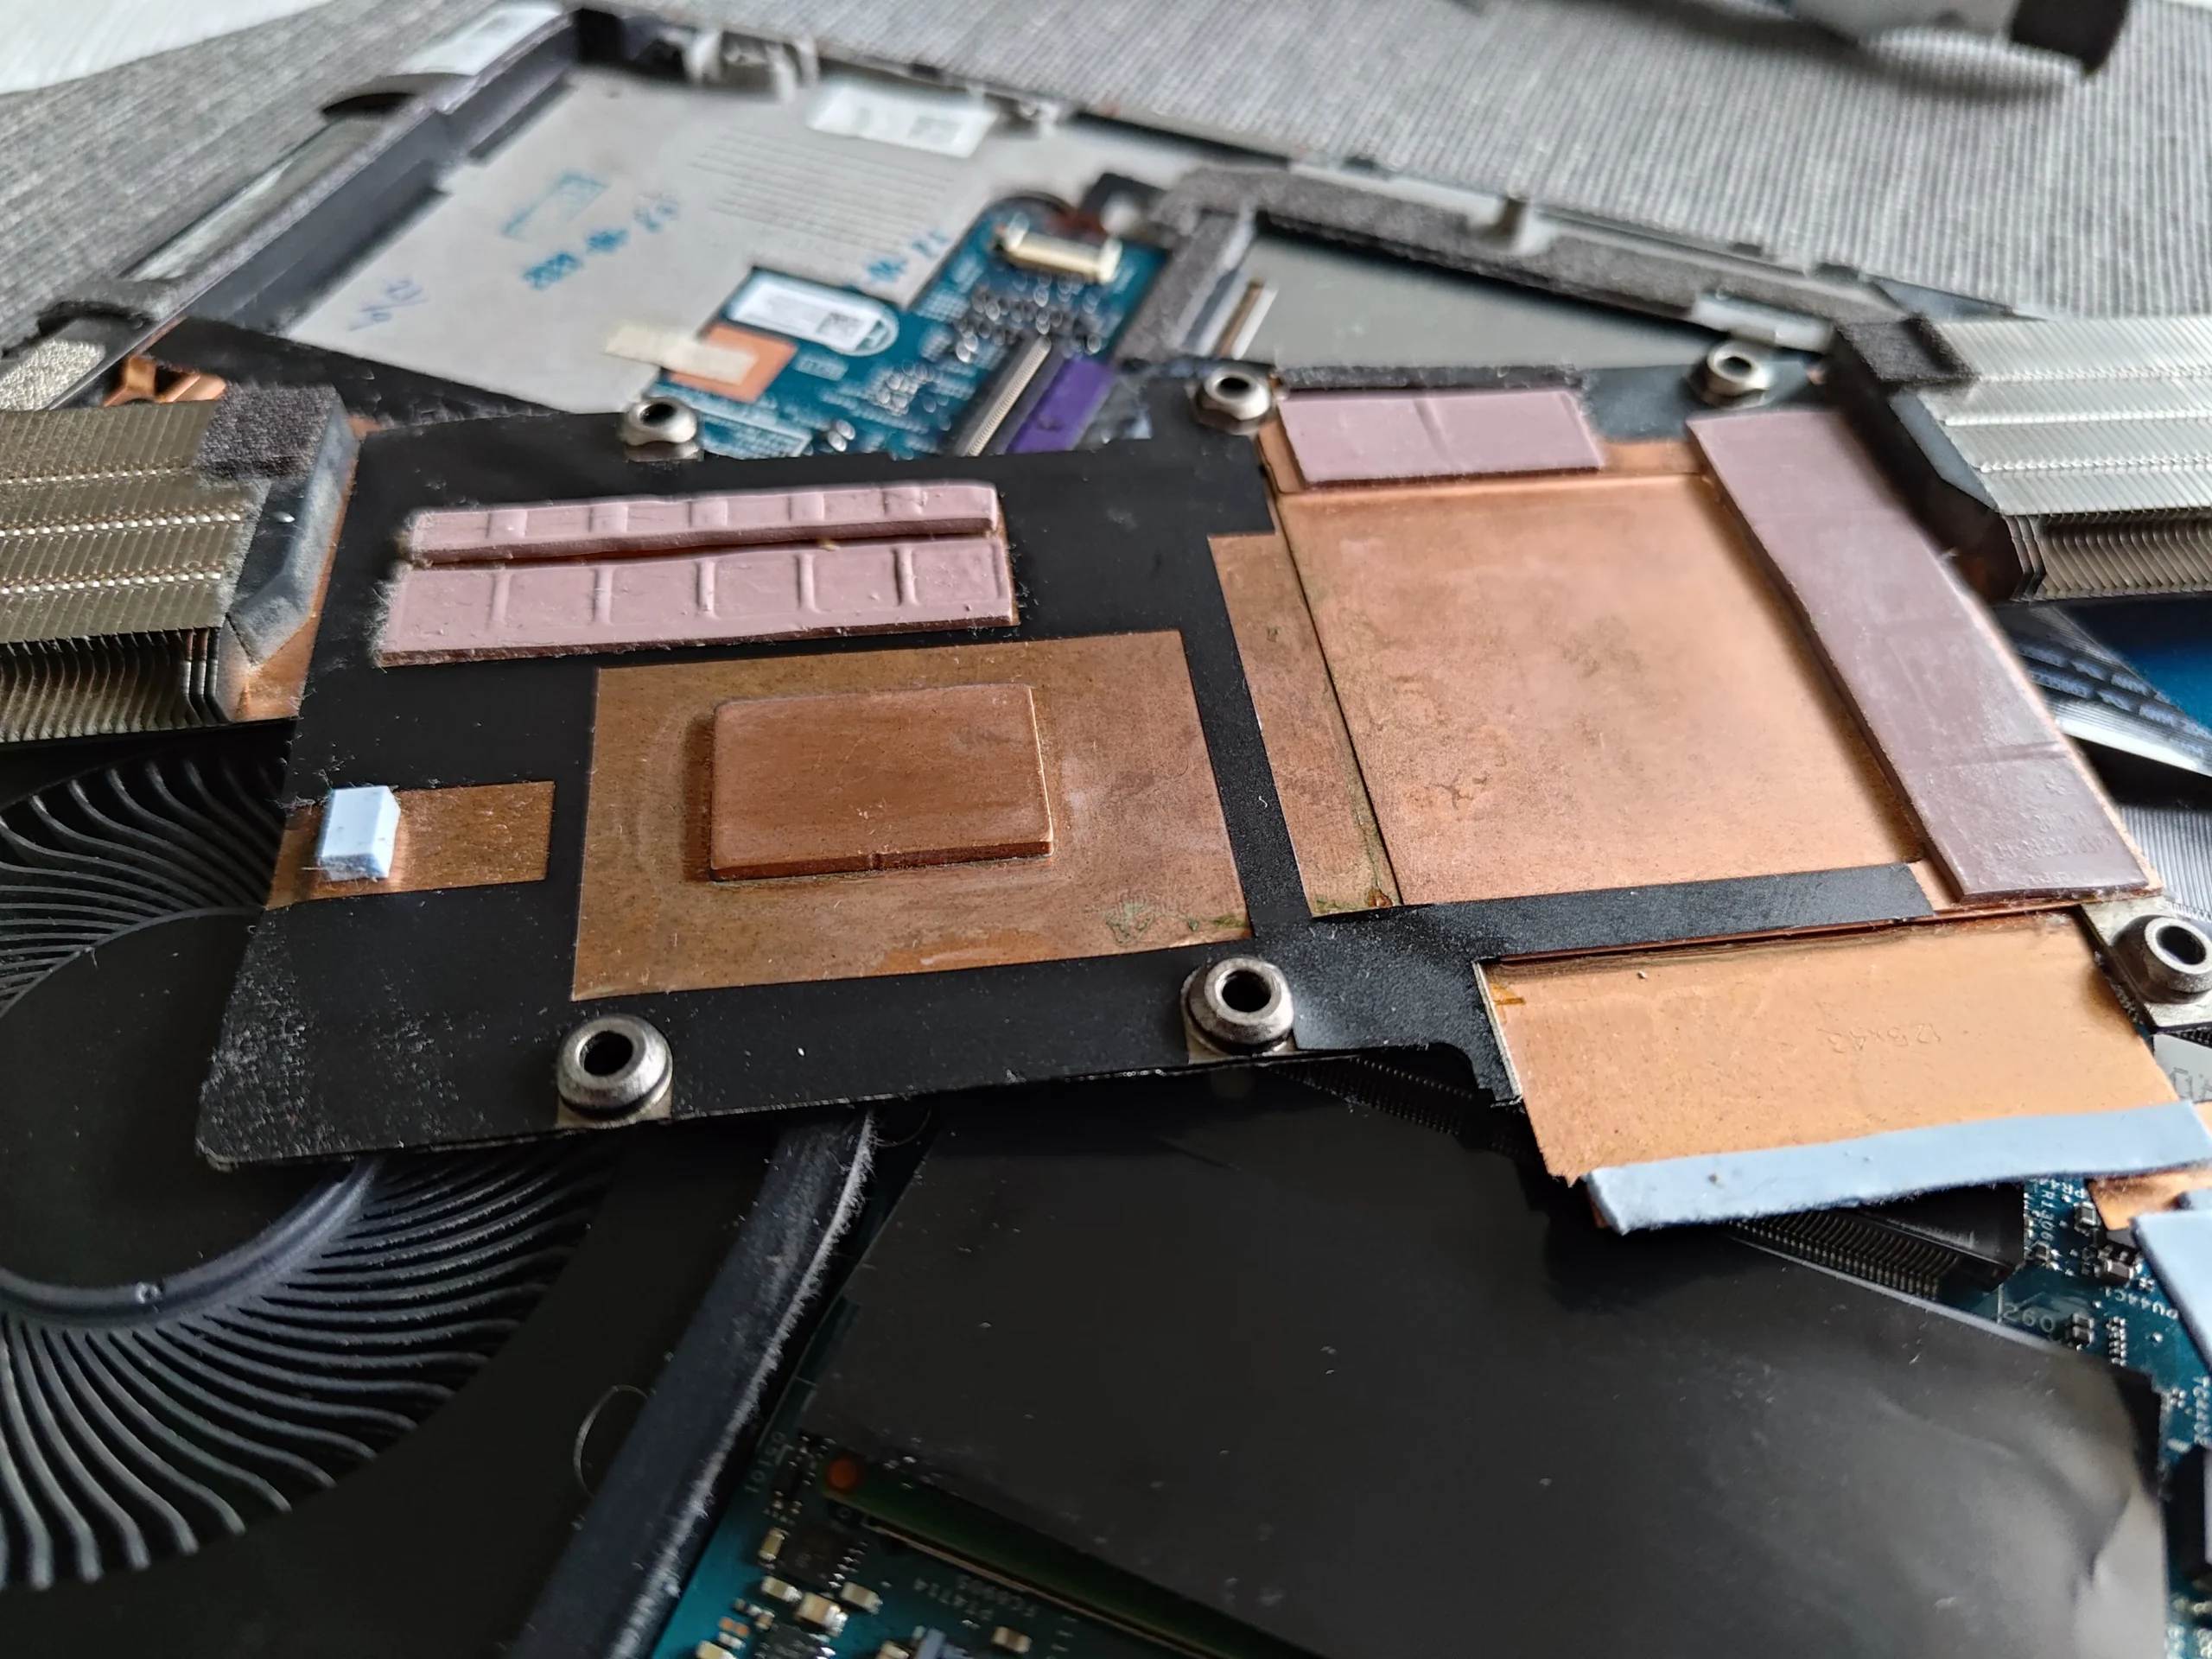
The shared assembly lifted from two main chips
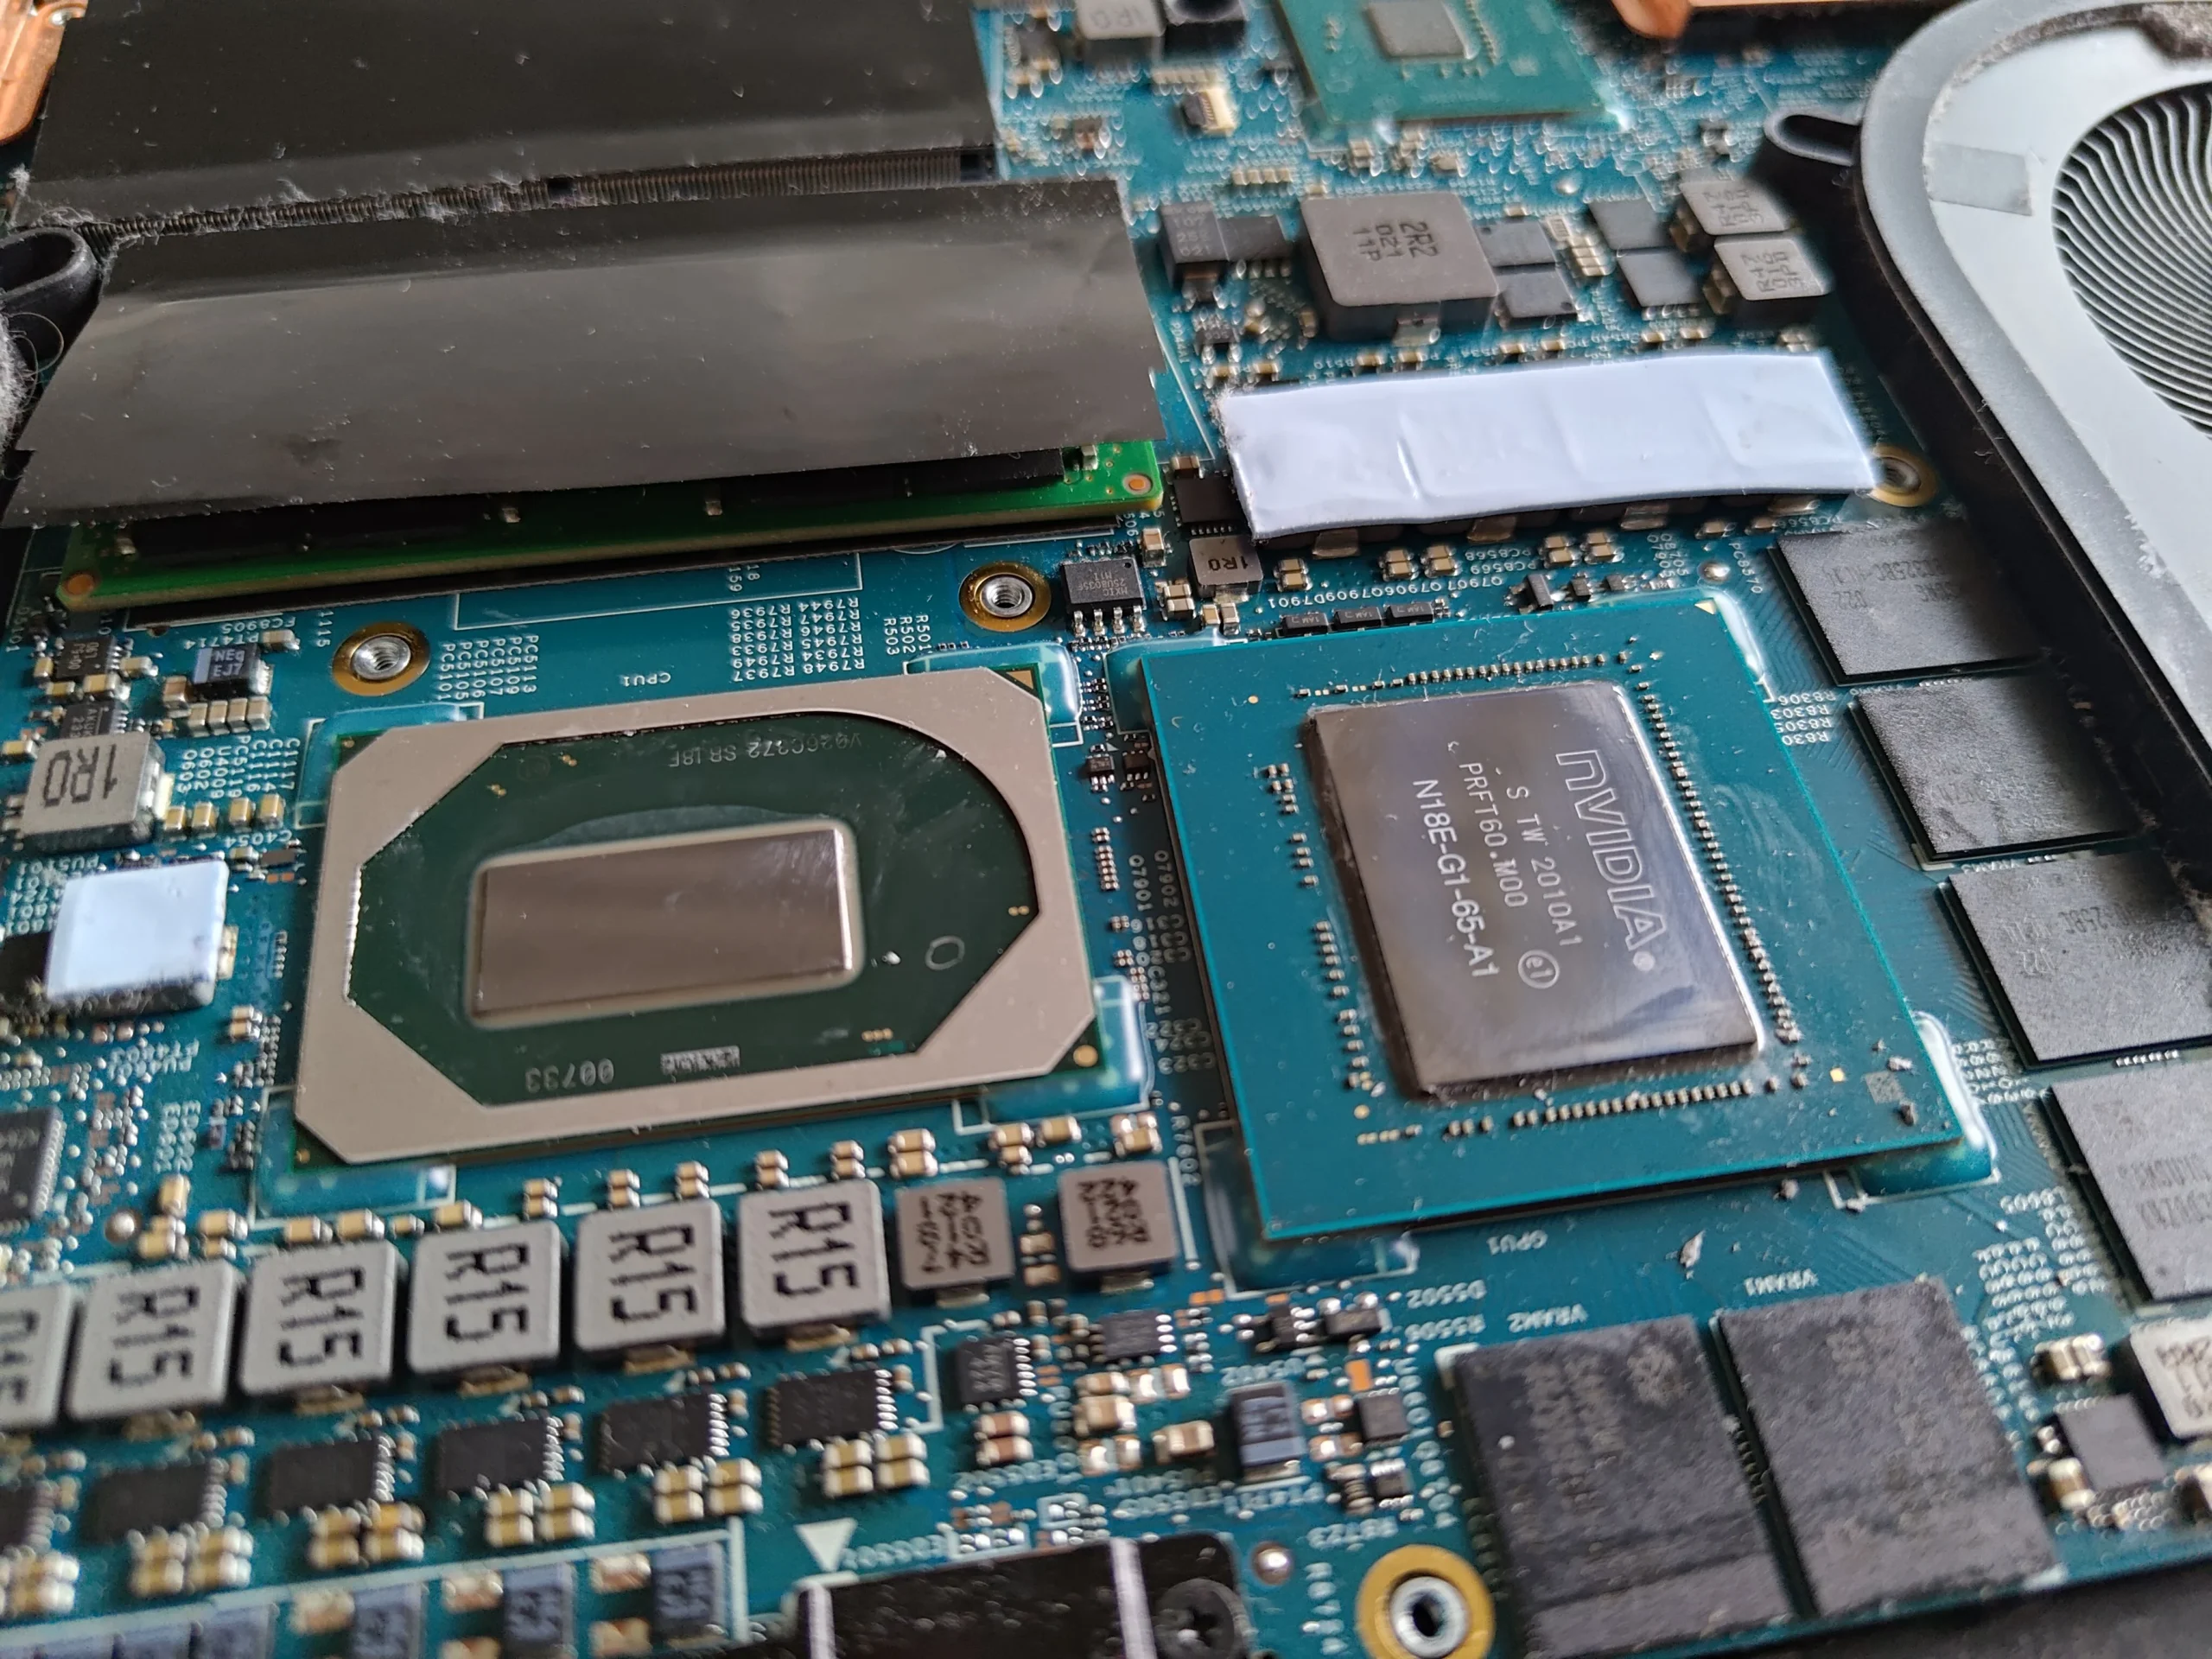
The removed copper cooler shows two principal contact plates, and board photos show the matching chip surfaces with old thermal material. Smaller pink thermal pieces are visible nearby. Their position and thickness are part of the cooler's design.
If the assembly is lifted, clean and renew chip paste and preserve the correct treatment of the smaller components. An even mount matters; adding a random pad thickness can stop the main plates seating properly.
04 / Closing the air path
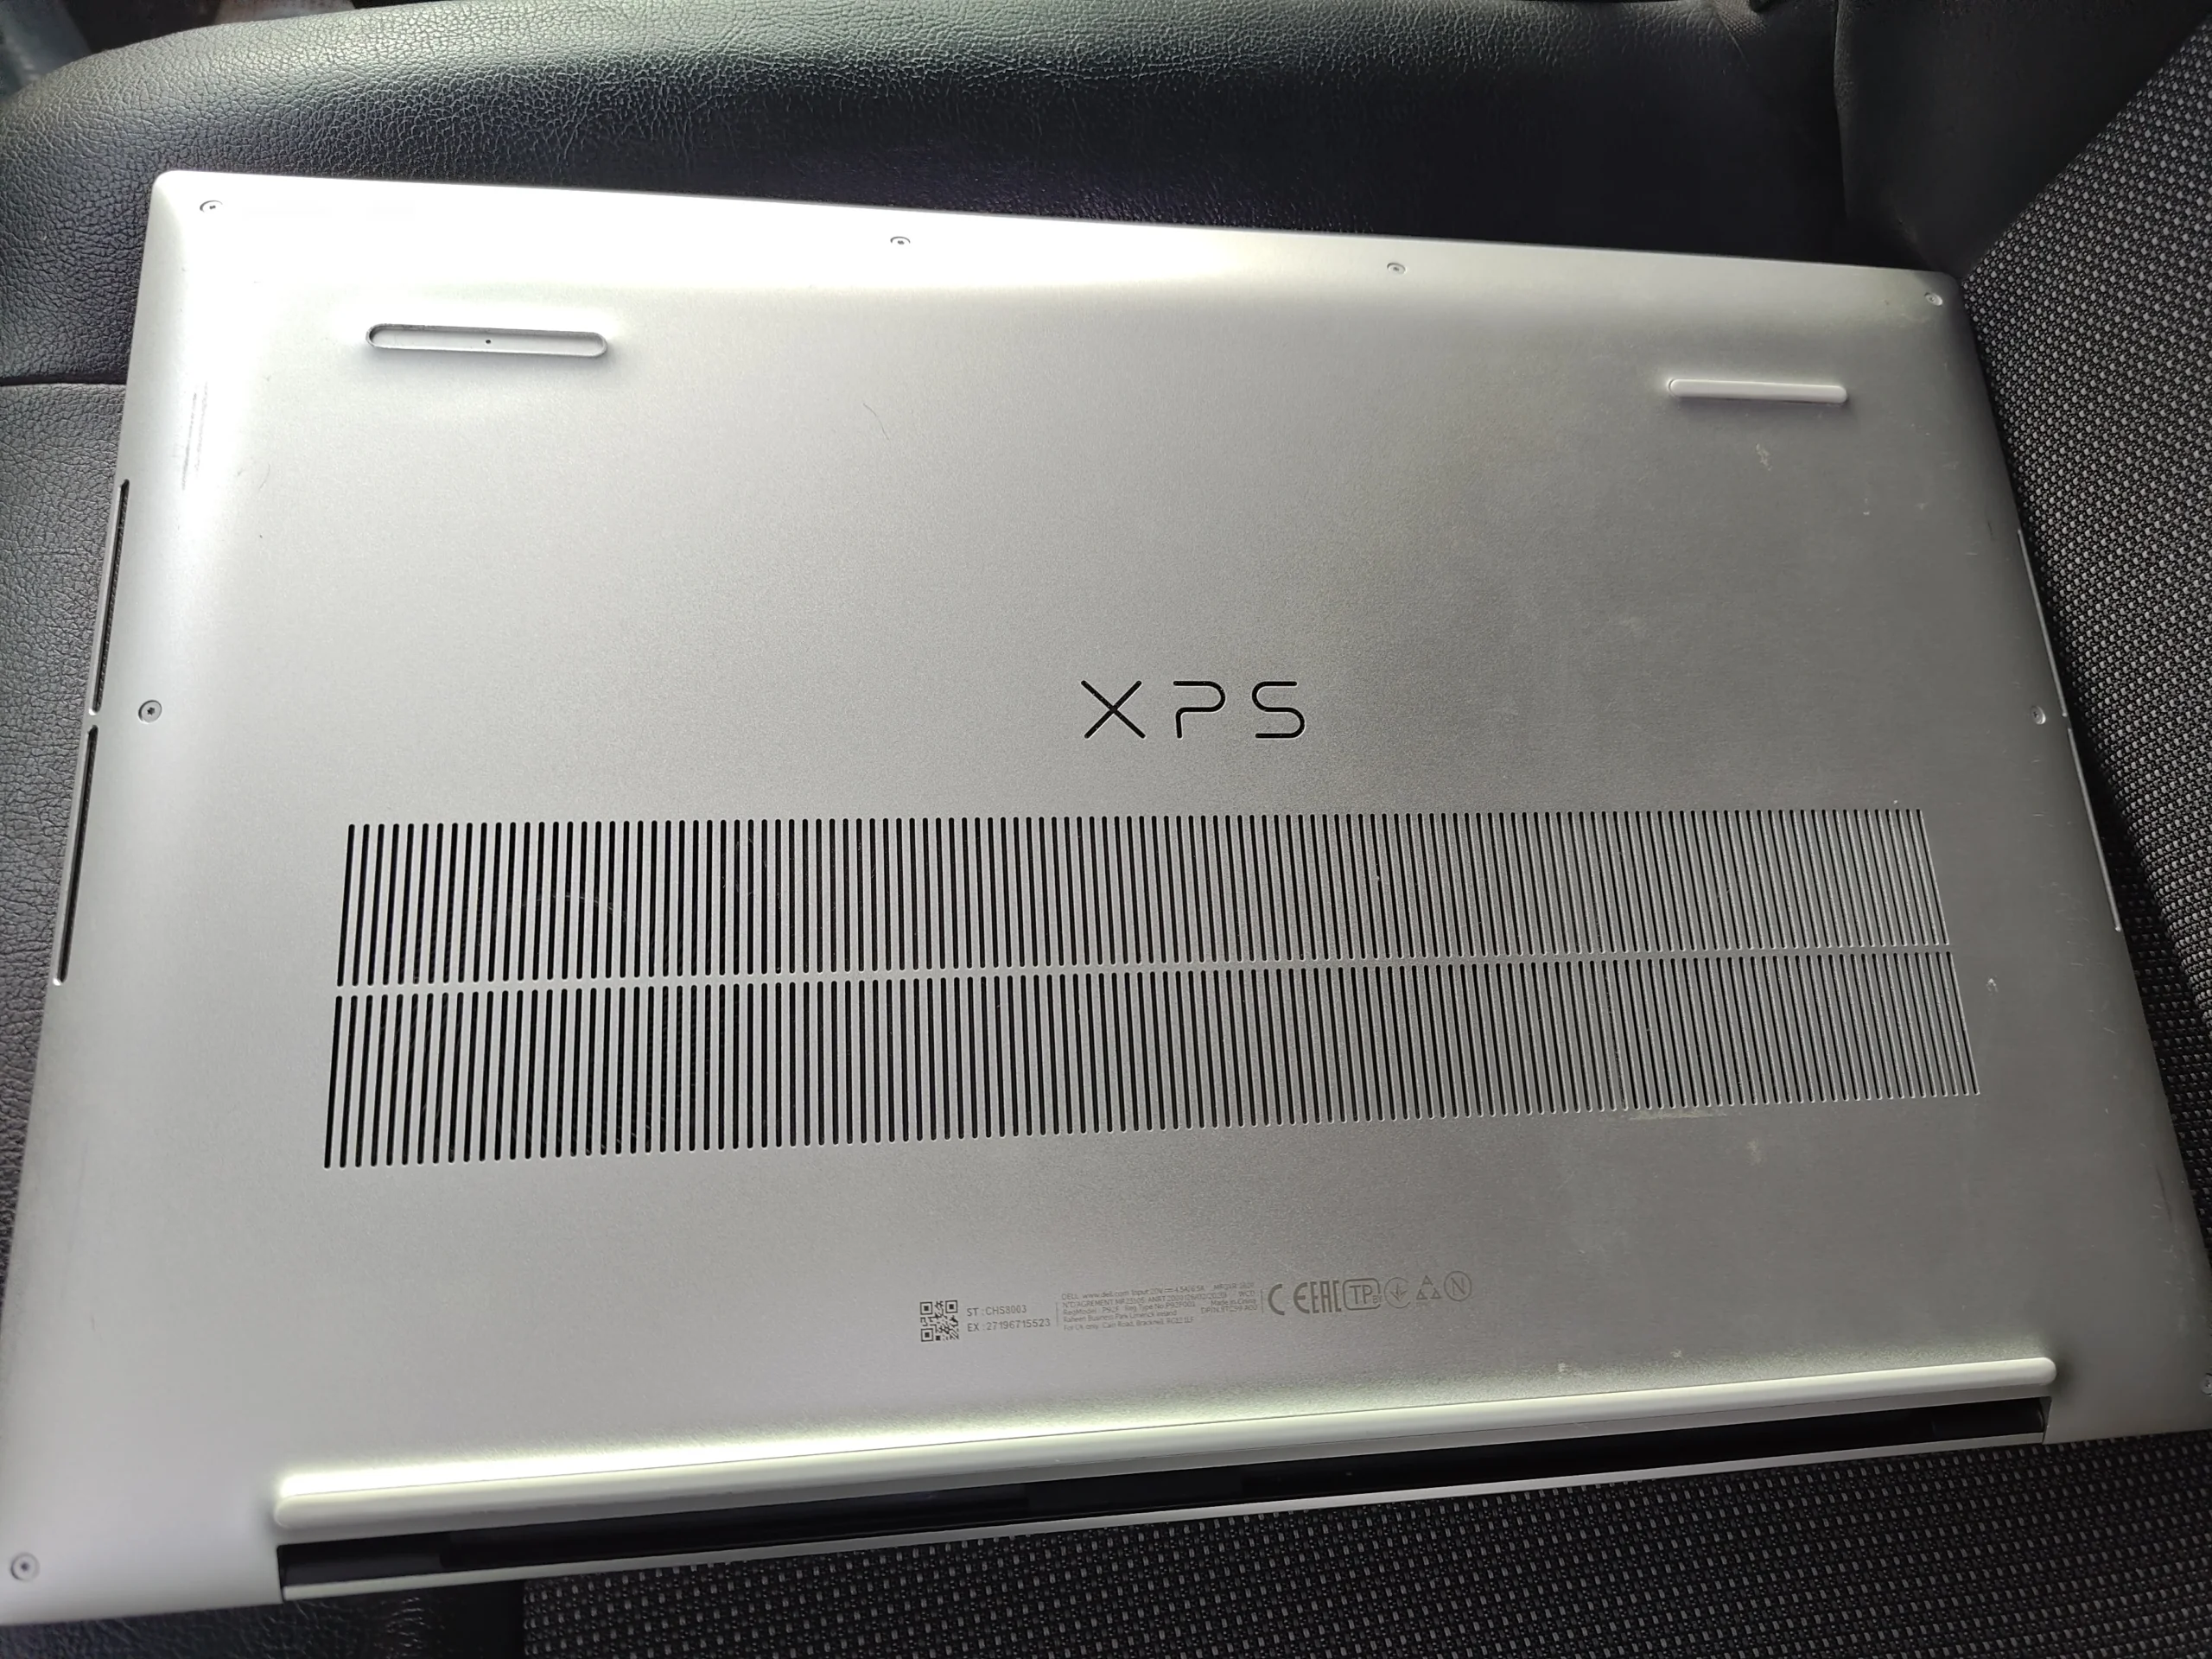
The bottom intake and both fans must be clear at reassembly
The silver underside has a long perforated intake. Check it on both sides before reinstalling the cover. Make sure screws return to their own holes and no thin fan lead is trapped beneath the panel.
After power-on, check both fans under appropriate demand and compare temperatures under the same workload if earlier readings exist. The archived screenshot alone cannot establish a service improvement.
The engineer’s takeaway
This XPS shows how a thin chassis fits two fans, one shared cooler and a narrow fin exit together. Fan cleaning, fin inspection and thermal-contact restoration are related but distinct parts of a thorough service.
Before you open the laptop
Can you clean a Dell XPS like this yourself?
Shut down, unplug the charger and use Dell's service instructions for your exact XPS model. Map the base screws and disconnect the internal battery as directed before touching fan cables or the board. Thin covers and connectors need light handling.
Clean accessible vents and fan dust with the rotors held still. If compacted debris requires cooler removal, prepare the correct paste and smaller thermal materials first; the broad copper assembly must seat evenly again.
After the clean
How to assess the XPS afterwards
Listen for smooth fan response and confirm that air leaves both intended exits. A thin laptop may change fan speed quickly with workload, so compare under the same task and room conditions.
There is no matched thermal test in this archive. If heat or noise persists, diagnose each fan and cooler contact rather than assuming a clean grille solved it.
Questions from owners
Dell XPS dual-fan cleaning FAQs
Answers based on the wide fan layout, fin bank and copper contacts in this XPS.
Do all Dell XPS laptops have two fans?
No. This photographed XPS has two, but the family spans several chassis. Check the exact model before using a guide.
Why inspect the fin edge?
Air has to pass through those narrow gaps. A hidden internal mat can remain after the visible fan blades are cleaned.
Do I need to lift the copper cooler to clean the base vent?
No. Accessible vent and fan cleaning can be separate. Cooler removal is only needed for deeper work and disturbs thermal materials.
What are the smaller pink pieces near the cooler plates?
They are thermal-interface pieces for nearby components. Their original position and thickness need to be preserved if the cooler is removed.
Can a hardware-monitoring screenshot prove the clean helped?
Only matched tests under comparable conditions could support that conclusion. This archive does not provide such a pair.
What exact XPS model is this?
The photos identify a Dell XPS laptop, but do not give a confidently publishable exact submodel here.
UK Dell XPS cooling enquiries
Need the XPS fin exits checked?
If you are in the UK, tell us the exact XPS model from your order or underside label, your postcode, and whether the fan noise or heat occurs during ordinary work or demanding tasks.
Mention any earlier repaste or fan replacement. That helps us distinguish a dirty outlet from a fan or cooler-contact problem.
Read about our laptop cooling service, then use the form to tell us your computer model, symptoms and UK postcode.
Free to enquire · No obligation to book. We discuss the proposed work and price before you decide.
The workshop photos
Dell XPS dual-fan and copper cooler gallery
Open the workshop photos for the two-fan layout, narrow fin bank, copper contacts and underside intake.