Published 8 November 2026 · Lenovo Legion 5 case study
Legion 5 cooling clean
the fan was not the tightest part of the air path.
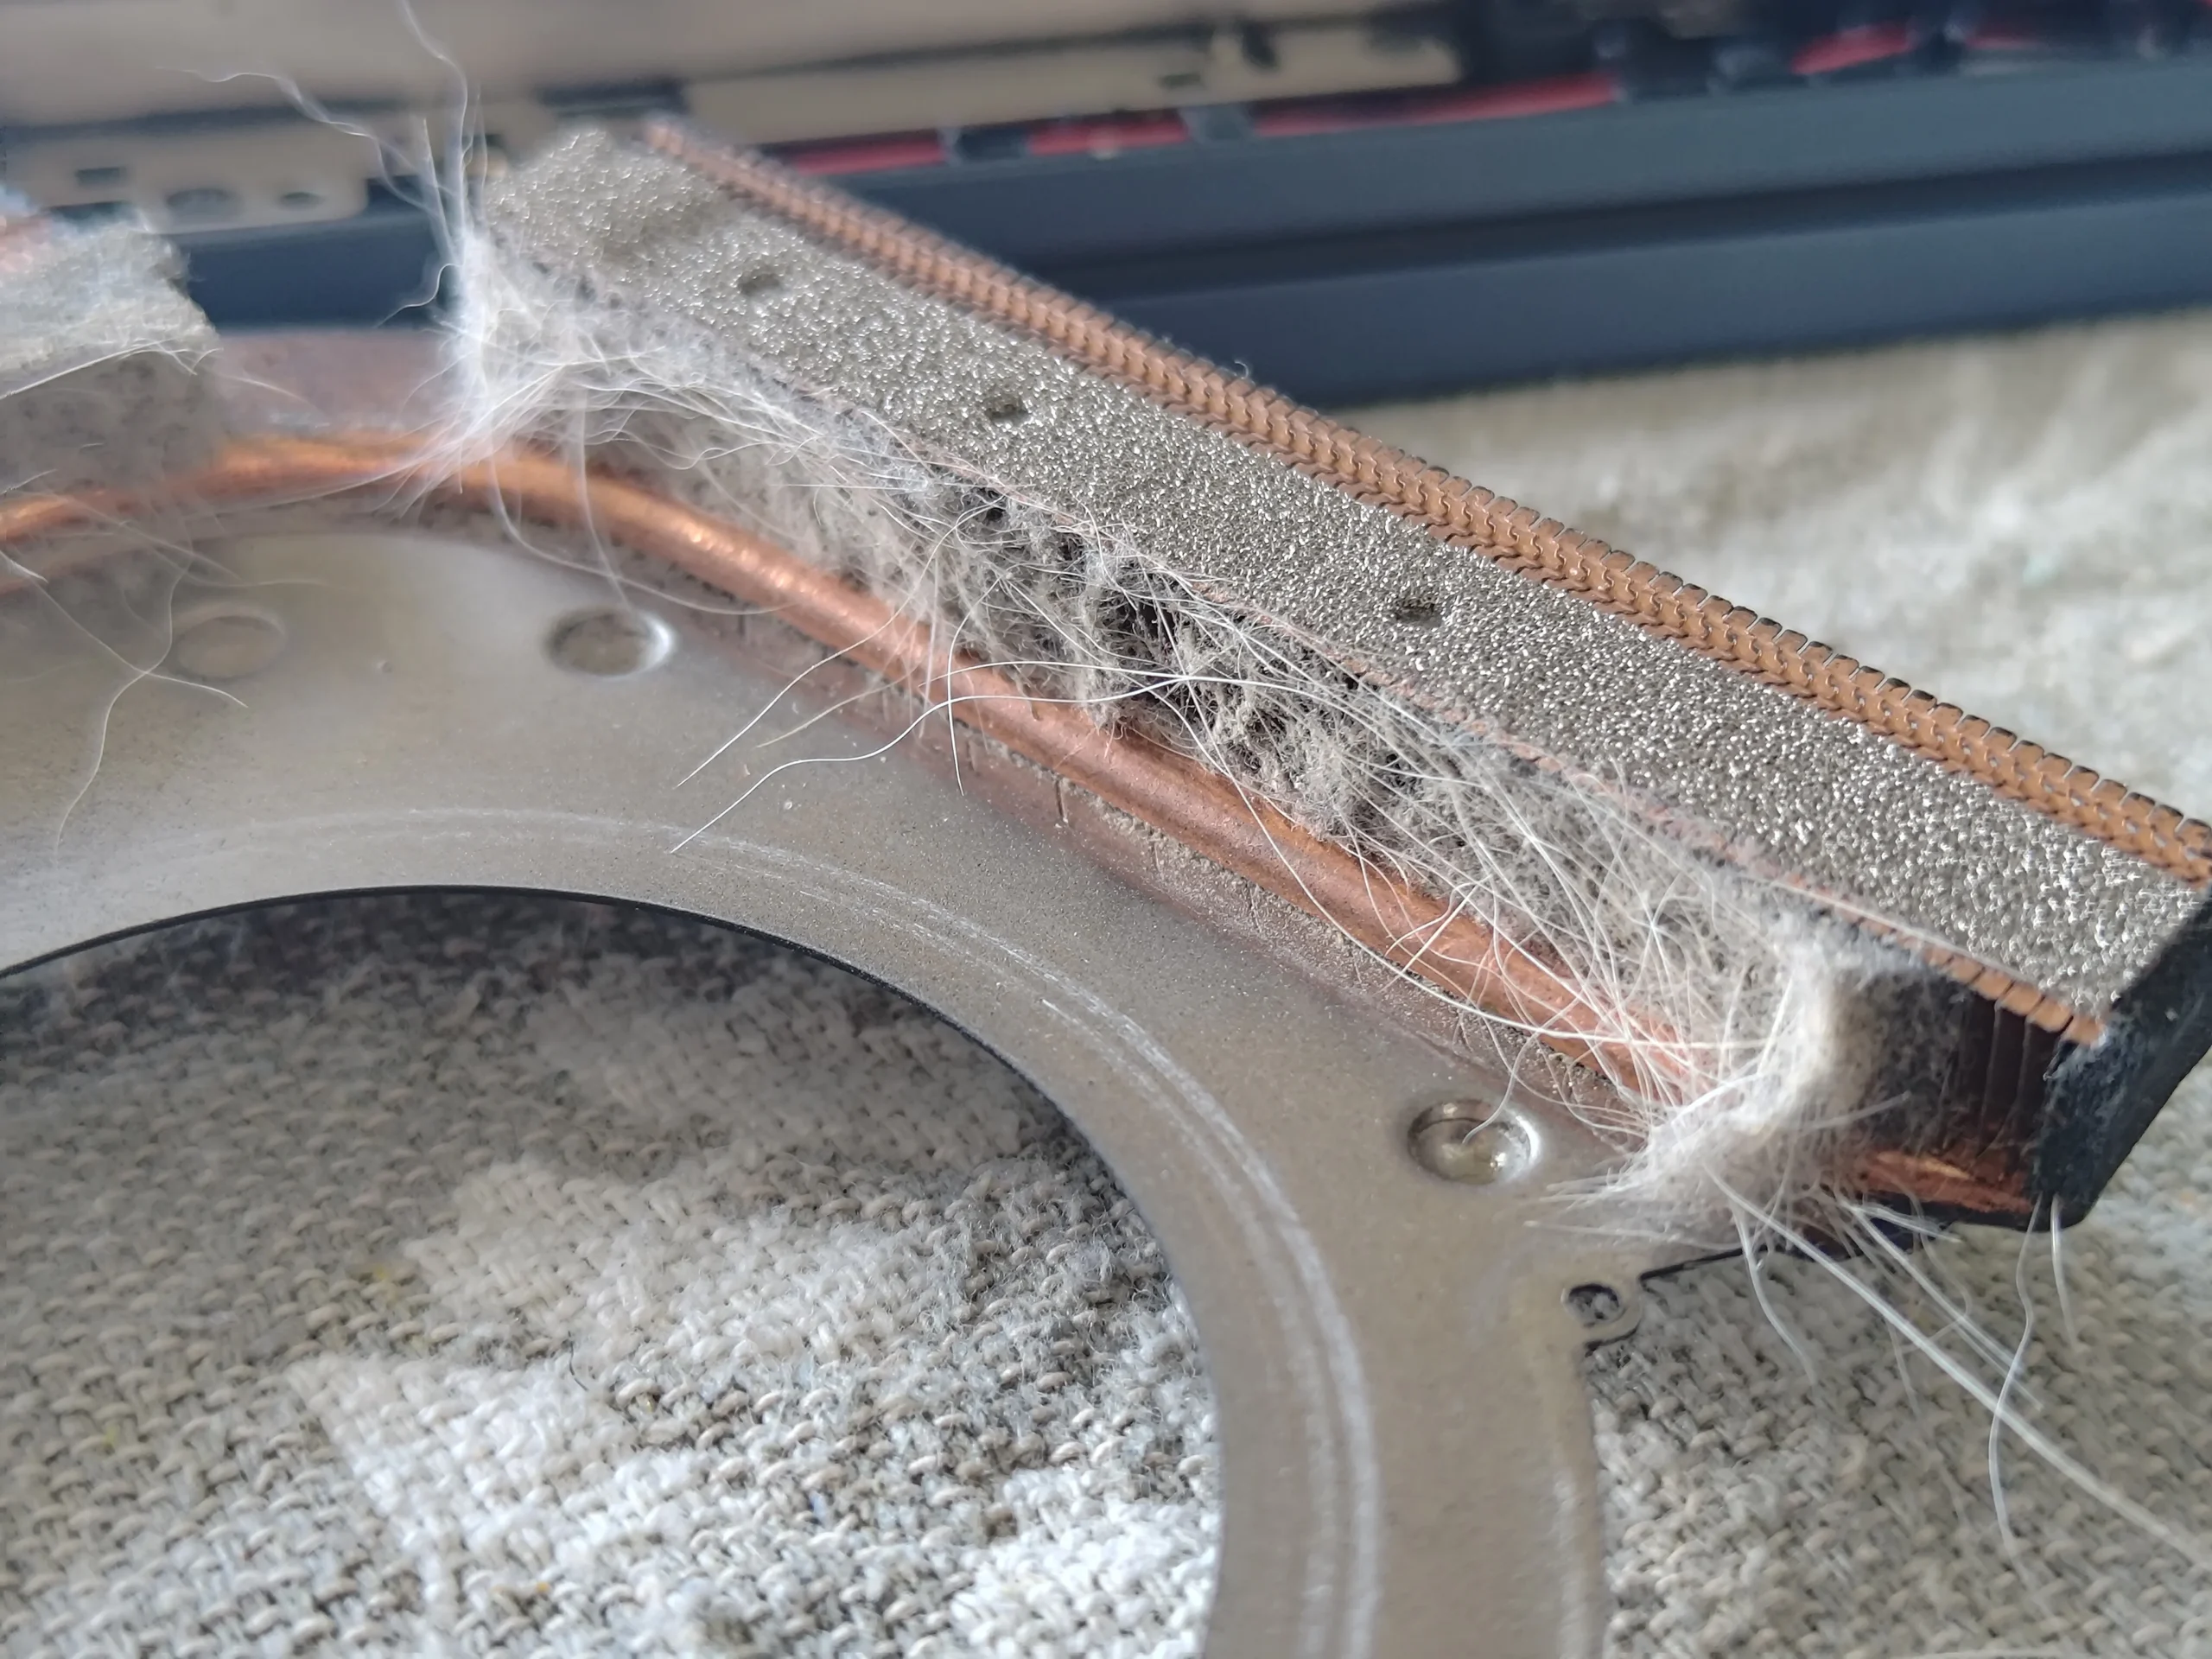
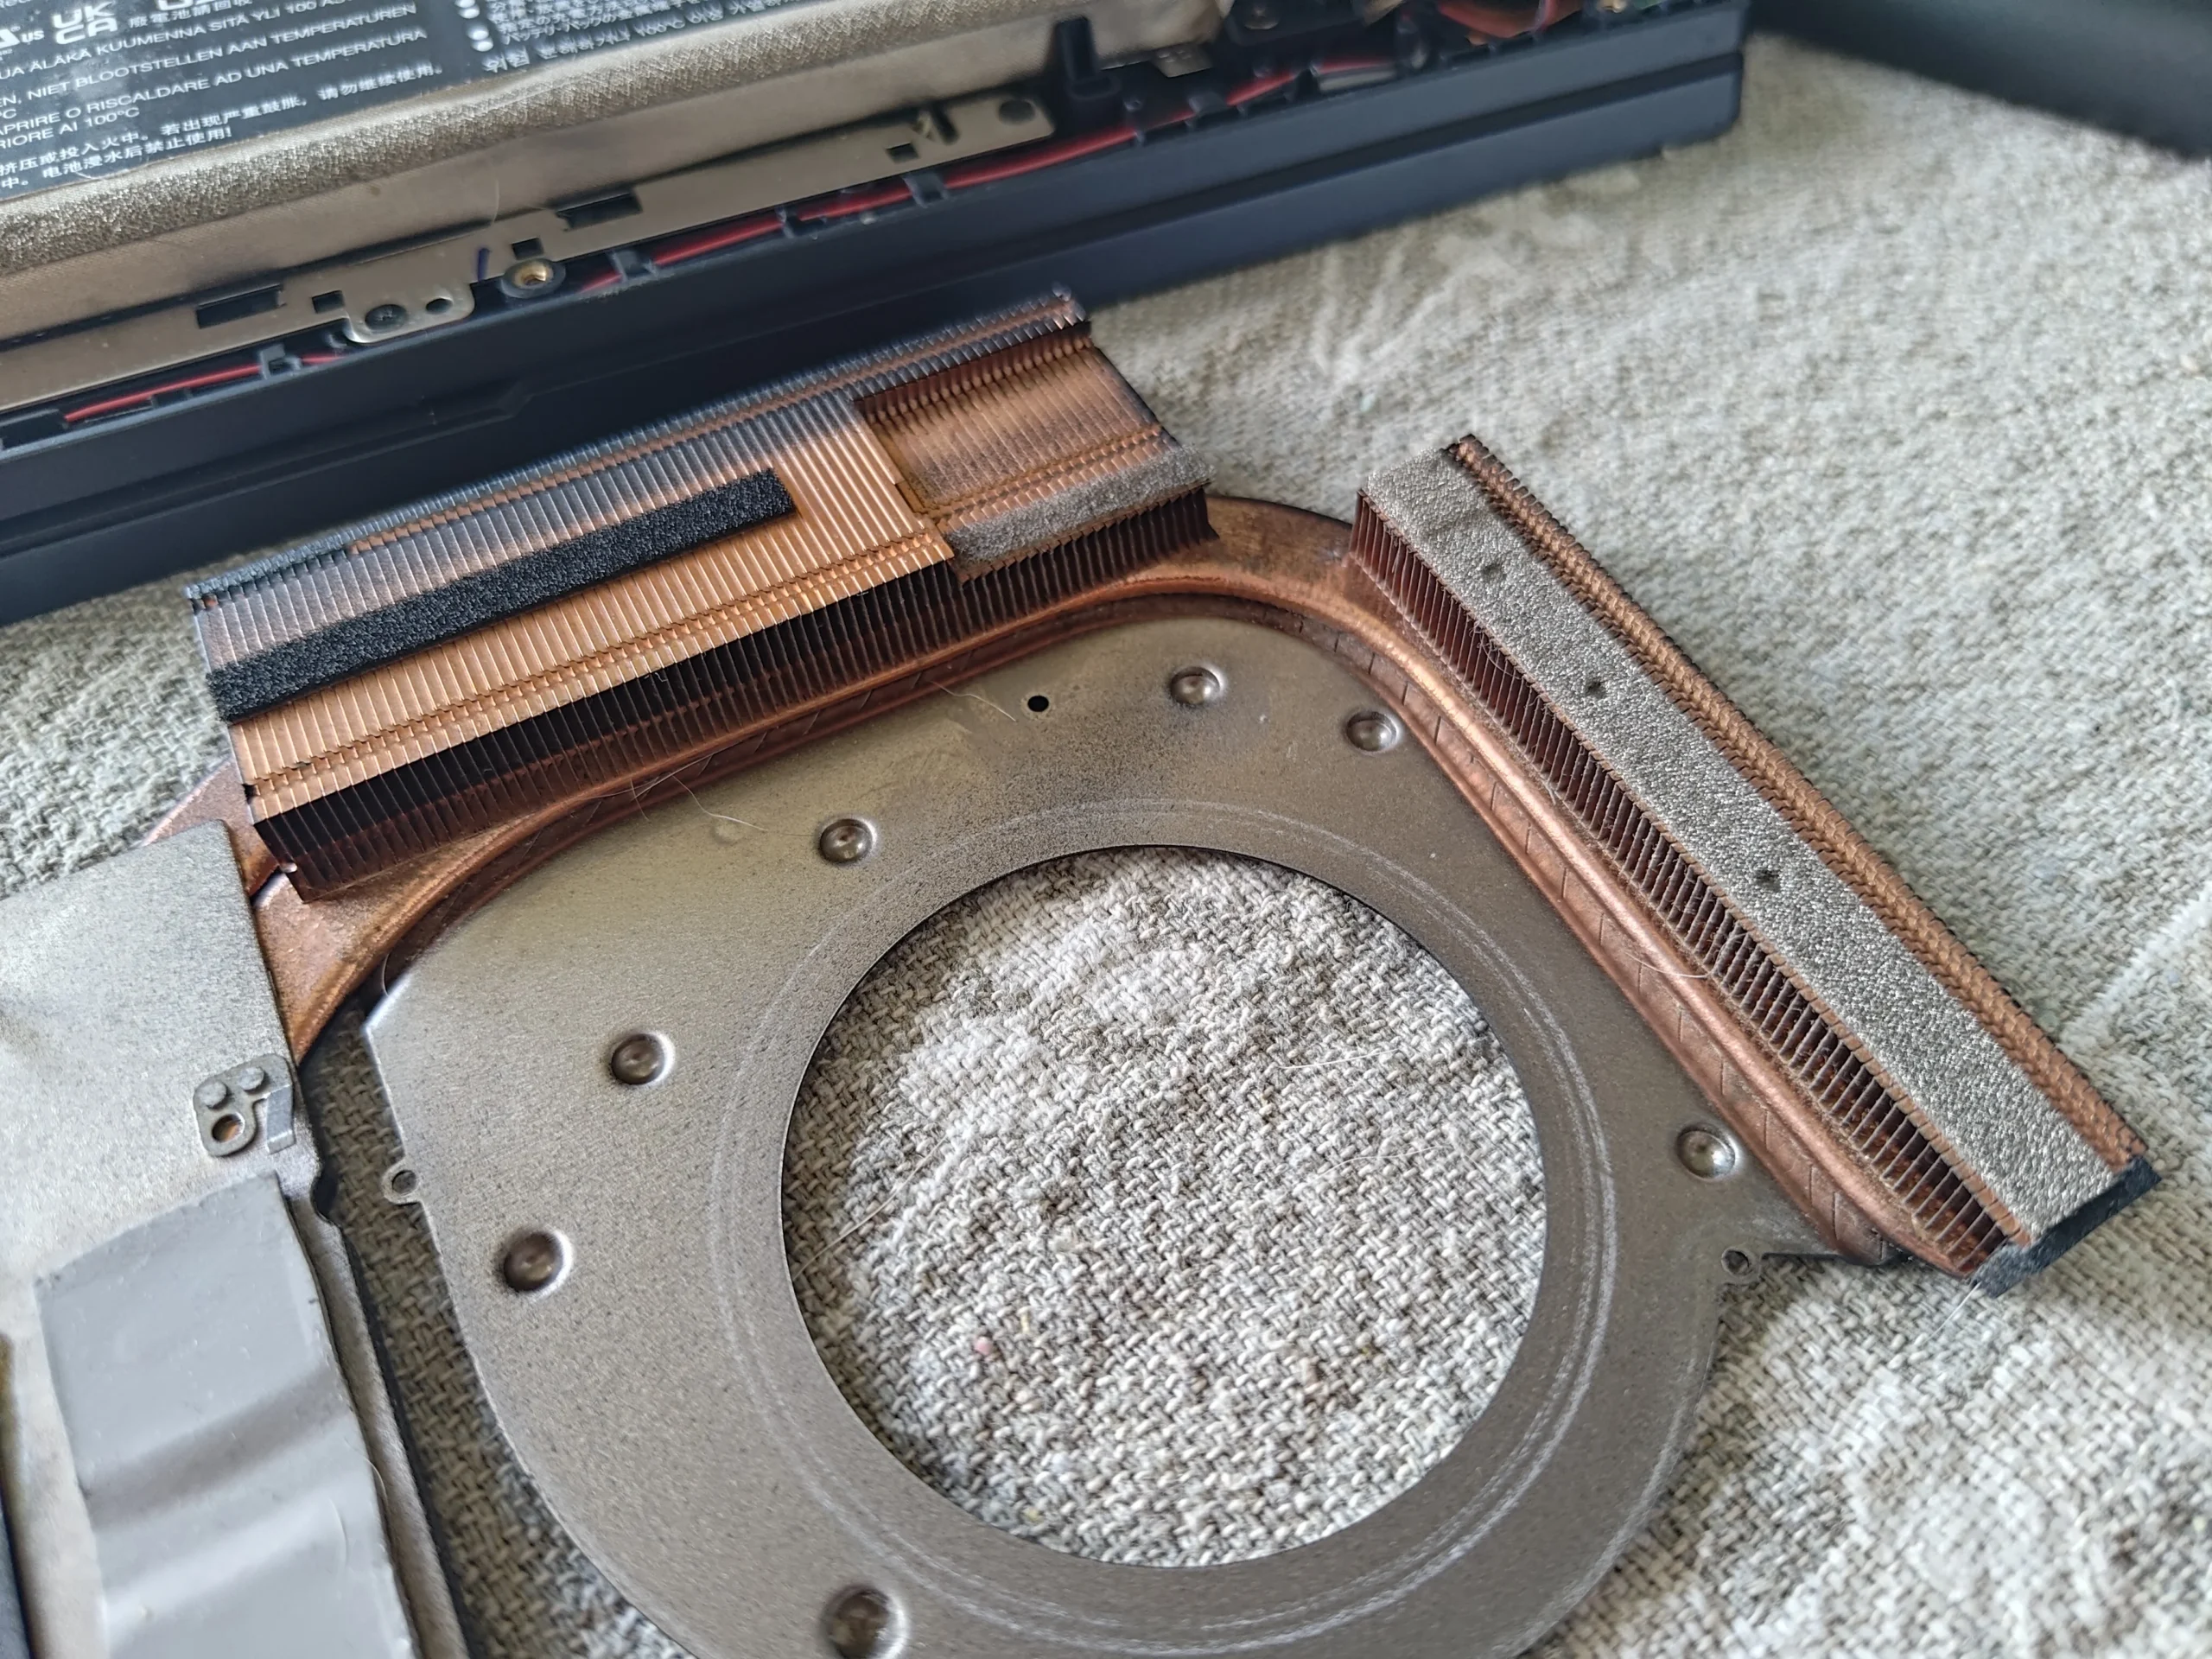
The photo that explains this service is the removed cooler: a long strip of lint clings to its fine copper exhaust edge. The archive also follows two fans and the thermal surfaces beneath the shared heat-pipe assembly.
The machine
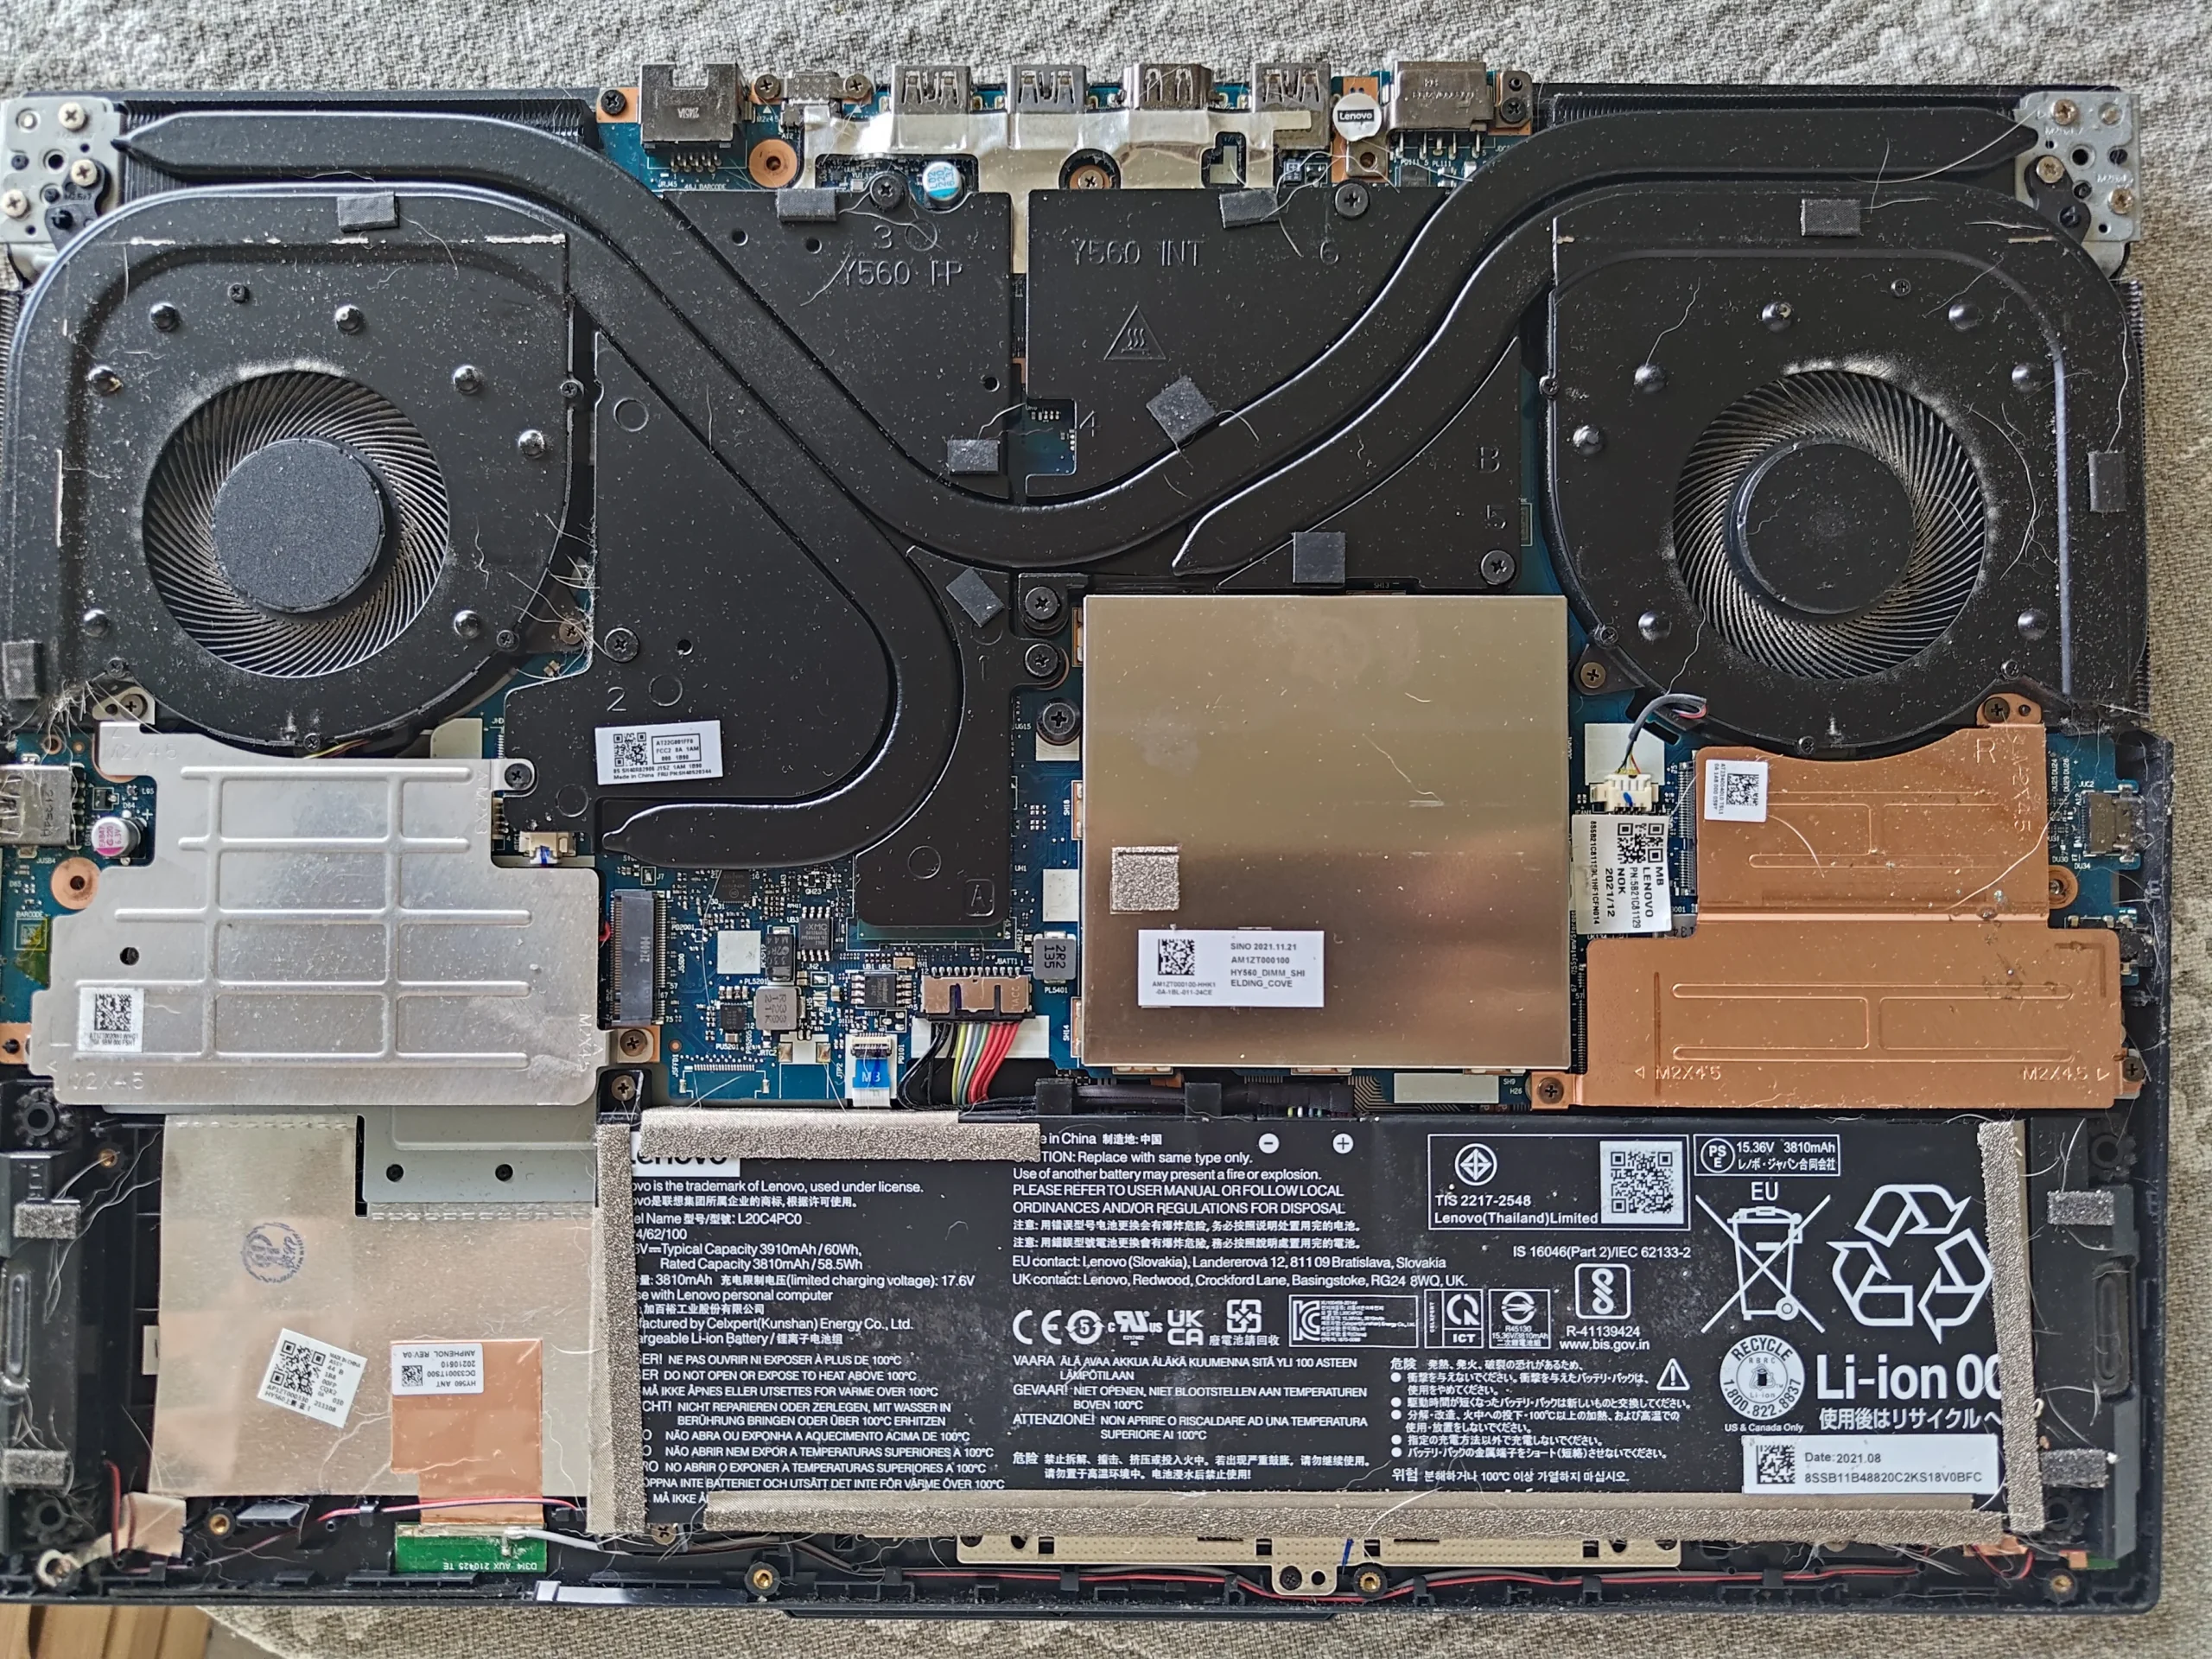
Lenovo Legion 5 with two blower fans
Main obstruction
Lint packed along the copper fin edge
Other work shown
Chip and cooler contact surfaces cleaned and prepared
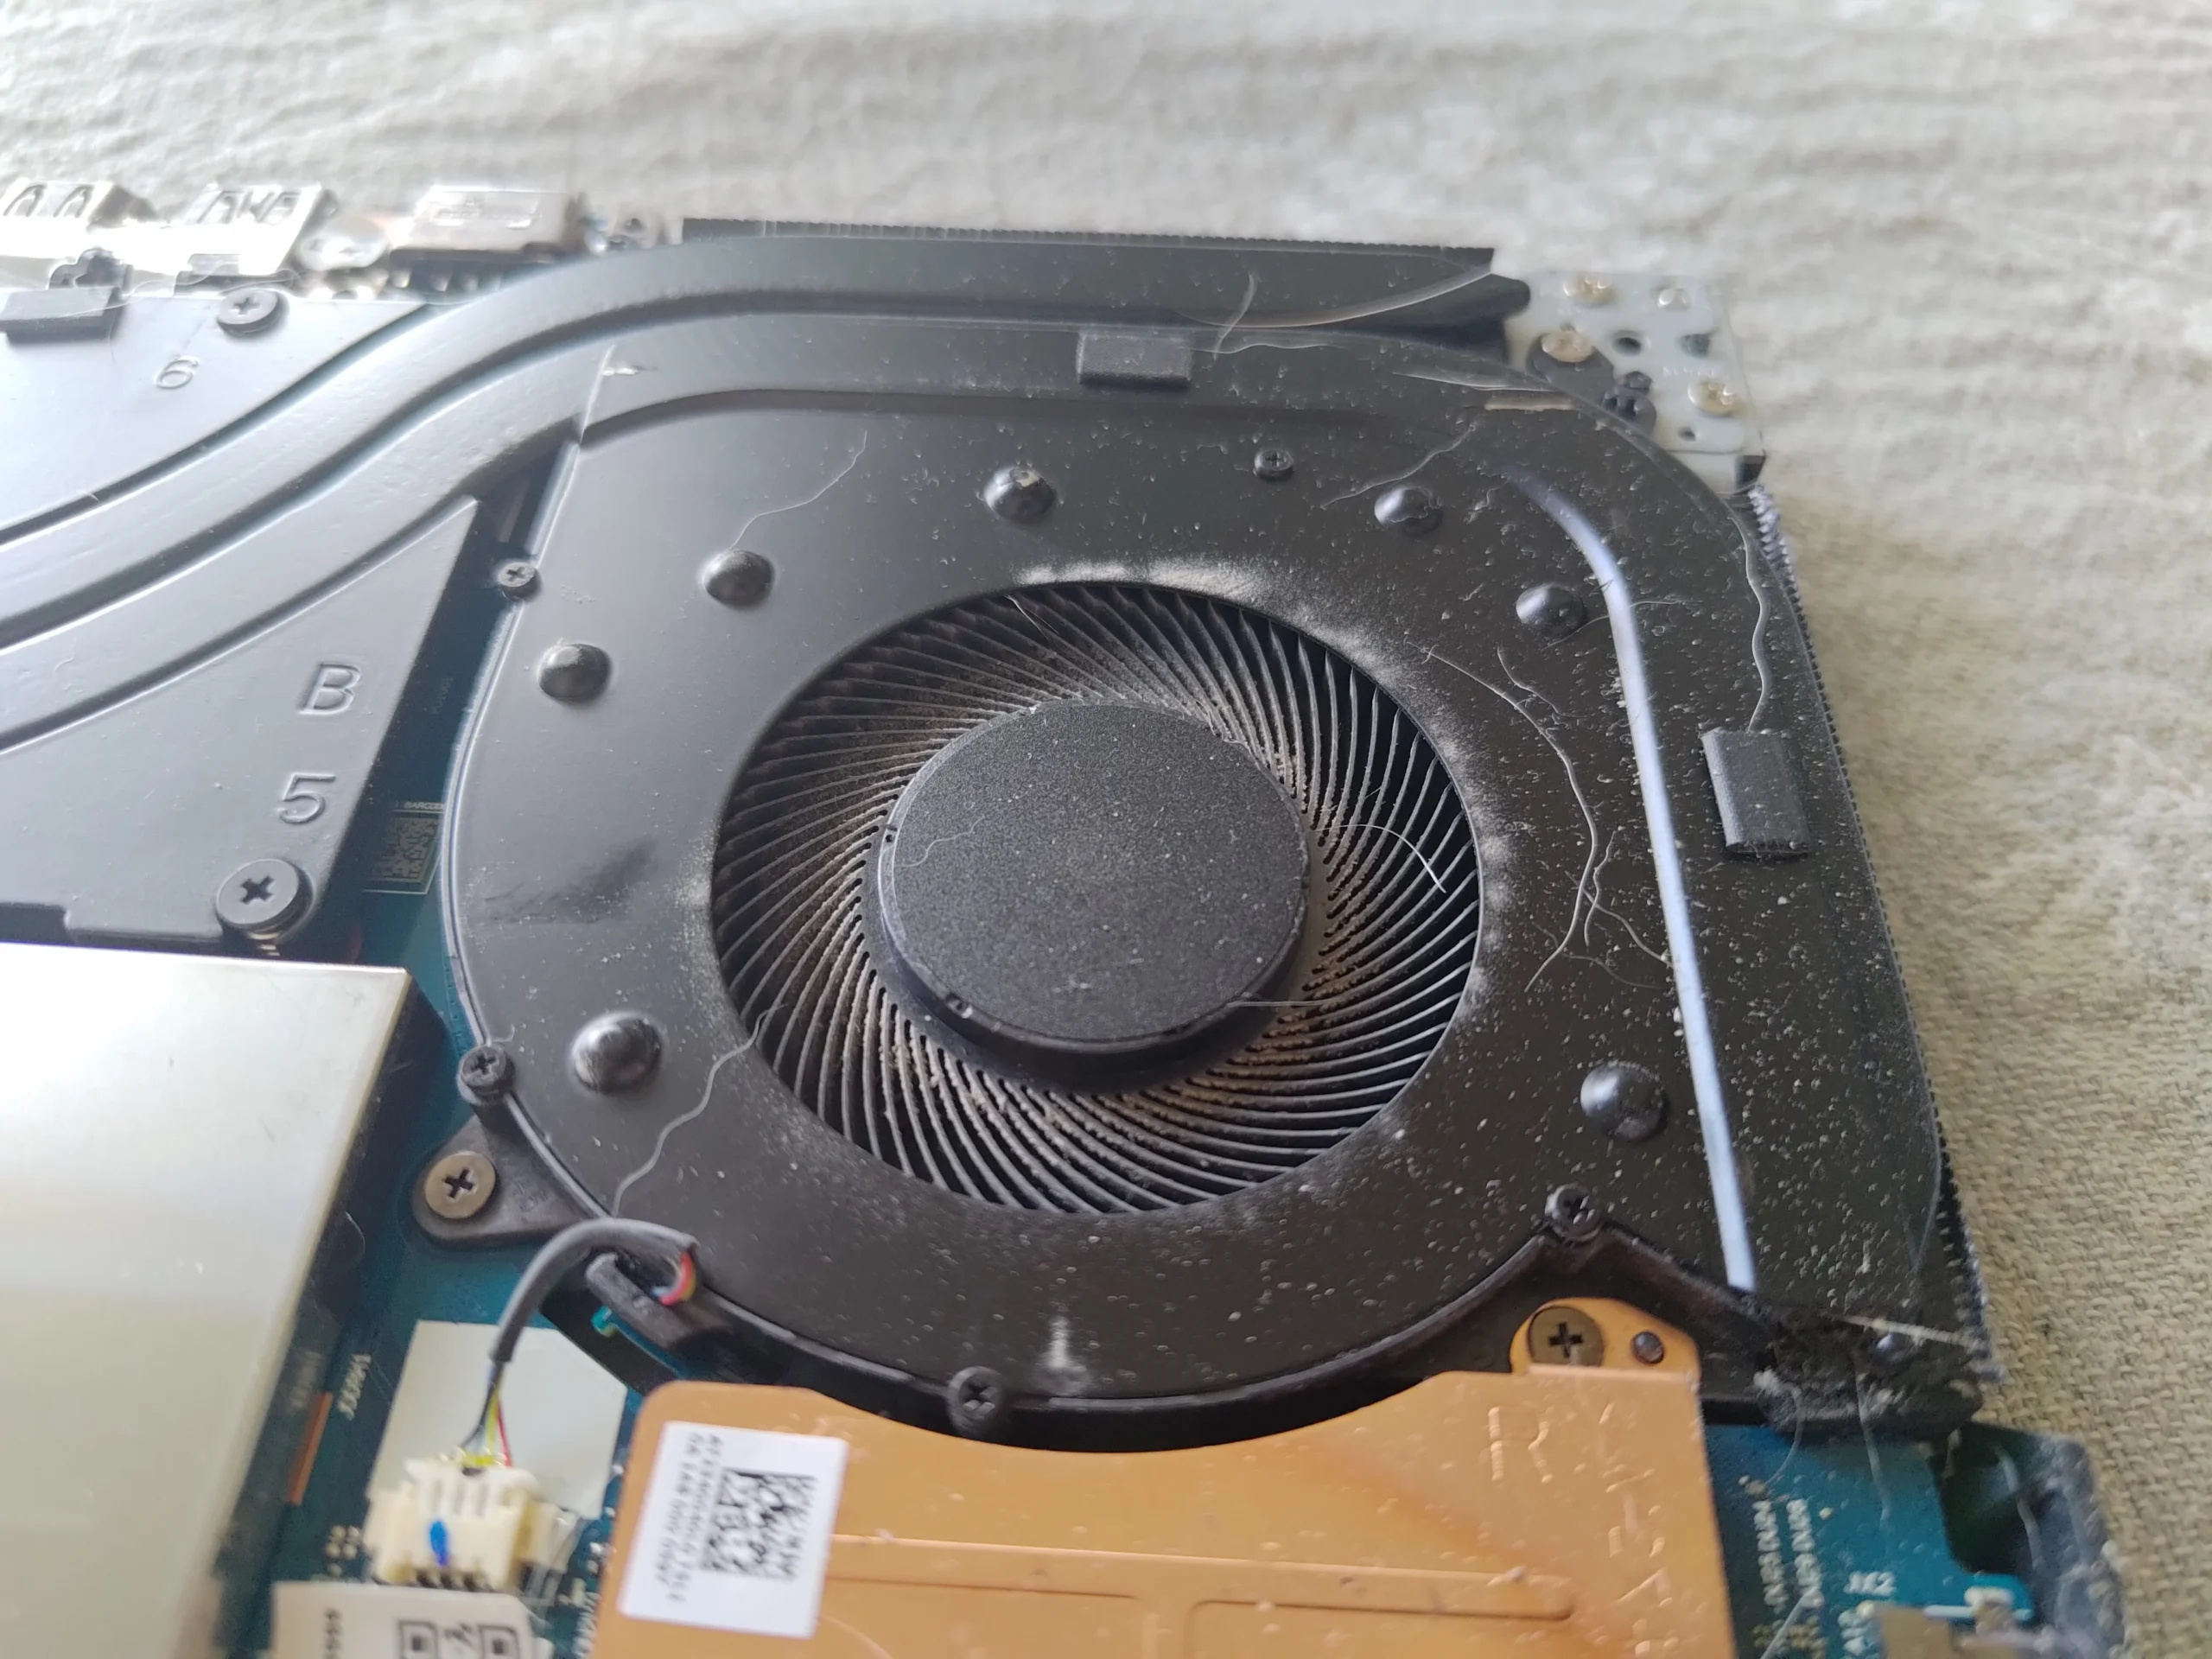
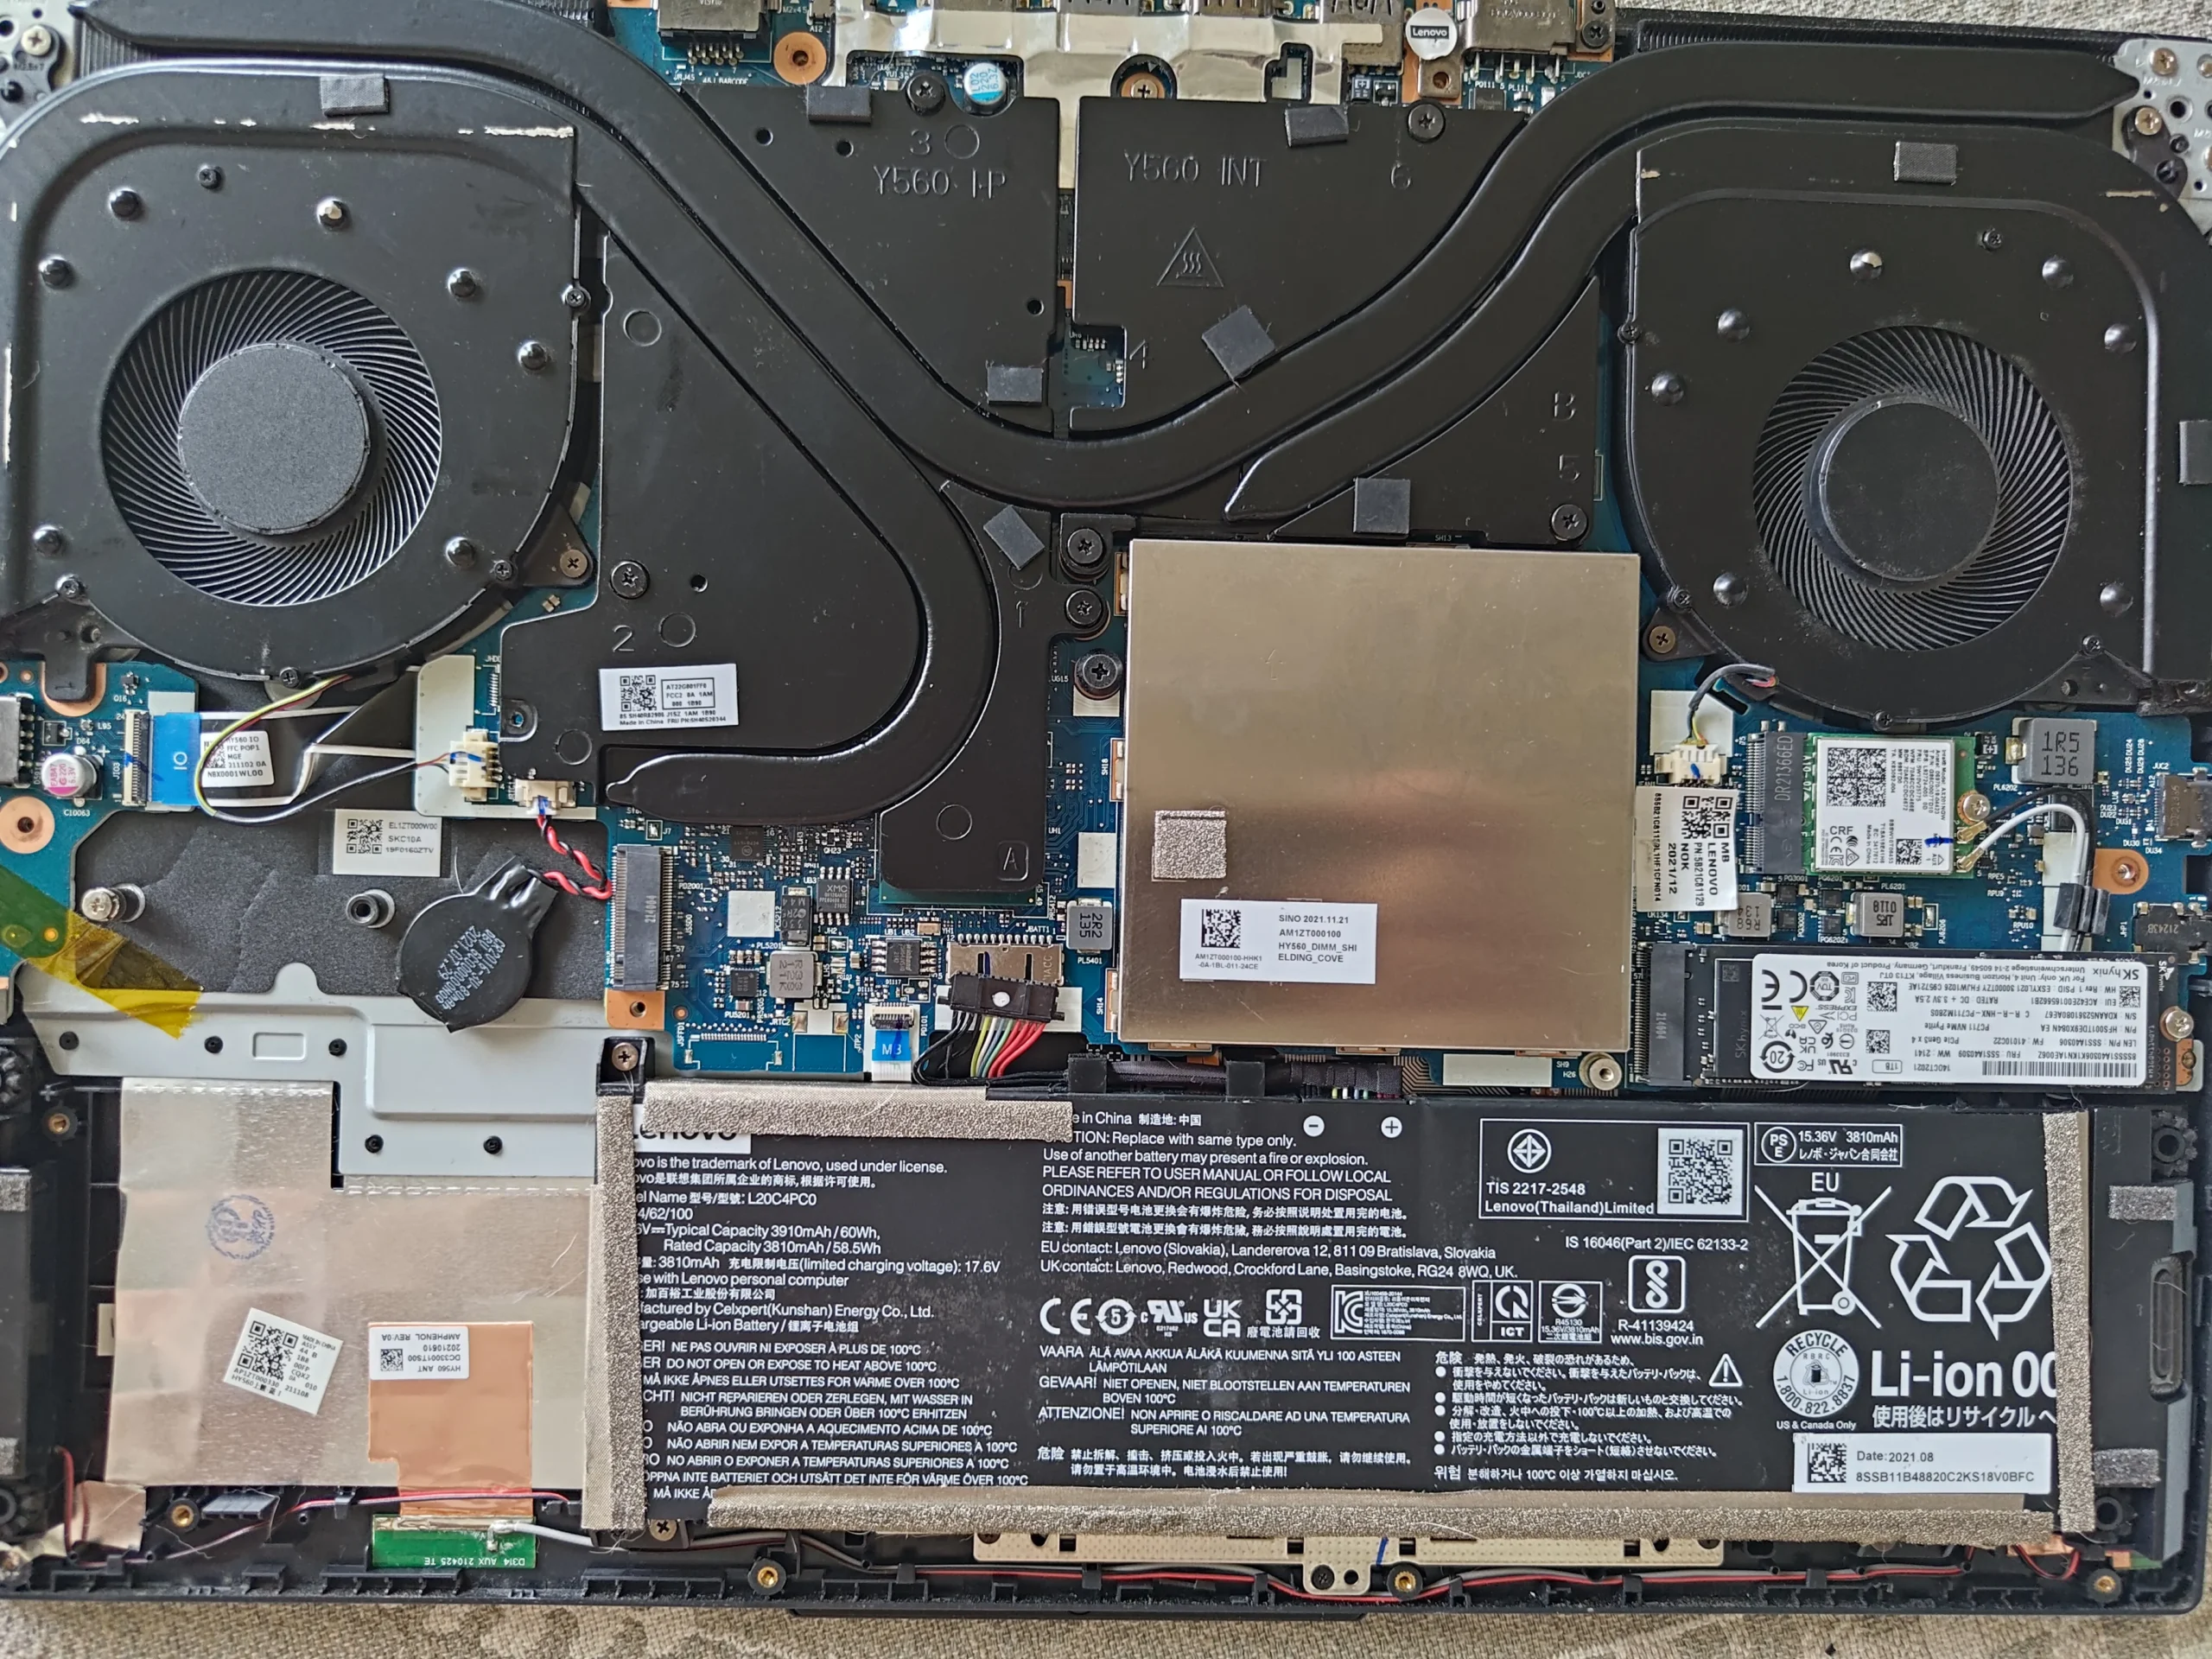
From above, the opened Legion looks like a familiar gaming laptop: two round blowers at the corners and a broad shared cooler across the chips. The removed assembly tells the more useful story. Fibres had collected in a continuous band along a copper fin stack, right where a fan tries to push heated air out.
The photos show the cooler removed, dusty fin close-ups, cleaned-looking later views and work on the old thermal compound. They do not include a controlled temperature comparison or confirm the precise Legion 5 submodel. This case stays with what the photographs can establish.
In this case study
01 / The hidden bottleneck
A strip of lint followed the copper exhaust fins
The close-up of the removed cooler shows a pale, fibrous layer stuck to the fine fin edge. The fan blades may still spin normally with this obstruction, yet the air has less open area to pass through. It is an easy place to miss when the cleaning stops at the visible circular fan.
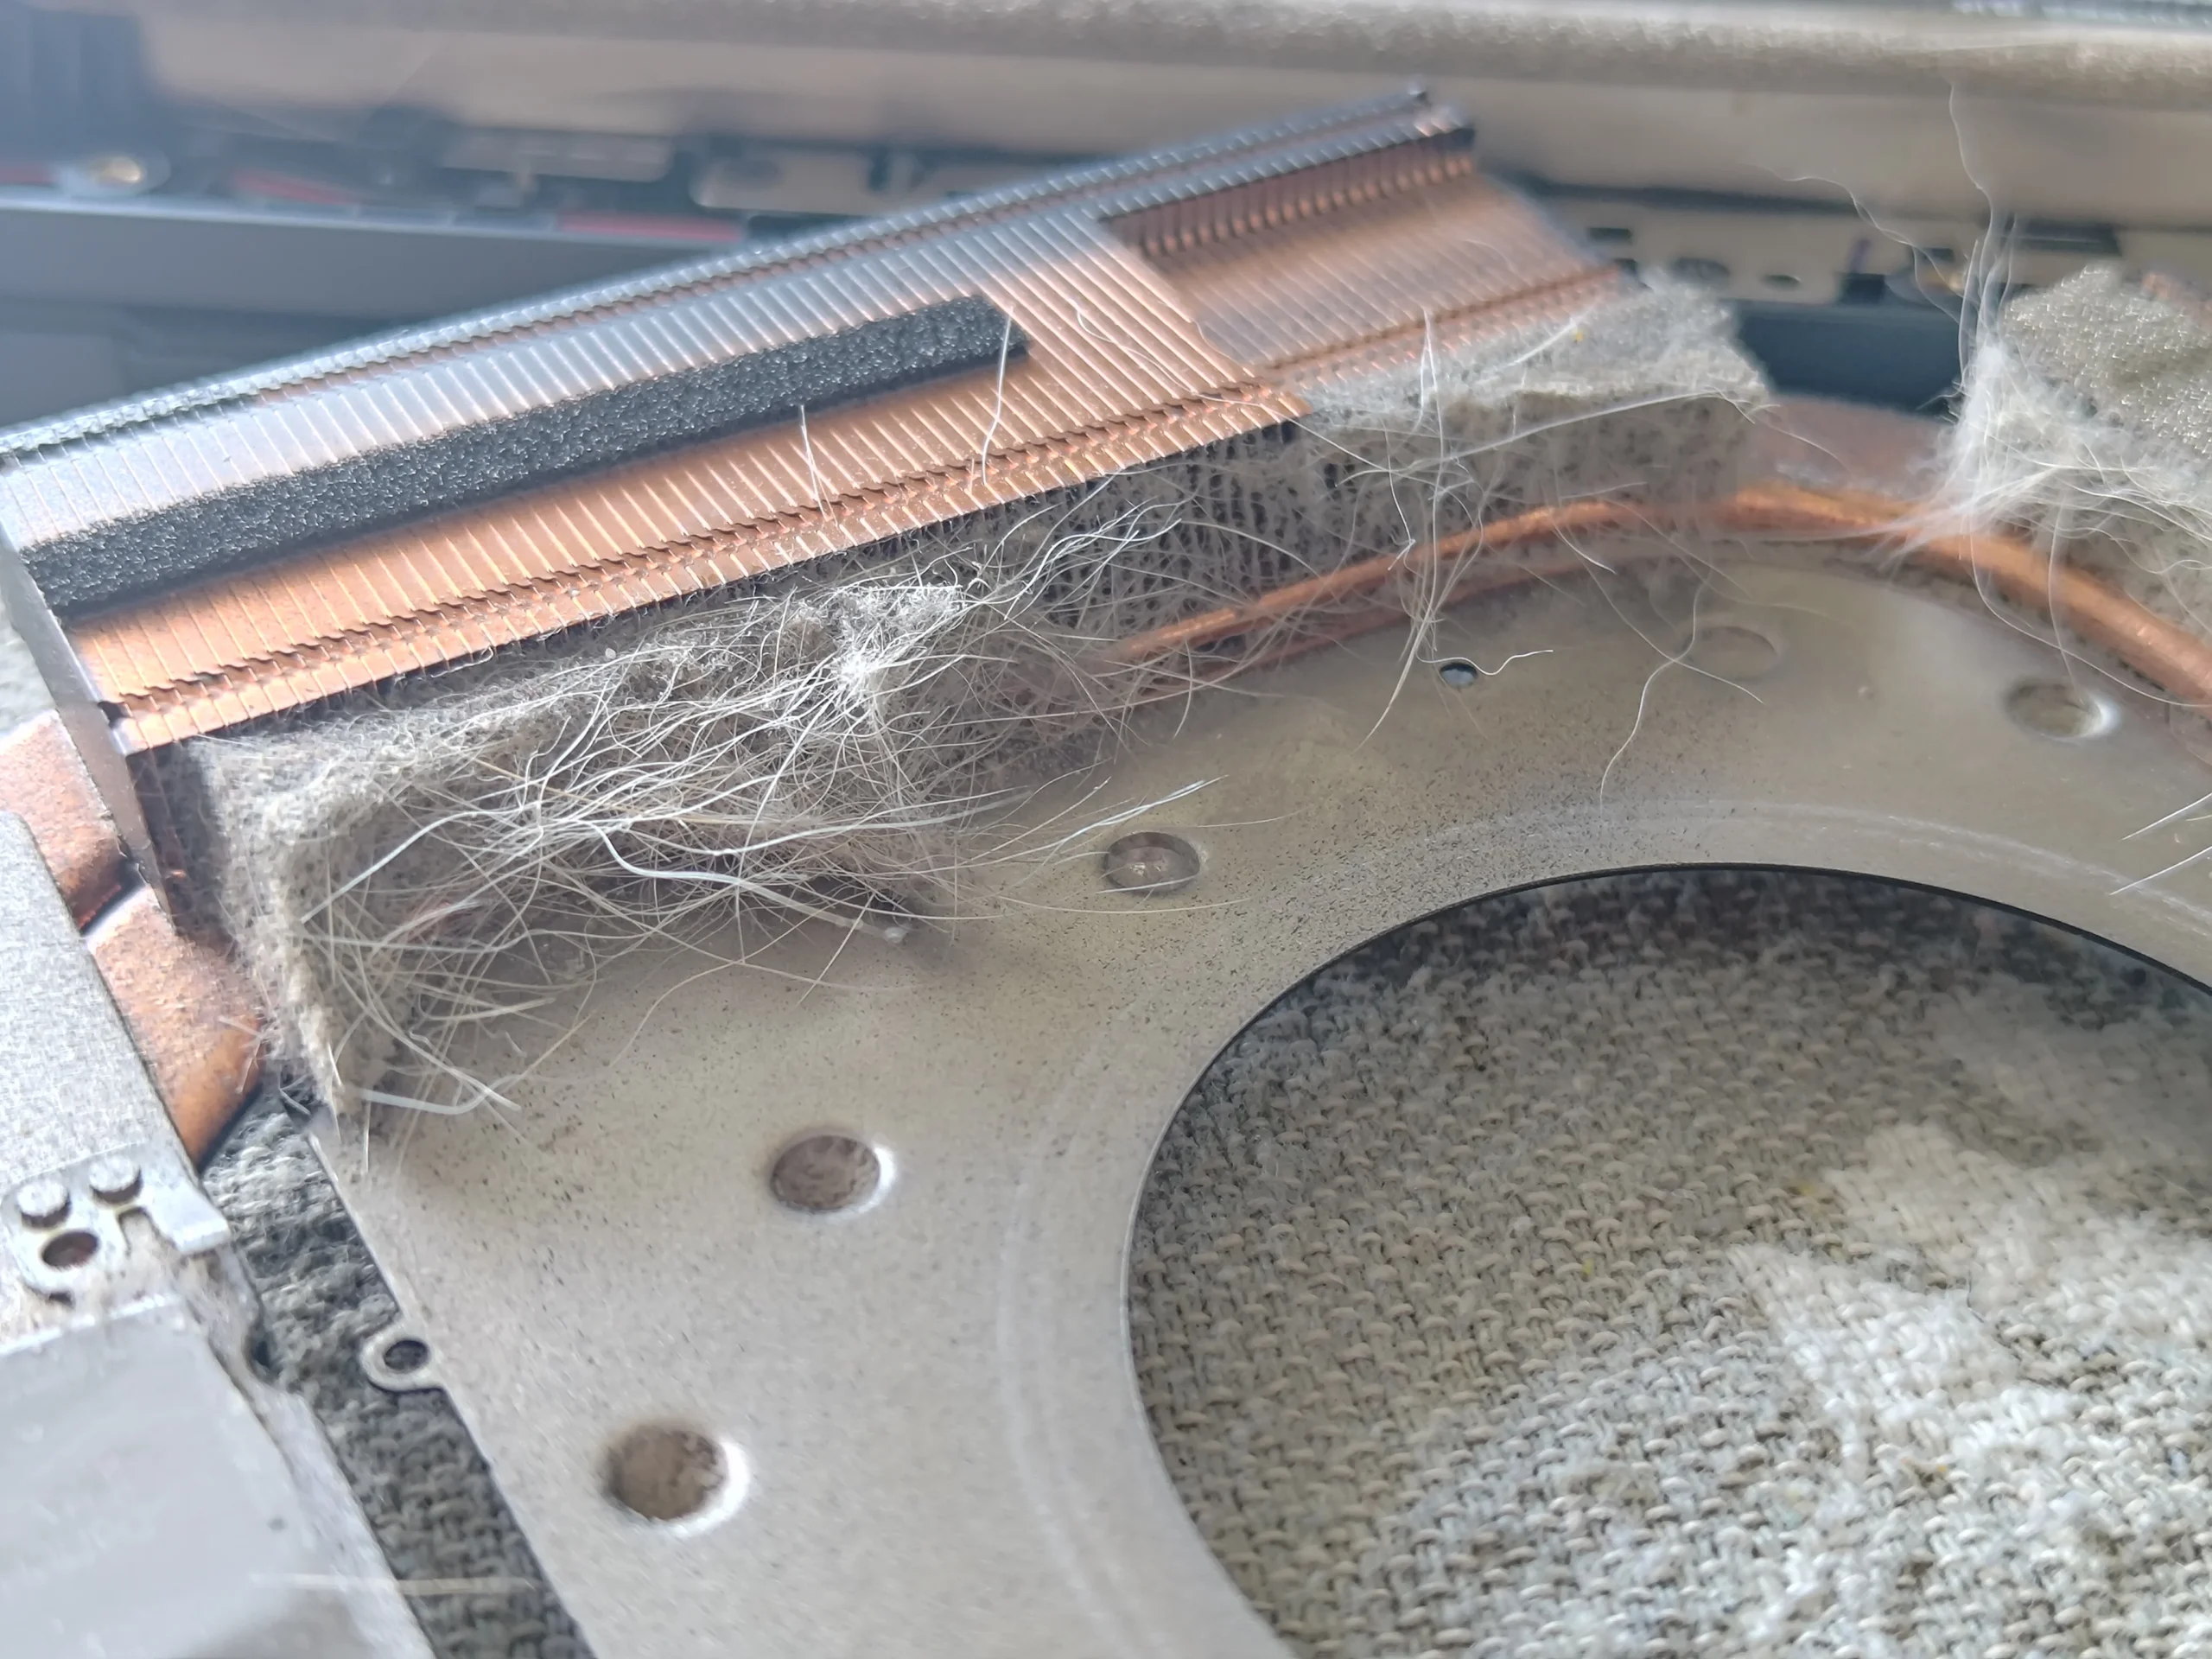
The later fin photo shows that edge much clearer. For a useful inspection, follow each fan to its outlet and look at the inner fin face, not only at the grille on the outside of the laptop.
02 / The cooling layout
The Legion's two blowers share the cooling job
An overview shows a fan on each side of the copper heat-pipe assembly. They move air across different parts of the same general thermal system, so inspect both blades, both housings and each exhaust route independently.
One close-up shows the fan housing after removal from the main chassis. Removing a fan or cooler involves small screws and fragile connectors; a DIY owner should photograph the layout and stop if a cable or mounting sequence is unclear.
03 / Under the heat pipes
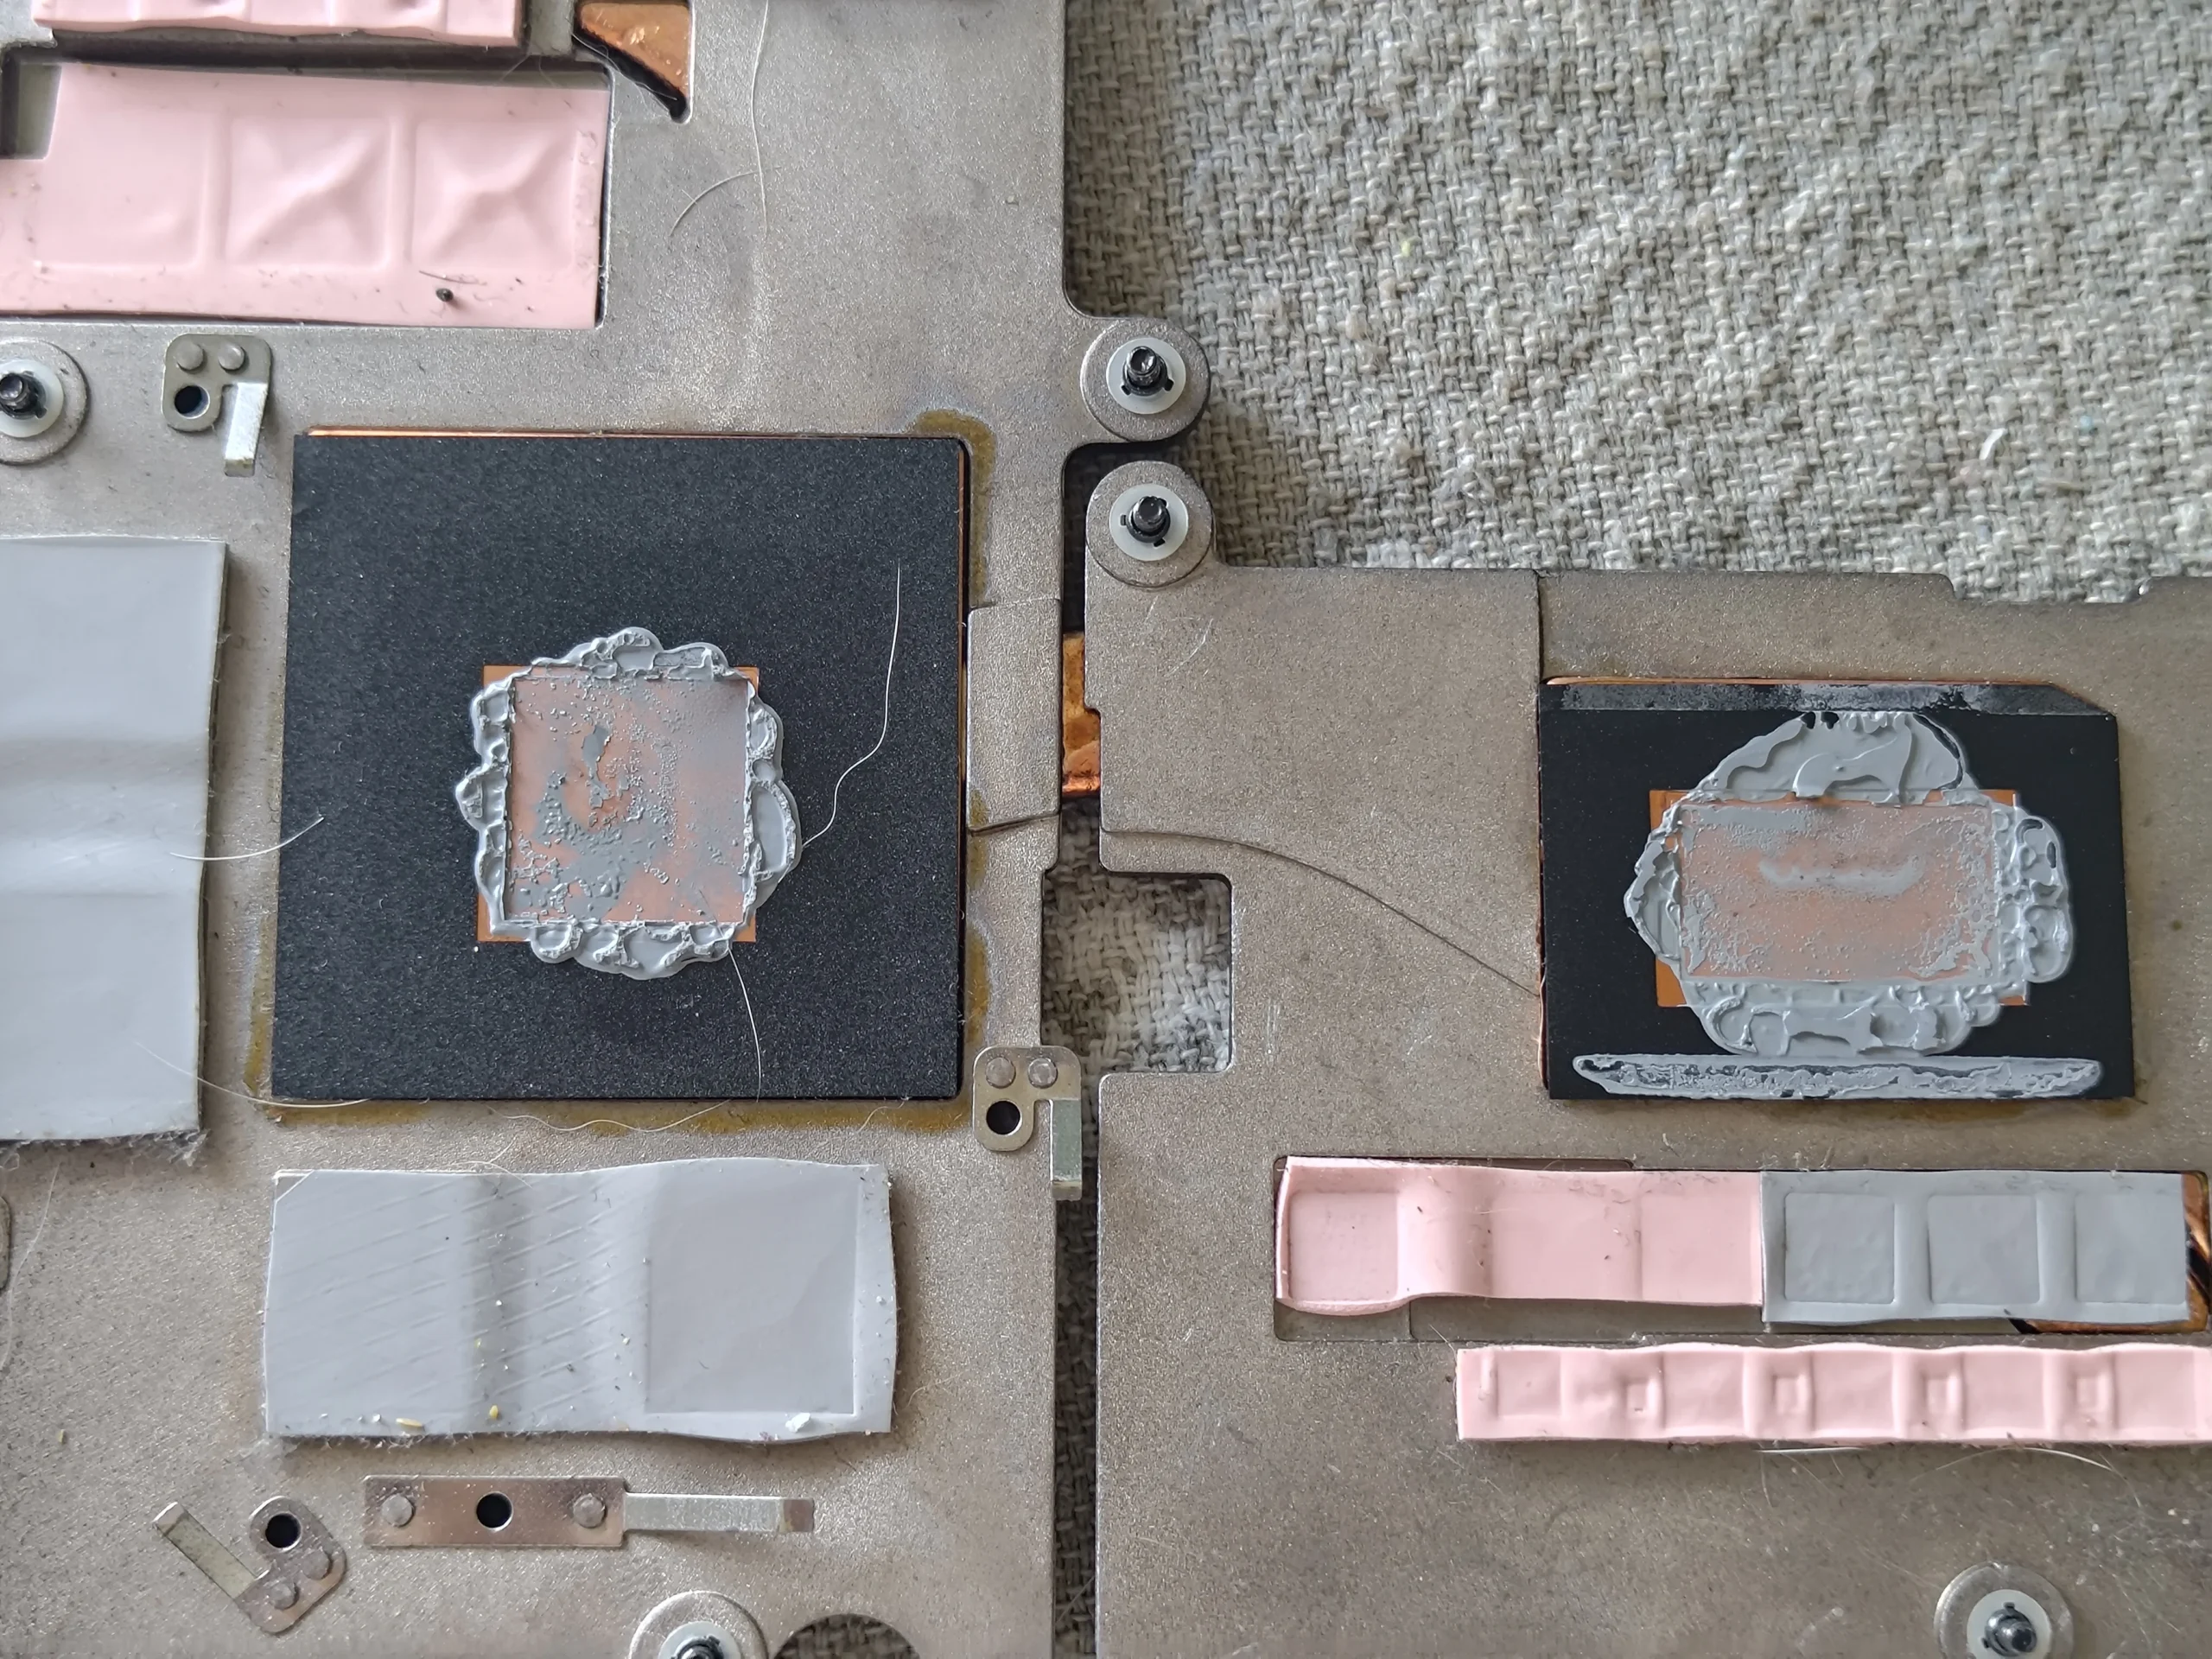
The cooler was lifted from two chip contact areas
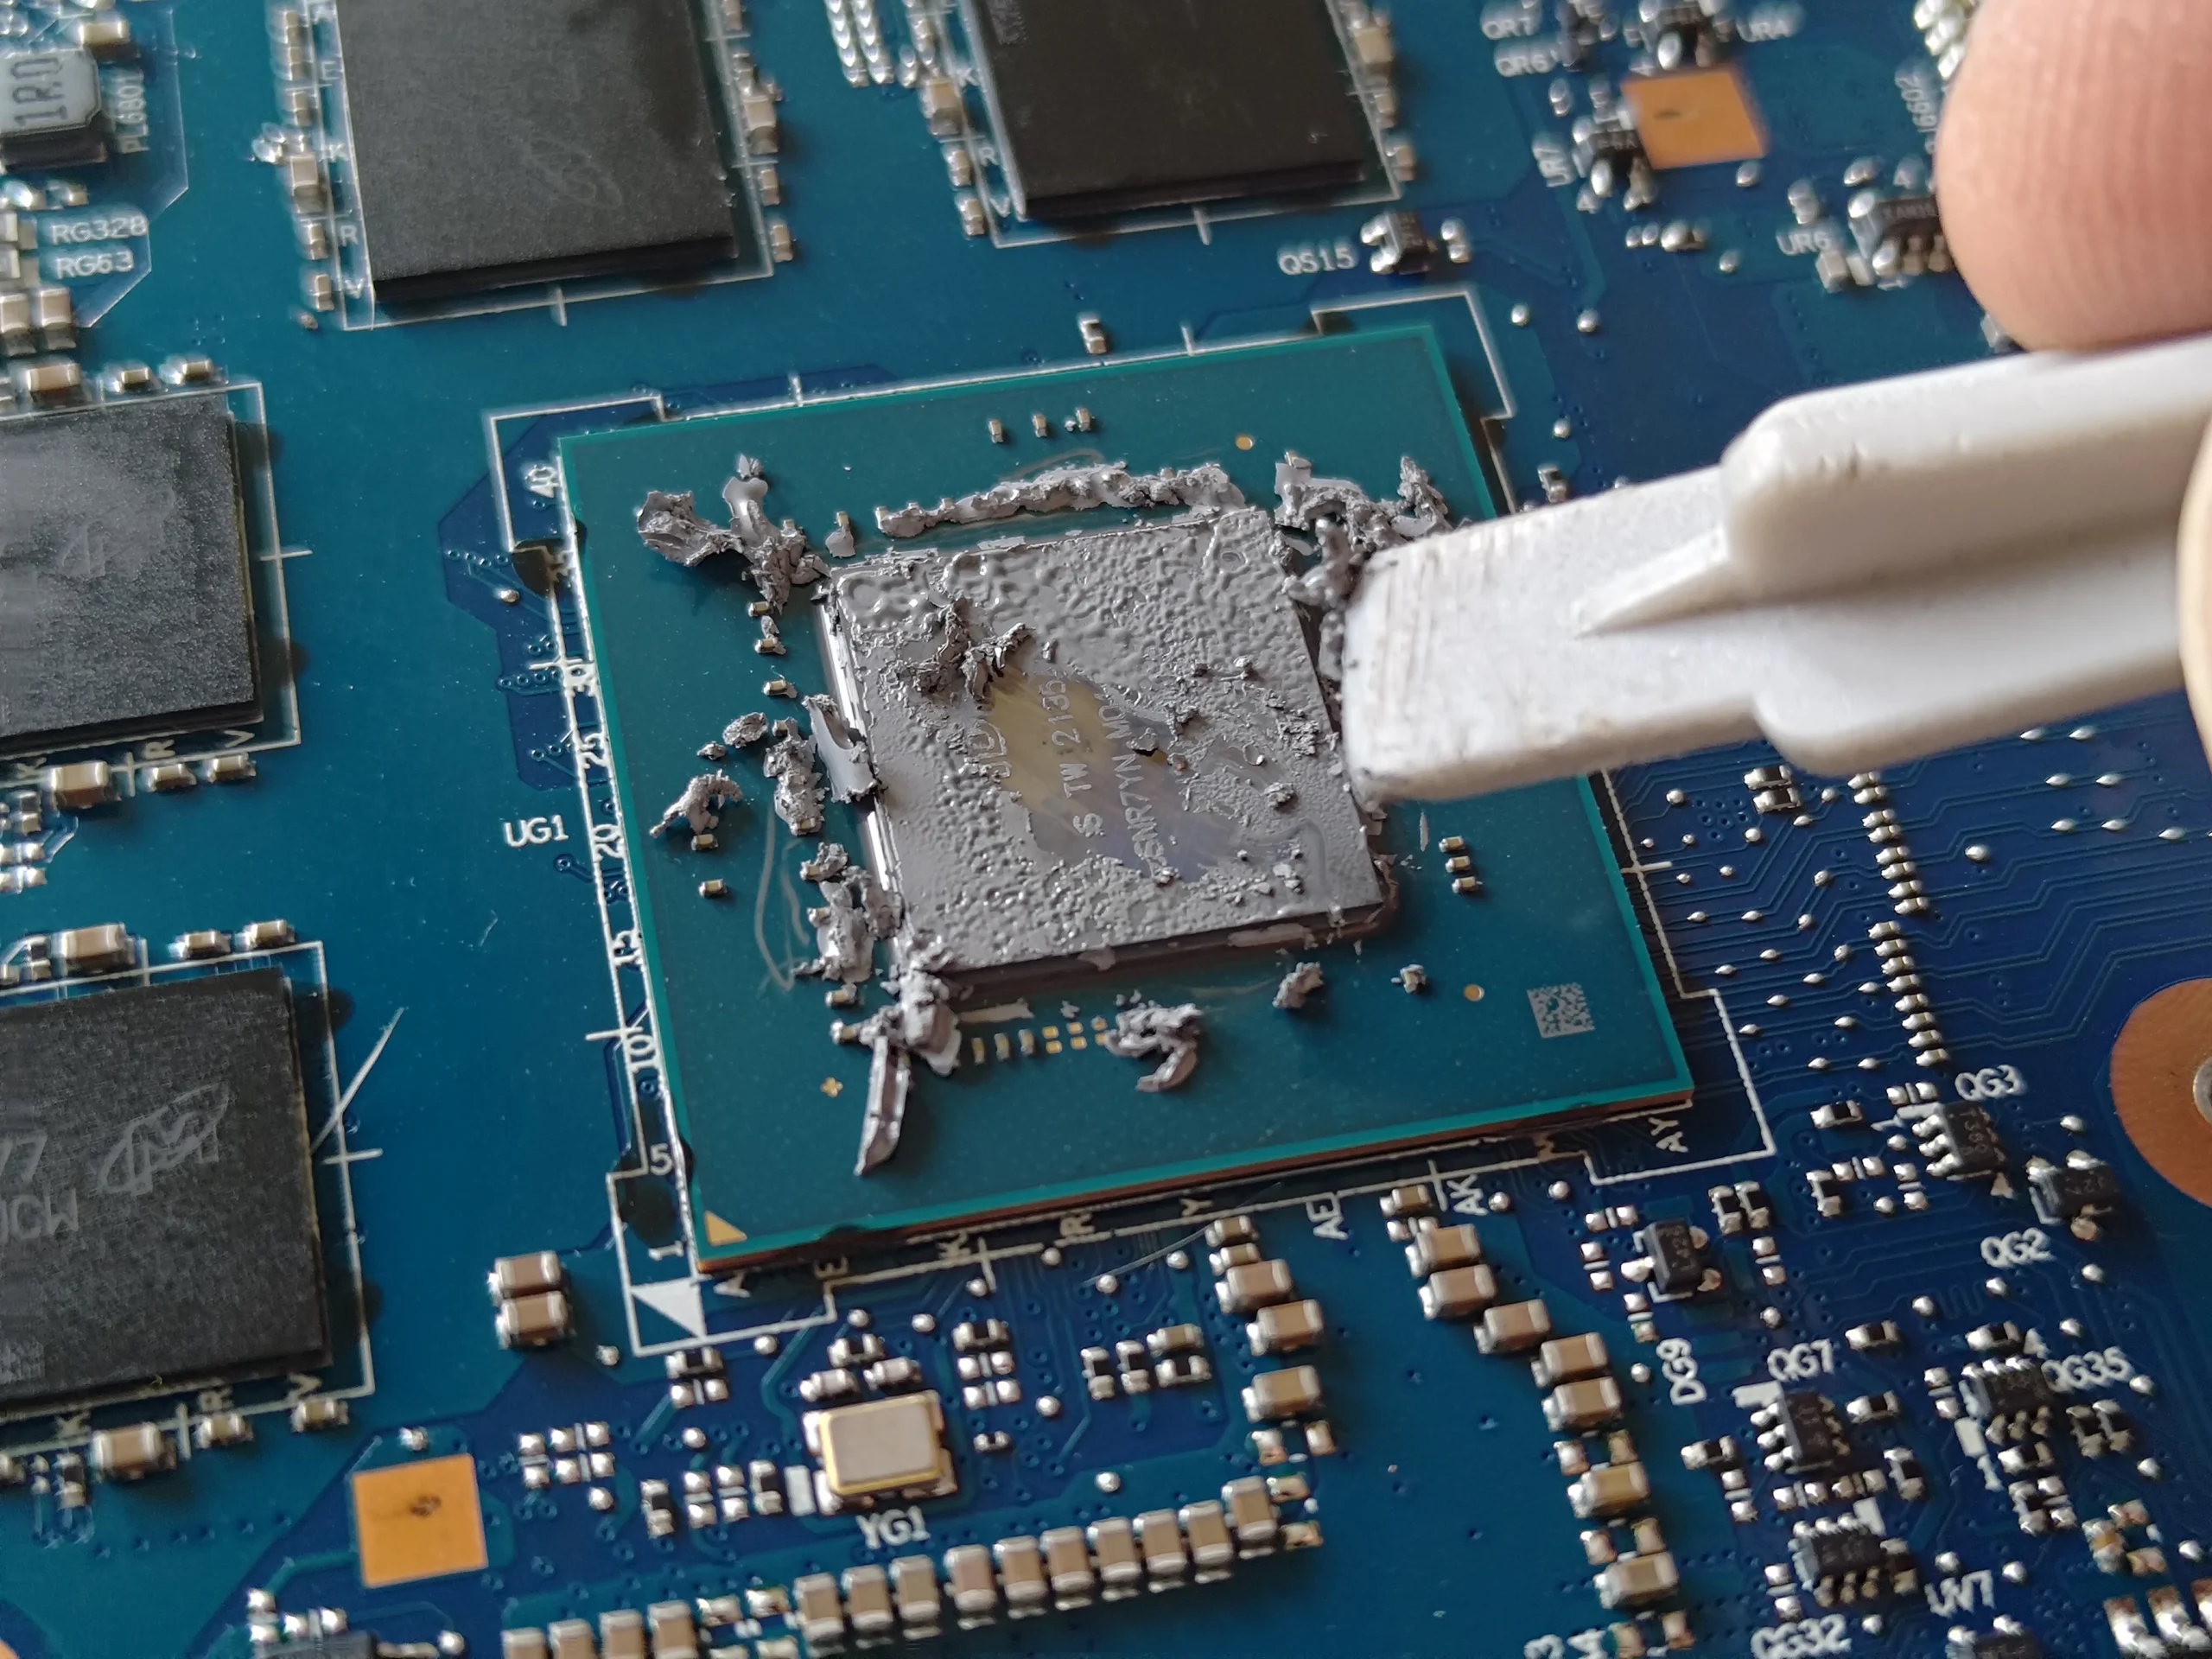
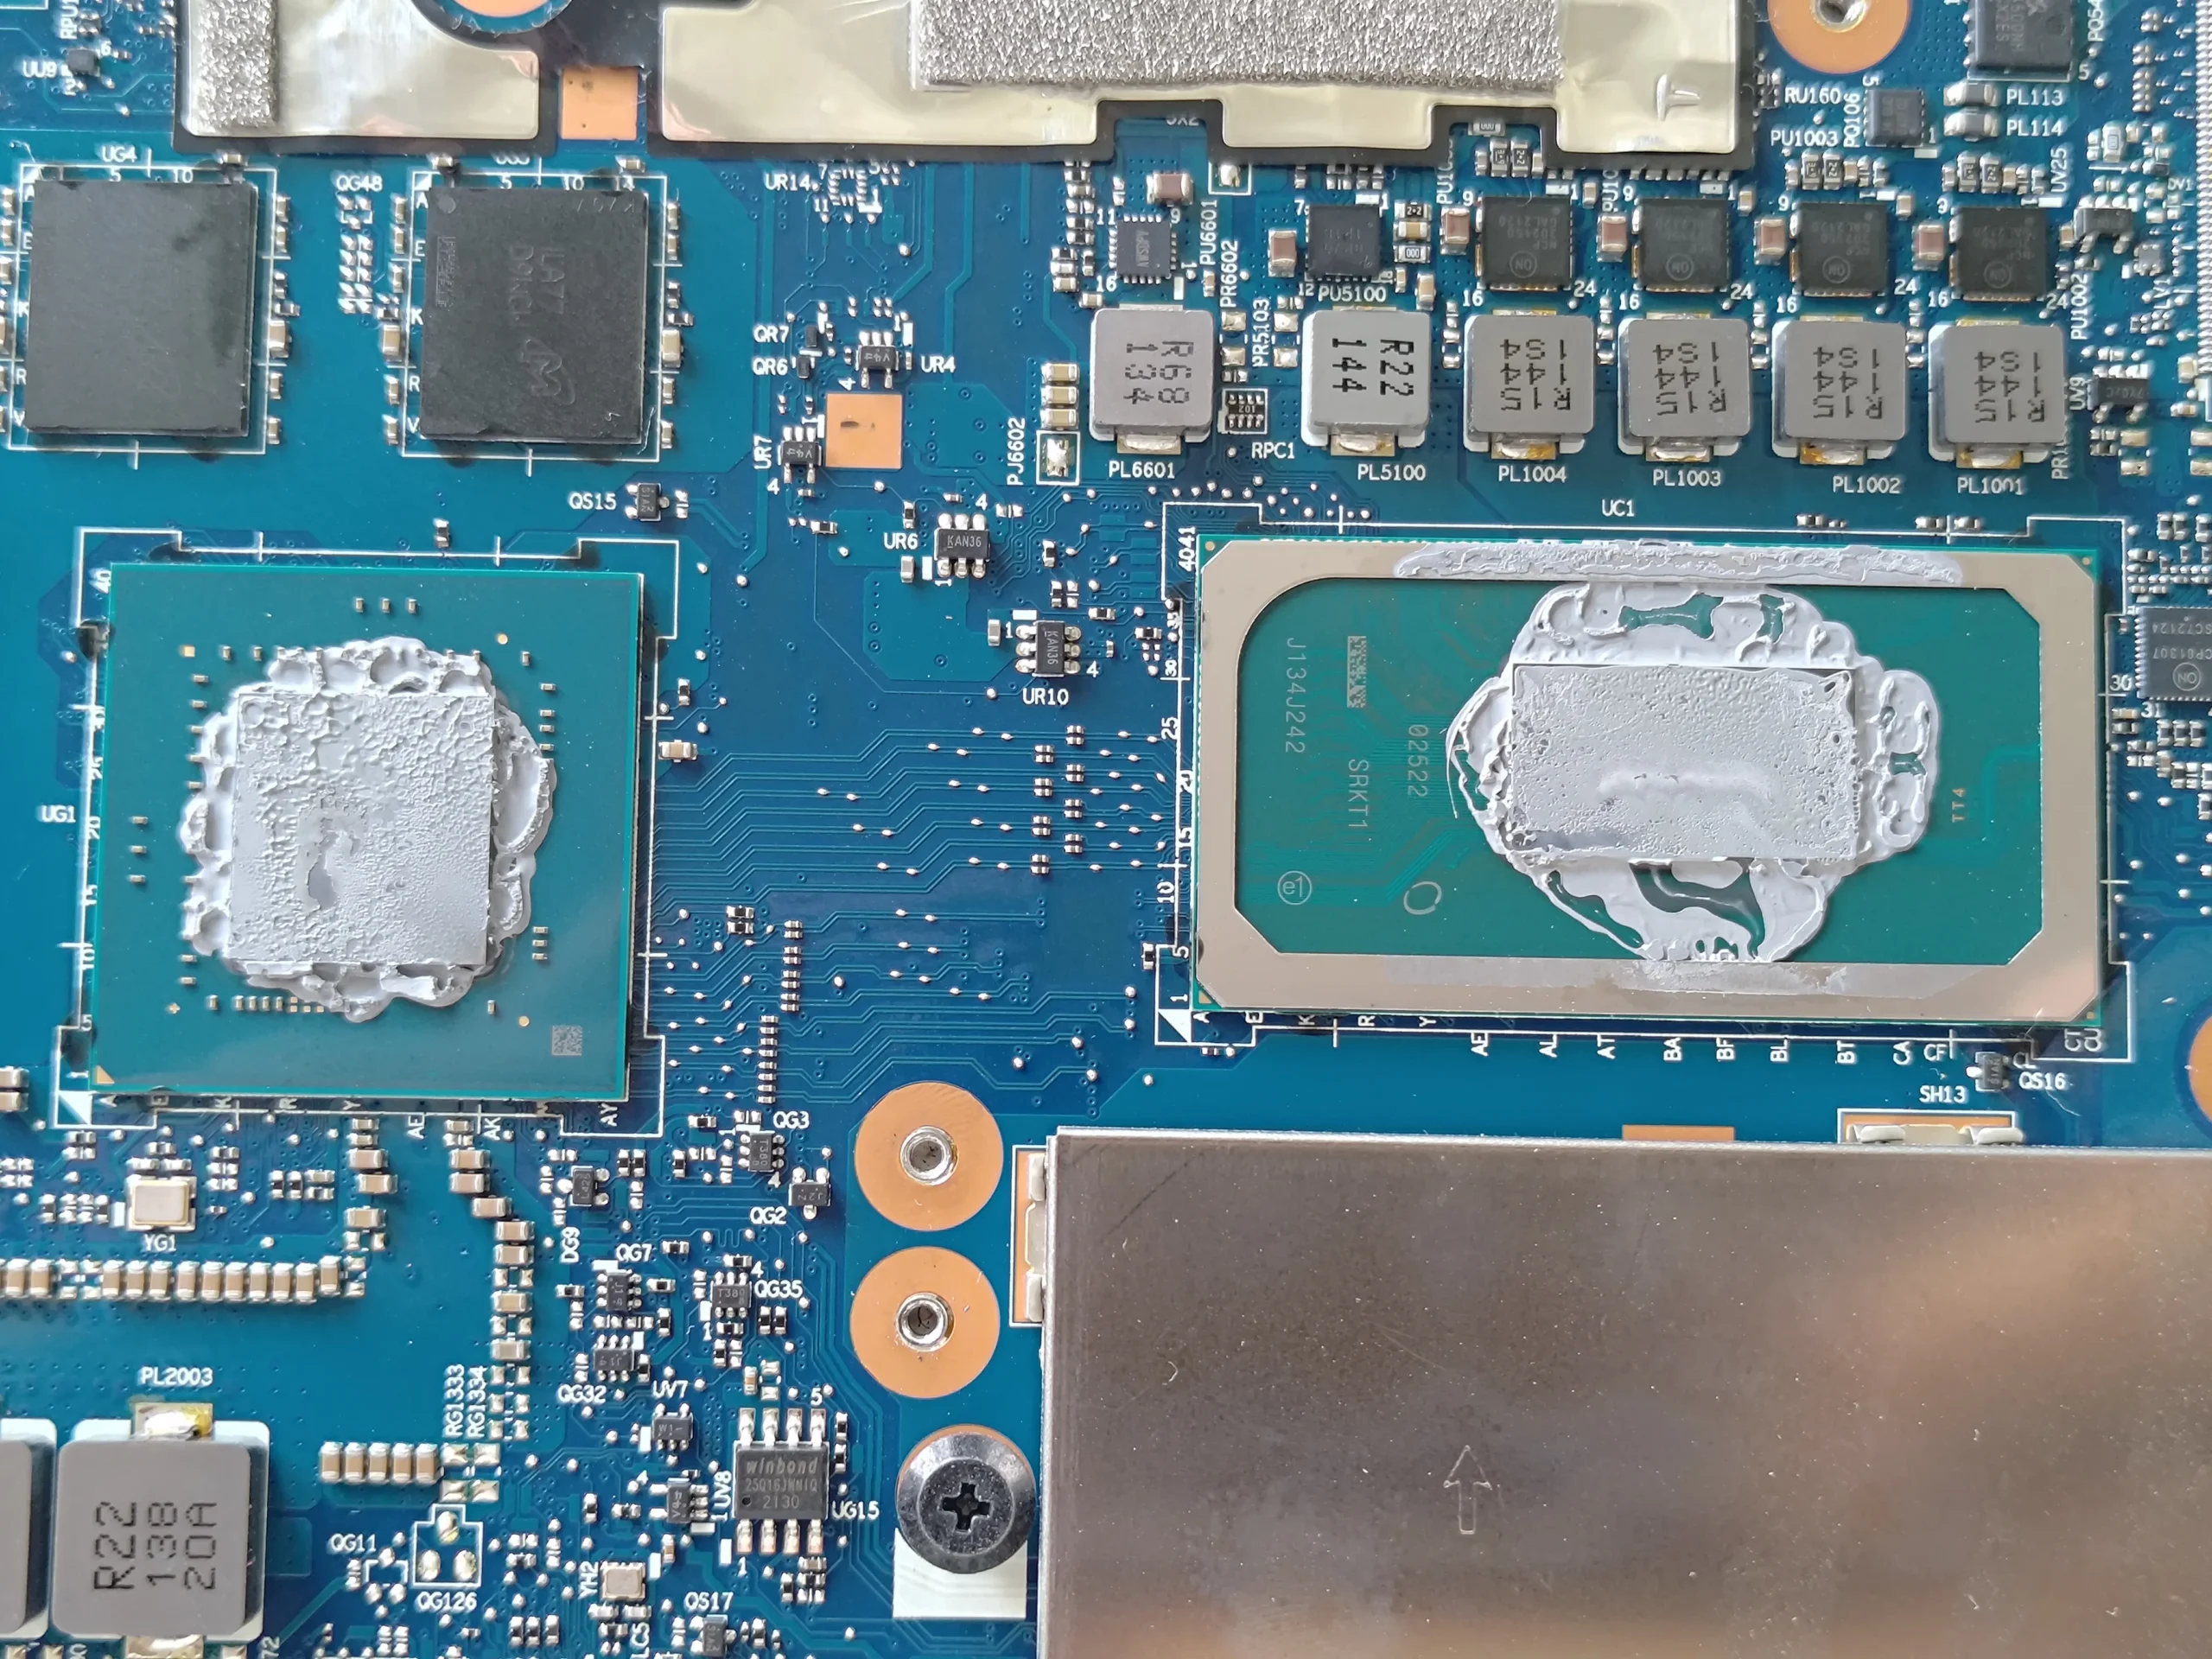
The removed assembly shows two main contact plates and smaller surrounding thermal-contact pieces. On the board, grey old compound is visible on both exposed chips. A later photo shows material being worked off a chip surface.
Once the cooler is lifted, the original thermal arrangement must be restored correctly. Paste belongs on the intended chip contact areas; pads or other materials on neighbouring components need their proper thickness and placement. The archive records surface preparation, but it does not show every final application step.
04 / What the photos resolve
The fin edge was exposed and the system reassembled
The later close-up of the copper fin pack is much less obscured, and another overview shows the cooler and both fans back in the machine. Those photographs support a visible cleaning and reassembly sequence.
They are not a substitute for checking fan operation, temperatures and noise under a known workload. If the same symptoms remain, the fan, cooler seating or a different hardware fault may need separate diagnosis.
The engineer’s takeaway
On this Legion 5, the critical dust sat along a fine copper fin edge rather than merely on the fan blades. A good clean follows both blower routes, and cooler removal requires deliberate thermal-interface work.
Before you open the laptop
Can you clean a Legion 5 yourself?
Power off, unplug the charger and follow the service procedure for your exact Legion 5 variant before opening the base. The family spans different layouts and fasteners. Photograph screw locations, disconnect the battery as directed and hold each fan still while loosening surface dust.
If lint is trapped on the internal face of the fins, external air alone may fail to lift it. Removing the shared cooler is a more advanced job because the thermal materials and screw pattern must be restored accurately; do not lift it just to wipe an accessible fan.
After the clean
How to check the result
After reassembly, ensure the fans respond smoothly and that air leaves both exhaust paths. Compare CPU and GPU temperatures during the same workload and with similar room temperature if you have earlier readings.
The archive includes close photos of the lint and later reassembly, but no trustworthy paired performance log. A remaining thermal problem should be diagnosed rather than attributed automatically to dust.
Questions from owners
Lenovo Legion 5 cleaning FAQs
Answers drawn from the fin lint and two-fan cooler shown in this Legion 5.
Why clean the heatsink fins if the fan looks fine?
The fan can spin while lint restricts the fin outlet. This case shows a visible fibrous strip along the removed copper fin pack.
Does every Legion 5 have the same cooler?
No. Exact Legion 5 variants differ, so use the model or machine type on your own laptop when looking up disassembly guidance.
Do I need to remove both fans?
Inspect both fan chambers and their outlet fins. Removal depends on access and the specific layout; do not disturb a connector or cooler unnecessarily.
Must thermal paste be renewed after removing the heat-pipe assembly?
Yes, the disturbed chip contact surfaces need proper cleaning and suitable fresh material. Preserve any separate pad or putty placement around them.
Could I simply blow air into the rear vents?
That may leave a dense internal lint strip in place or move it deeper. Restrain fans if using air and inspect the fin face directly where safe.
Did this Legion gain a measured temperature reduction?
The photos show cleaning and reassembly, but they do not provide a comparable before-and-after test.
UK Legion cooling enquiries
Need the hidden fins checked?
If you are in the UK, tell us the exact Legion 5 model from its label, where the air feels weak and whether noise or heat appears in games or ordinary use. Include your postcode when you use the form.
Mention any previous repaste or fan replacement. It helps us assess the exhaust fins and the cooler's thermal contact as separate parts of the service.
Read about our laptop cooling-system cleaning service, then use the form to tell us your computer model, symptoms and UK postcode.
Free to enquire · No obligation to book. We discuss the proposed work and price before you decide.
The workshop photos
Legion 5 copper fin and fan cleaning gallery
Open the photos to see the fin lint, two-blower layout, cooler contact plates and later clearer fin edge.