Published 4 November 2026 · MSI laptop with MS-16J5 chassis case study
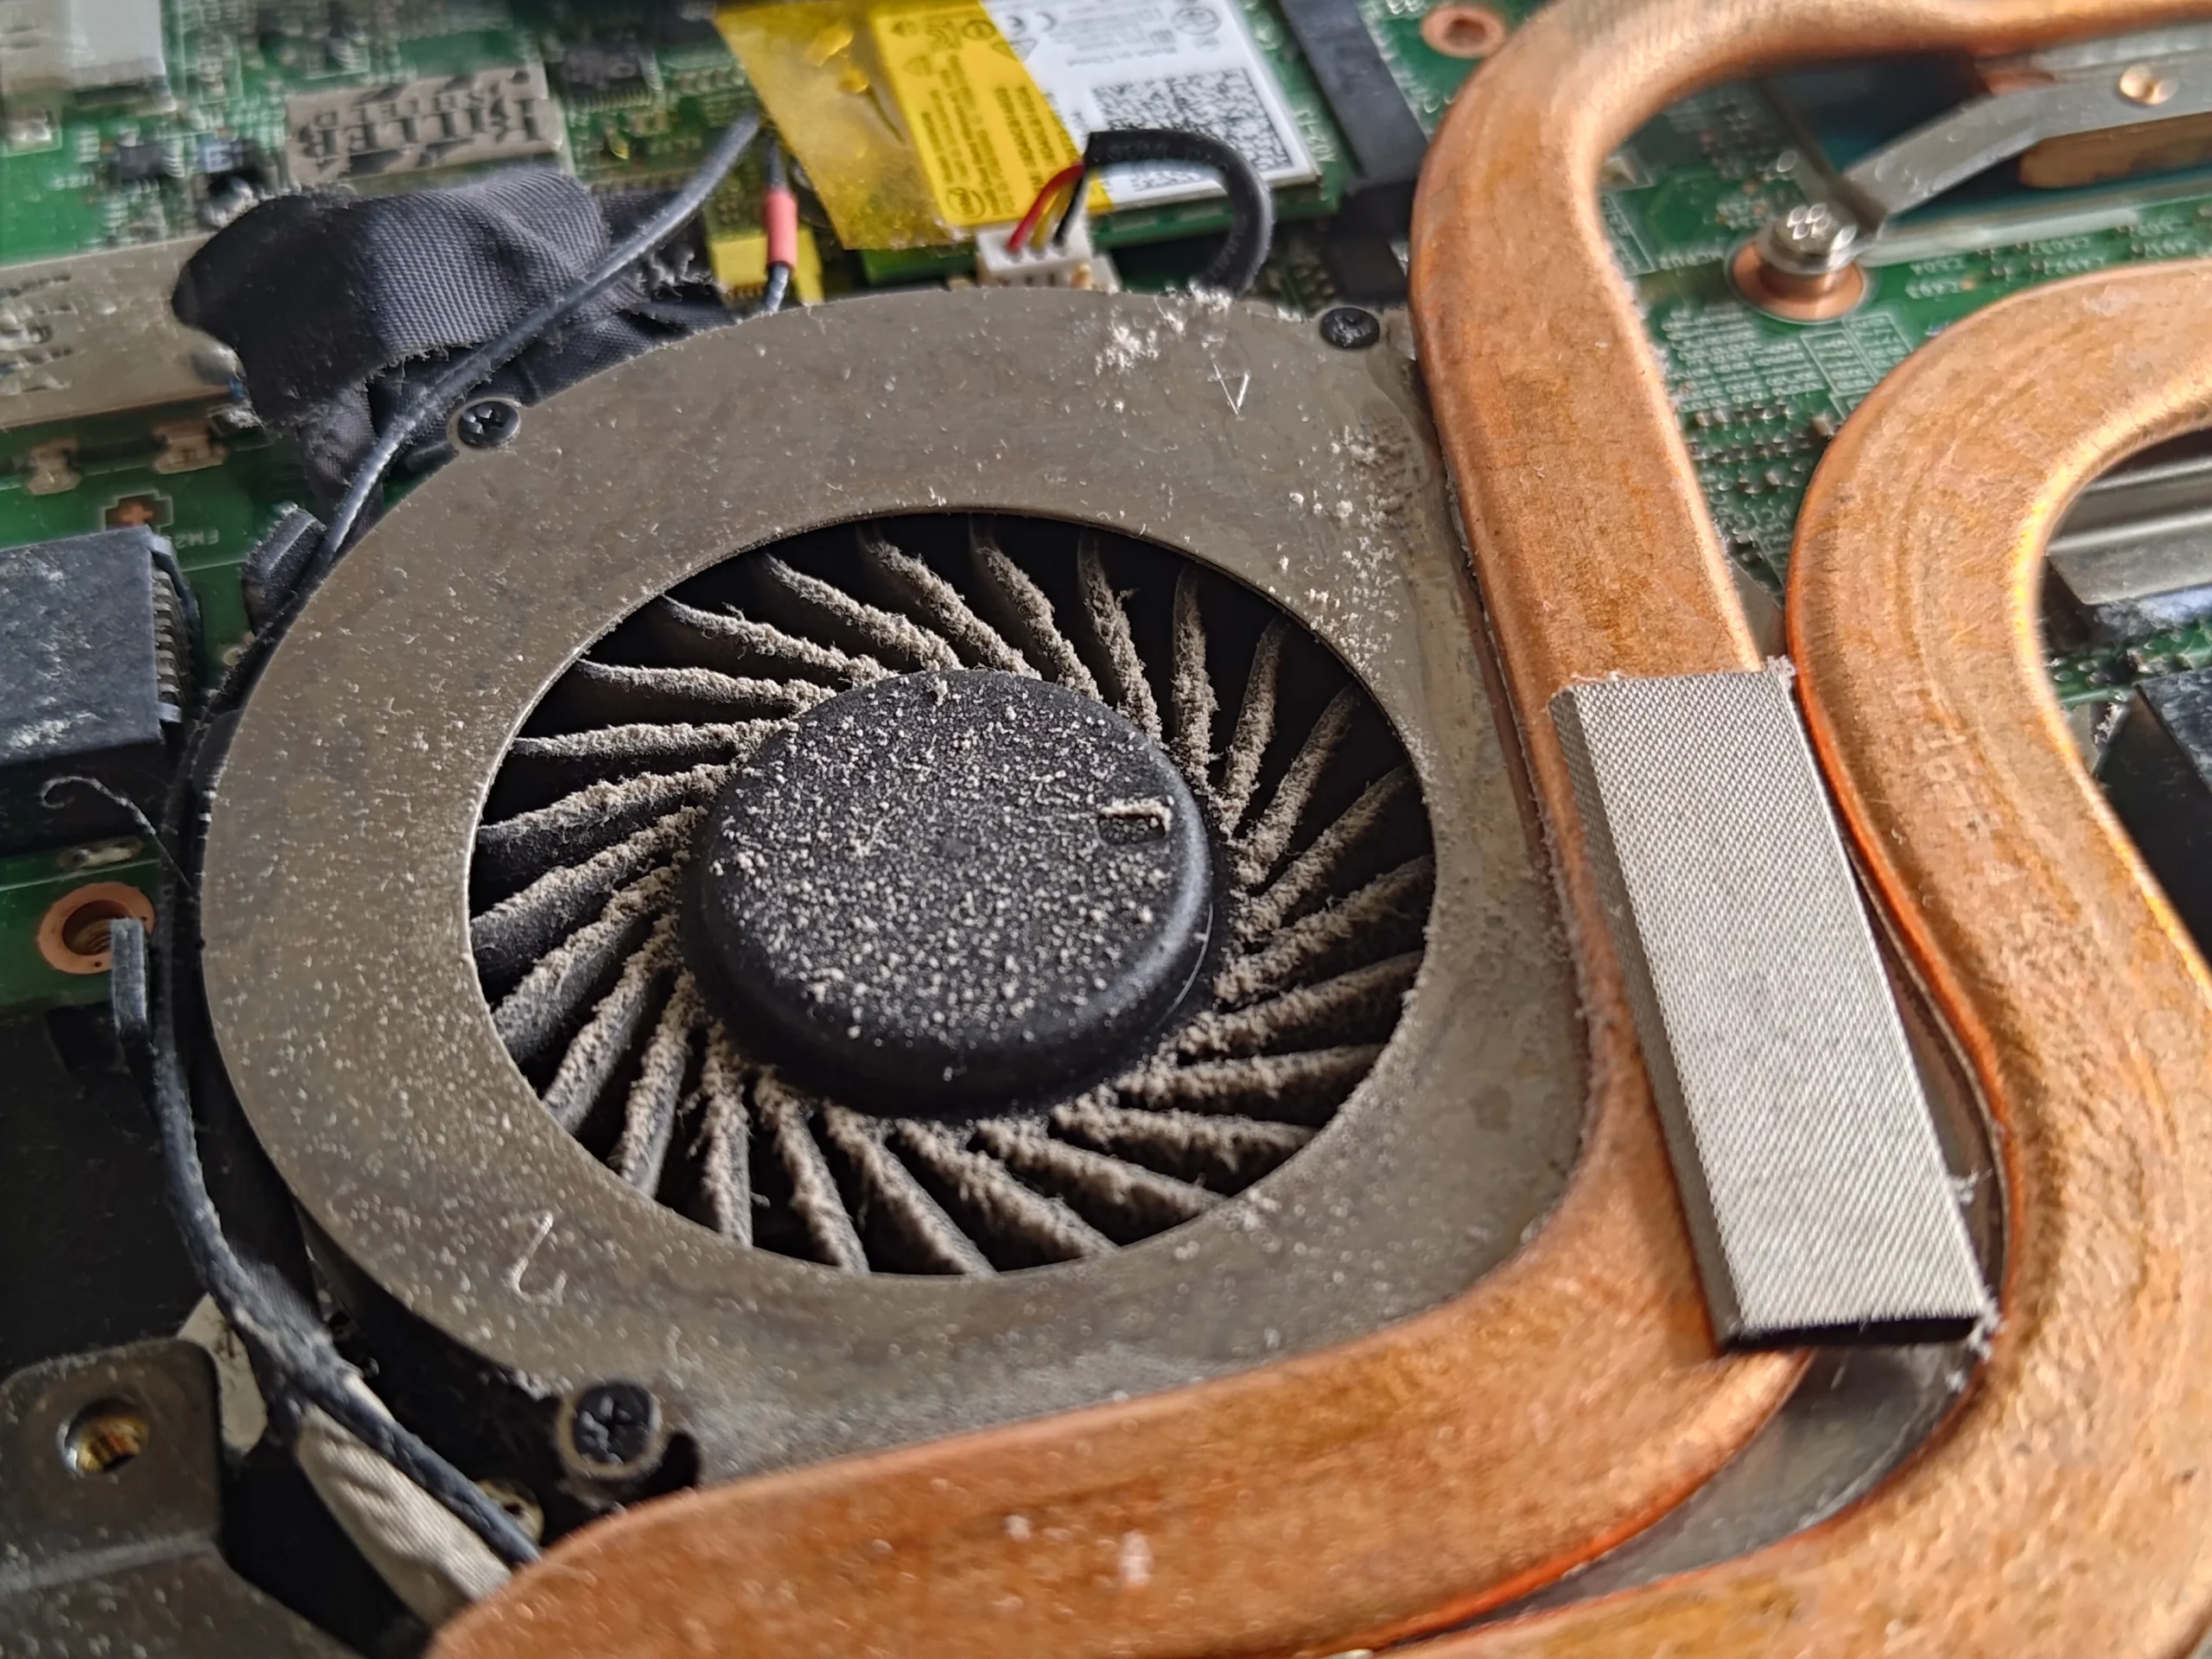
The fan was dusty
and the fin edge needed attention too.
This MSI's underside gives the MS-16J5 chassis code, while the photos show two fans joined by copper pipes. One blower has dust on its blades and a grey strip across the fin edge. The lifted cooler then reveals a second challenge: chip compound and several separate pads must all go back in the right places.
Identifier in photos
MSI MS-16J5 chassis code
Airflow
Two fans and copper pipes toward fin outlets
Thermal interface
Two main contacts plus smaller pads
The underside label reads MS-16J5. That is a chassis code, not enough to establish the full sales model: MSI's own parts list associates it with several GE62, GP62, GL62 and other variants. We therefore use the code visible in the archive and advise owners to check the full model before buying a fan or following a teardown guide.
The images show a dusty fan and fin edge, direct brushing, a lifted copper assembly and old material at two chip contacts. They also include temperature-monitor screenshots, but those are snapshots taken under different conditions and cannot prove a before-and-after improvement.
In this case study
01 / Beyond the blades
Dust had gathered where the fan meets the fins
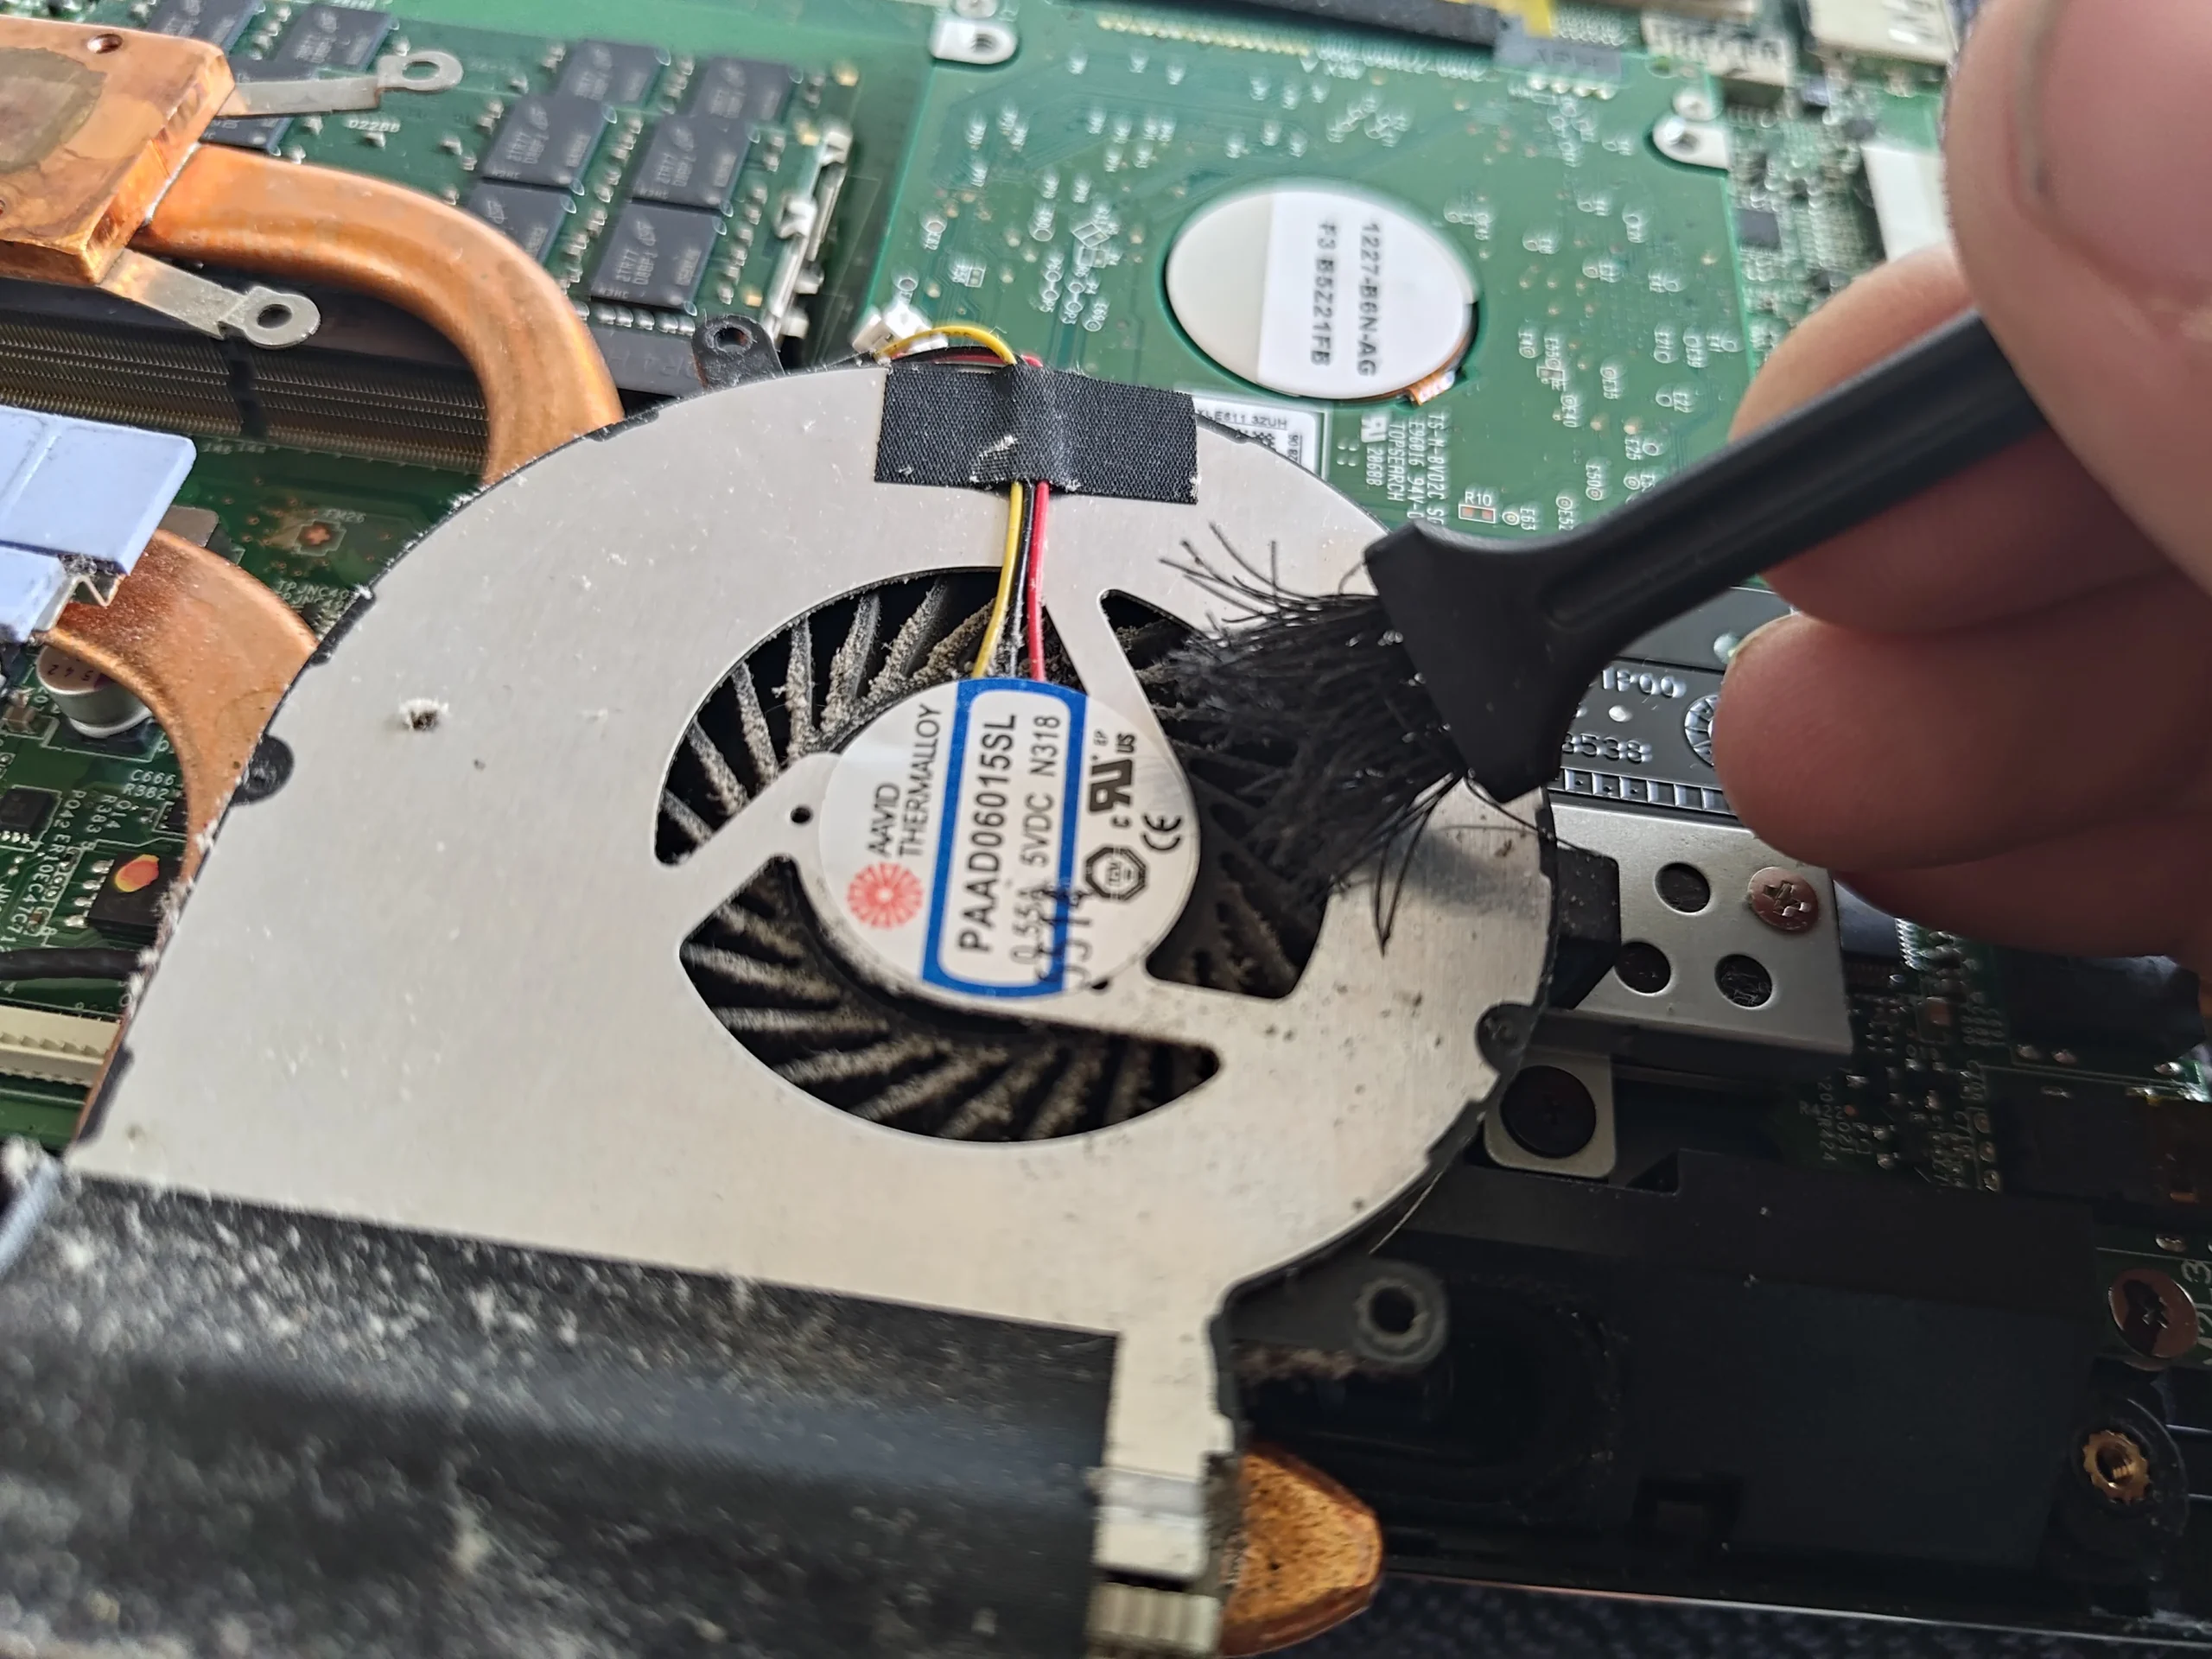
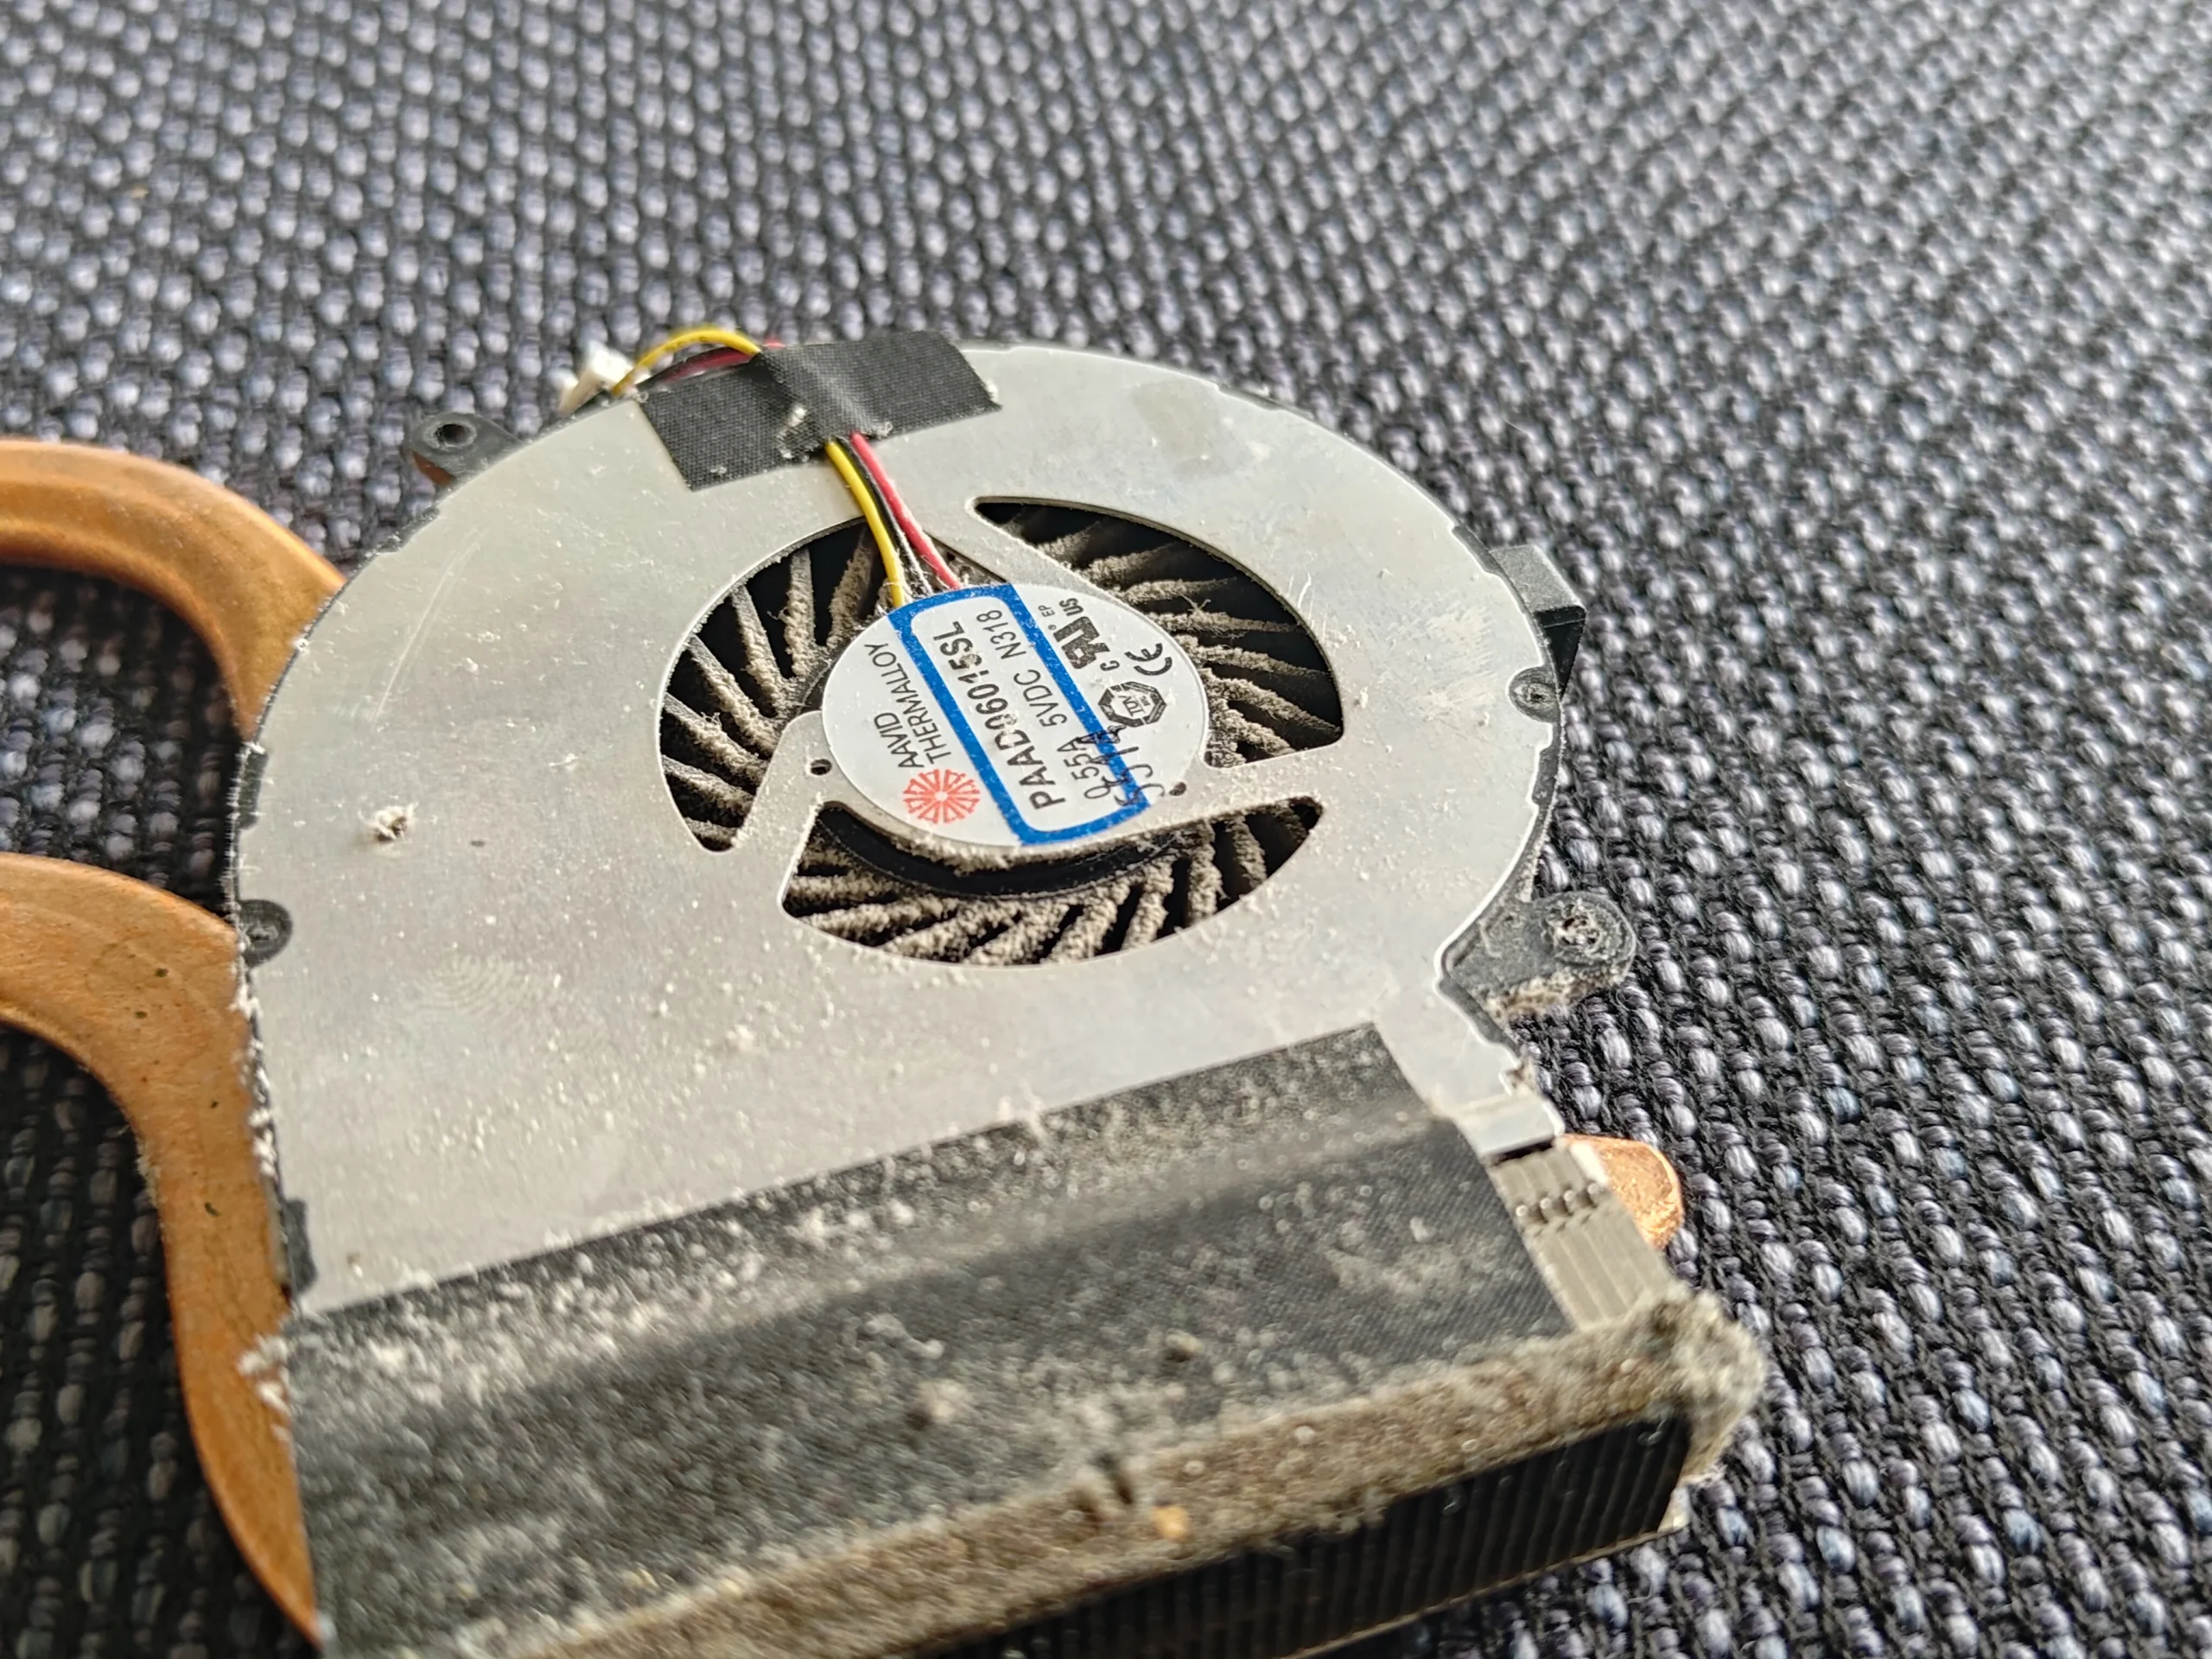
A close view of the removed fan shows a grey band on the edge of the fin stack. That is where air from the blower should cross narrow metal channels and leave the laptop. A fan may still rotate while this edge holds debris.
The photos also show dust on the curved fan blades. Clean both surfaces and inspect the full outlet rather than judging the job from the central fan hub. Keep the rotor still during controlled air cleaning and collect what the brush lifts.
02 / The wider path
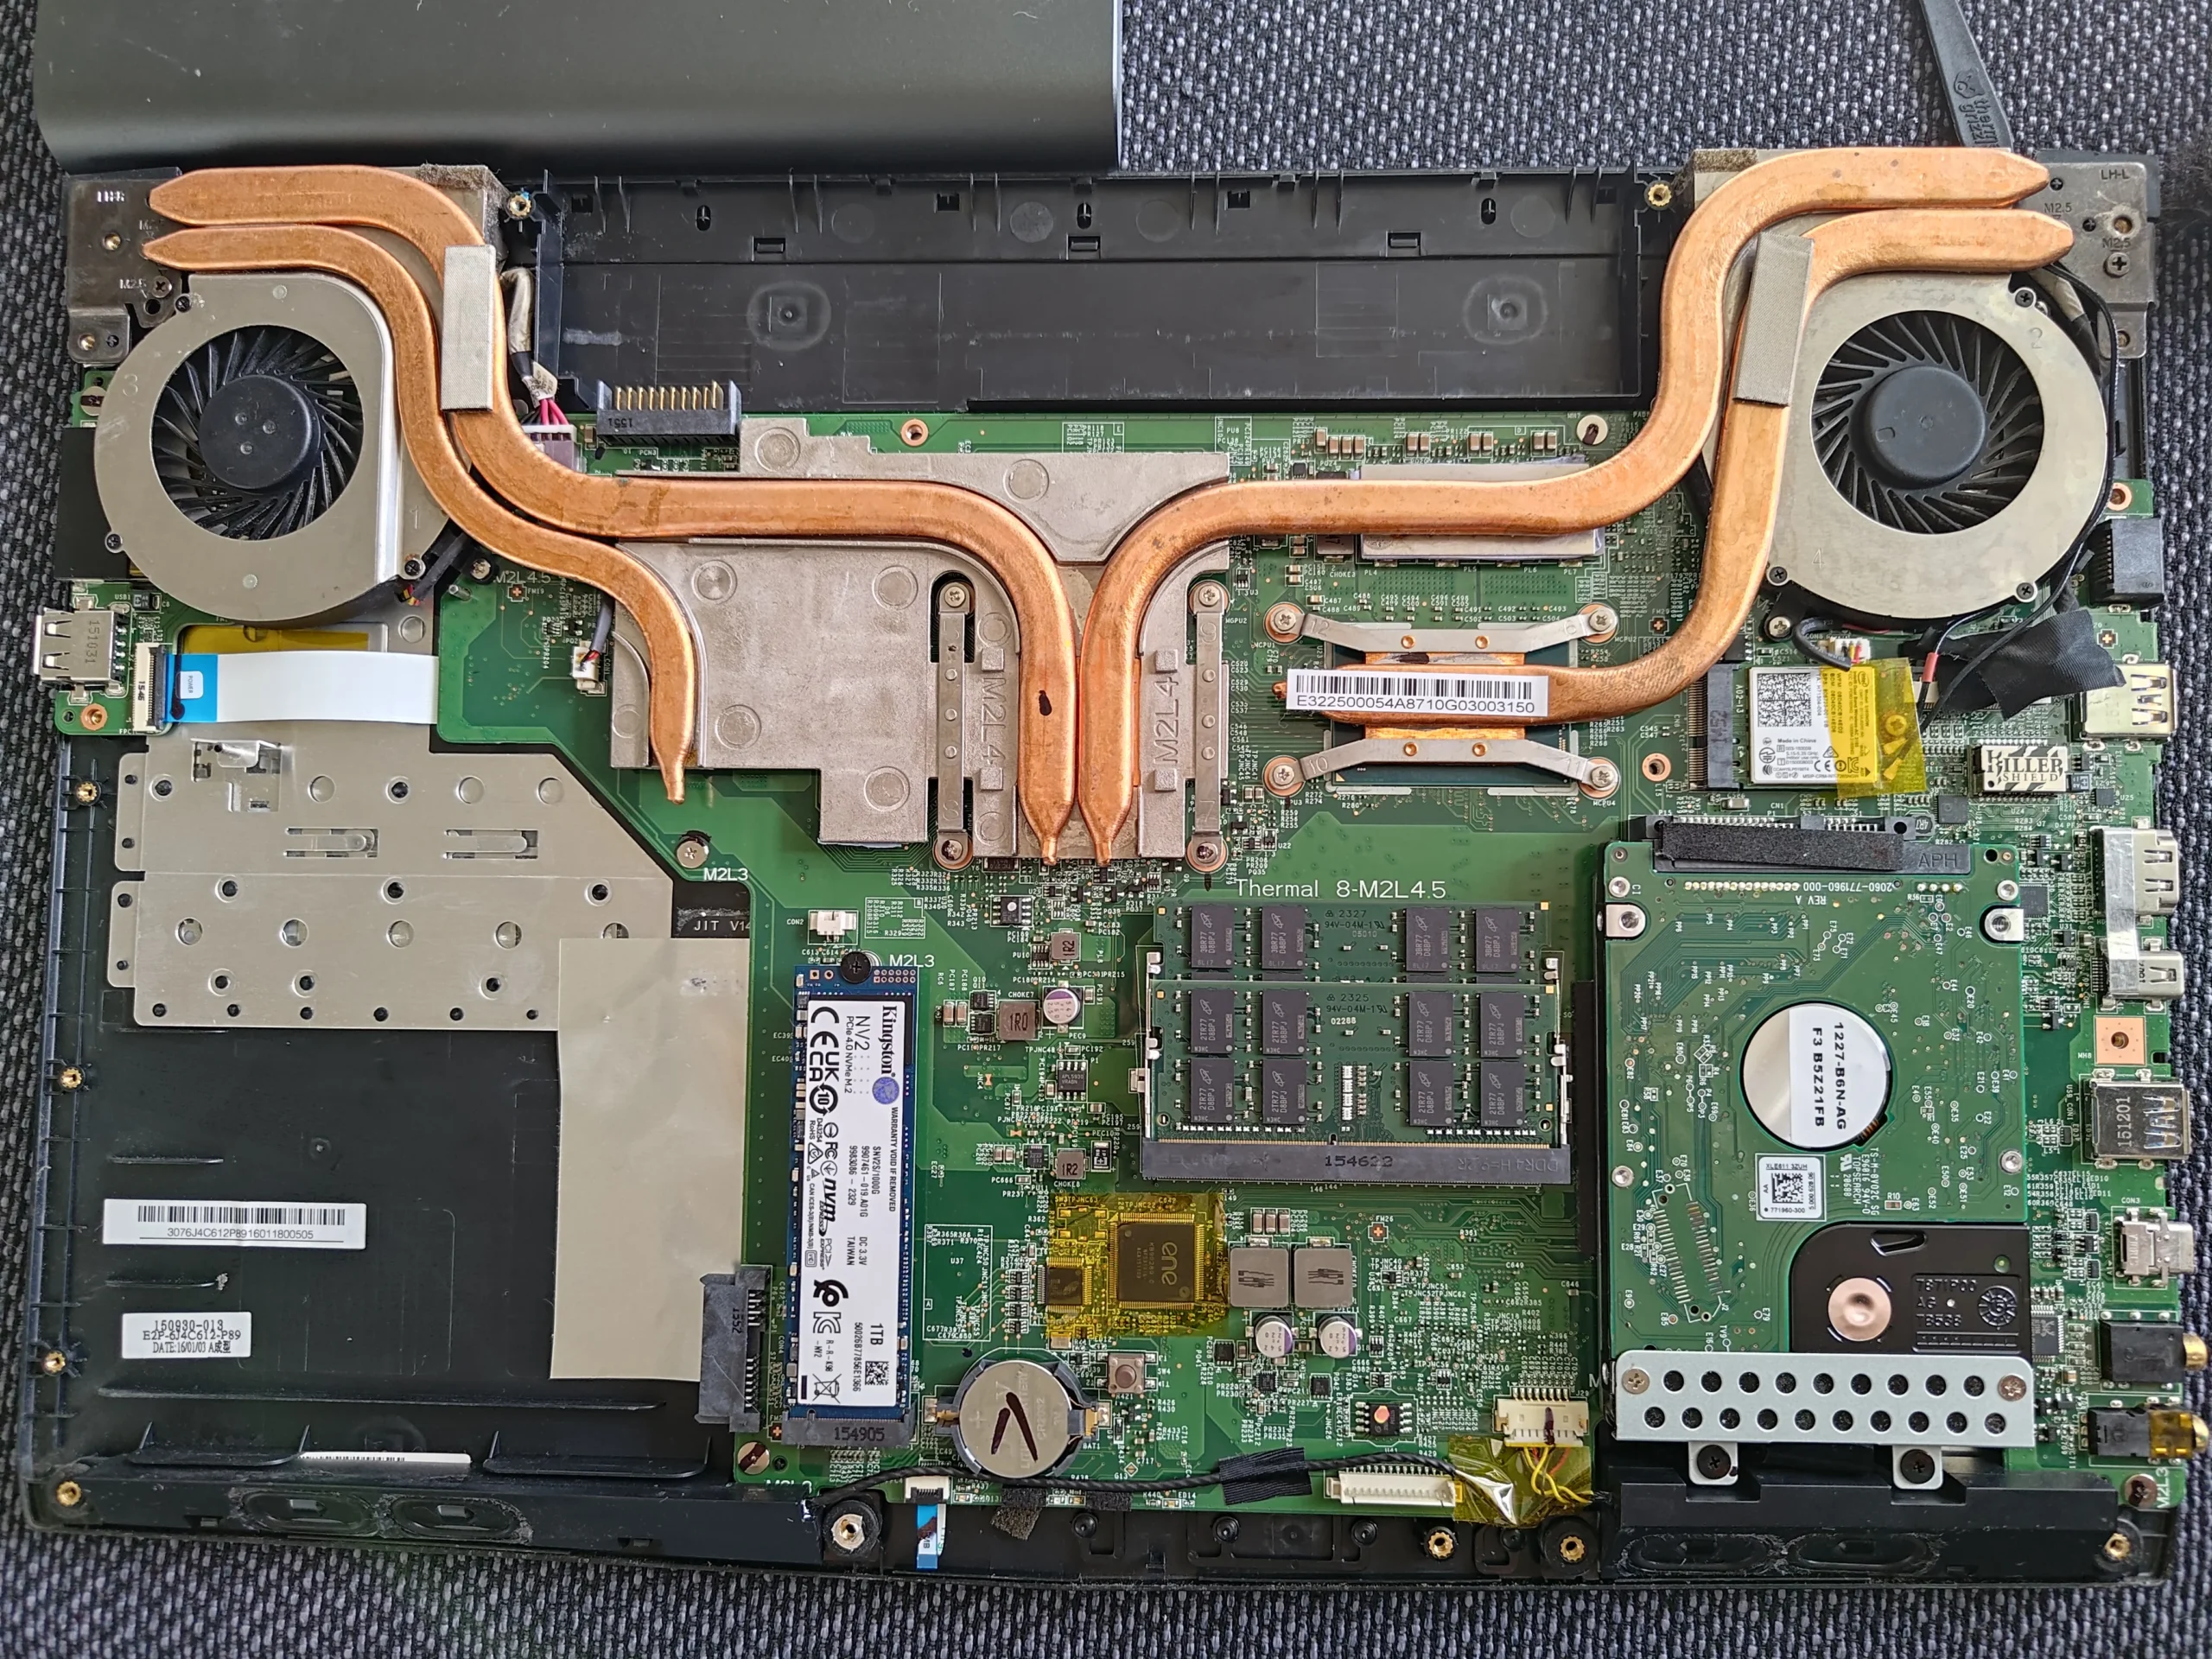
Two blowers feed the copper-pipe cooler
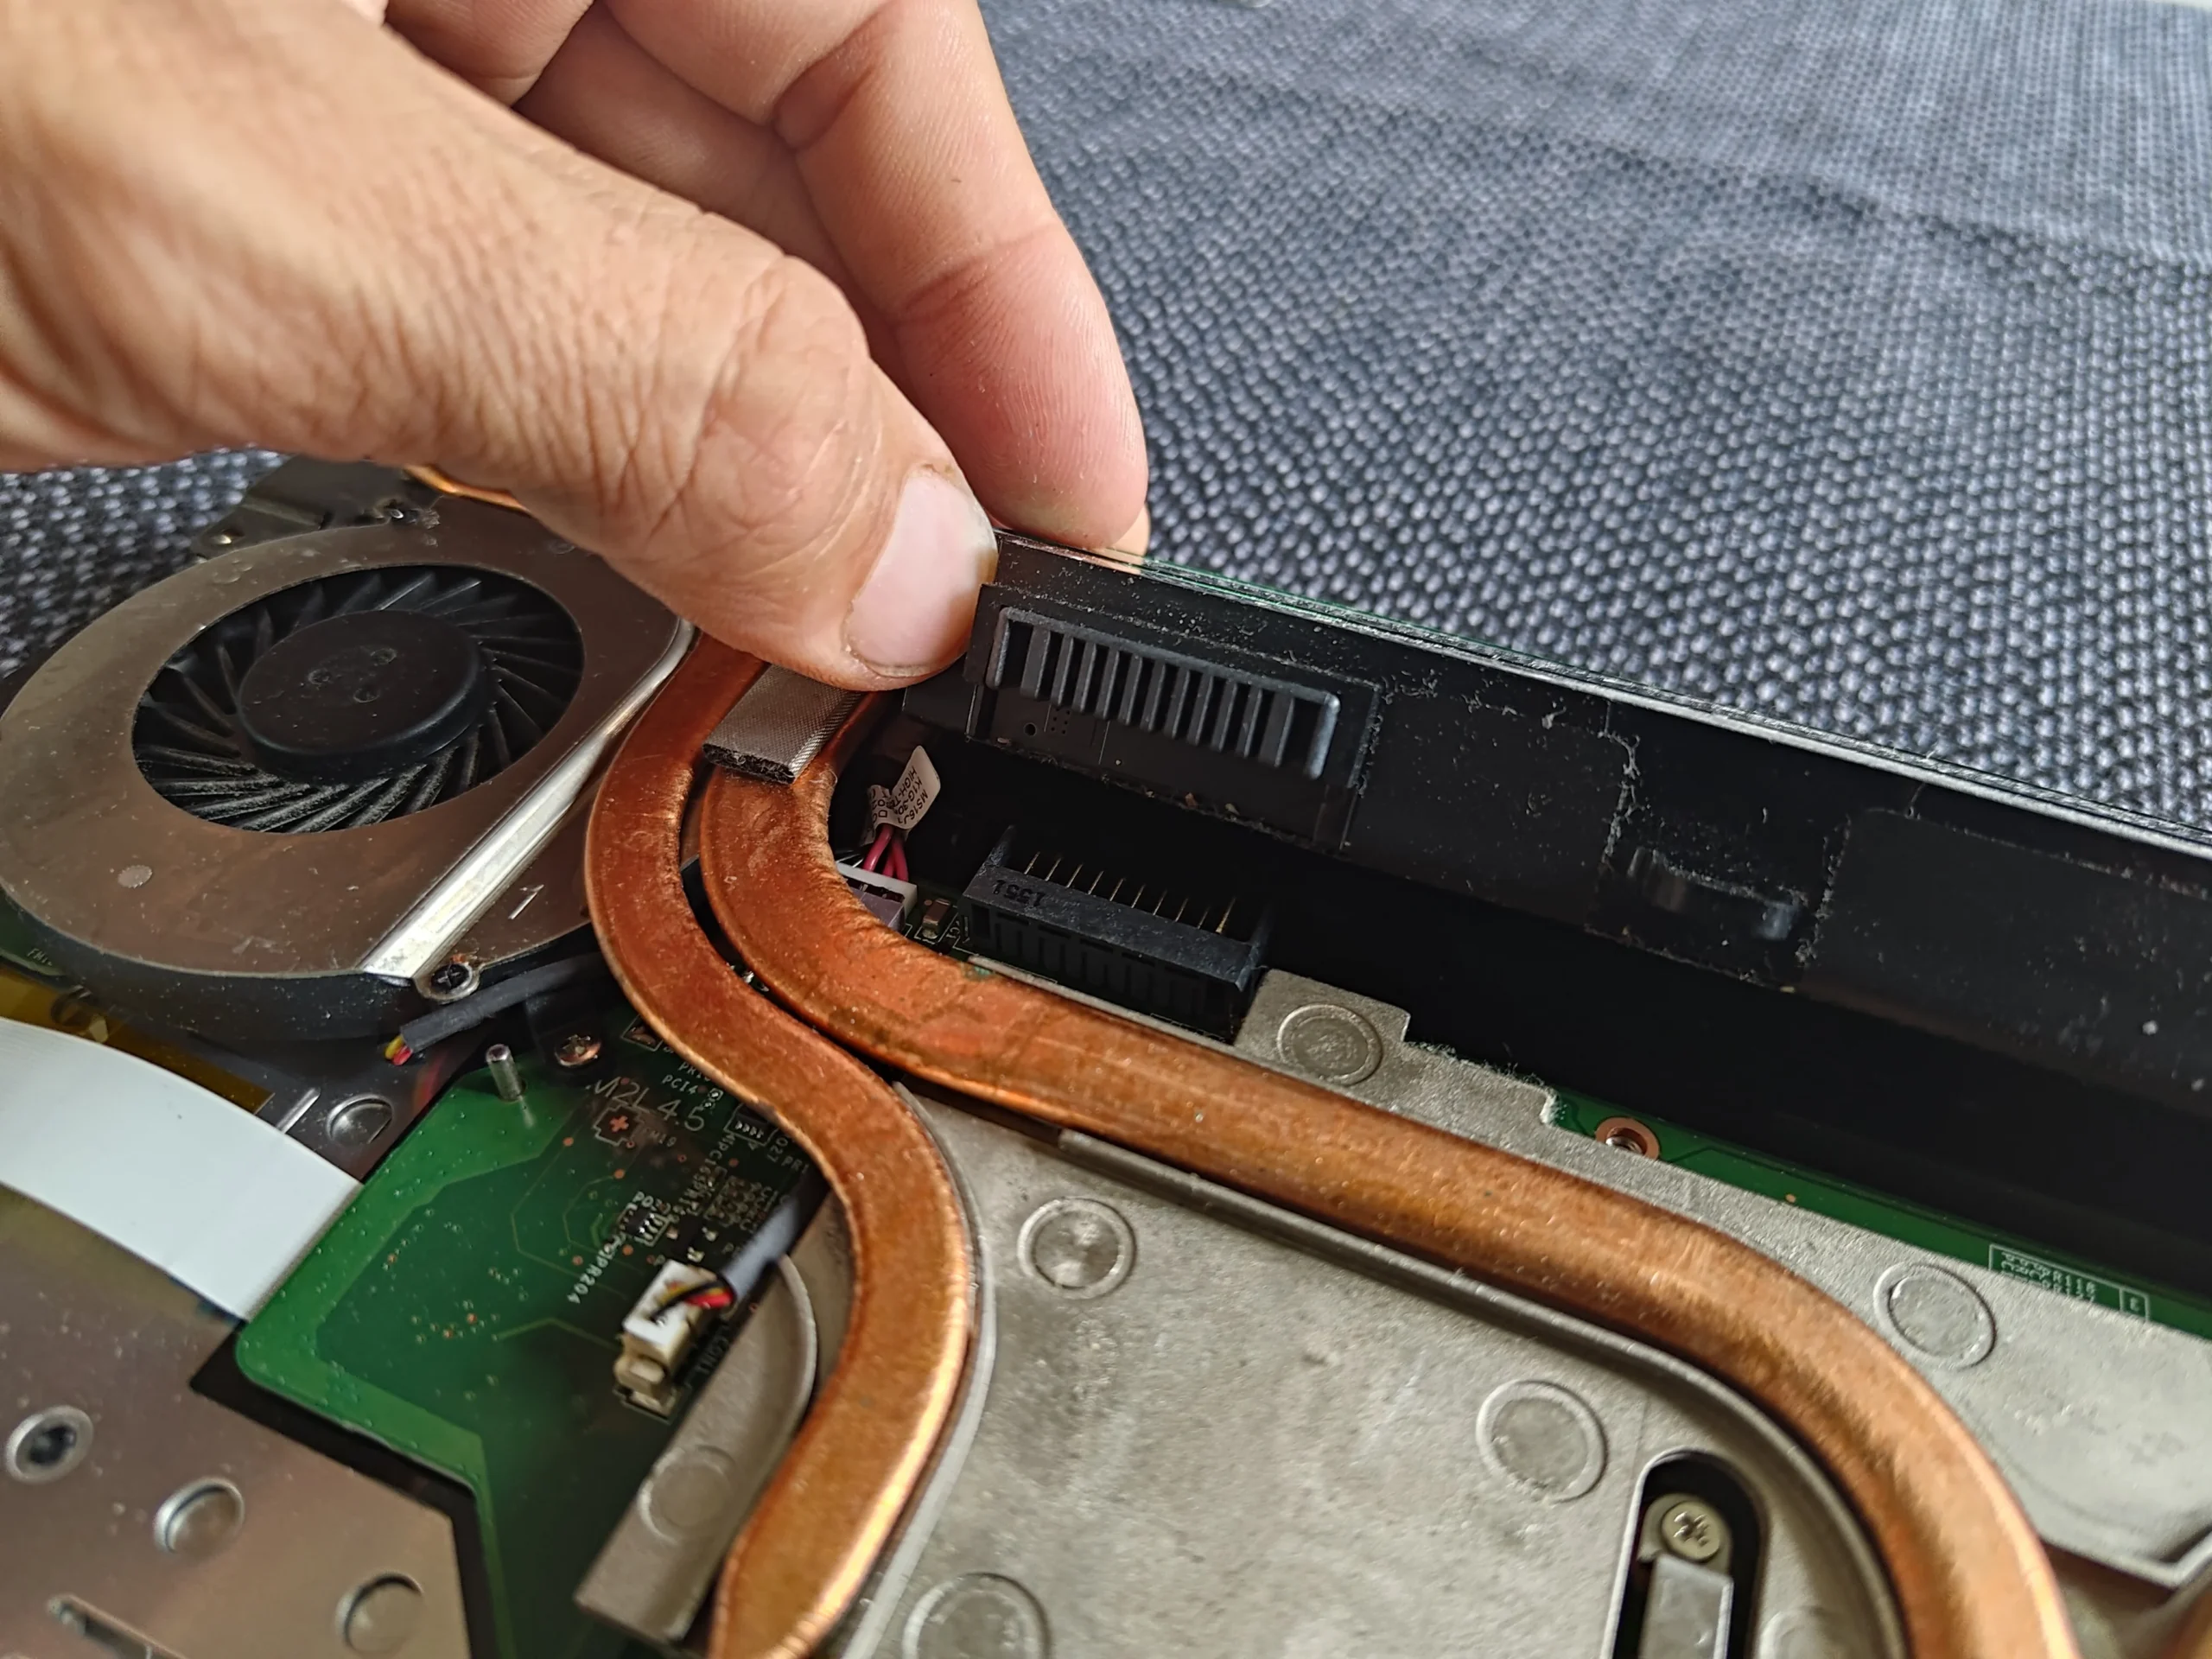
The open-base view shows one fan on each side of a linked heat-pipe arrangement. One side is visibly dustier, but both wheels and their outlets deserve a direct check. Dust removed from one fin bank should not be driven into the other side or onto exposed circuitry.
The same view shows the battery and memory close to the work area. Map fan plugs, battery connection and cooler screws before removing parts; similar MSI chassis variants may differ in small but important ways.
03 / Under the assembly
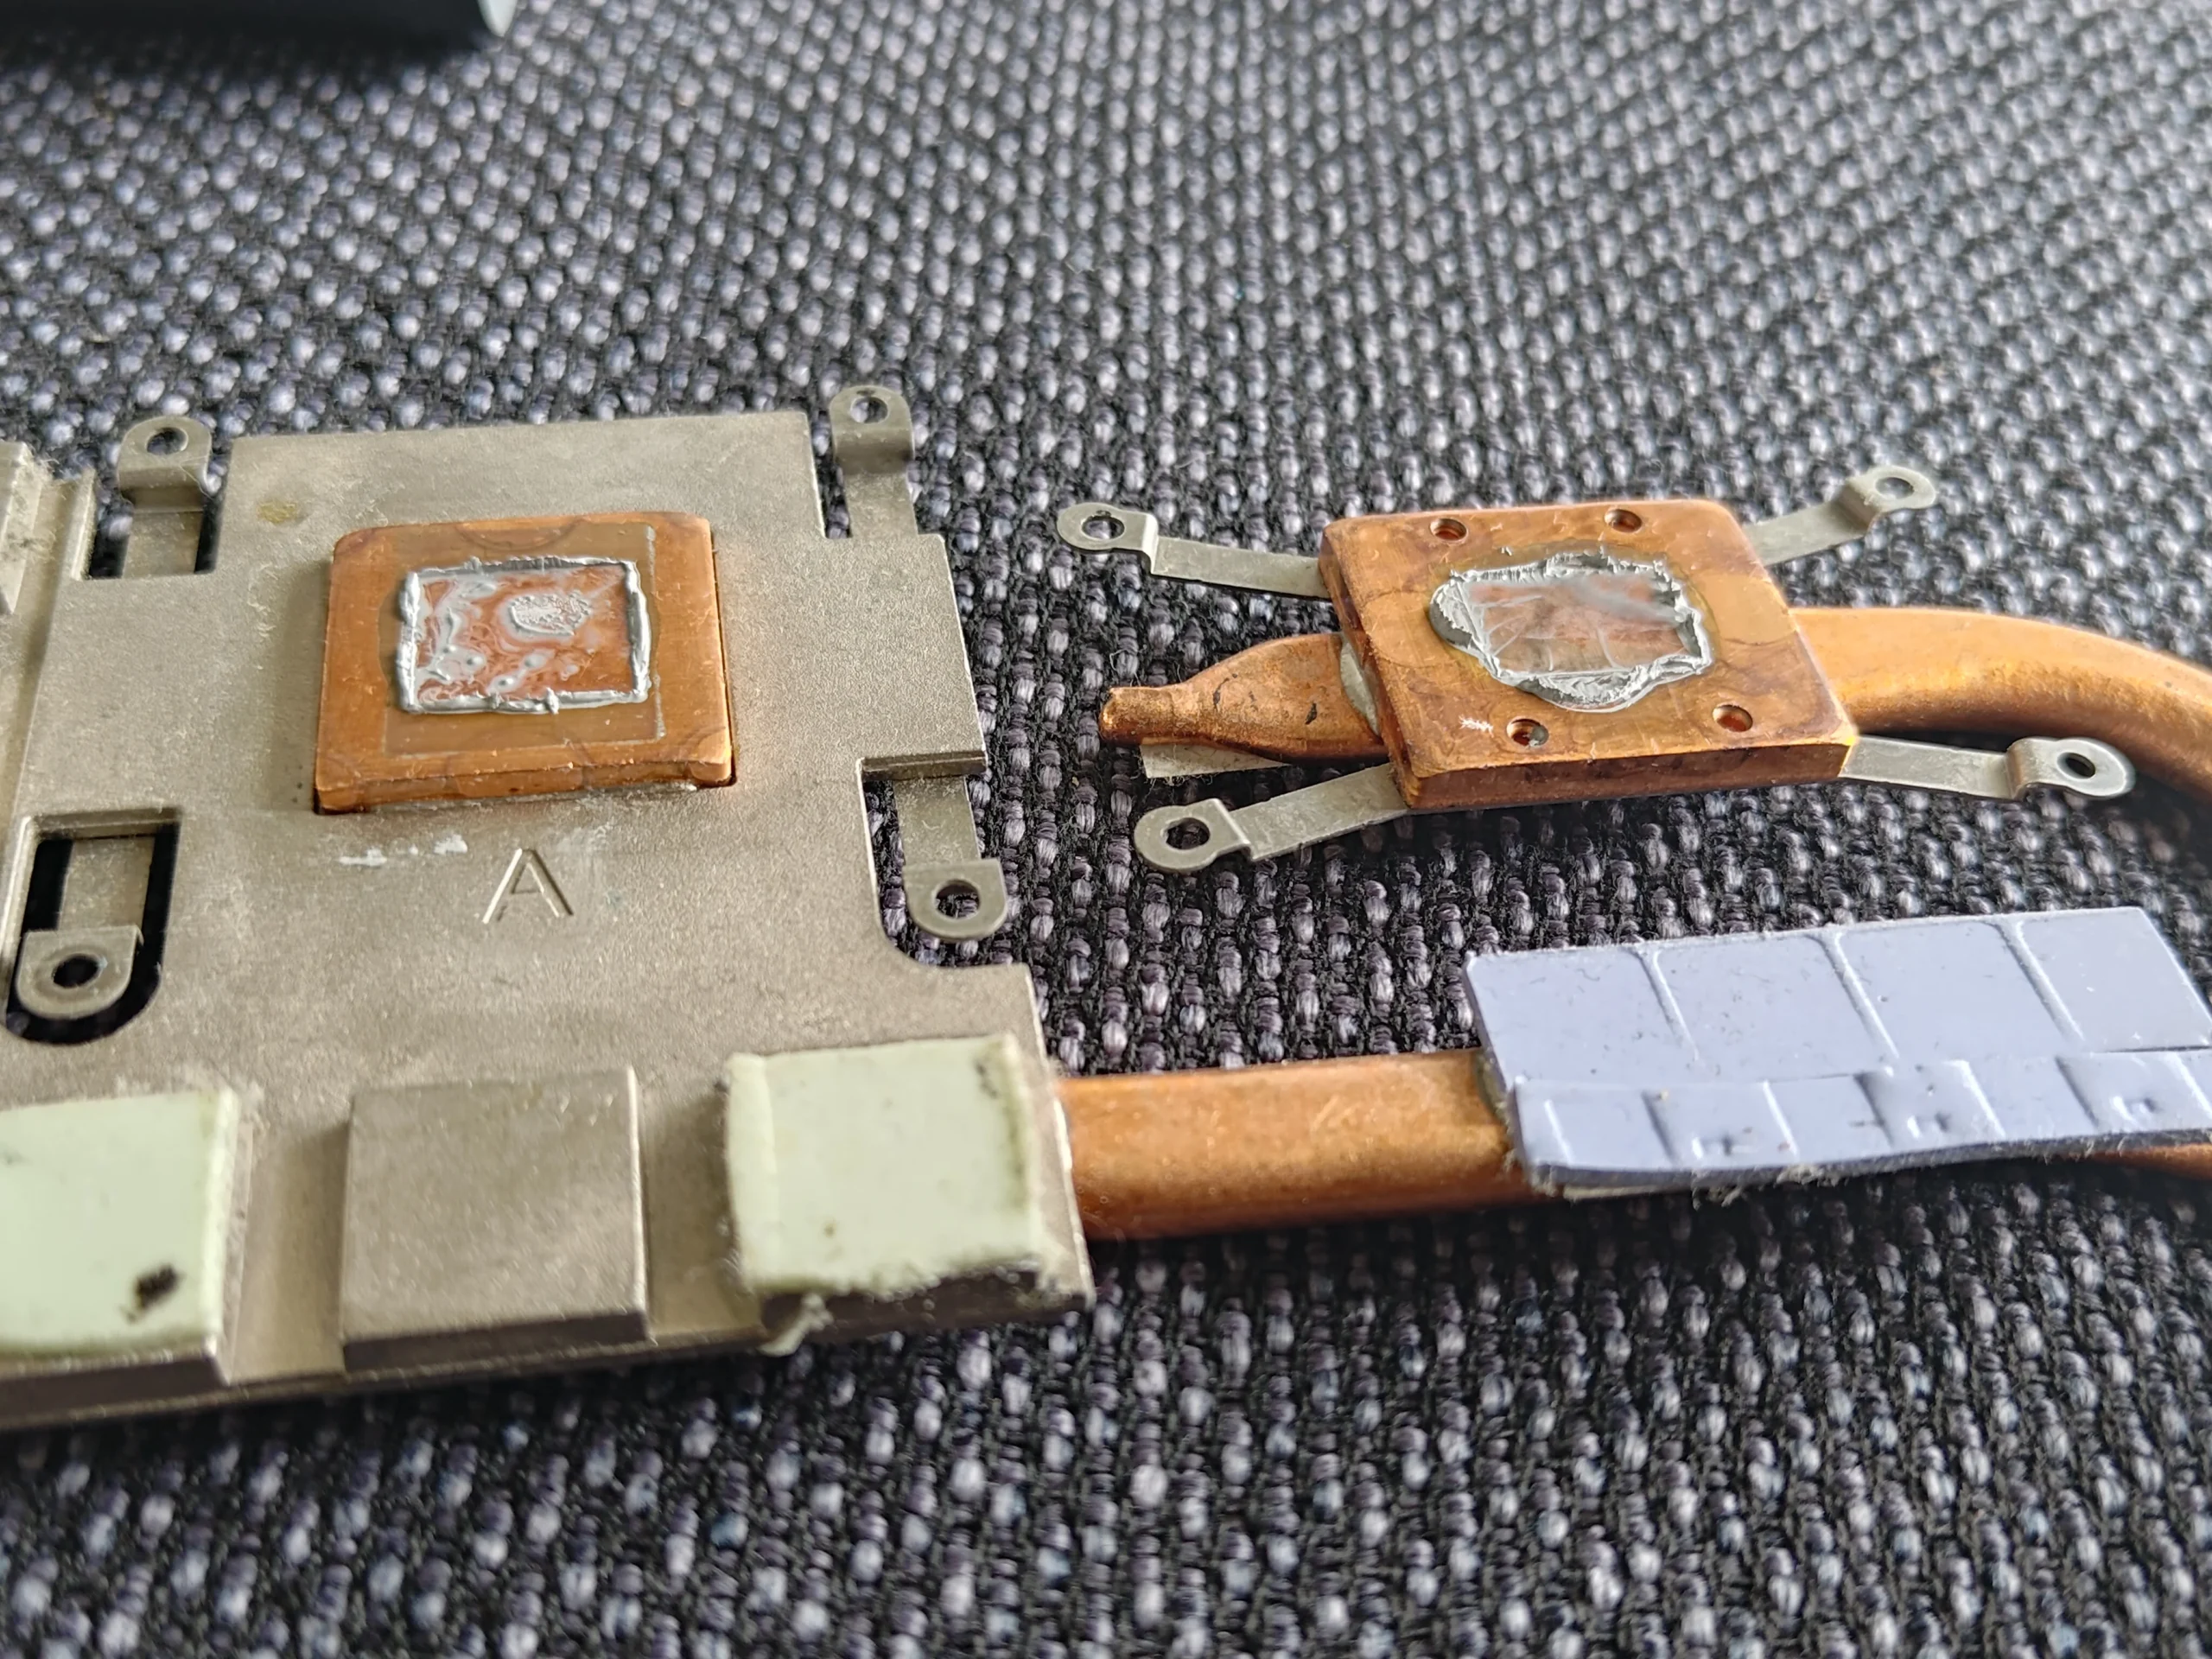
The lifted cooler has more contacts than two chip plates
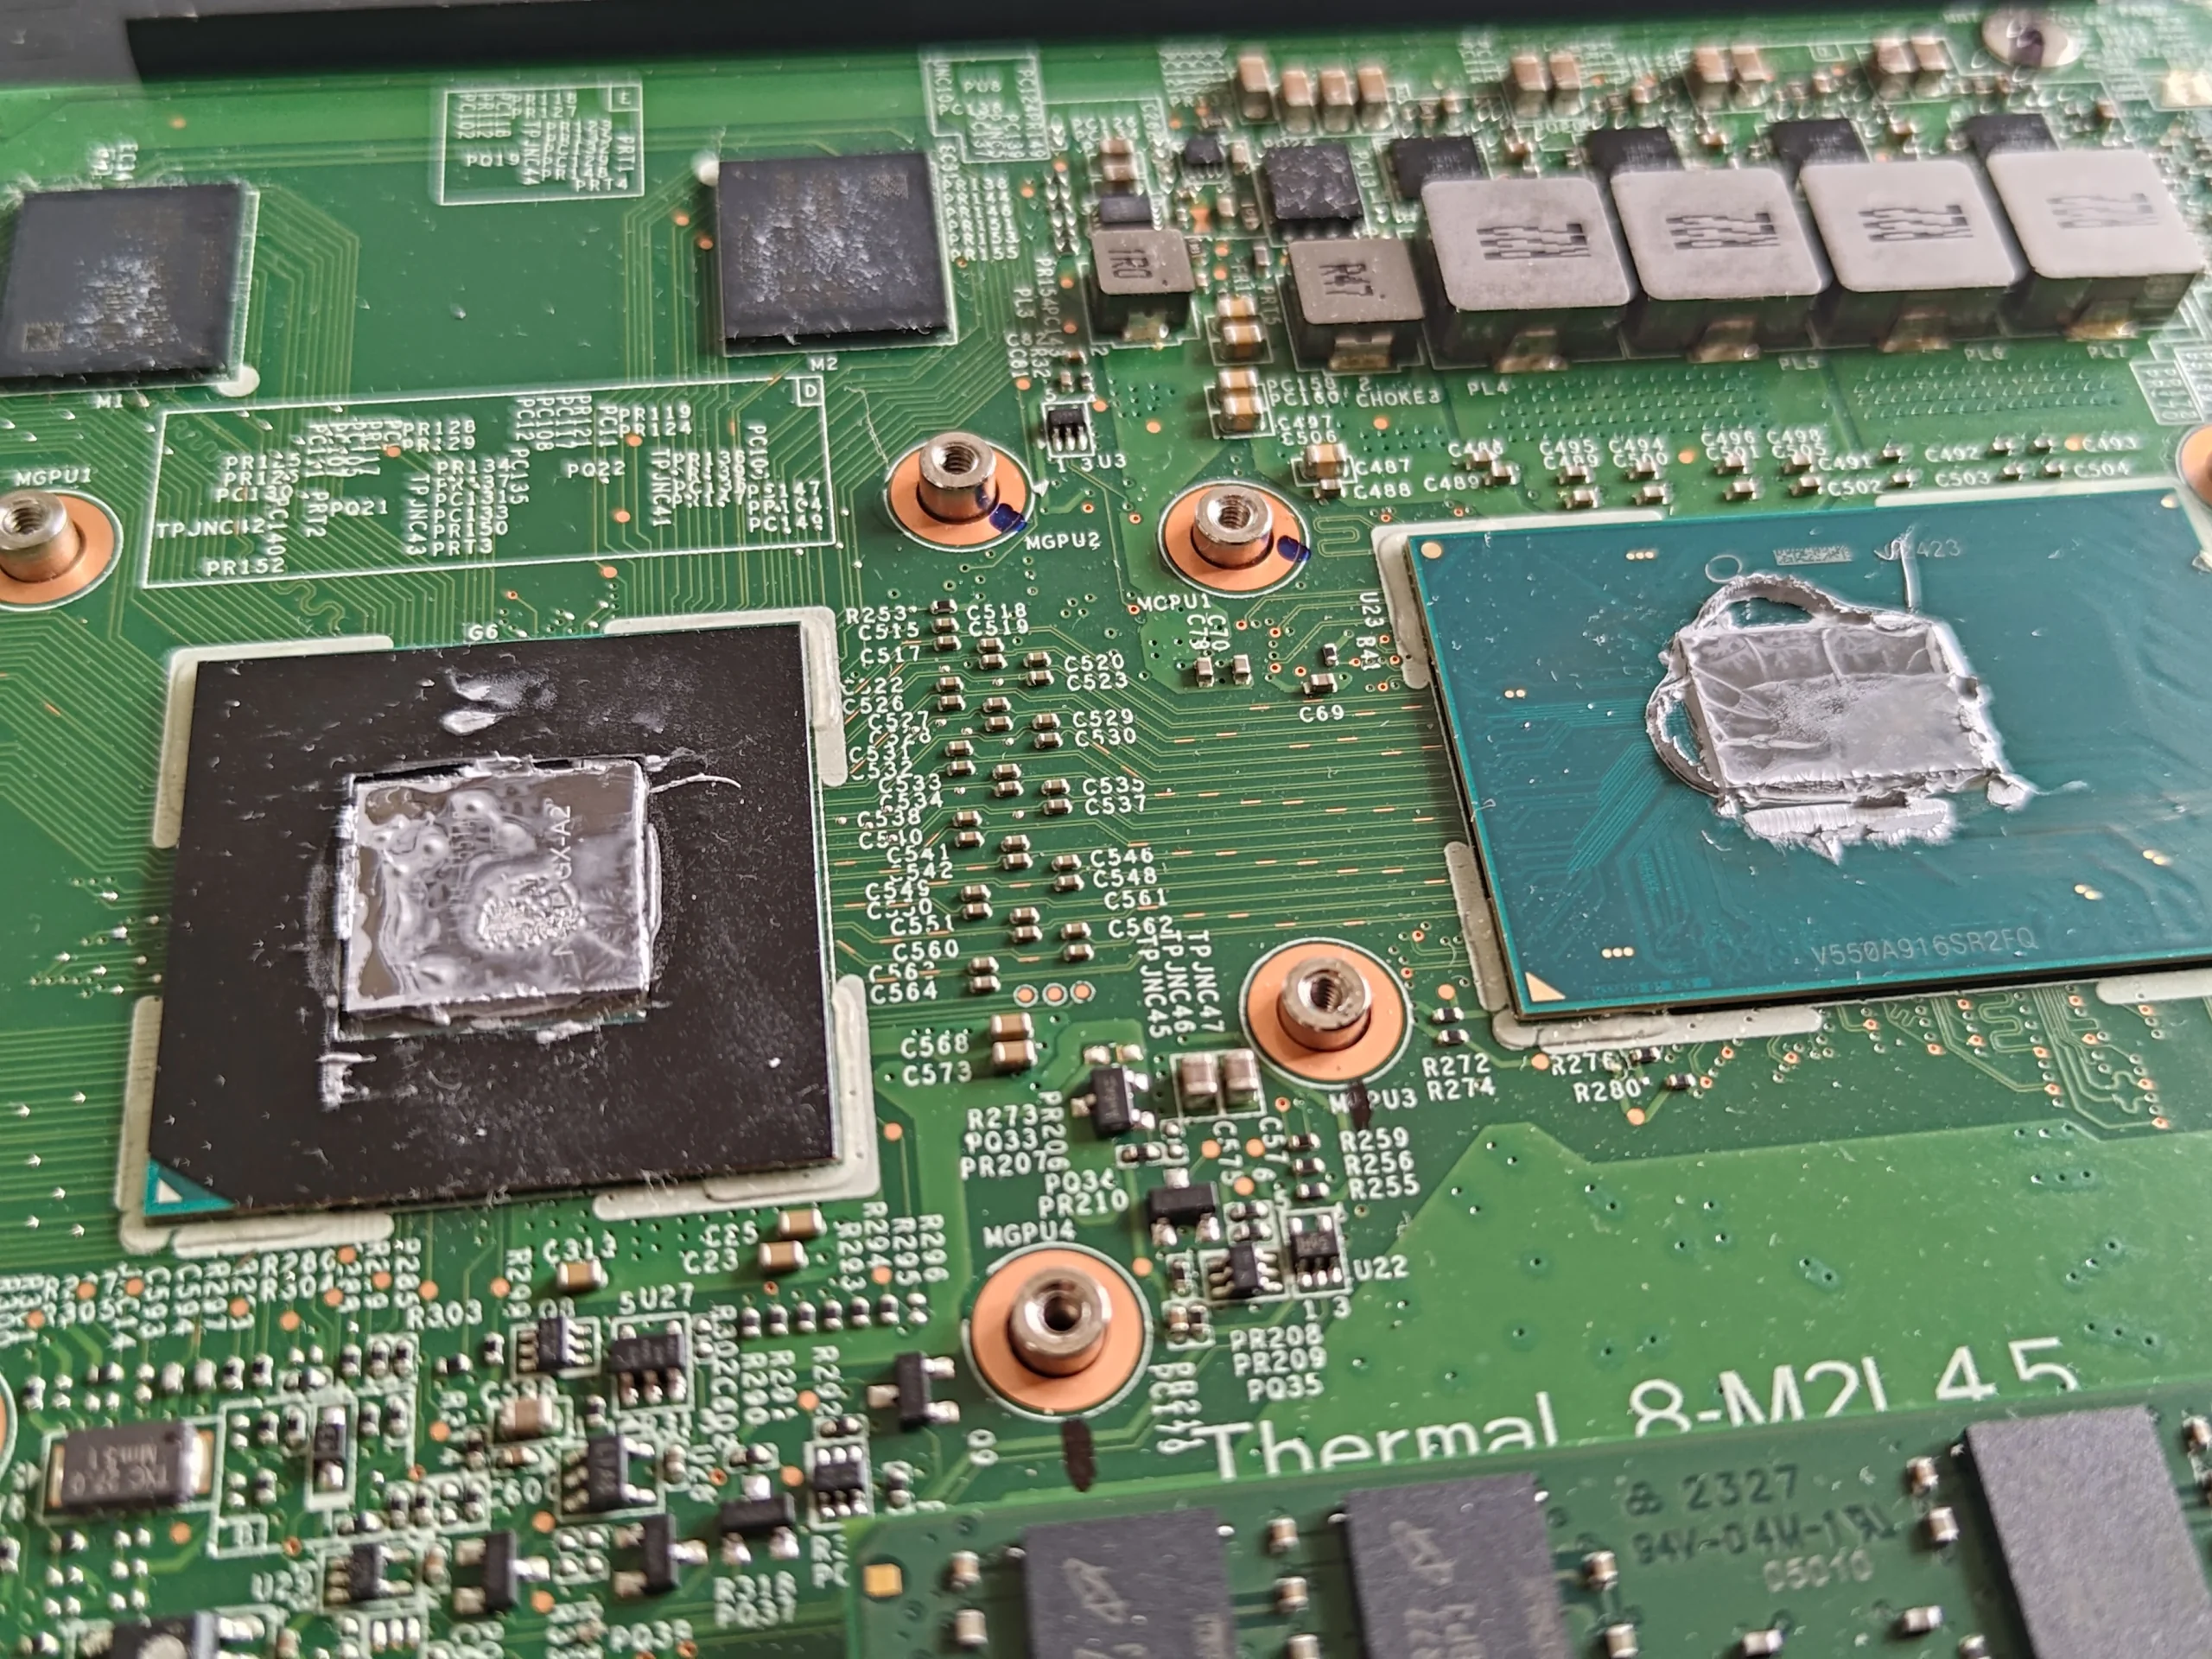
The removed copper assembly shows old compound on its two main contact plates and several smaller grey or pale pads. Those pads bridge gaps to other components. The board photo shows the matching chip surfaces after the cooler came away.
A pad that shifts, tears or changes thickness can change how the main plates seat. Photograph every location before cleaning, check the correct specification for the full model and never replace all interfaces with one generic material.
04 / Responsible finish
Contact preparation and a repeatable load check matter
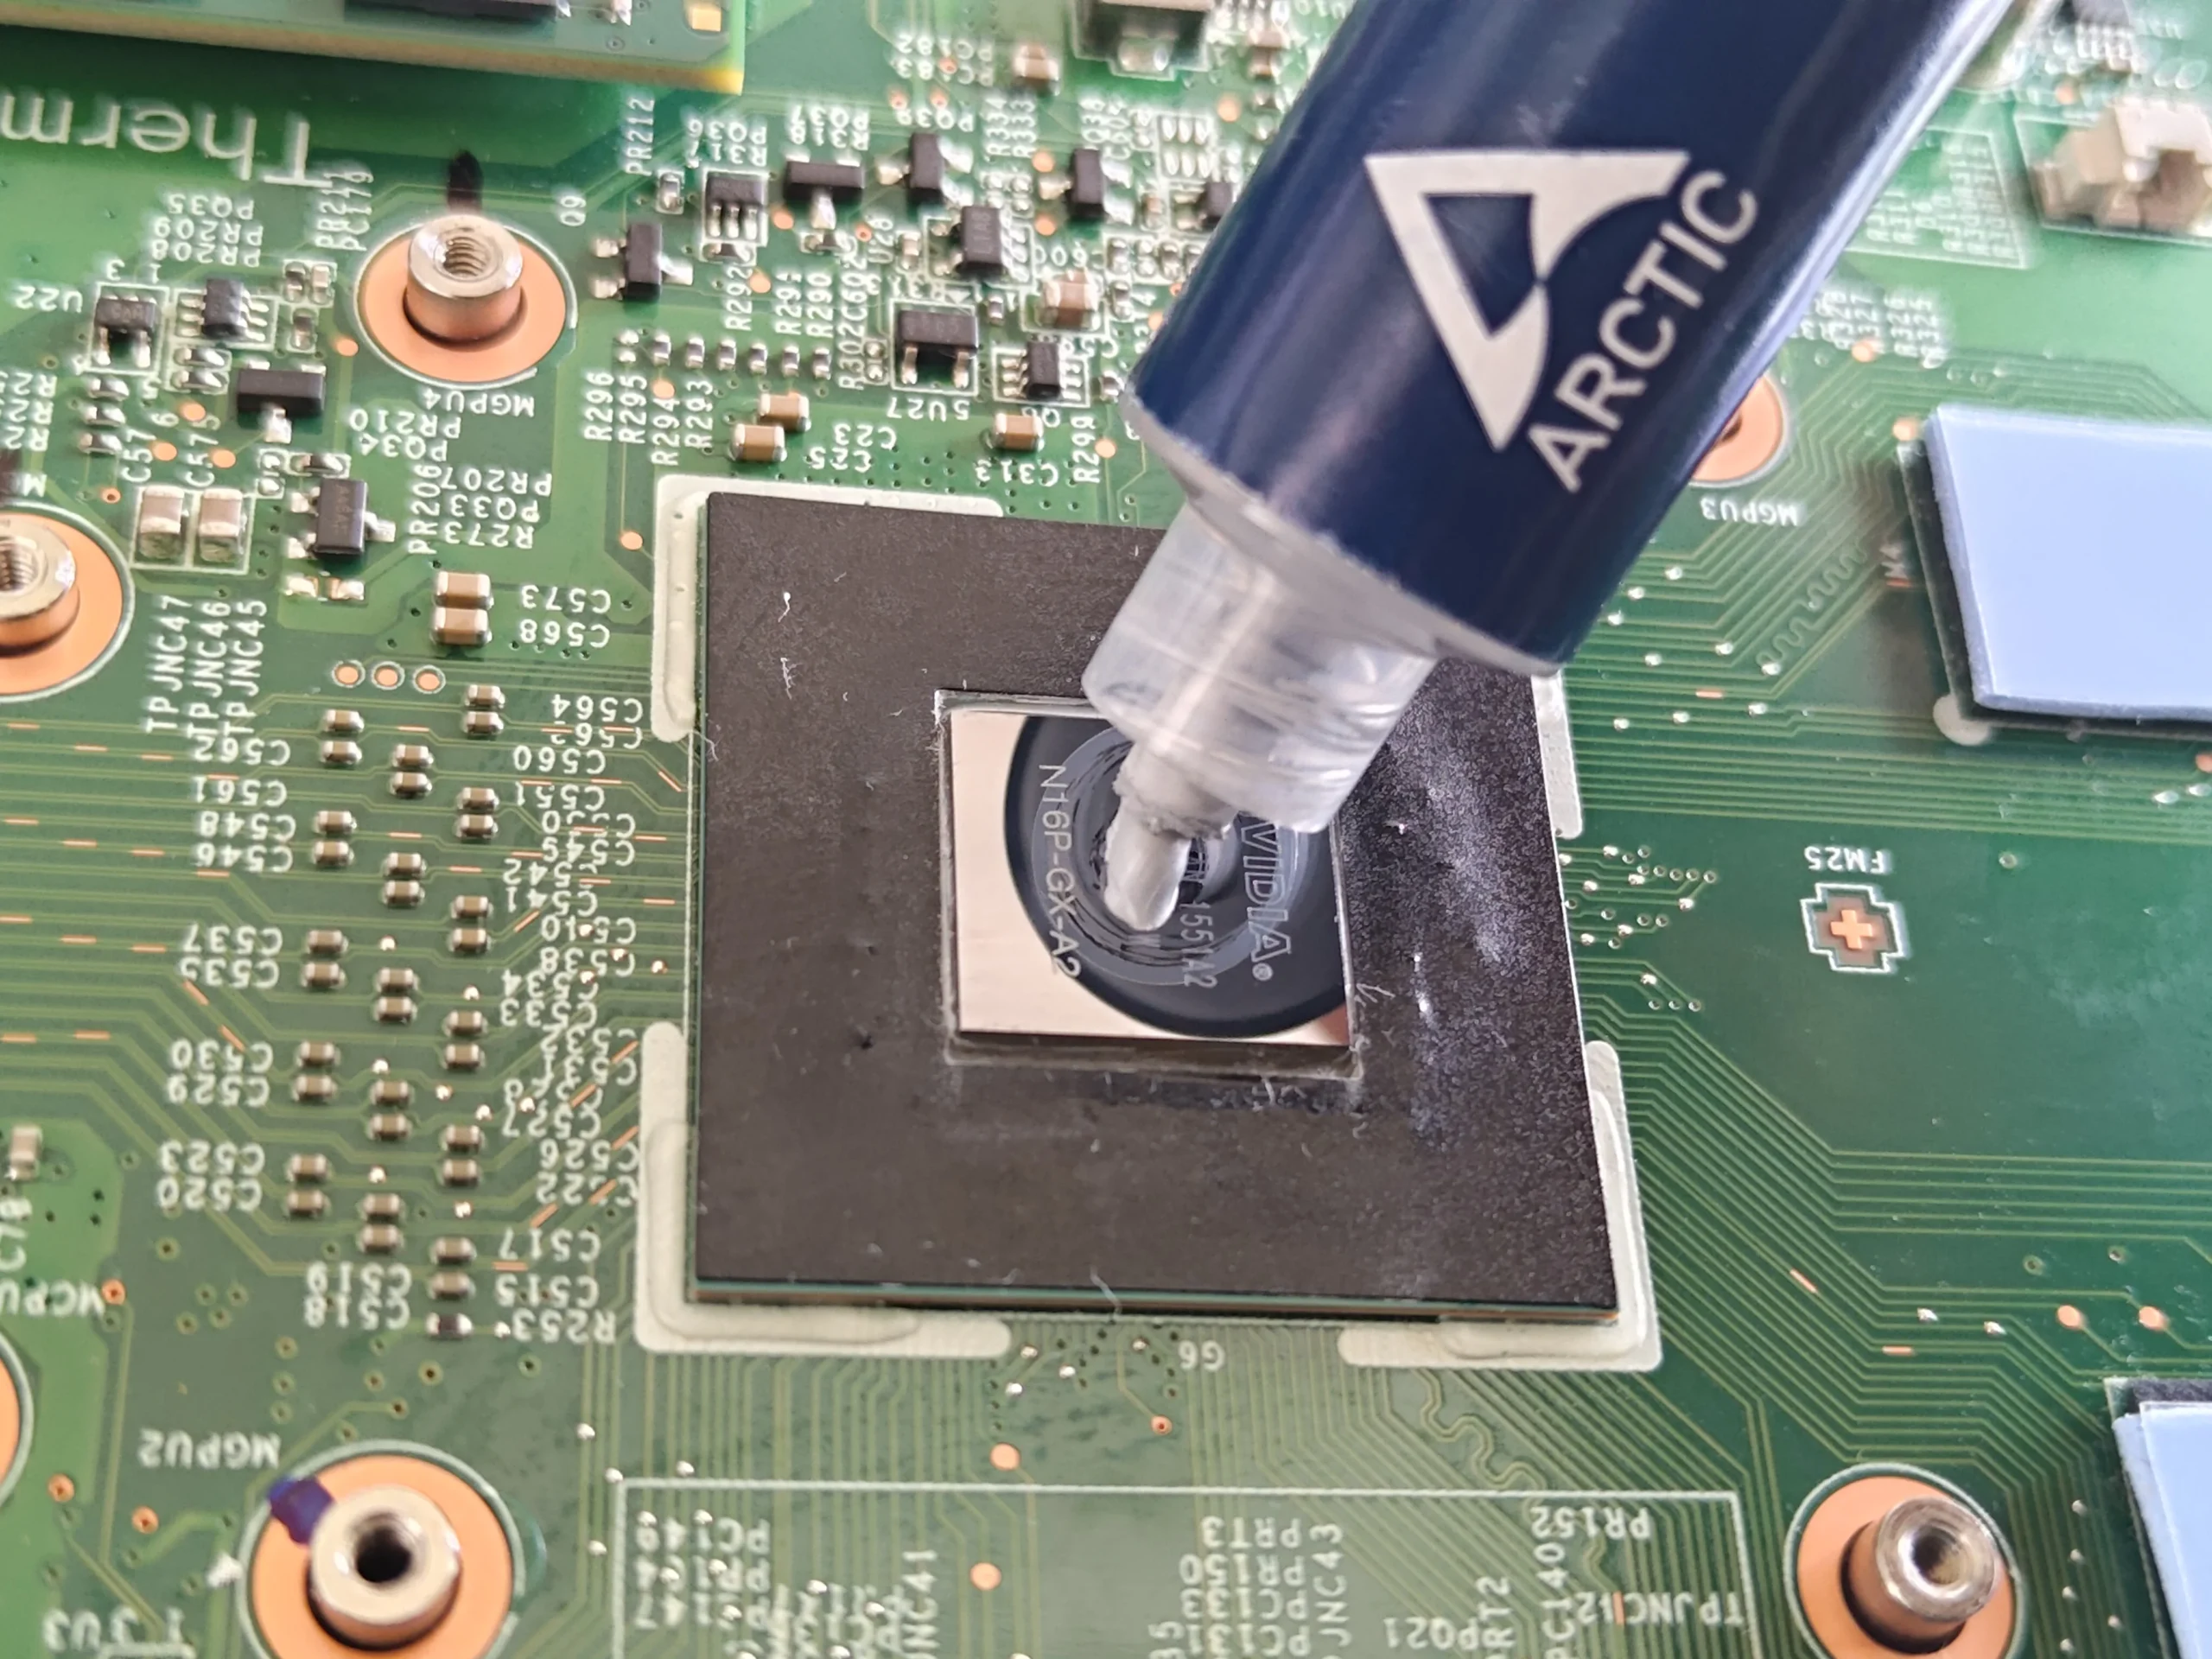
The sequence shows old material being removed and fresh compound applied at a main chip contact. The fan blades are brushed as well. The archive supports those physical stages, not a precise thermal result; the monitoring screenshots lack a matched workload and ambient context.
After reassembly, verify that both fans respond without rubbing and that warm air reaches both exhausts. Compare CPU and graphics readings during the same sustained task if you want evidence of a performance change.
The engineer’s takeaway
This MS-16J5 case shows why a cooling clean is not only a fan-blade wipe. Dust sat at a fin edge downstream of the rotor, while the lifted cooler had two main plates and several padded contacts to restore. The chassis code helps identify the family, but the full marketed model is needed for parts and service instructions.
Before you open the laptop
Can you clean an MS-16J5 laptop yourself?
Begin with the machine shut down and unplugged. Check the exact marketed MSI model as well as MS-16J5 on the underside; MSI lists this chassis code for multiple lines. Use guidance and replacement parts that match the complete model, not just the chassis number.
An owner can inspect external intakes and reachable fan dust first. Cooler removal breaks two chip interfaces and may disturb numerous pads. Stop before lifting it if you cannot document pad placement and obtain correct thermal materials and screw-order guidance.
For model documents, check the official manufacturer support page.
After the clean
How to check the cooling result
Confirm a normal boot, two smooth-running fans and airflow through both fin outlets. Let a familiar workload run long enough to warm the cooler and observe temperatures and fan behaviour together.
The archive's monitor screenshots were not captured as a controlled pair, so they cannot establish a numerical improvement. Use the same task, power plan and similar room conditions for a fair comparison.
Questions from owners
MSI MS-16J5 fan and thermal pad FAQs
Answers for the chassis code and cooling arrangement shown in this photo set.
Is MS-16J5 the full MSI laptop model?
No. MSI's parts list associates MS-16J5 with several GE62, GP62, GL62 and other variants. Confirm the full marketed model before ordering a fan or using a service guide.
Does this MS-16J5 unit have two fans?
Yes. The open-base photos show a fan at each side connected through a copper-pipe cooler.
Why clean the fin edge if the blades are dirty?
The fin edge is where warm air must pass out of the cooler. Dust held there can restrict flow even when the rotor still spins.
Can I use one thickness of thermal pad everywhere?
No. The lifted assembly has several separate contacts. The required thickness and placement depend on the exact configuration.
Was fresh compound applied to the main chip?
A photo shows compound being dispensed at a main chip contact. The archive does not establish the product used or the final spread under the refitted plate.
Do the monitoring screenshots prove a temperature drop?
No. They lack matched workload and room conditions. A repeatable load test is needed to compare results.
UK MSI cooling help
Is your MSI fan noisy or its exhaust weak?
If you are in the UK, tell us the full marketed MSI model as well as MS-16J5 if printed underneath, what task triggers the issue and your postcode. Please leave serial numbers out of public photos.
We can discuss both fans and fin outlets, whether the copper cooler needs to come off, and how its pads and chip contacts should be handled.
Read about our MSI gaming laptop cleaning service, then use the form to tell us your computer model, symptoms and UK postcode.
Free to enquire · No obligation to book. We discuss the proposed work and price before you decide.
The workshop photos
MSI MS-16J5 cooling service gallery
Open the photos to follow the dusty fin edge and fan, dual-fan copper layout, exposed contacts, pads and compound application.