Published 9 October 2026 · Razer gaming laptop (exact model unconfirmed) case study
Razer laptop cleaning
the real blockage was at the fins.
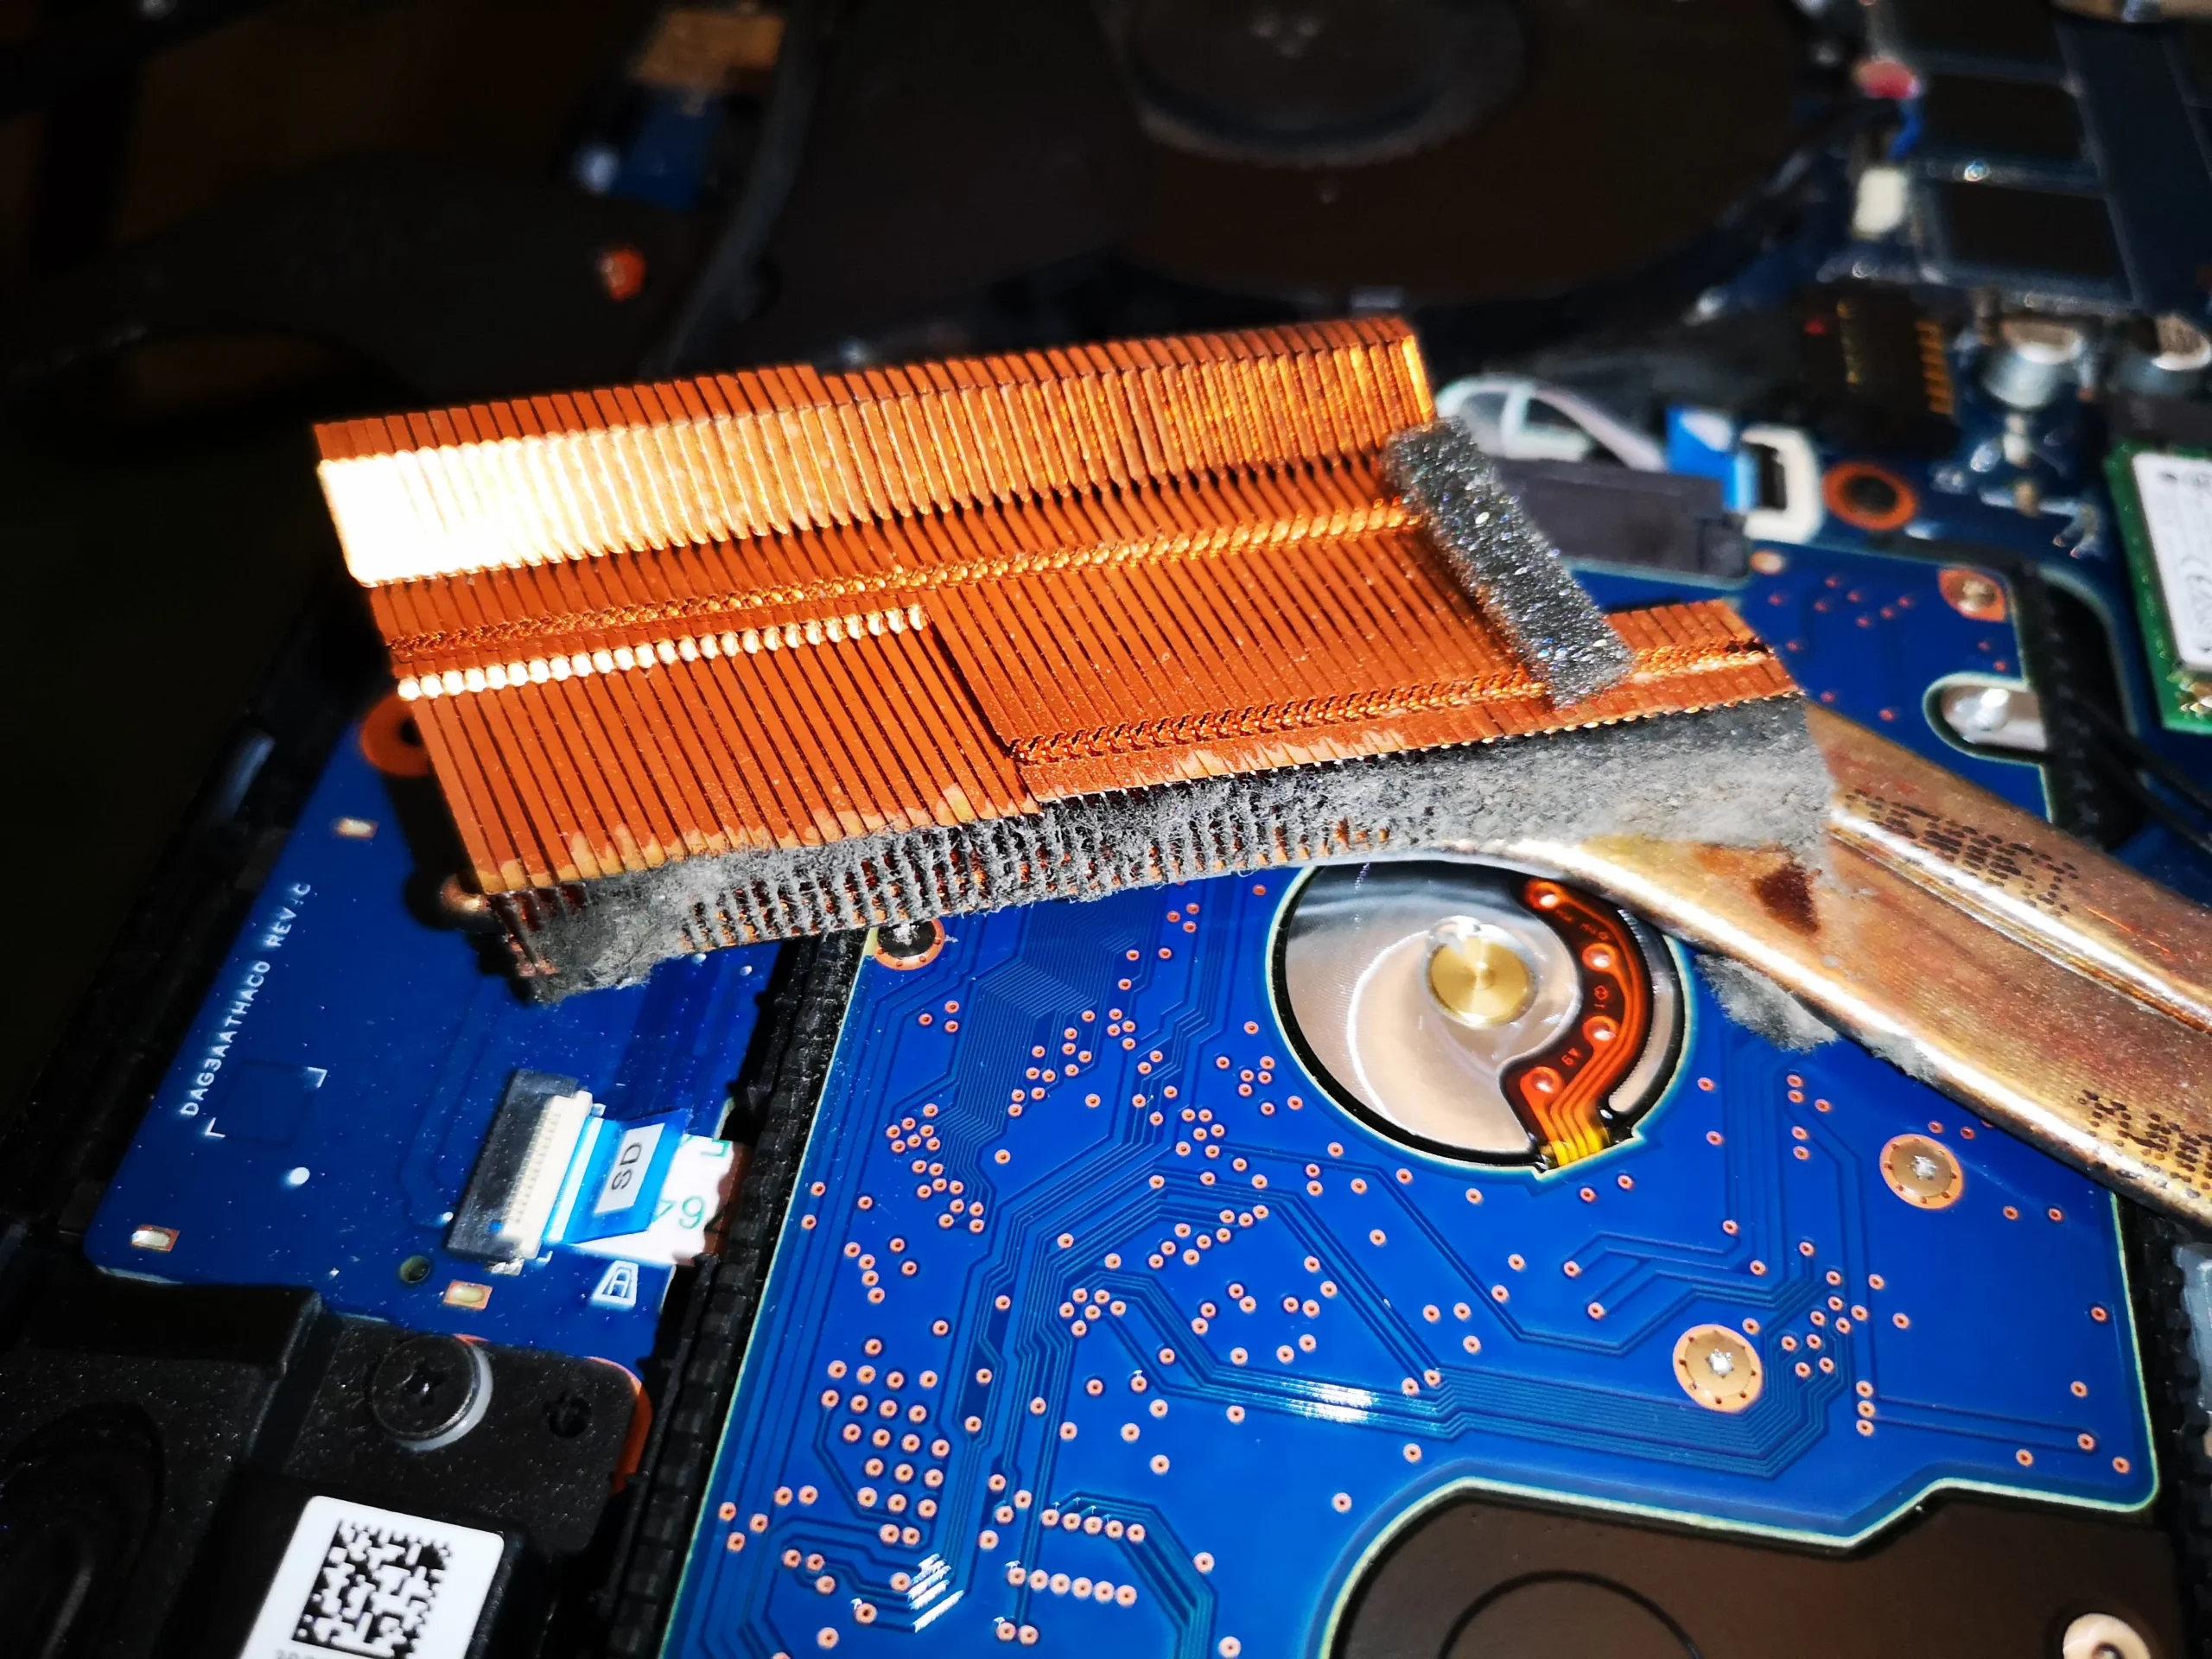
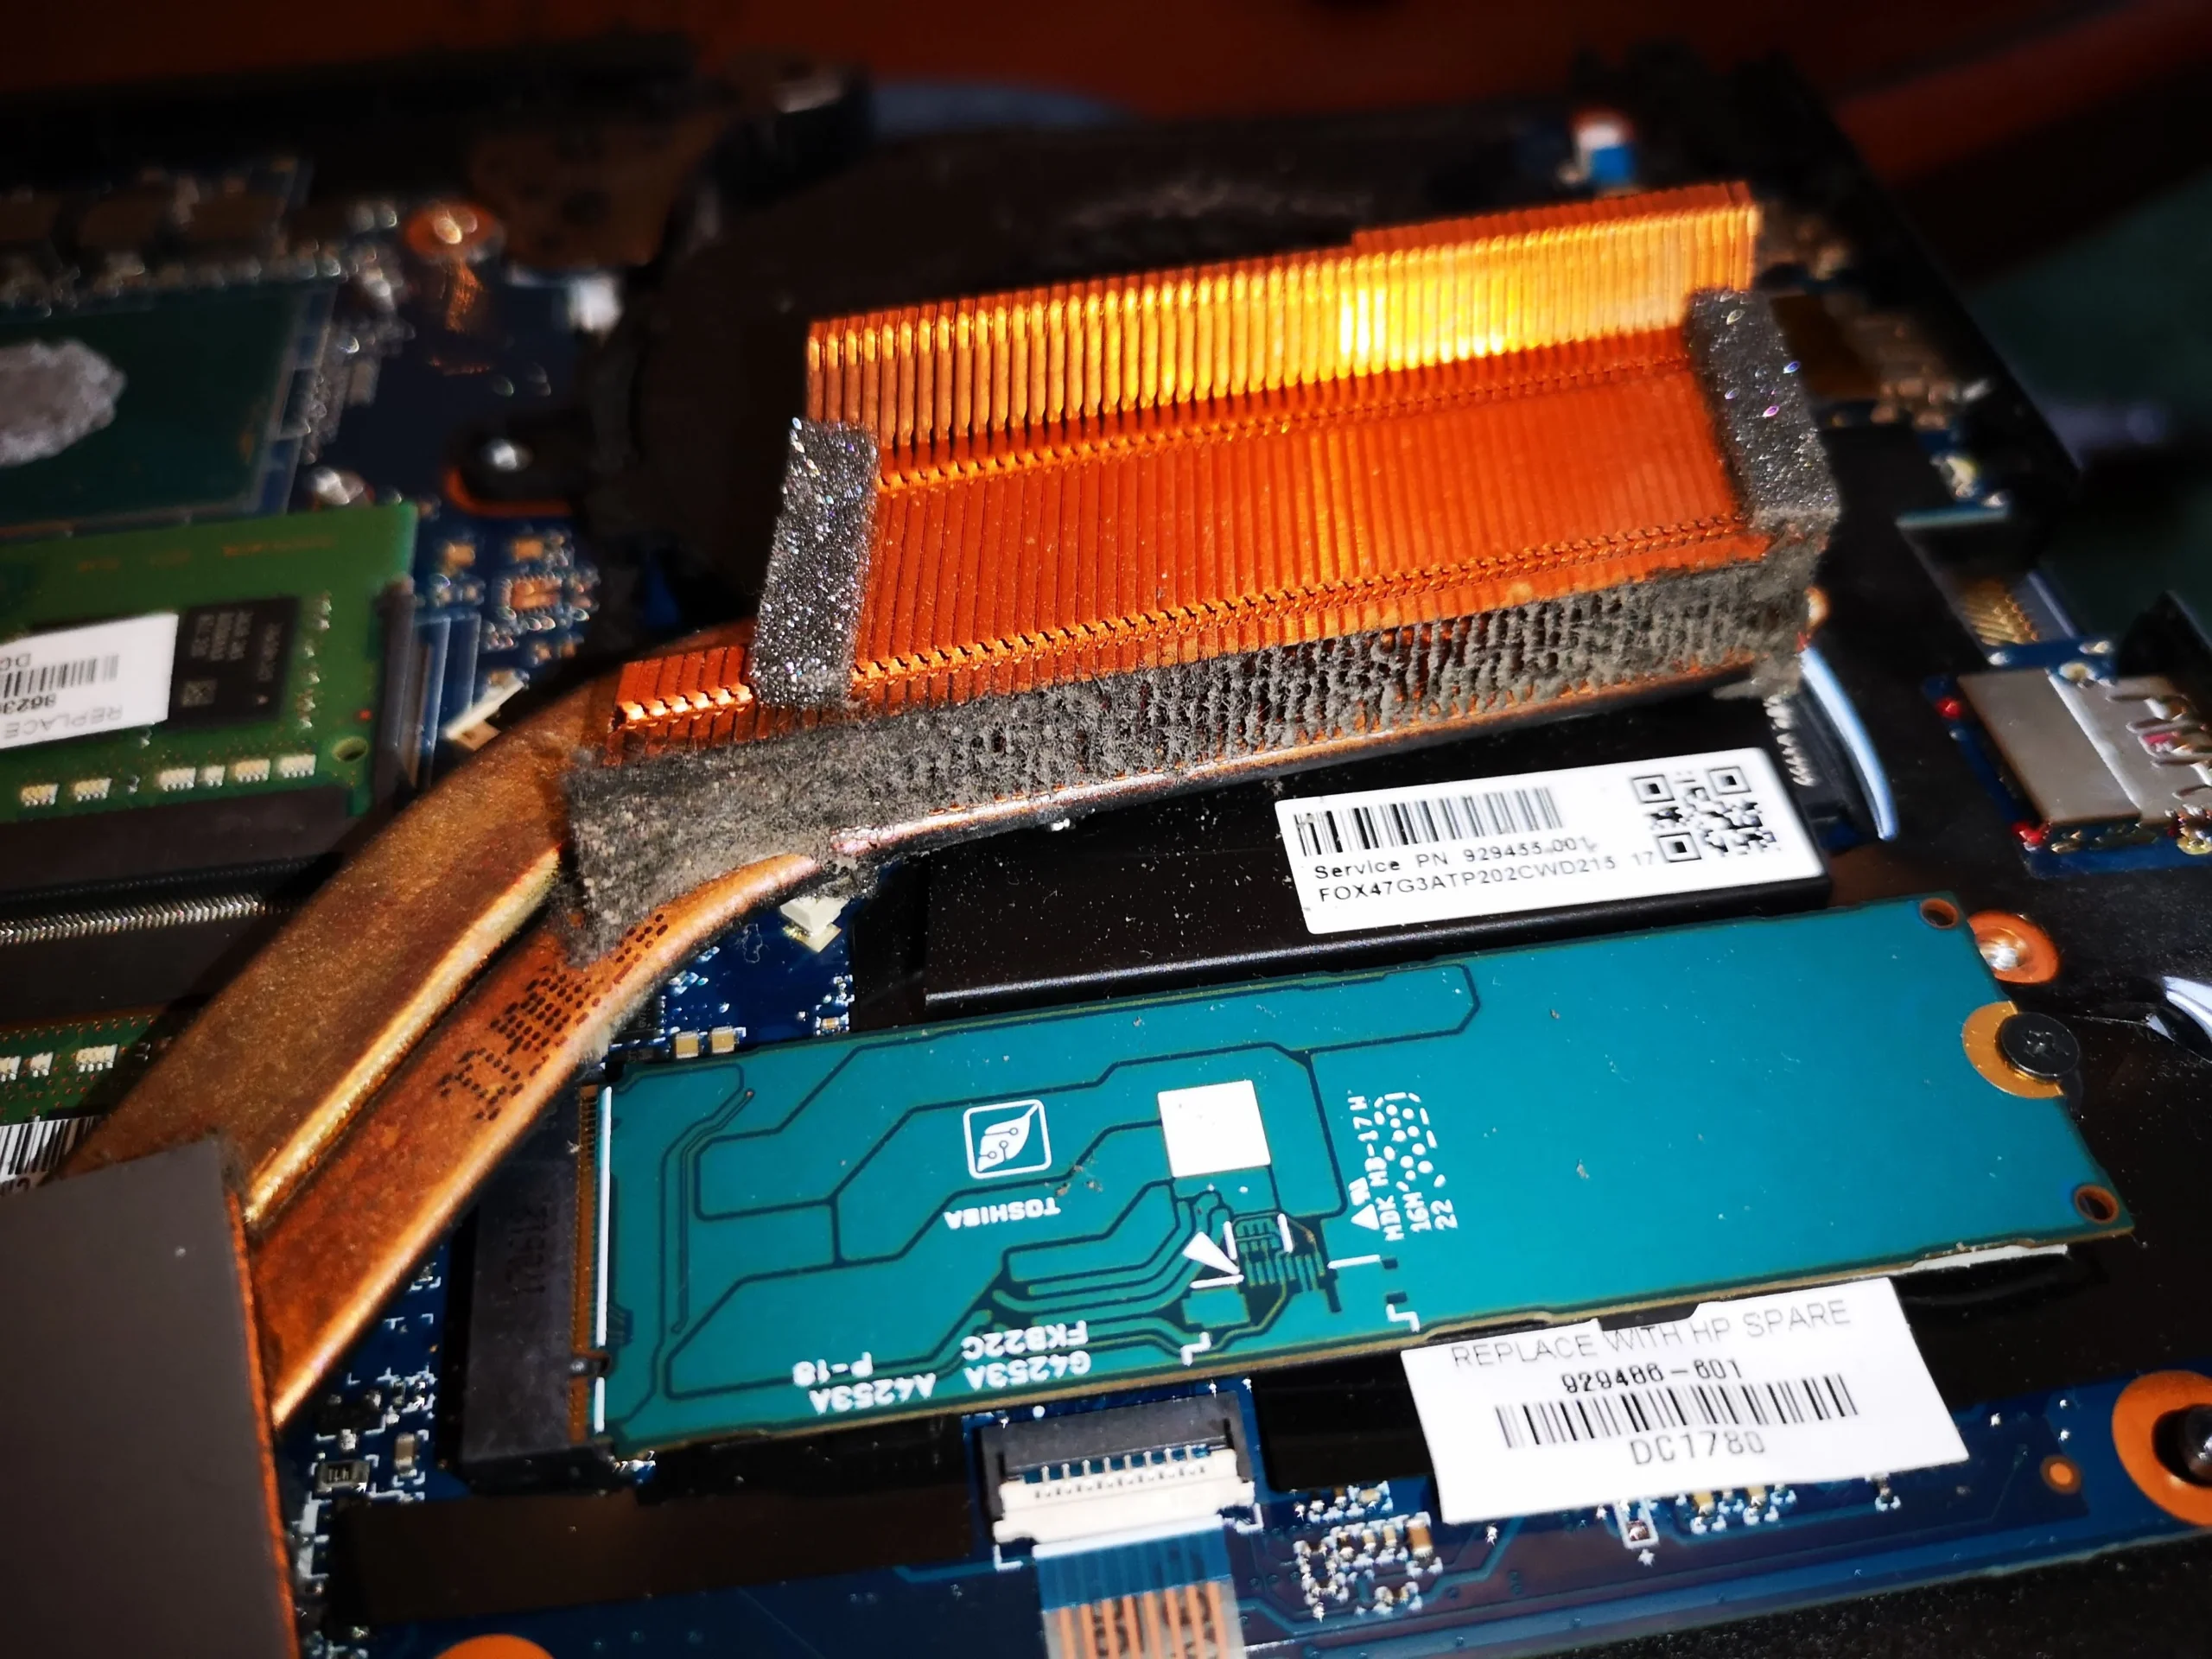
The two fans looked dirty, but the copper heatsink photo reveals the bigger issue: a grey strip of lint had collected where warm air should pass through the fins. That is why an internal clean has to follow the air beyond the spinning blades.
The machine
Razer gaming laptop with two cooling fans
The visible restriction
Lint at the copper fin stack
The service access
Cooling assembly lifted; chip contact surfaces exposed
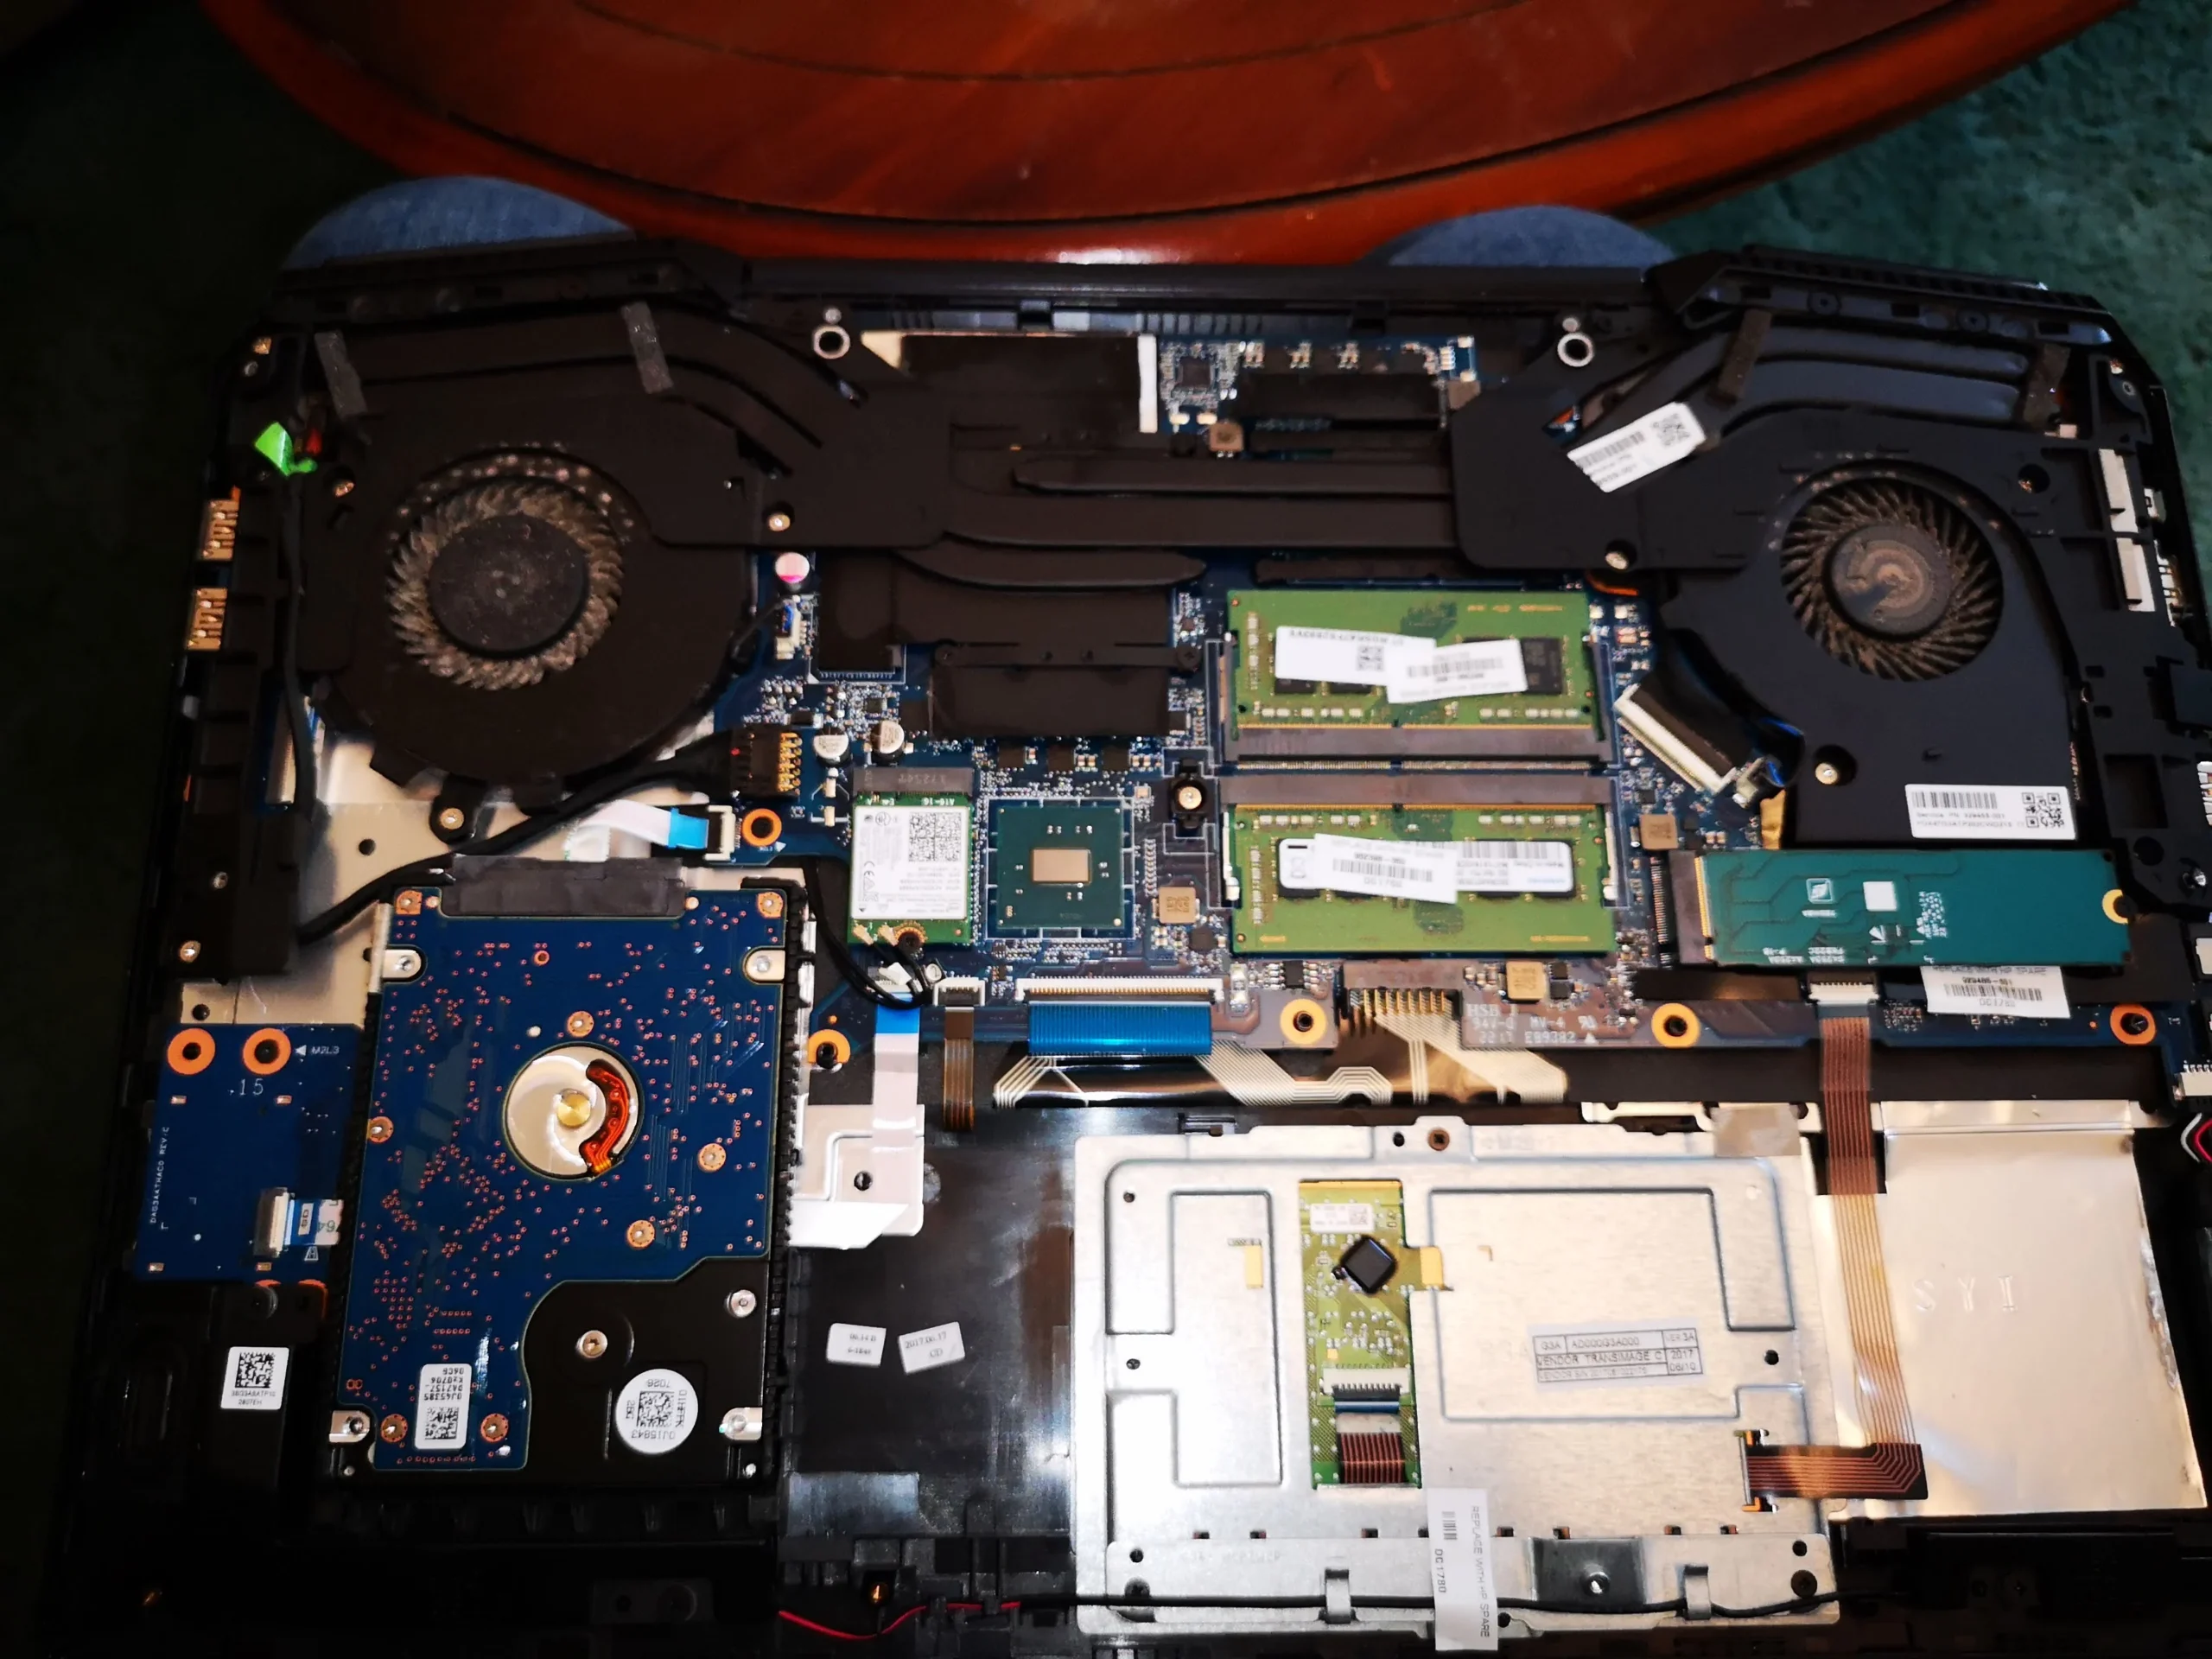
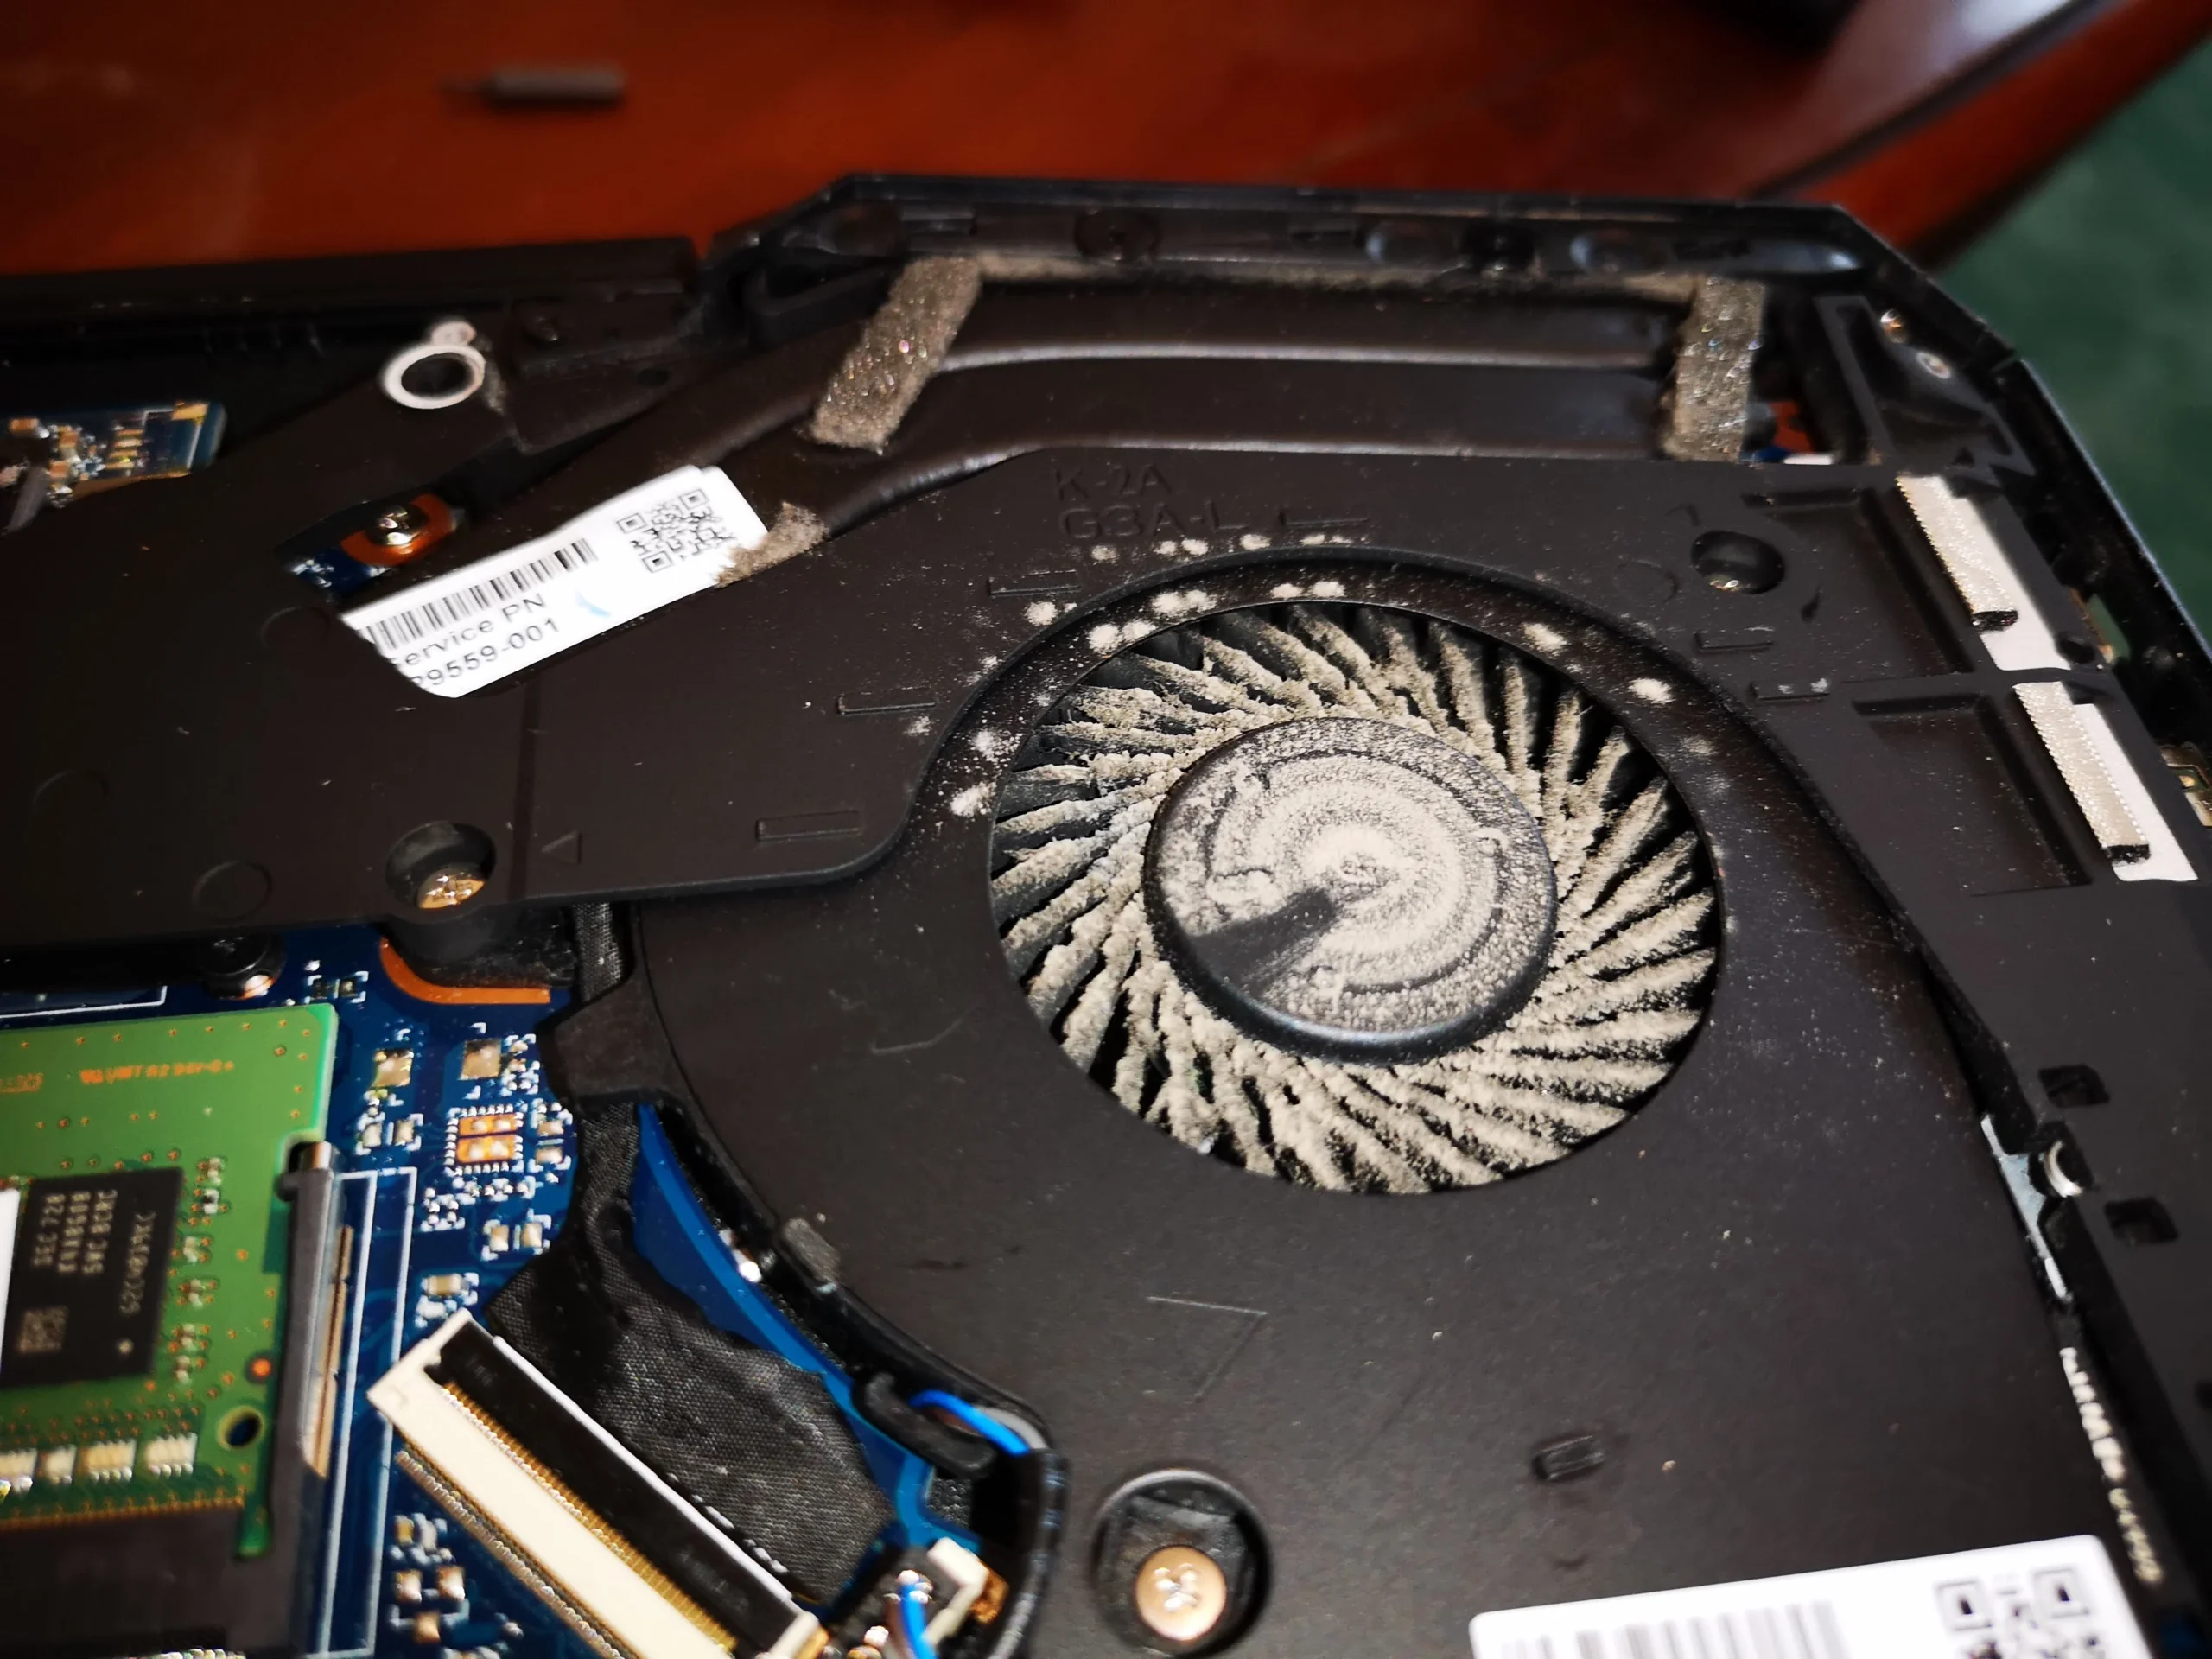
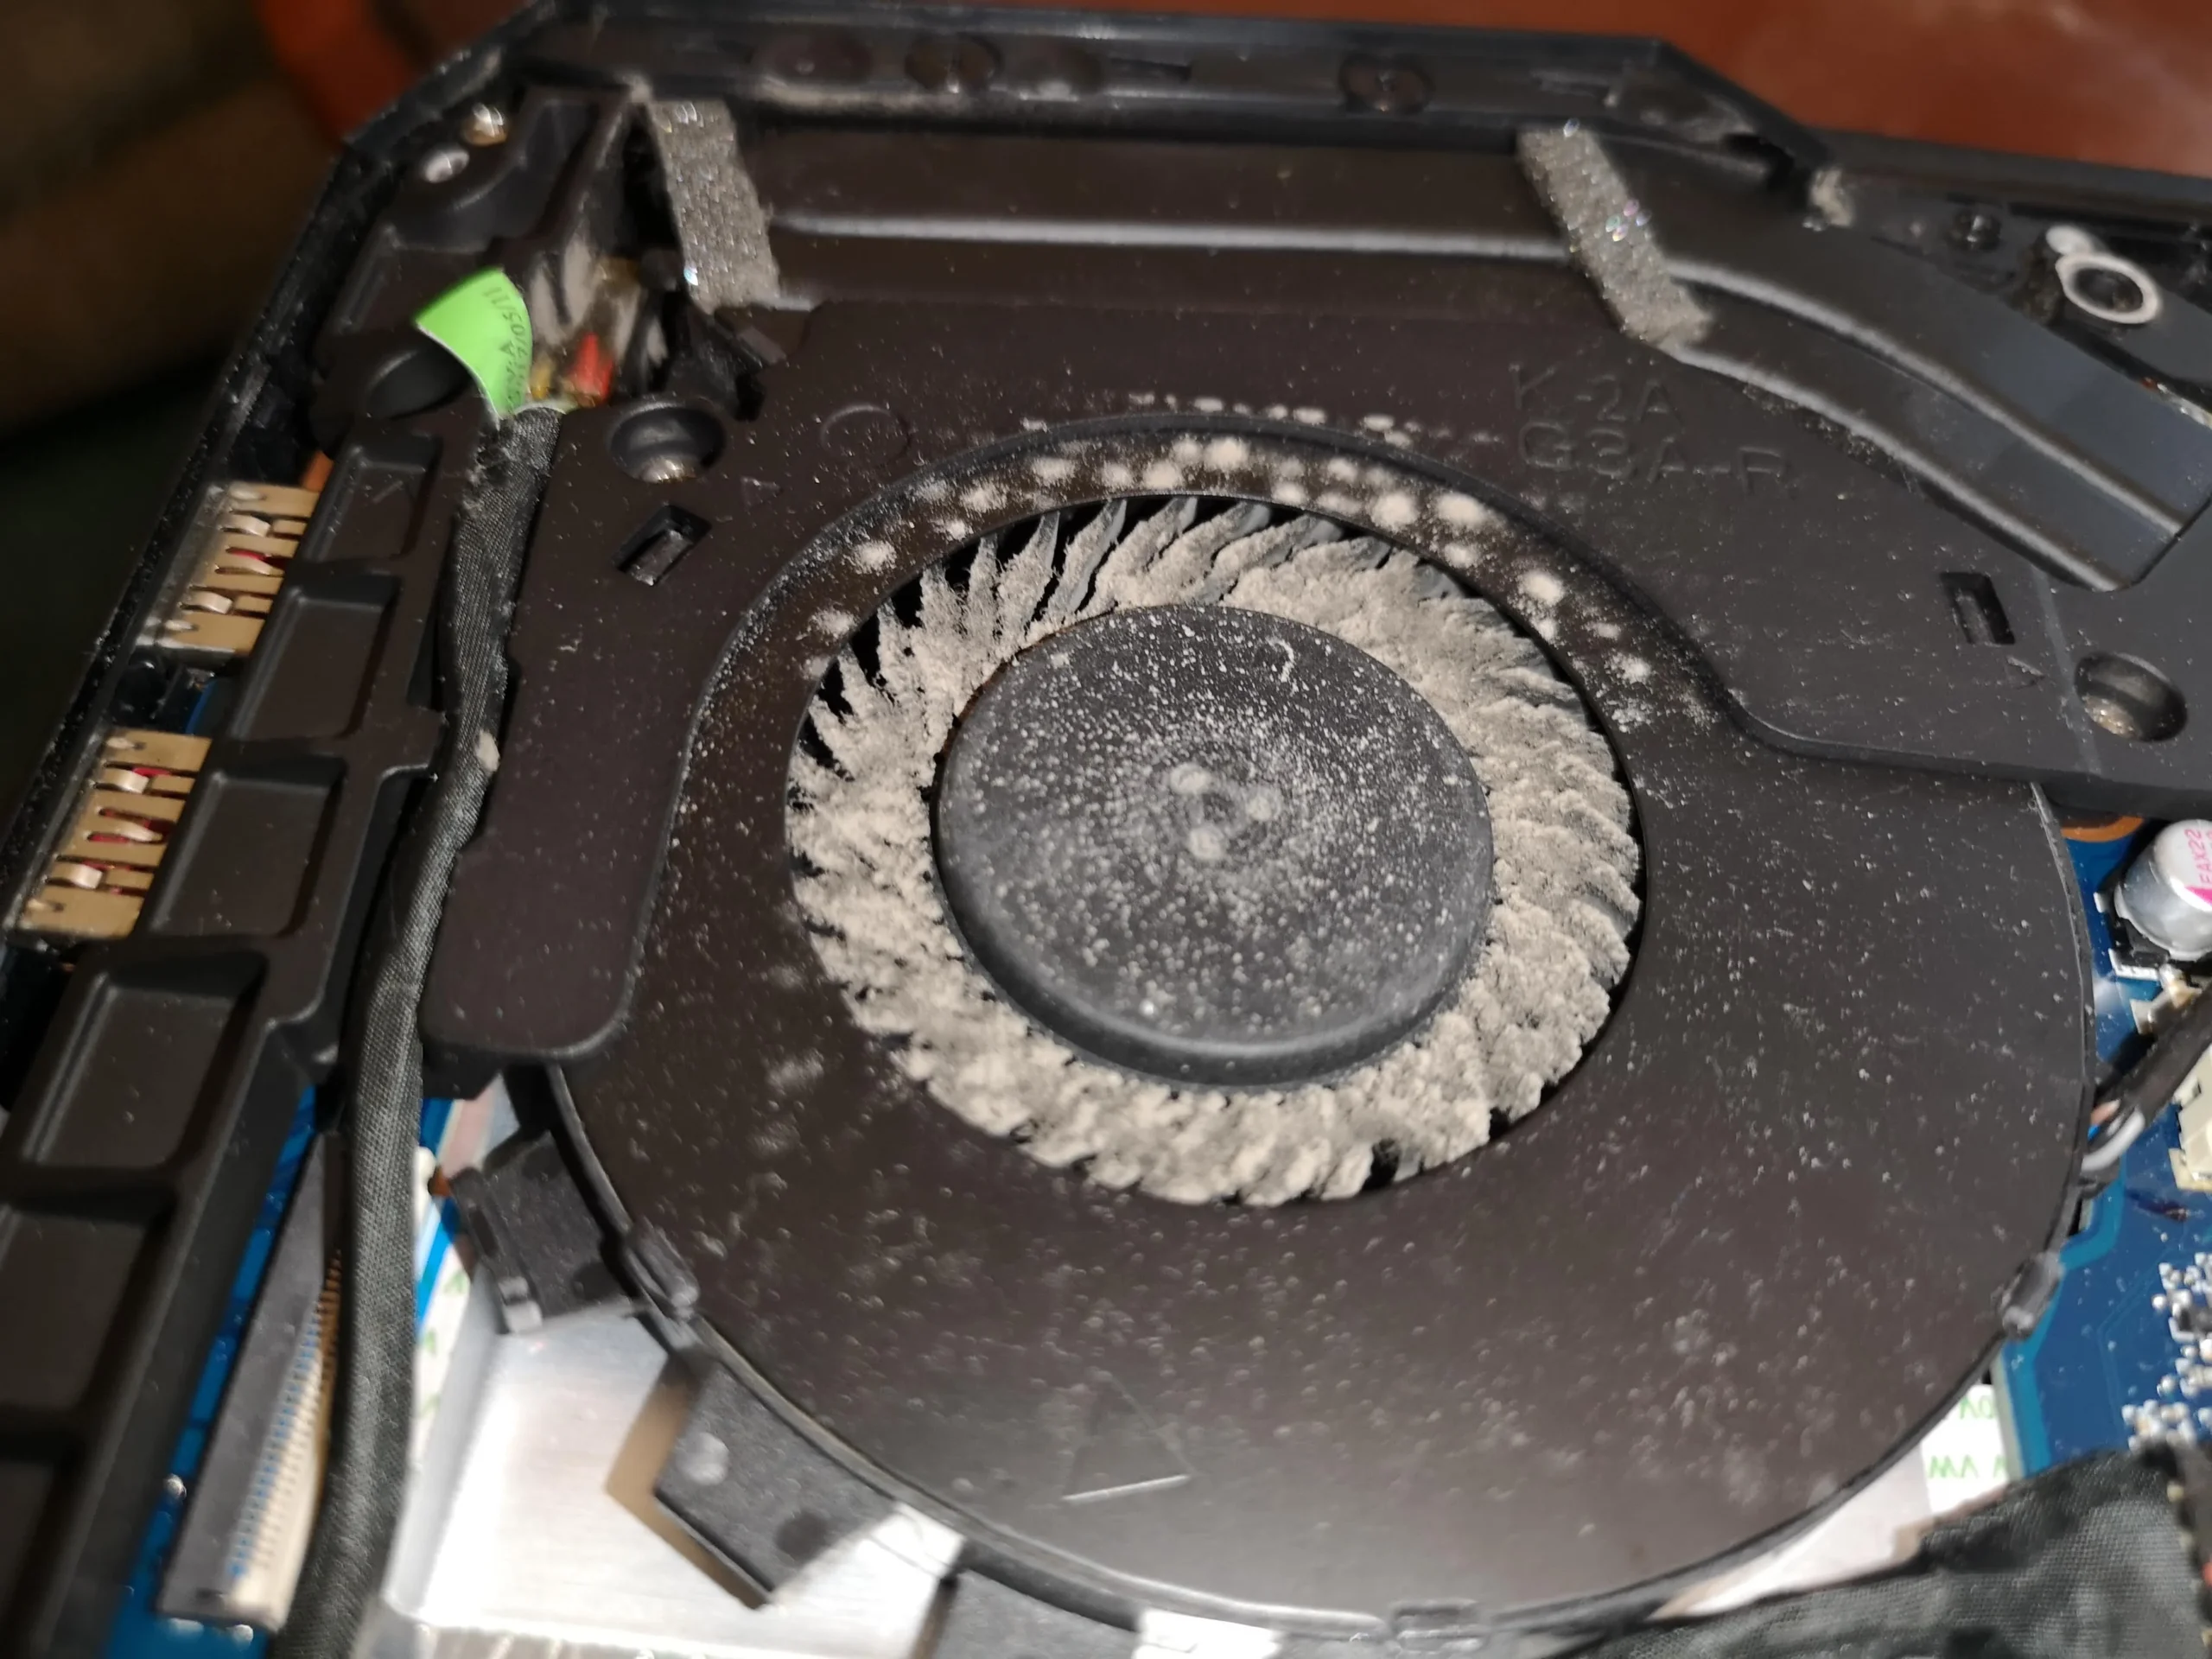
This Razer laptop has a compact dual-fan cooling assembly. In the opening overview, one fan has a heavy grey coat over its inlet blades. Another image shows debris on the second fan. The copper fin stack, exposed after lifting the cooling assembly, carries a distinct felt-like edge of lint.
That combination matters more than a single dusty fan photo: air must enter the fans, move through the metal fins and leave the chassis. The photo archive does not show a readable model number or a controlled before-and-after test, so this article identifies the machine as a Razer gaming laptop without guessing its exact Blade version or a temperature improvement.
In this case study
01 / What you can see first
Two fans, two inlets to inspect
With the bottom open, the Razer's left and right fans sit at opposite ends of the cooling assembly. The left fan close-up has dust packed along the curved impeller blades and across the centre. The other fan also needs its own inspection, even if one side looks worse.
Dust on blades can reduce their efficiency and become loose during cleaning. Hold the rotor still and collect material rather than spinning it fast with a blast of air. A photo after cleaning shows the blades looking much clearer.
02 / Where air has to leave
The copper fin edge had grown a felt-like lint wall
The exposed copper fin stack has a thick grey strip along its lower edge. That material sits across the narrow passages the fan needs to push air through. A perfectly healthy motor cannot move much air through a blocked outlet.
This is the point that an outside vent clean can miss. A puff of air from the exterior might move some lint, but without internal access you cannot see whether the strip has been removed or pushed farther into the assembly.
03 / The thermal contact
Removing the cooler exposes the chips as well as the fins
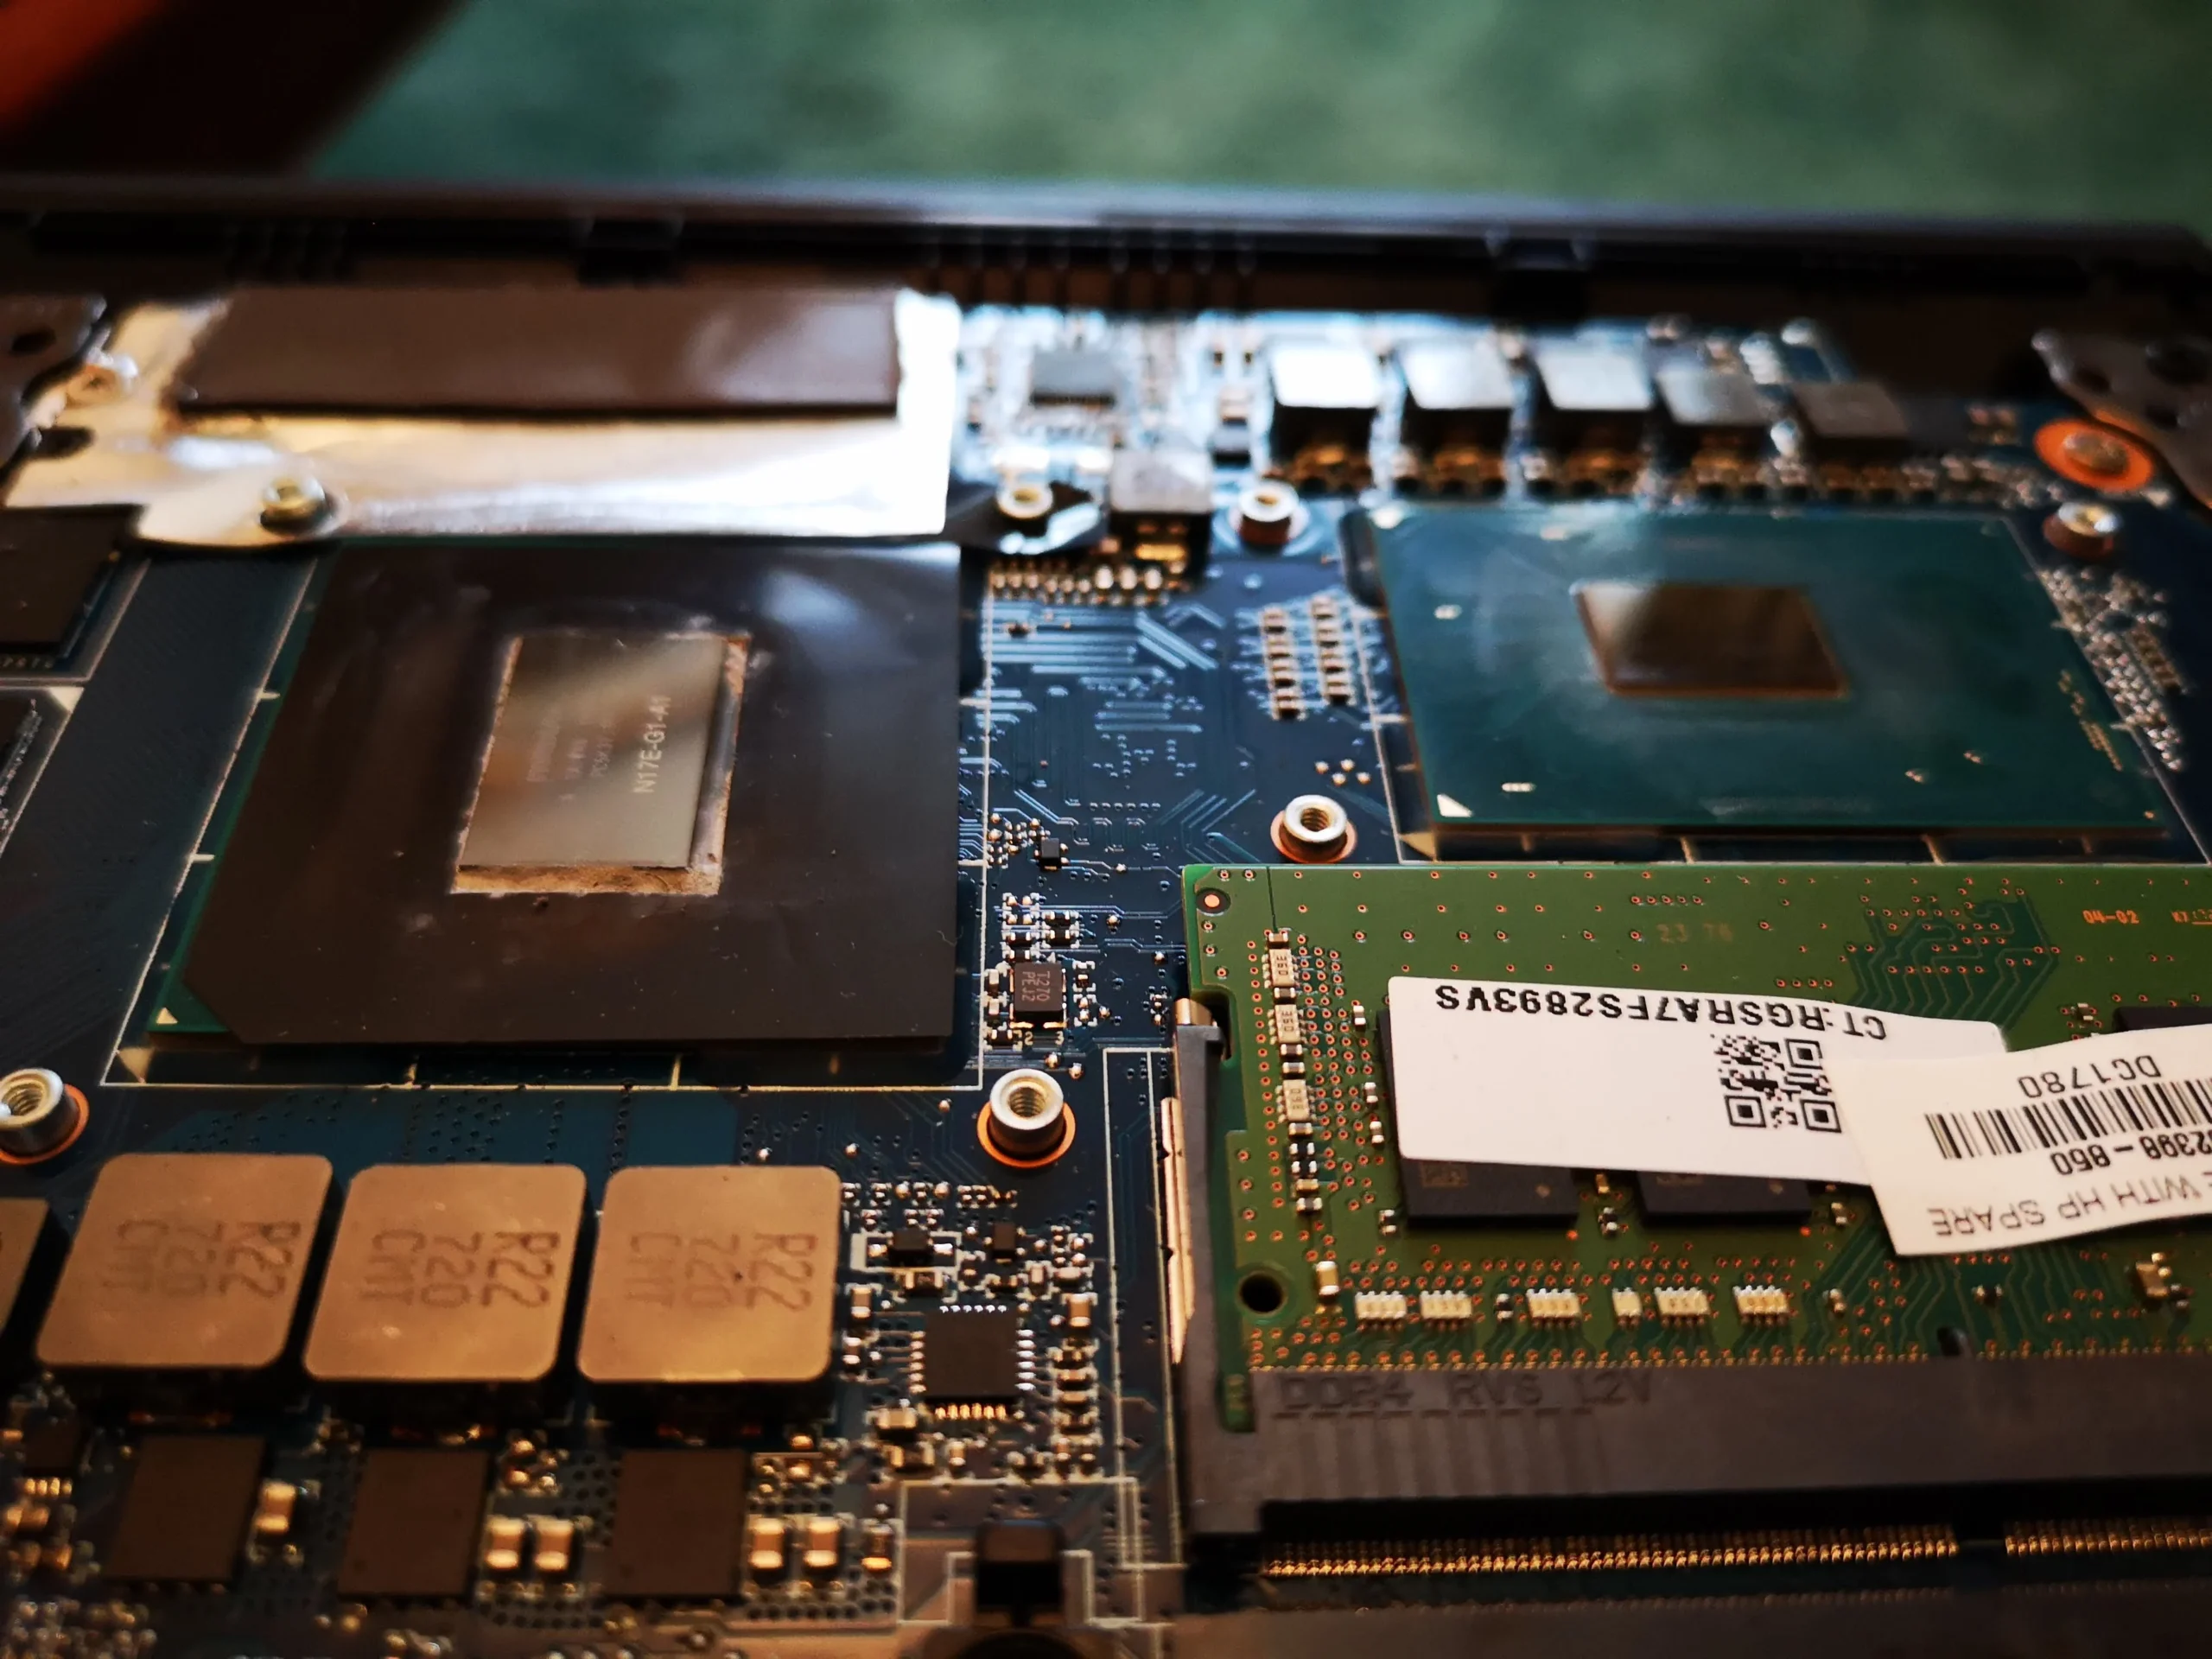
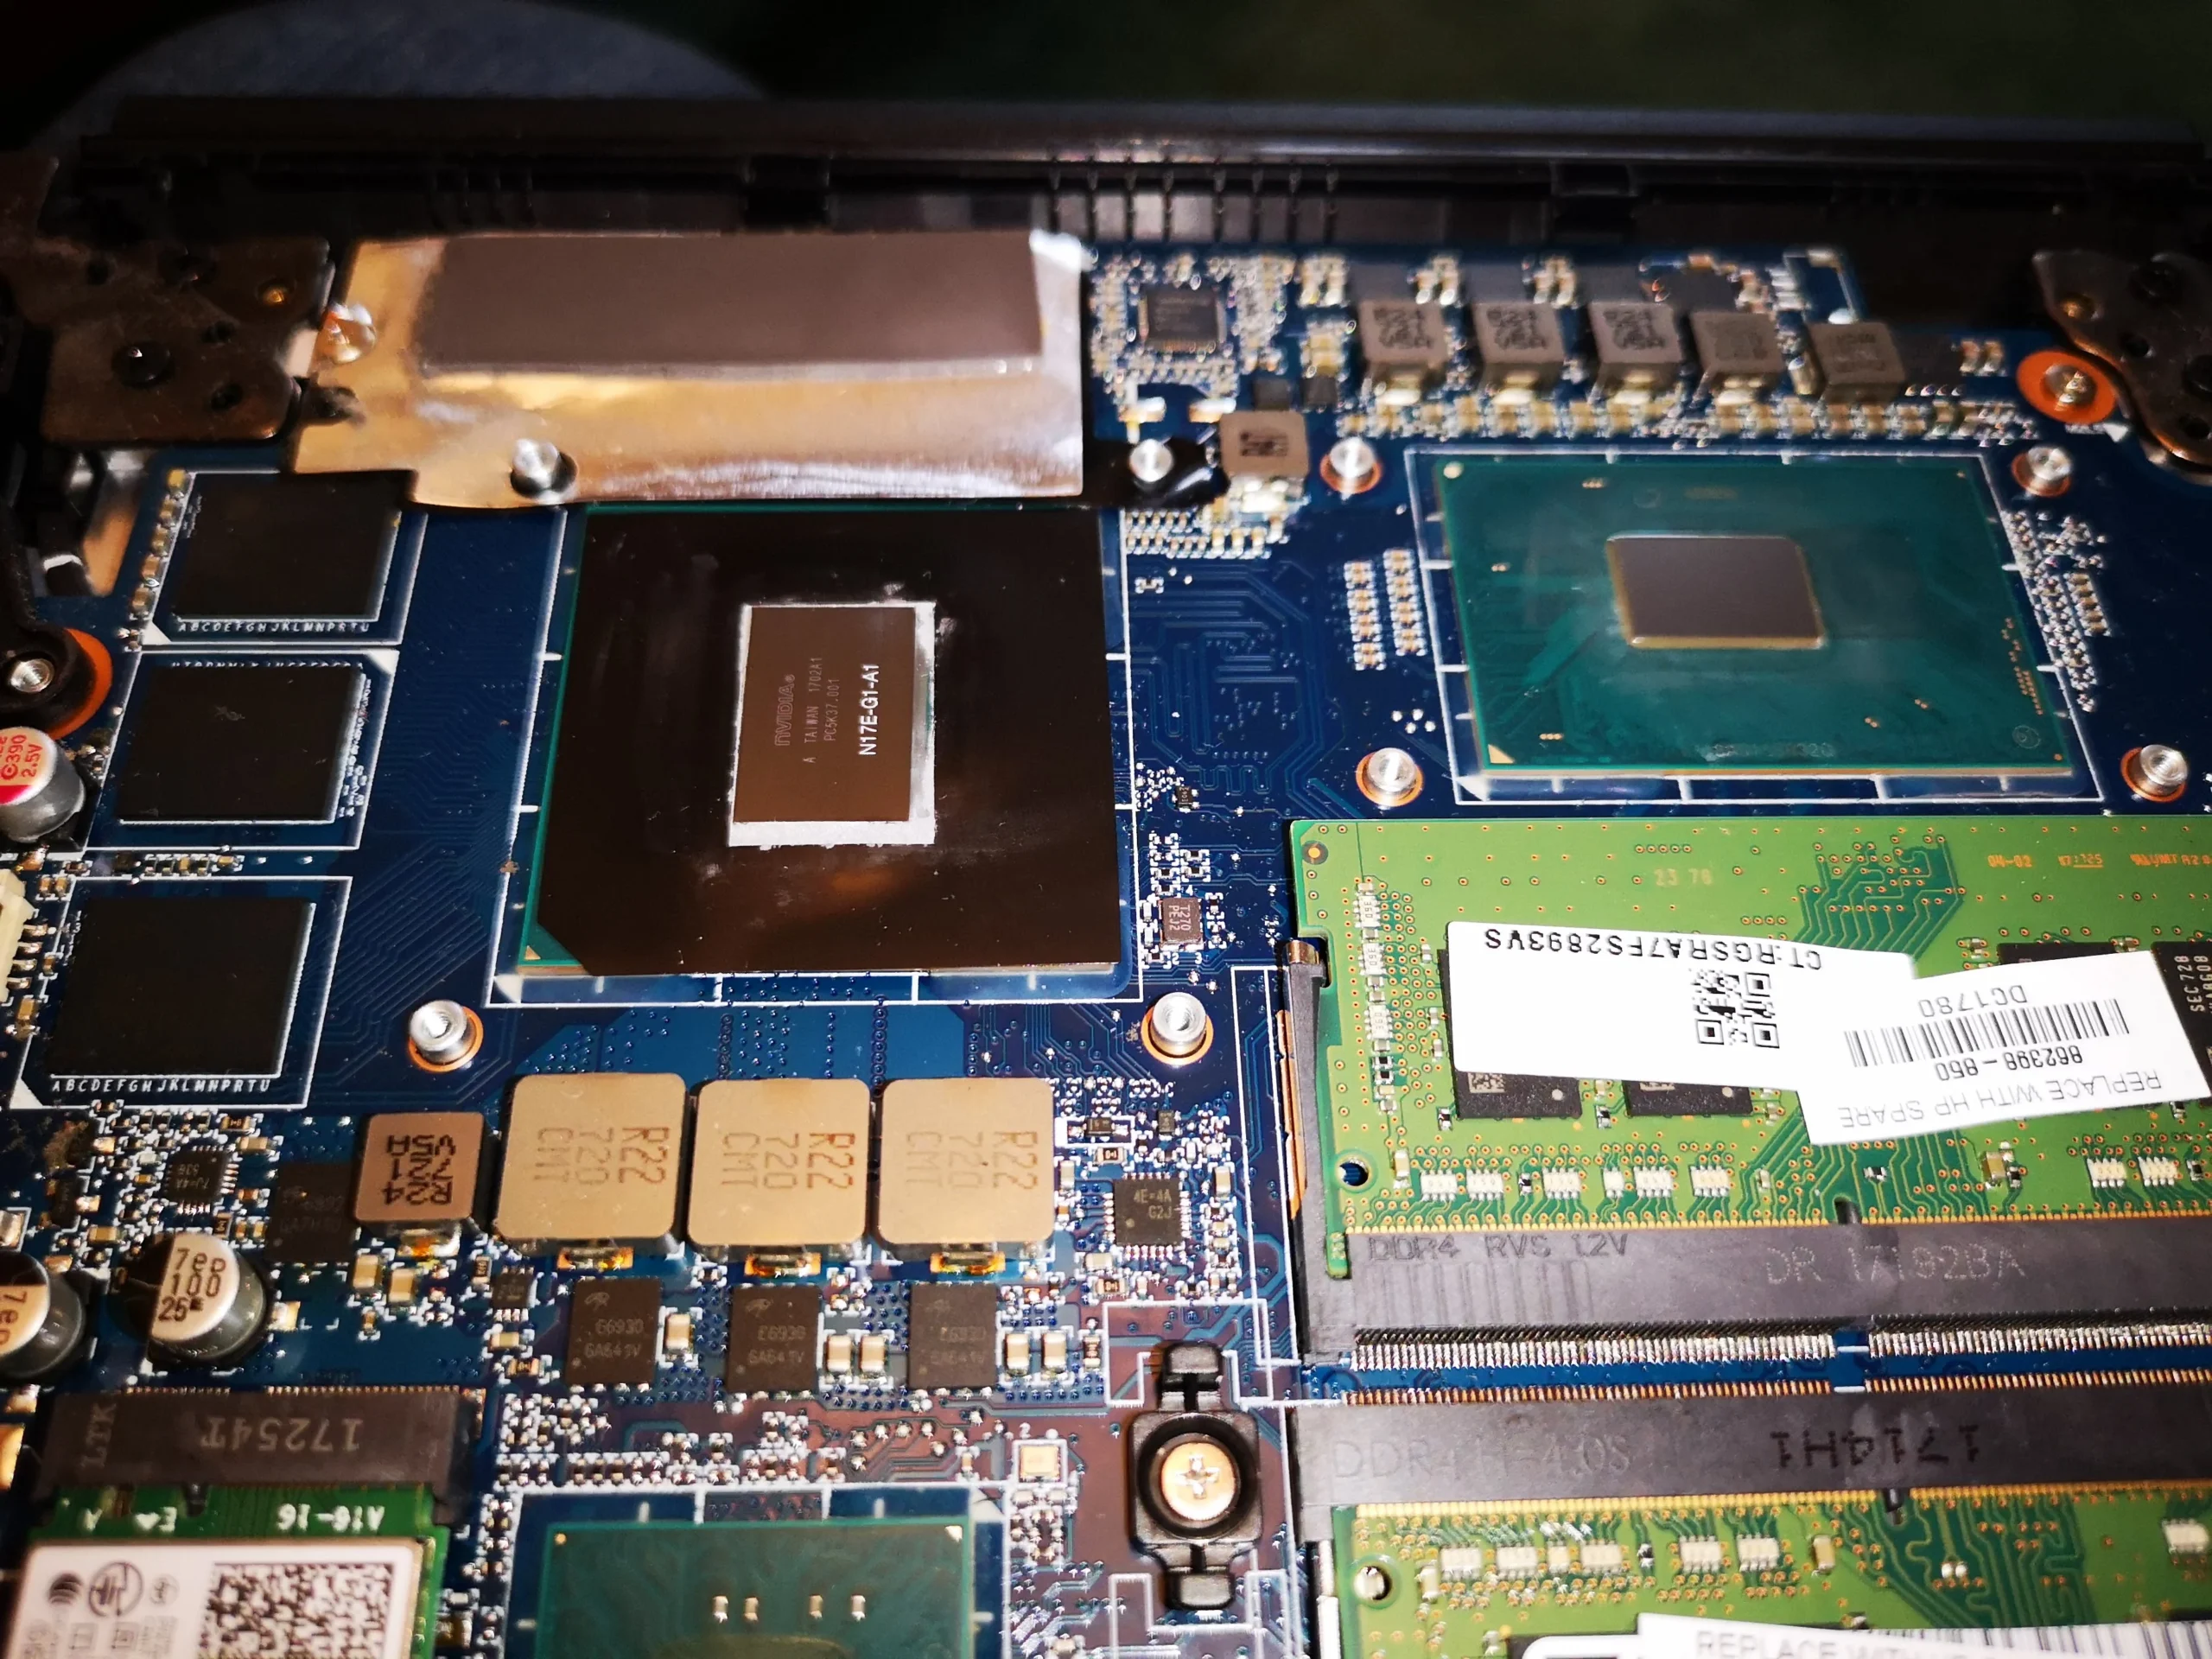
With the cooling assembly lifted, the photos show two exposed chip contact areas and the copper heatsink. This gives access to the blocked fin edge, but it also disturbs the interface between the chips and the cooler.
Old compound should be cleaned from the contact surfaces and the correct thermal interface renewed before the assembly is seated evenly. The photos show the surfaces during the work, not a close-up of the final application, so they cannot support a claim about a specific paste product or measured result.
04 / The visual check
The later fan photo is visibly cleaner
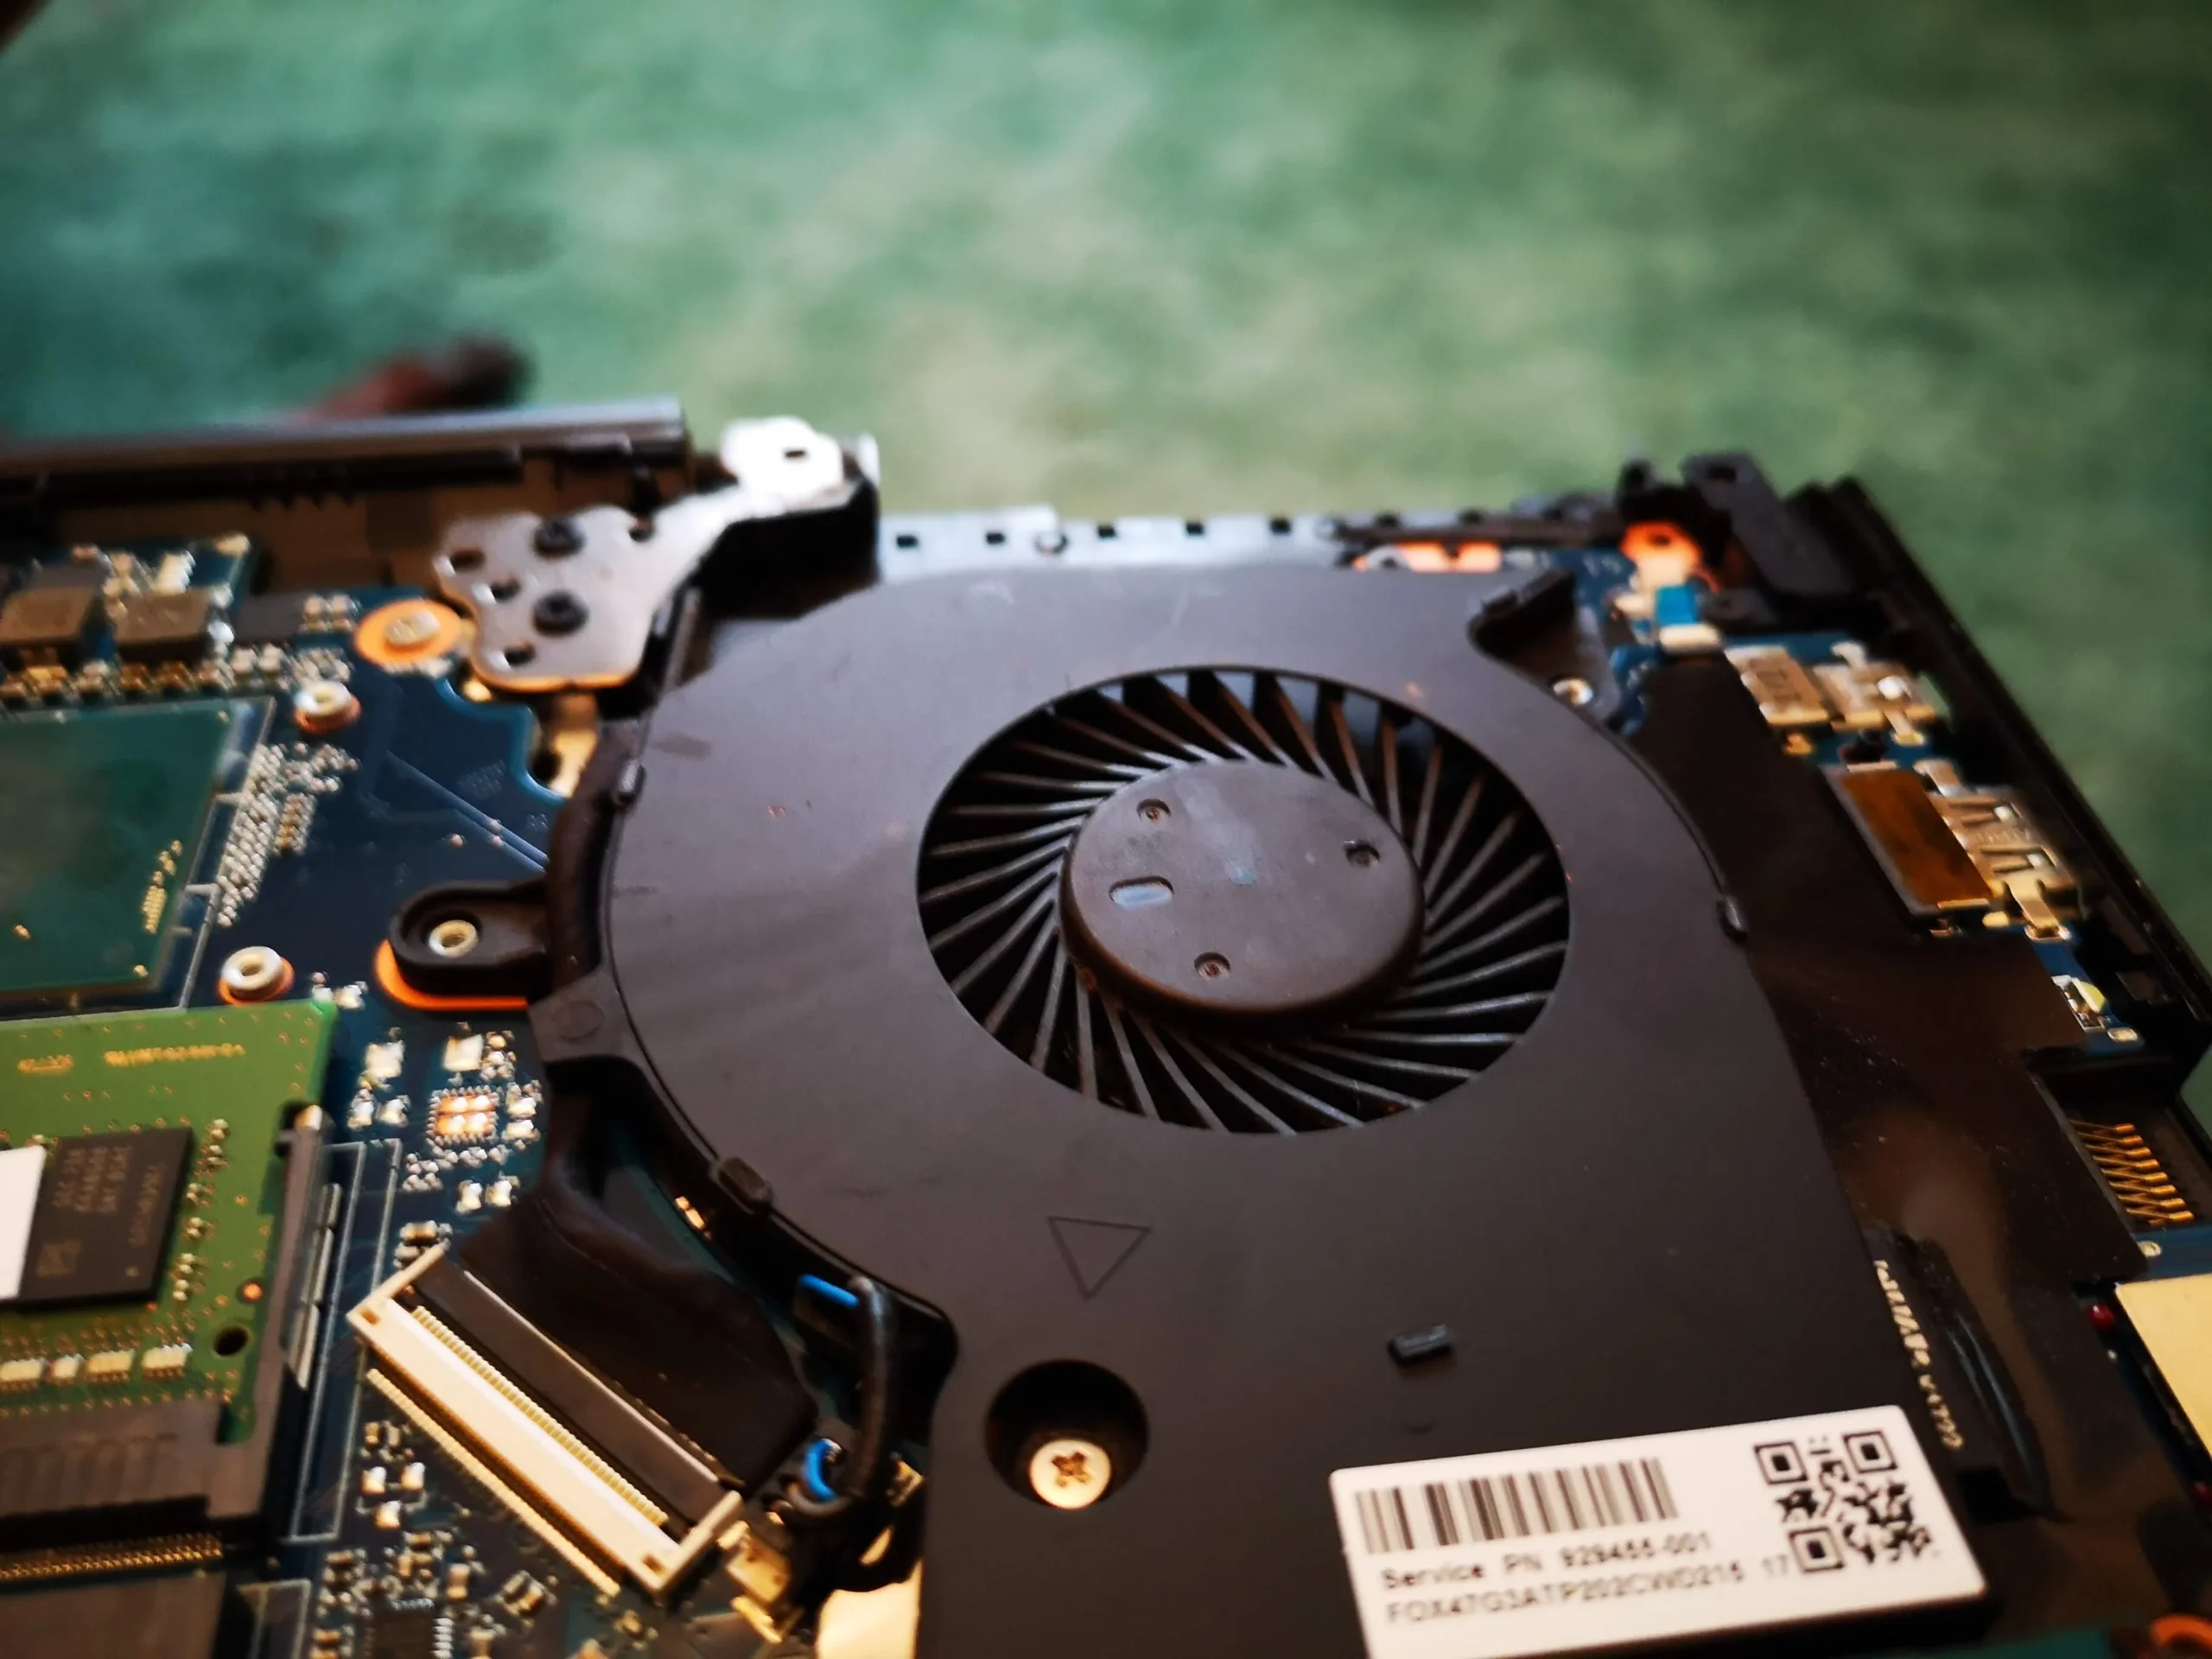
A later close-up shows a fan with much darker, clearer blades and fewer loose fibres near its centre. That is a useful visible check, but the fin stack must be clear too: the two parts work as a pair.
After reassembly, check for normal boot, both fans responding to a sustained workload and unobstructed exhaust. If the laptop still runs hot or shuts down, inspect fan operation and the chip-to-heatsink contact separately.
The engineer’s takeaway
On this Razer, the most important photo is the lint strip at the copper fins. Dirty blades show where dust has travelled; the fin wall shows where airflow can be stopped. Both sides of the cooling route need attention.
Before you open the laptop
Can you clean a Razer gaming laptop yourself?
Start externally: shut down, unplug, inspect the vents and record what workload triggers extra fan noise or heat. If you intend to open it, first identify the exact Razer model from its label or system information; screw patterns and battery arrangements differ.
Internal cleaning around the fans requires care with the battery, small fan connectors and fragile fins. Lifting the cooling assembly also commits you to preparing the chip contacts and renewing the proper thermal interface. If you are unsure about that step, ask a technician rather than reseating the cooler on disturbed old compound.
After the clean
What a useful after-clean test looks like
Confirm the laptop starts, charges and displays normally, then run the same demanding task that previously brought on heat or fan noise. Let it warm up and compare fan behaviour and temperature under similar conditions.
The archive has no paired measurements. Clearer fan blades and an accessible fin stack are visible, but a photo cannot establish a temperature drop or prove that any other cooling fault is gone.
Questions from owners
Razer dual-fan cleaning FAQs
Answers tied to the dusty impellers and copper fin stack visible in this machine.
Why can a Razer laptop run hot while both fans spin?
A spinning fan still needs a clear outlet. This machine had a felt-like lint strip along the copper fins, which can restrict air leaving the cooler.
Can I clear the fins by spraying air through the outside vent?
External cleaning may move loose dust, but it does not show whether a dense strip like this one has been removed or simply shifted. Internal inspection is the reliable way to confirm the passage.
Do I have to remove the heatsink to clean the fans?
That depends on the exact model and how much access is needed. Here the cooling assembly was lifted, exposing the chips and fin stack; doing that also means the disturbed thermal interface needs proper renewal.
Is the exact Razer Blade model shown here?
No readable model identifier appears in this photo set. The article describes the dual-fan Razer machine pictured, without assigning a particular Blade generation.
Should both fans be replaced because they are dusty?
No. Dust alone calls for careful cleaning and inspection. Replacement is for a separate fault, such as a seized rotor, damaged blades or a bearing that still makes noise after cleaning.
How can I tell whether cleaning helped?
Compare the same workload, settings and room conditions before and after. Check both fan behaviour and temperatures; this archive has no measured before-and-after result.
UK Razer cleaning enquiries
Want the fans and fin outlets checked together?
If you are in the UK and your Razer gaming laptop is loud, hot or shutting down, send us its exact model from the underside label and explain when the problem appears. Your postcode and a vent photo help us suggest the next step.
We can discuss an internal dual-fan and heatsink clean and whether the cooling assembly needs to be lifted for proper access.
Read about our gaming laptop cleaning service, then use the form to tell us your computer model, symptoms and UK postcode.
Free to enquire · No obligation to book. We discuss the proposed work and price before you decide.
The workshop photos
Razer fan and copper heatsink cleaning photos
Open the gallery to see the dual-fan layout, dusty blades, lint at the copper fins, cooler access and a cleaner fan view.