Acer Nitro gaming laptop fan cooling system cleaning and repasting

Acer gaming computer is overheating? Fans are super loud? Laptop gets very hot when gaming?

Your laptop need a proper fan cleaning and repasting.

You can do it yourself or you can call a professional to do it right at your home. You can find instructions below, but just in case you’ll decide that it is too difficult – you can check our laptop fan cleaning service

HOW TO CLEAN ACER NITRO LAPTOP FAN
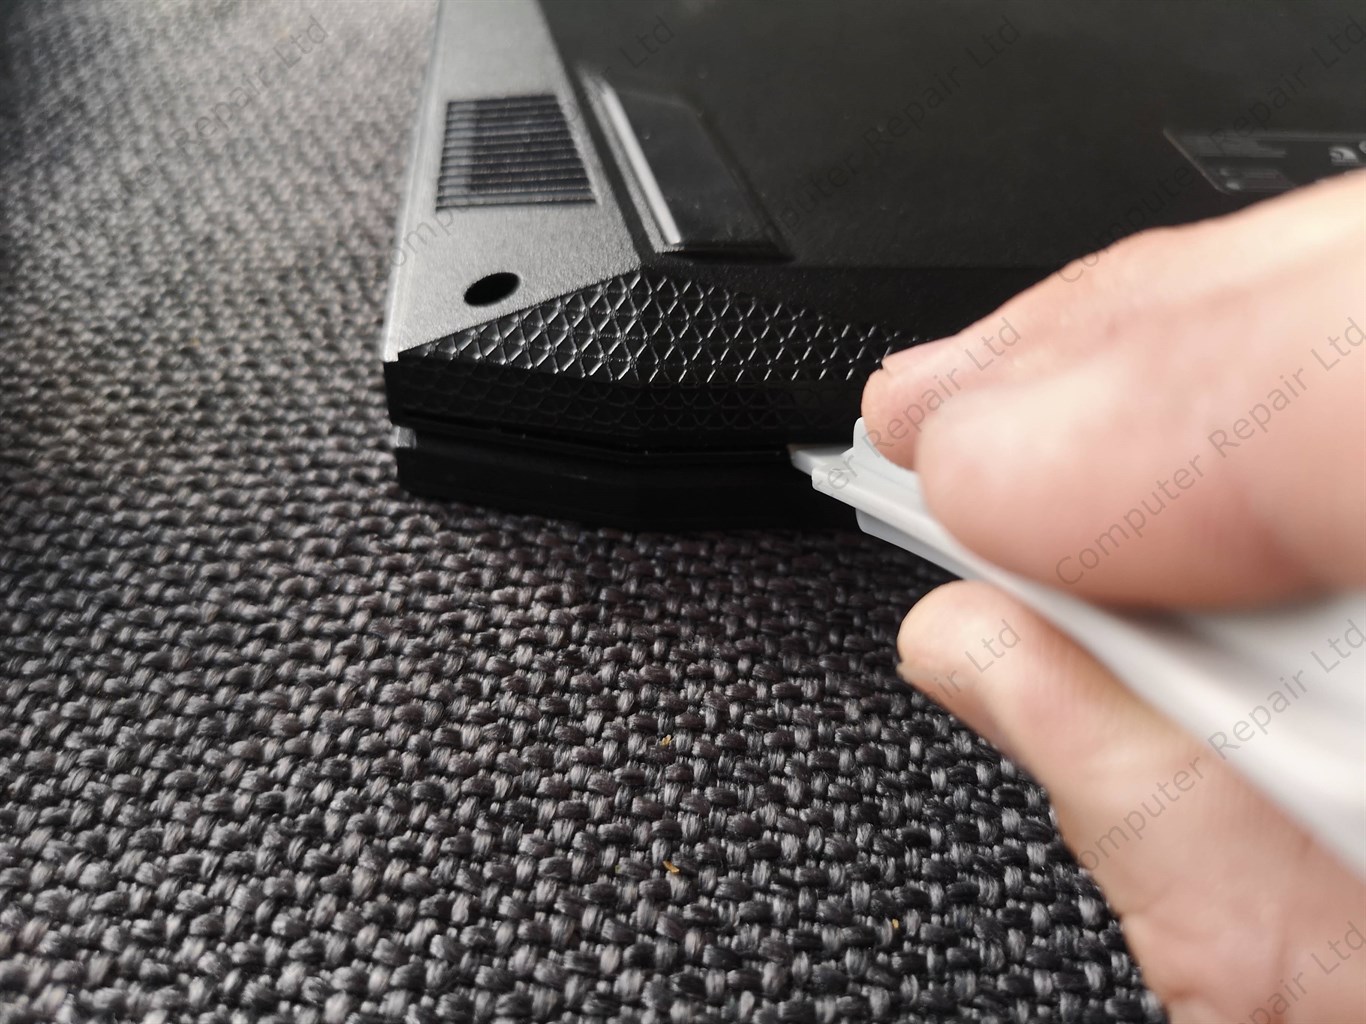
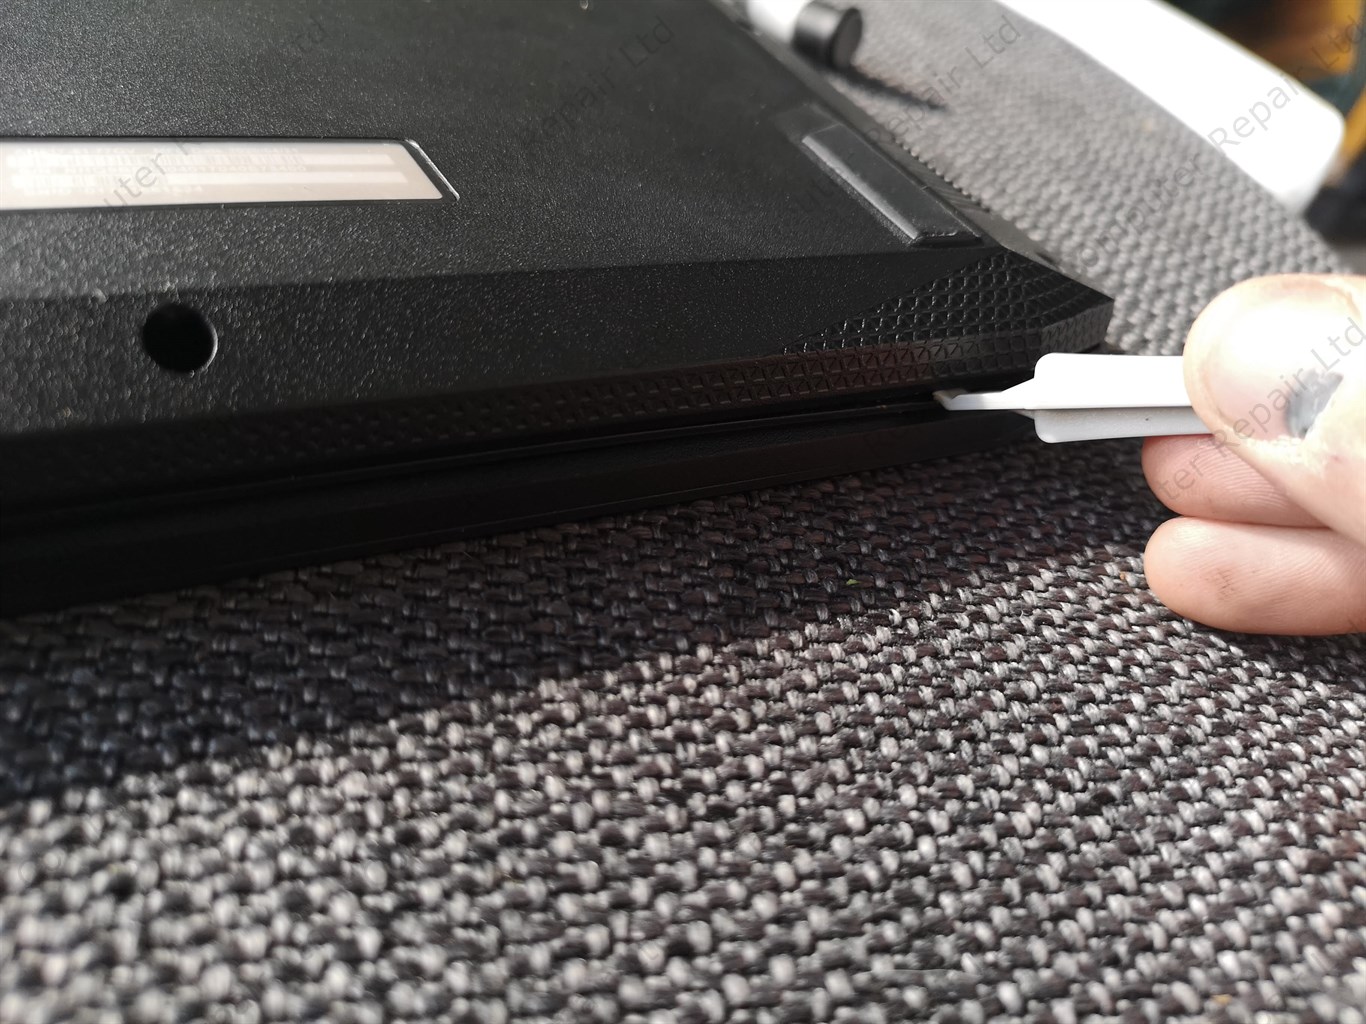
TAKE OFF BACK COVER

Put your laptop upside down on the non slip material. Try not to use towel or any material that can cause static electricity as this can damage your laptop internal components.

Unscrew all screws showed in the photo using small precise screw set. Do not use standard big standard screw drivers as they can damage the screws. It is very difficult to open the back cover if one of them is stuck.

Use special tool to open the back cover. Do this carefully and all over perimeter.

Do not use any metal opener or knife as this can damage your cover.

Take your time and open it slowly and thoroughly.
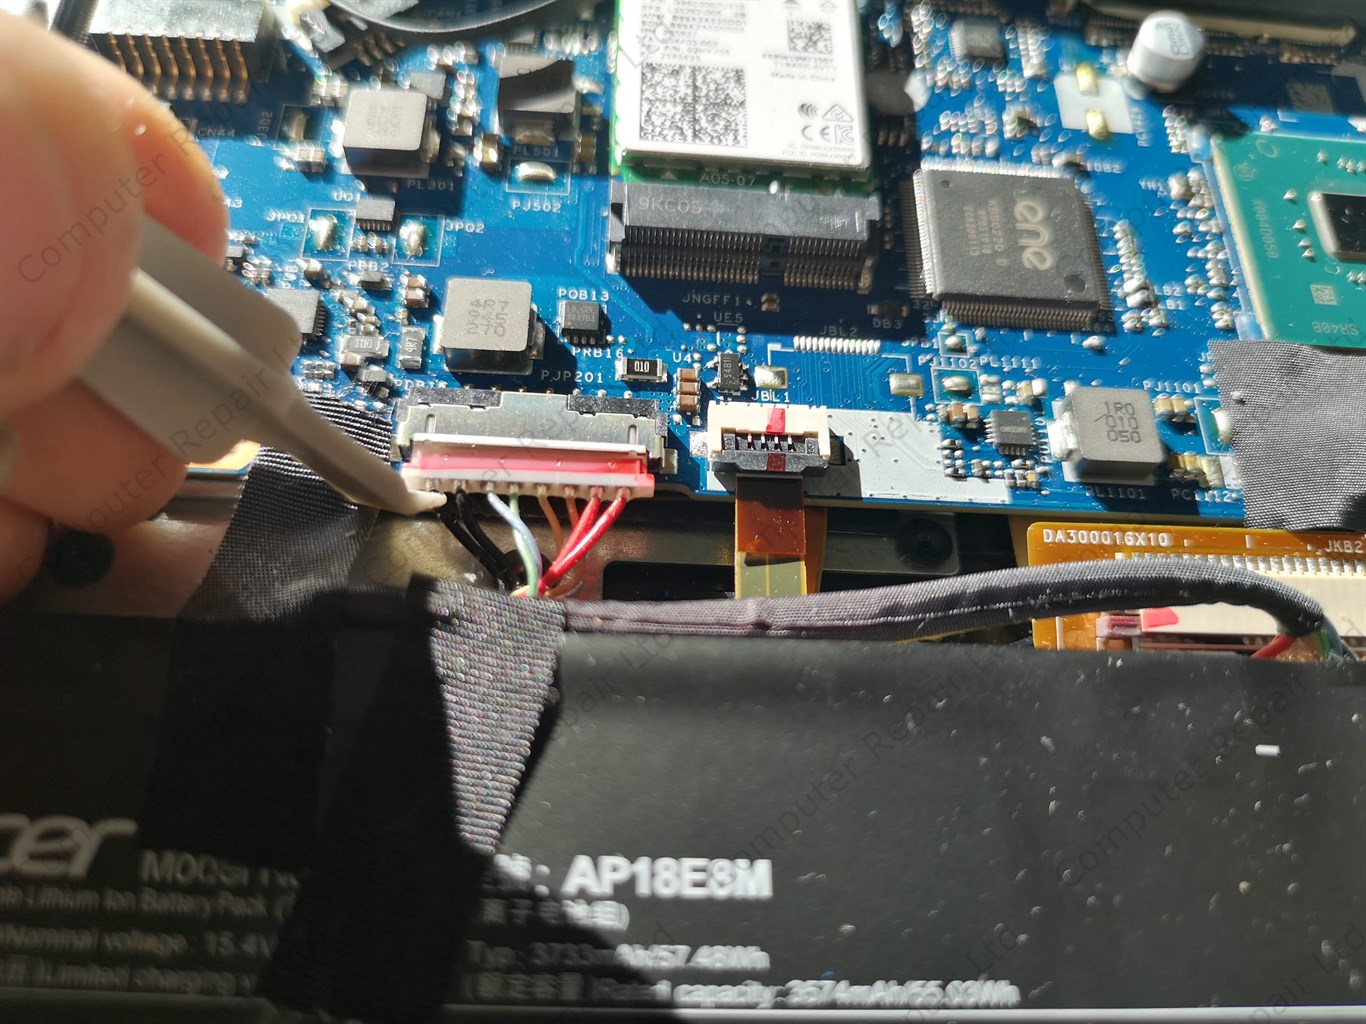
DISCONNECT BATTERY

First of all disconnect the battery. Check the cable that goes from the battery to the motherboard. Use plastic pin to do that.

Try not to damage any wires as this will result in battery fault.
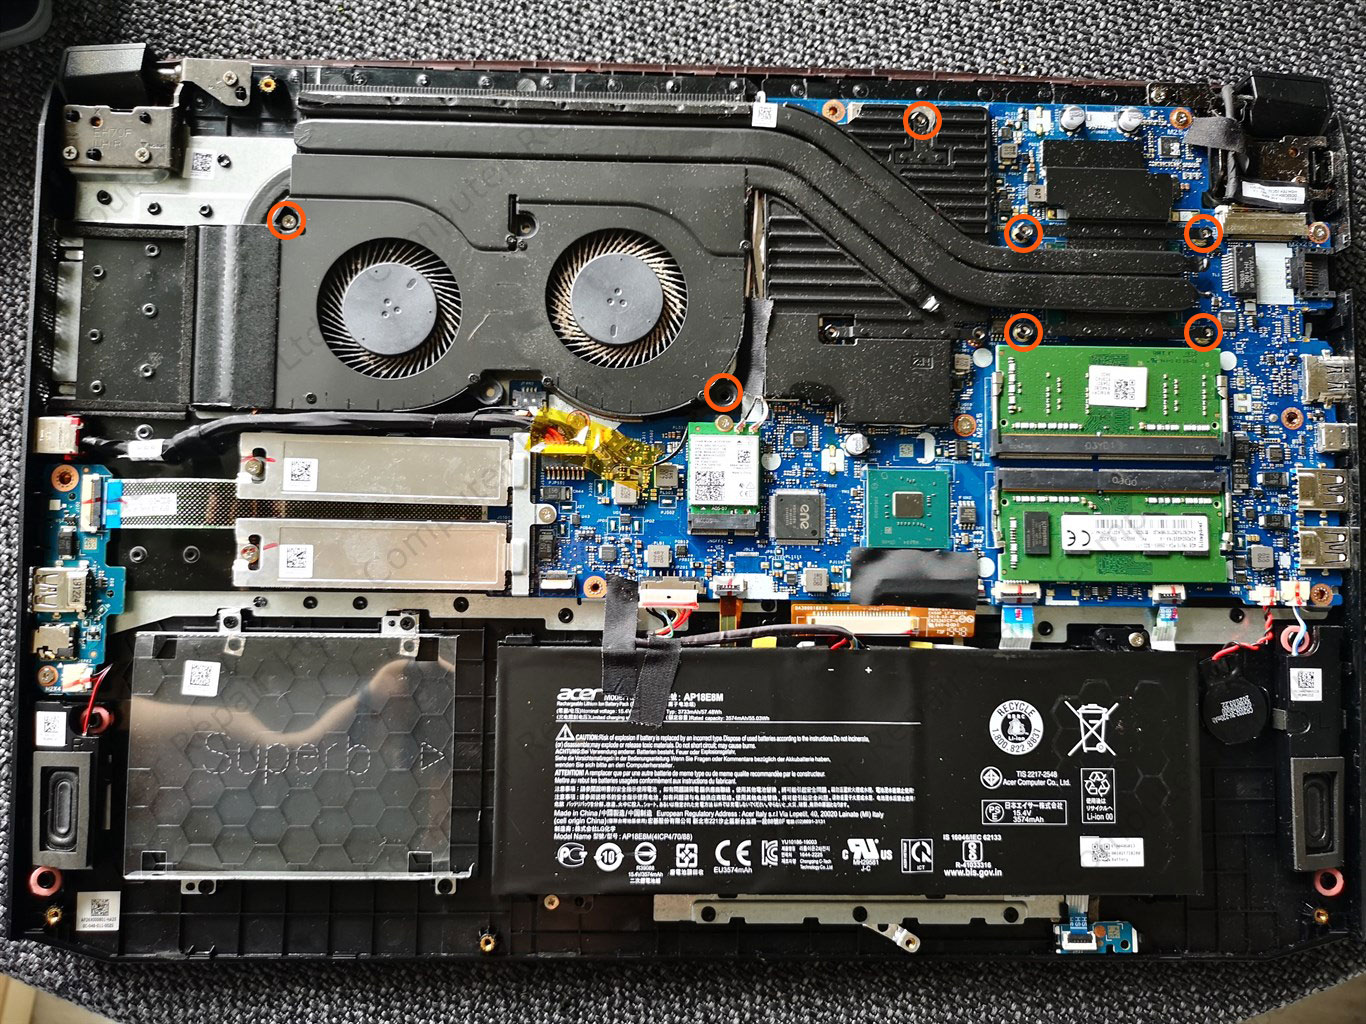
REMOVE THE SCREWS

That holds cooling system. Again use precision screw driver to prevent damage to the screws.

There are 7 screws that holds CPU and GPU cooling pipes to the motherboard. Remove them all and put in the same pattern on the magnetic mat.

You will need this to put the screw in exactly the same place when assembling the laptop.
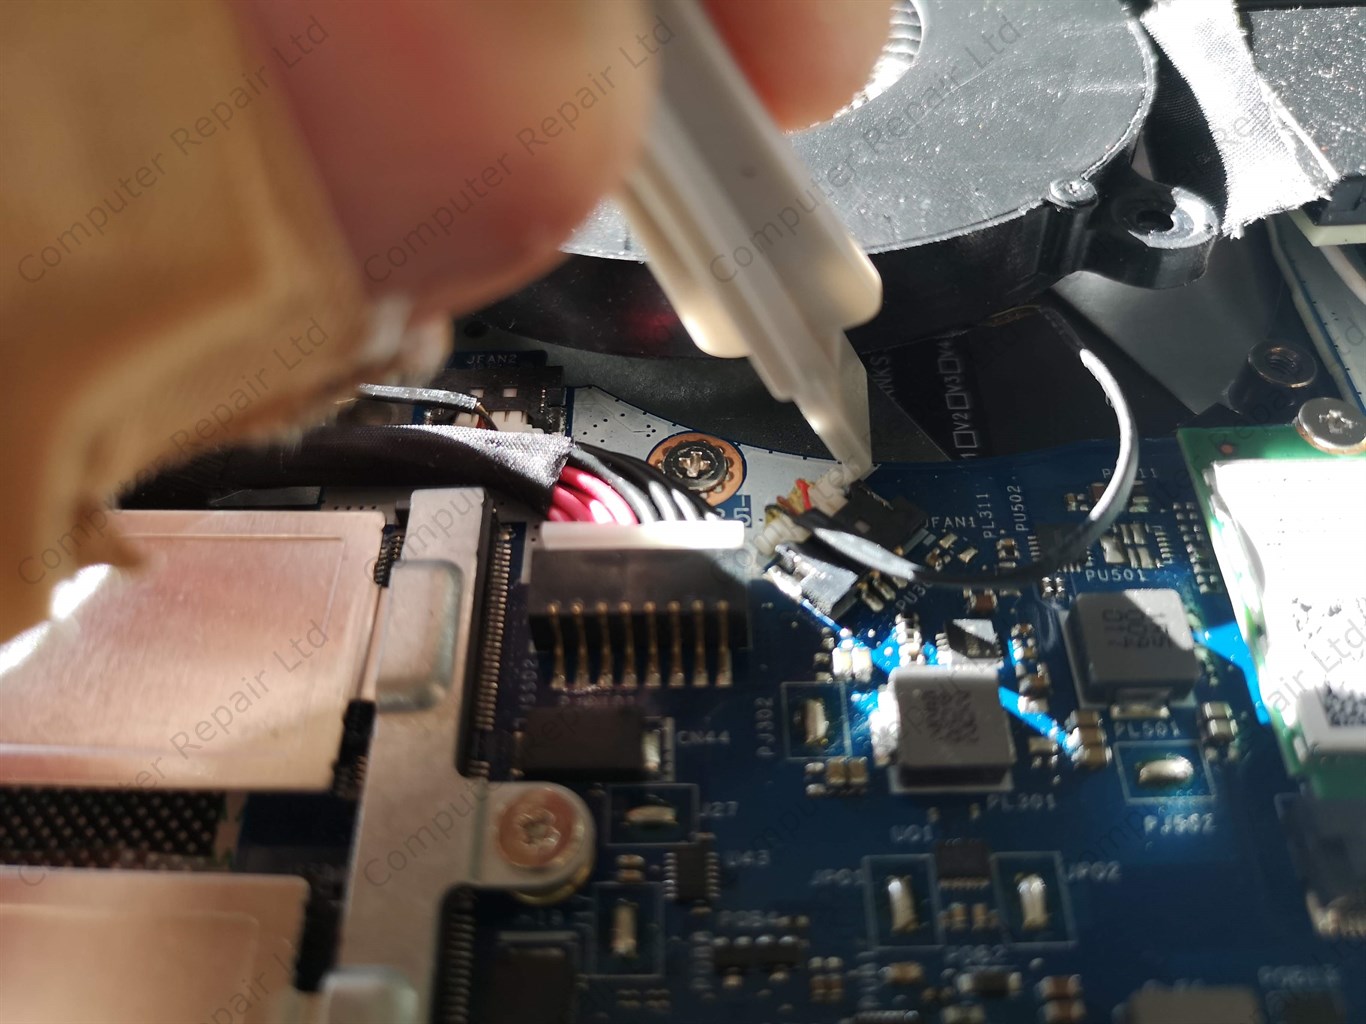
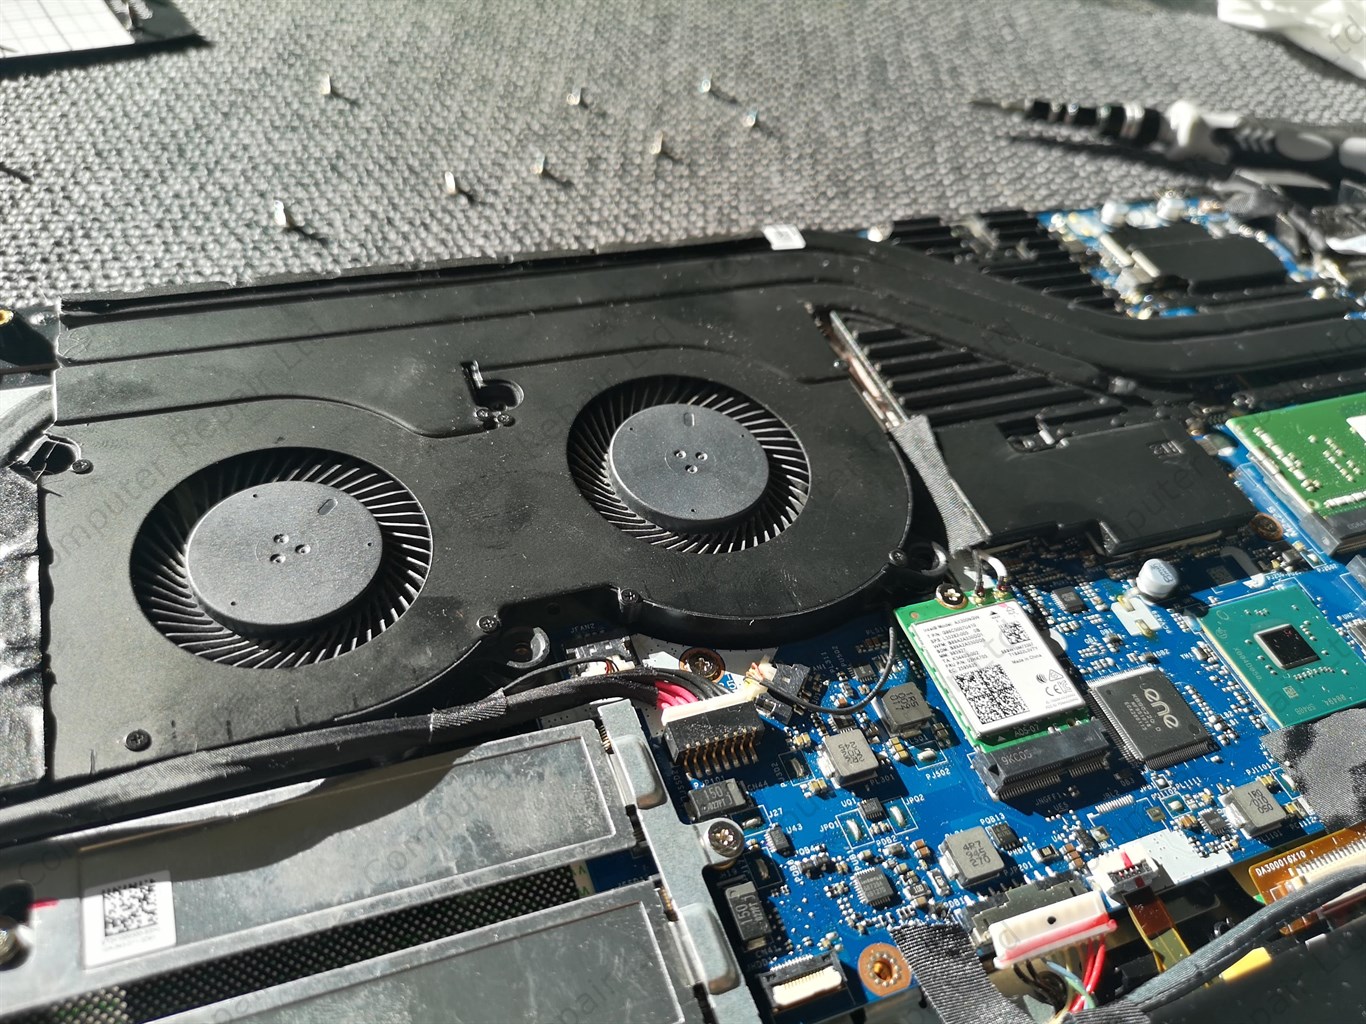
DISCONNECT FANS

Disconnect the fans from the motherboard. To make it easier disconnect the power socket as well.

Use plastic pin for this to not damage any cables and connectors.

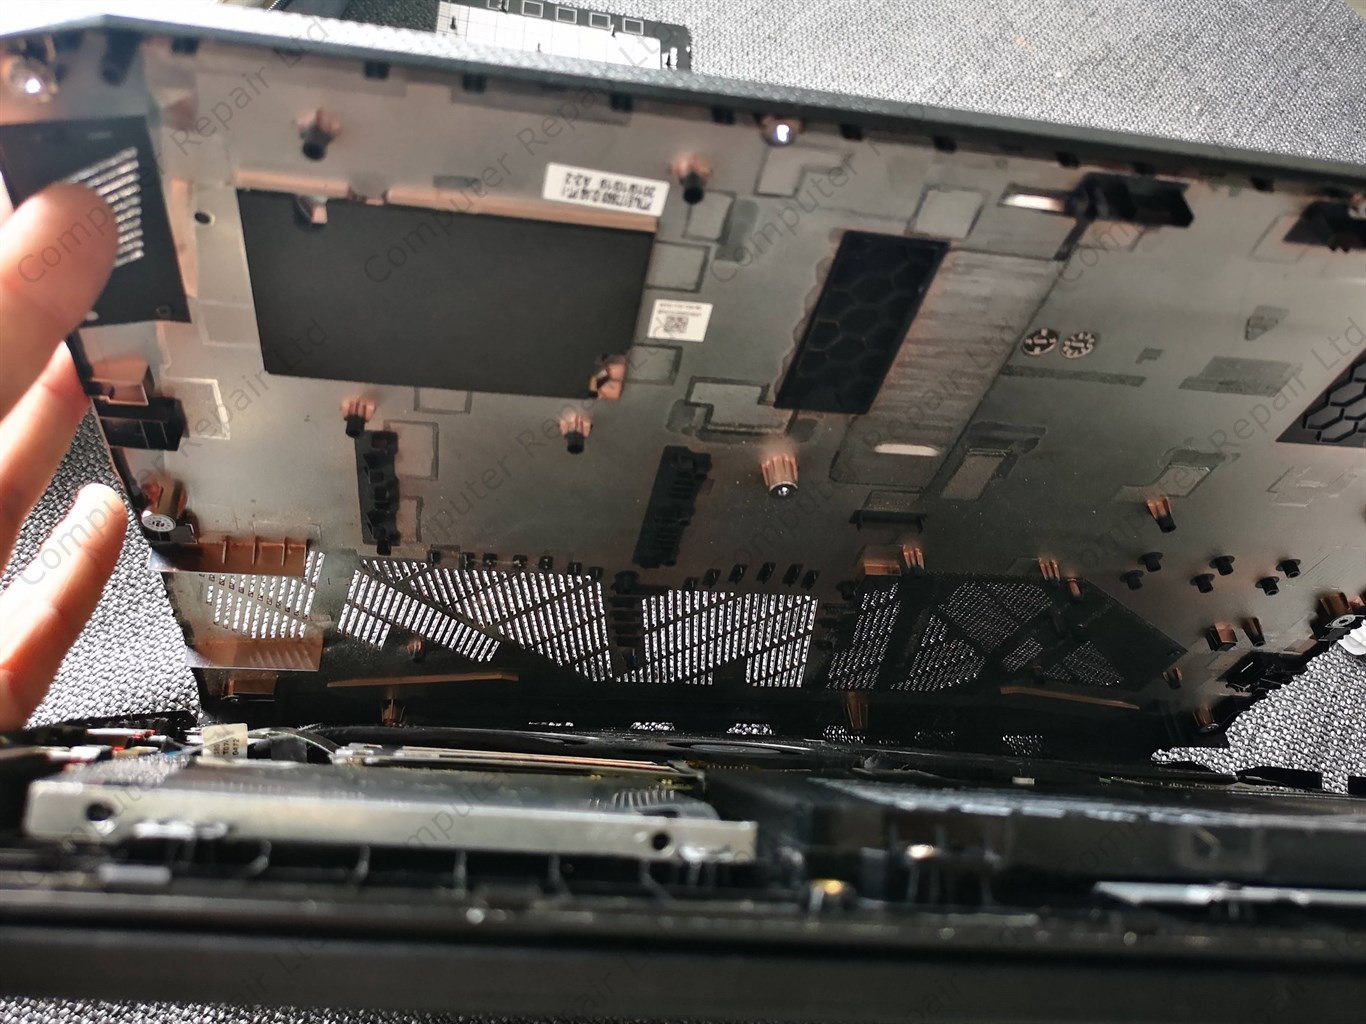
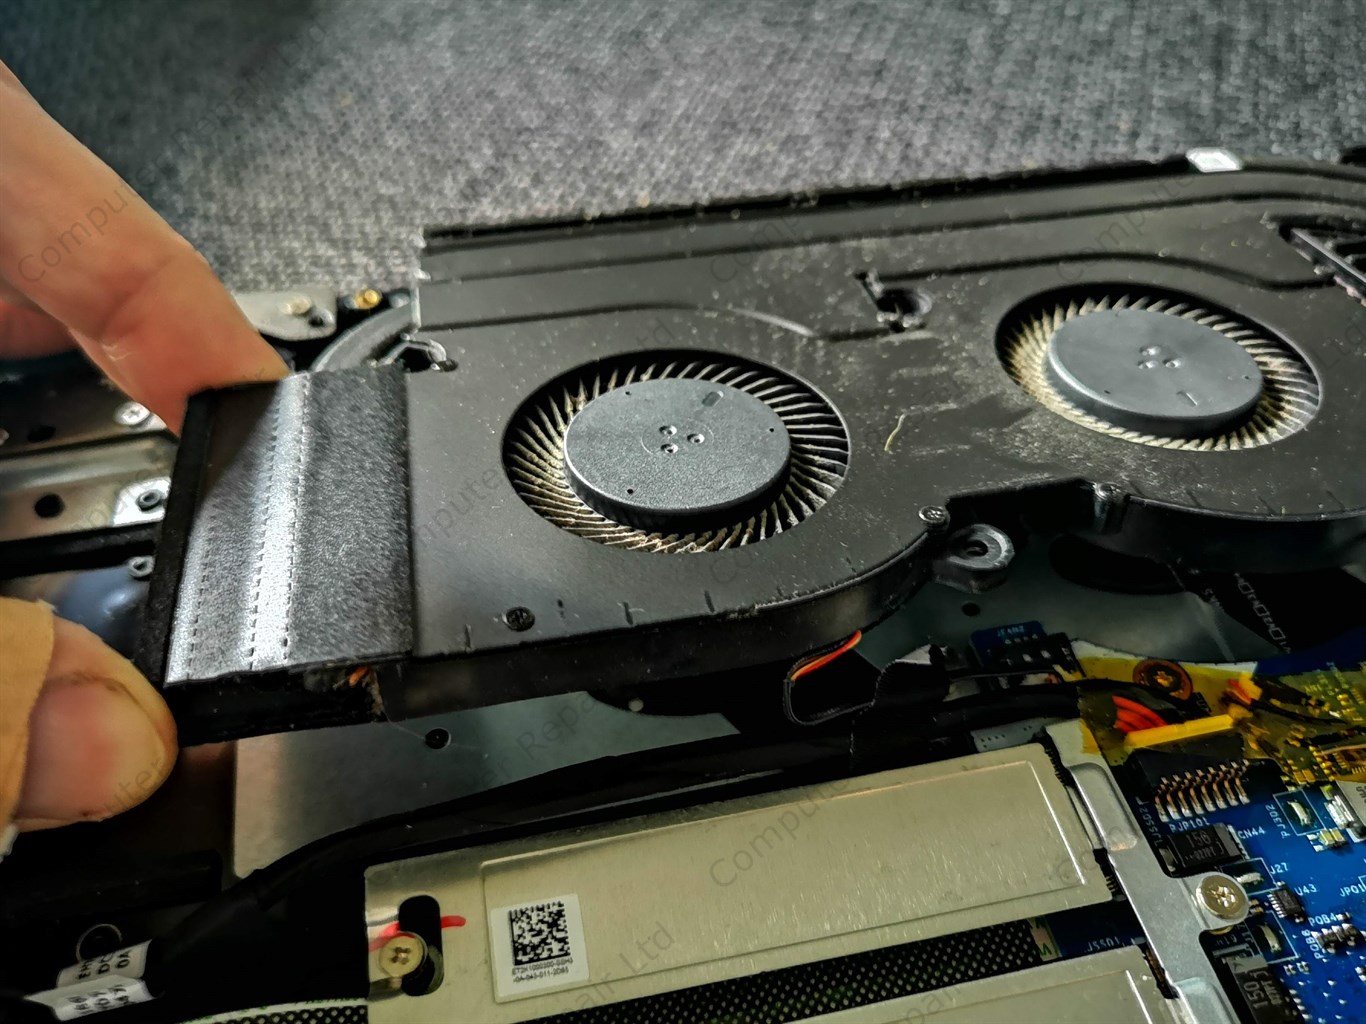
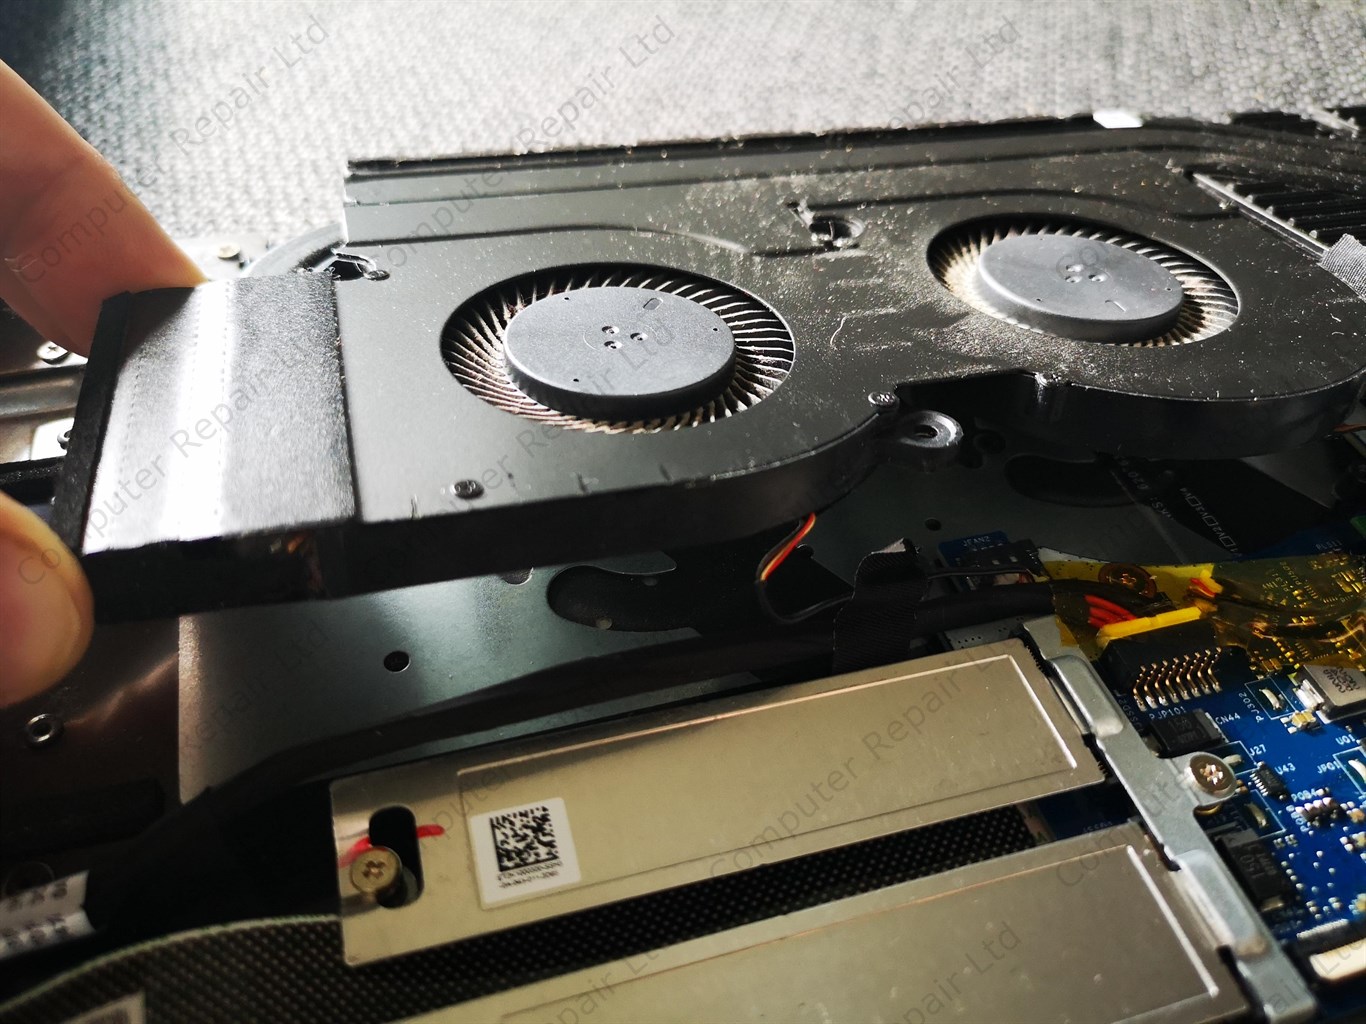
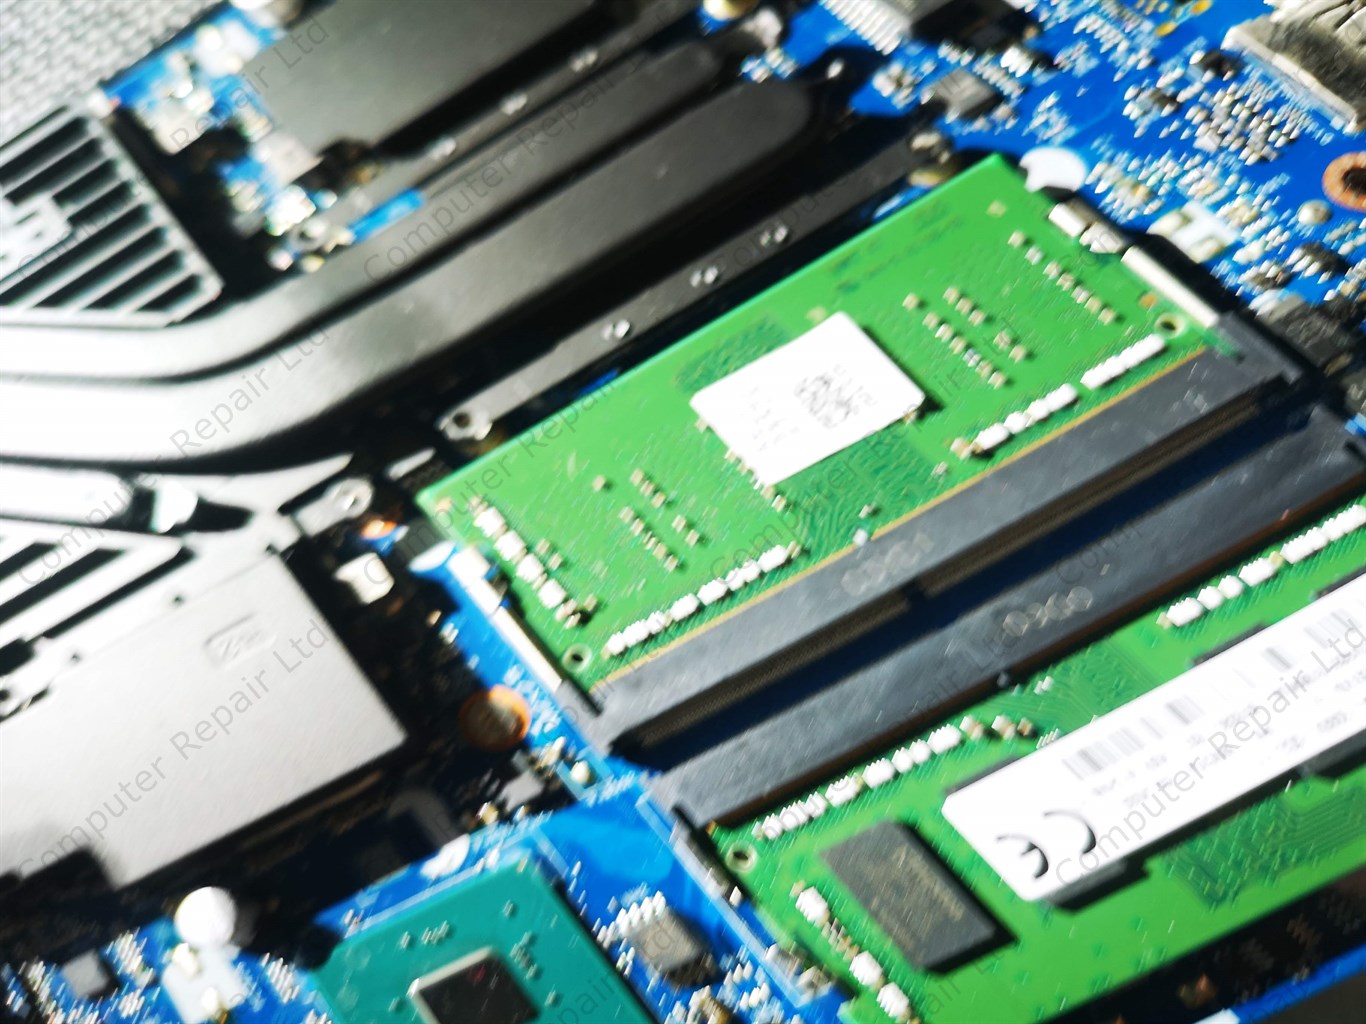
TAKE OFF COOLING SYSTEM

Carefully take off the whole cooling system. Use plastic caps to pull it from the motherboard from all sides.

Heat makes cooling paste to dry. This leads to pads stuck to the motherboard. Never use force while taking off cooling part as this may result in CPU, GPU or other chipset damage.
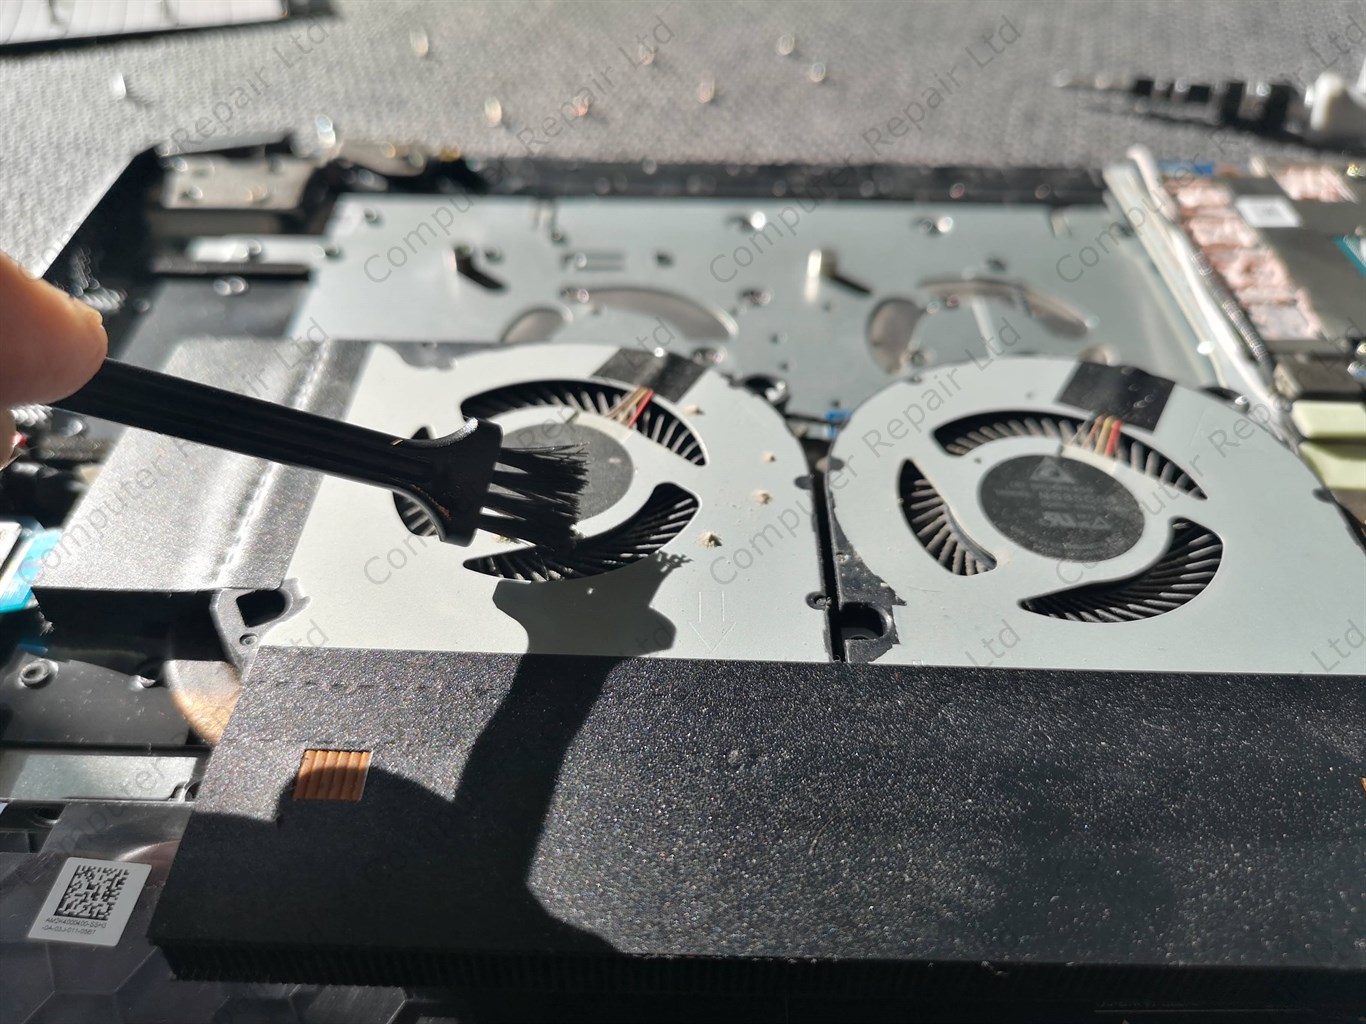
REMOVE DUST

Remove dust from fans using soft brush first. Remove dust balls between grills and fans using tweezers.

Use compressed air or your lungs to blow away excess dust from grills and fans. Just don’t let the fans to spin by holding them with fingers. Fast spin speeds can lead fan wings or fans itself to brake down.
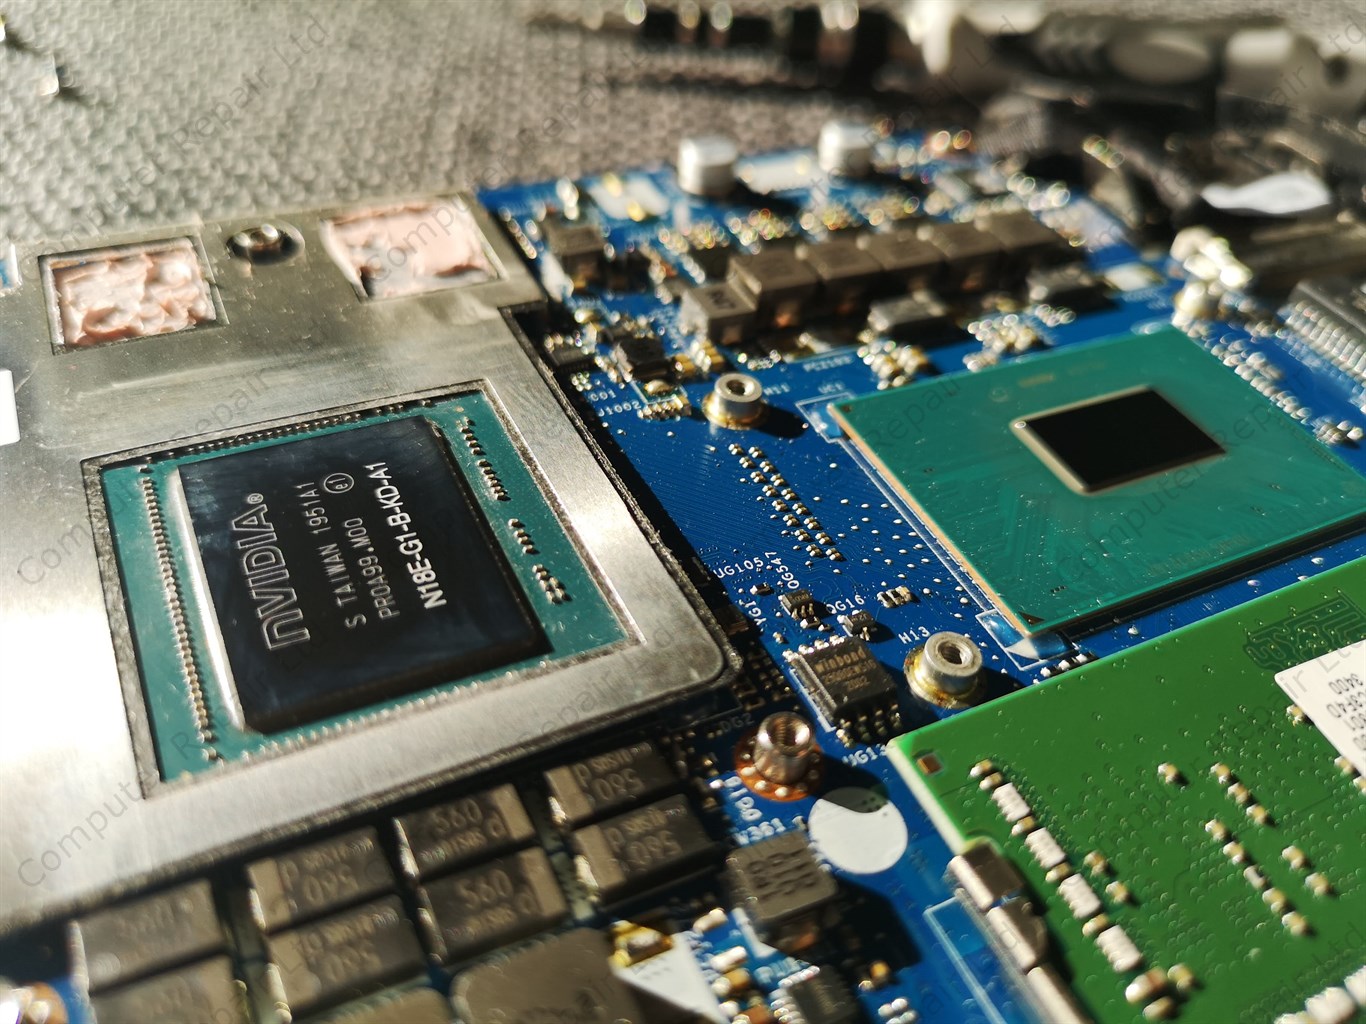
REMOVE DRY PASTE

Carefully remove all paste from laptop CPU and GPU. Remove paste from cooling part as well.

Use towel paper and soft brush to remove old cooling paste. Look pout for dried parts of paste not getting into motherboard, as this can cause problems later.

Use special liquid to remove very dry cooling paste and liquid to clean cooling part.

REPLACE COOLING PADS

Clean all the chipsets from old cooling pads.

Replace all cooling pads. Use precise cooling pad height as too thin cooling pads can lead to reduced cooling performance for all chipsets.

REPASTE

Put small amount of high quality cooling paste on processor and graphic chipset.

If the chipset is bigger, such as GPU, we recommend making an X with the paste to cover whole chipset.

If the chipset is small, such as CPU, we recommend making the line with cooling paste.

Do not put too much cooling paste as this will lead paste overflowing chipsets and this will not help to cool them properly and even make the things worse.

REASSEMBLE

Carefully put cooling parts back where they belong. Try not to wiggle cooling system as this can lead cooling pads and cooling paste from chipsets to stuck to top part.

Try to put cooling part in place 1 cm above chipsets and when it is aligned properly, just push it into the place. This way pads and paste will stick directly into the dedicated cooling part places.

Reconnect both fans and power socket to the laptop motherboard. Put all screws back into they original places. Don’t tight them too much, but don’t let them loose as well. Find this golden spot in the middle.

BATTERY AND COVER

The last thing you need to do is to connect the battery. Carefully put back the connector where it was before laptop cleaning.

Examine the laptop carefully. Check if everything is connected properly and if all parts are in their original places.

Clean both sides of the laptop bottom cover from any dust and put it back into the place. You’ll need to use your finders and some gentle push to put it into the place. You’ll hear click when it will be in the right space.

Check if the bottom cover stays right in the place and there is no gaps between it and laptop main case.

Put back all the screws into their original places.
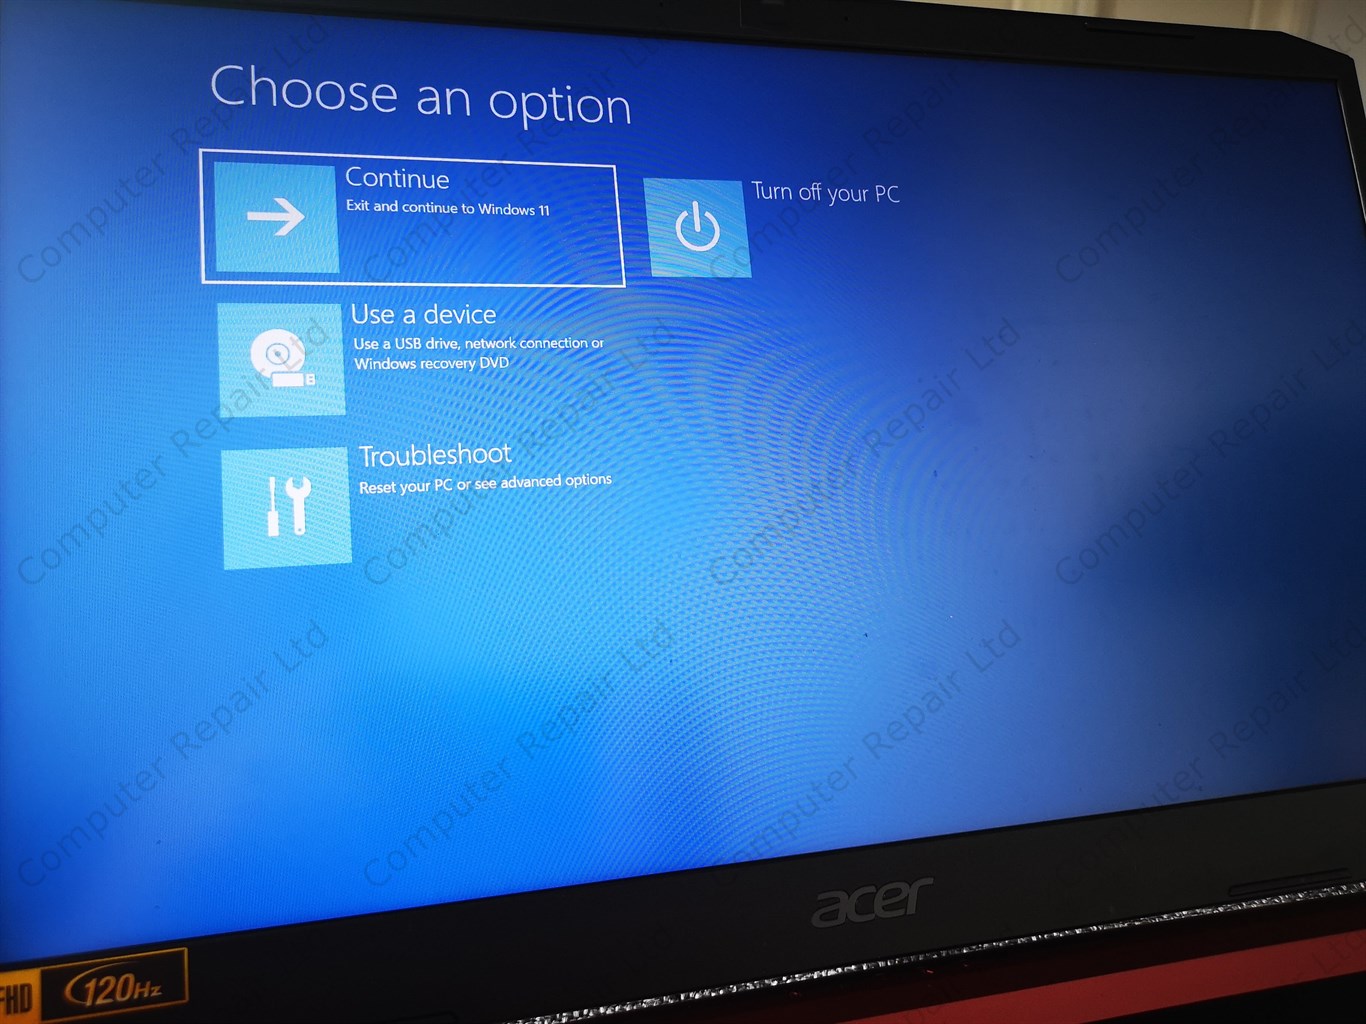
TEST TEST TEST

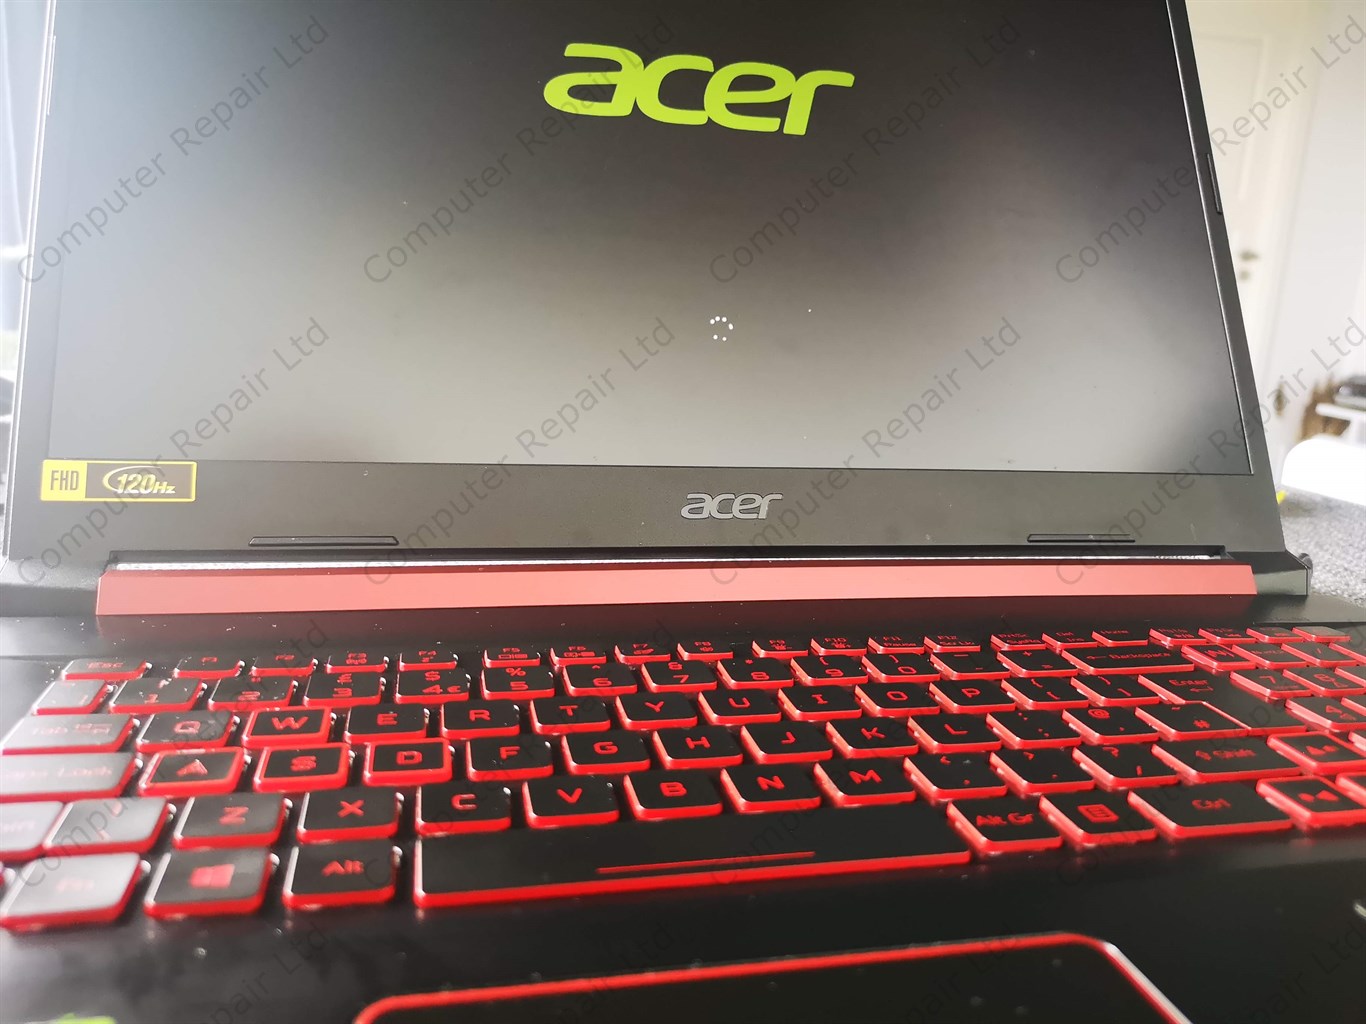
Try to turn on the Acer Nitro. If the laptop is starting fine, test it further. Wait for a while and check if both fans are spinning. If both fans are spinning and there is no weird unusual noise – good job. Cleaning almost done.

Next and the last step to test other parts – touchpad, keyboard, wifi, sound – all must be tested. If everything is working fine – you’re done. You have cleaned your Acer gaming laptop fan and cooling system. You’ll notice lower heat and fan noise while using the laptop straight away.

If any of the parts are not working, or you even cannot turn the laptop on after cleaning, or you just not skilled enough to do the cleaning yourself, please check our LAPTOP FAN CLEANING SERVICE IN LONDON. We will be able to clean it for you or test it if something went wrong during the laptop fan cleaning.

Acer Nitro Fan Cleaning and Repasting – Frequently Asked Questions

This FAQ covers all common Acer Nitro cooling questions. It explains overheating symptoms, cleaning tools, safe repasting, pad thickness, screw patterns, and troubleshooting after reassembly.

Your Acer Nitro laptop overheats because dust, worn thermal paste, and clogged cooling grills reduce the ability of the cooling system to remove heat from the CPU and GPU. Over time the fans pull dust inside, which builds up around the blades, the heatsink fins and the exhaust vents. When these areas fill with dust, airflow becomes restricted. Air cannot move through the cooling pipes properly, so the system compensates by running the fans at higher speeds. This makes the laptop noticeably louder – especially during gaming, video editing or long play sessions.

Another major cause is dry thermal paste. Factory paste gradually dries out due to heat cycles. When paste dries, it becomes harder and loses the ability to transfer heat from the chip to the heatsink surface. Both CPU and GPU temperatures rise quickly under load.
Once the cooling pads between VRM, chipset, GPU memory and heatsink lose flexibility or contact, they stop transferring heat properly and performance drops even further.
Together these issues cause loud fans, sudden frame drops, thermal throttling, crashes, or the laptop shutting down under load. A proper cleaning and repasting restores cooling performance and reduces noise significantly.

For gaming laptops such as the Acer Nitro series, internal cleaning every 6 to 12 months is recommended if the device is used regularly for long gaming sessions, heavy workloads or lives in a dusty environment.
If the laptop is used daily for gaming or sits on soft surfaces like beds or sofas, dust buildup happens even faster. Fans start to whine, GPU temperatures rise, and the chassis becomes hot to the touch.

Thermal paste replacement should normally be done every 1 to 2 years.
If you experience sudden heat spikes, thermal throttling, or fan noise that does not match system load, the paste may already be dry.
High-quality thermal compounds last longer, but they still degrade due to the constant heat cycles typical in gaming laptops.

If you are unsure whether your system needs cleaning, monitor temperatures:

idle above 50–60°C
gaming above 85–95°C
fans running at full speed even during light tasks

These signs indicate that cleaning and repasting is due sooner rather than later.

It is safe if you follow instructions precisely and understand the risks. Opening a laptop is not dangerous in itself, but lack of experience can lead to accidental damage. Using the wrong tools or excessive force can crack the plastic bottom cover, break fan connectors, or damage motherboard components.

The biggest DIY risks include:

damaging connectors while unplugging fans or battery
stripping screws using incorrect screwdrivers
bending the heatsink when removing or reinstalling it
applying too much thermal paste
accidentally tearing flat cables
letting fans spin freely while blowing compressed air (which can break bearings)

If you work slowly, use the correct tools (precision screwdrivers, plastic pry tools, anti-static surface), and follow step-by-step guidance, cleaning is manageable.
However, repasting requires slightly more skill. Removing dried thermal paste, replacing pads with the correct thickness, and reseating the cooling system evenly is critical. If unsure, it may be safer to use a professional service, especially if your laptop must remain fully functional and reliable.

For a safe and effective cleaning you will need a precision screwdriver set, ideally with magnetic heads to avoid losing screws. A non-static work surface protects components from static discharge. A plastic pry tool helps to lift the bottom cover without damaging the edges. For cleaning dust, use a soft brush, tweezers for larger dust clumps, and compressed air to clear the heatsink grills.

For repasting, you need high-quality thermal paste and thermal pads of the correct thickness for your model (GPU memory modules and VRM require different pad sizes). Isopropyl alcohol or a dedicated cleaning solution helps remove old, dried paste safely. Lint-free wipes or paper towels help you clean the CPU/GPU surface without leaving fibers. A magnetic screw mat keeps track of screw positions, which is essential as Acer Nitro systems use different screw lengths in different points.

Using the correct equipment significantly reduces the risk of accidental damage and improves cooling performance after reassembly.

Using too much thermal paste can reduce cooling efficiency and create additional risks. Instead of improving contact, an excessive amount acts as a barrier between the chip and the heatsink, leading to higher temperatures.
When pressure is applied during reassembly, surplus paste can overflow onto surrounding components. While most modern pastes are not electrically conductive, some are slightly capacitive and can cause instability or short-circuits if they seep onto VRMs or small resistors.

In worst cases, excess paste spreads unevenly, creating air gaps that trap heat instead of enabling smooth thermal transfer.
Correct paste application is thin and even – enough to cover the surface without overflowing. GPUs often require an “X shape” to ensure even spread, while CPUs benefit from a small line or pea-sized amount.
If you are unsure, professional repasting ensures both proper application and correct pad thickness matching.

Thermal pads bridge the gap between the heatsink and VRM, GPU memory modules, and smaller chipset components. These surfaces do not always sit flush with the heatsink, so pads fill the gap to ensure proper heat transfer.
If pads are too thin, they will not make full contact, leaving components to overheat. VRM and memory chips may run dangerously hot even if CPU/GPU temperatures look normal.
If pads are too thick, they lift the heatsink slightly, reducing pressure on the CPU/GPU. This causes poor paste contact, higher temperatures, and unstable cooling performance.

Manufacturers use very precise thicknesses (0.5 mm, 1 mm, 1.5 mm etc.). When replacing pads, always match these exactly.
A mistake in pad size is one of the most common DIY errors and often leads to higher temperatures after “cleaning.” If temperatures go up instead of down, incorrect pad thickness is usually the cause.

Metal tools can scratch, bend or crack the bottom cover. More importantly, they generate static electricity which can damage internal components. Plastic pry tools resist static, provide flexibility, and reduce the risk of slipping and cutting into internal cables.

Using knives or flat metal screwdrivers can also leave permanent marks on the laptop’s edges. They may slip inside the seam and cut small ribbon cables connected to ports or indicators.
Plastic tools are designed to slide along the seam gently without stressing the chassis.
For this reason, always avoid metal tools during disassembly of Acer Nitro or any modern laptop.

If your laptop does not power on after cleaning, the most common issues are:

Battery not reconnected properly – Ensure the battery cable is fully seated. Even a slight misalignment can prevent power delivery.
Fan or power connectors loose – Check the fan connectors and the power daughterboard connector.
Cooling system misaligned – If the heatsink is not sitting flat, CPU/GPU may fail to initialise.
Thermal pads misplaced – Pads that slide onto the wrong component can prevent proper contact.
Screws overtightened or tightened unevenly – This can bend the heatsink and cause poor pressure distribution.

Start by reopening the laptop carefully and checking each connector one by one.
If everything looks correct and it still does not start, do not apply force or keep testing repeatedly. Instead, let a professional check the board. A technician can test power rails, locate short circuits or confirm whether a connector was damaged during cleaning.

A successful cleaning results in immediate improvements:

Lower idle temperature – CPU/GPU idle should drop noticeably.
Quieter fans – Fans should not stay at maximum speed during normal tasks.
Stable gaming temperature – Games should run without thermal throttling.
No unusual noise – Fans should spin smoothly without grinding or rattling.
Better performance – Frame rates become more stable due to improved thermal headroom.

You should also check the laptop exterior for any gaps in the bottom cover and ensure all screws are returned to their original positions. Run a stress-test (e.g., Cinebench, FurMark, or gaming) and monitor temperatures. If you see consistent temperatures and no spikes, your cleaning was successful.

Stop immediately and get a technician if you encounter any of these:

Stripped screws you cannot remove safely
The bottom cover or heatsink refuses to come off
You are unsure about thermal pad sizes
You accidentally bent the cooling system
You spilled thermal paste onto motherboard components
Laptop does not turn on after reassembly
Fans do not spin or produce loud mechanical noise
Temperatures increased after your cleaning

Professional cleaning services, especially onsite fan cleaning in London, include diagnostics, pad replacement, repasting, airflow testing and temperature monitoring.
If you rely on the laptop for work, gaming or school, a professional ensures it is cleaned without risk and performs safely after the service.